
INT- ROOM 903 26 - 09 - 24
Here it is, the moment I've been eagerly awaiting through the endless days of summer, ART CLASS! - Alright, listen, I ain't always had the confidence in my artistry, capisce? But I've been sharpening my skills, getting pretty darn good. Over the summer, I decided to get wise on environments, taking a little course to up my game, which dovetails nicely into this morning's workshop.
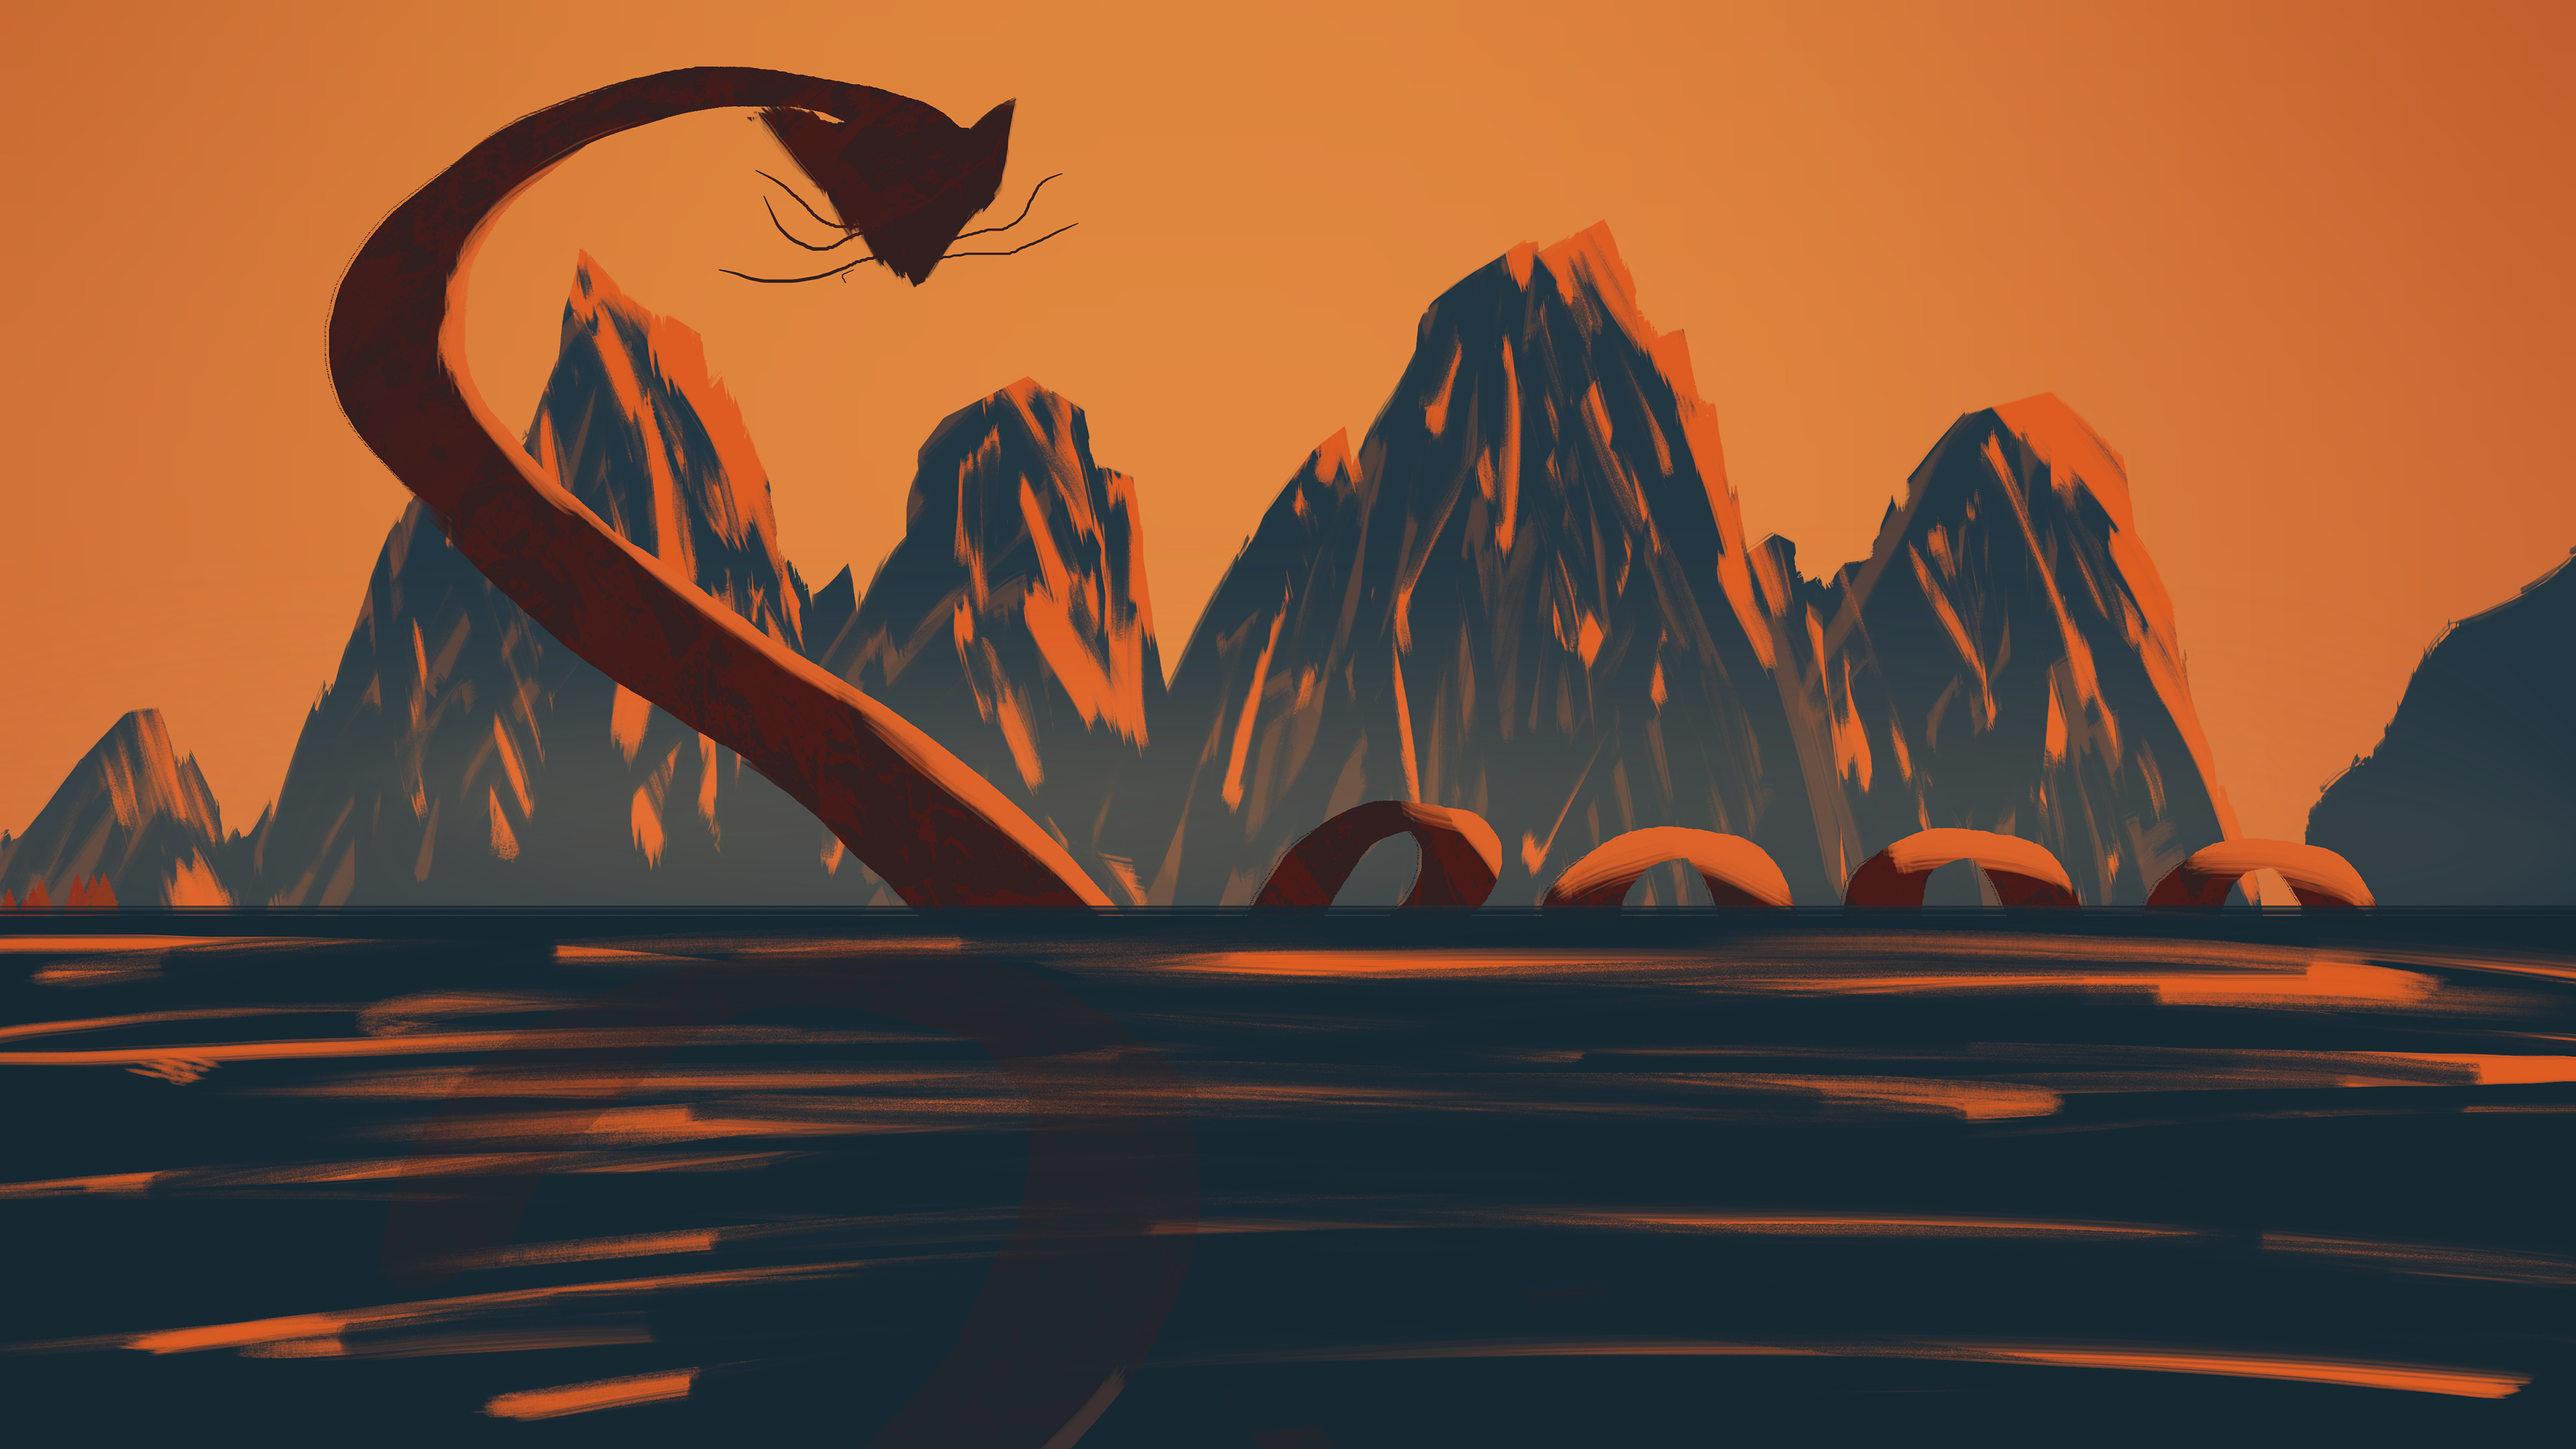
The theme for this week? LINE. And using our initials, name, or signature, we were tasked with creating a masterpiece. So, I mixed in my newfound knowledge of environments and quickly whipped up this masterpiece. I let my imagination run wild, starting with what I know best (the environment), and then, like a sign from the old country, a snake just appeared in my work.
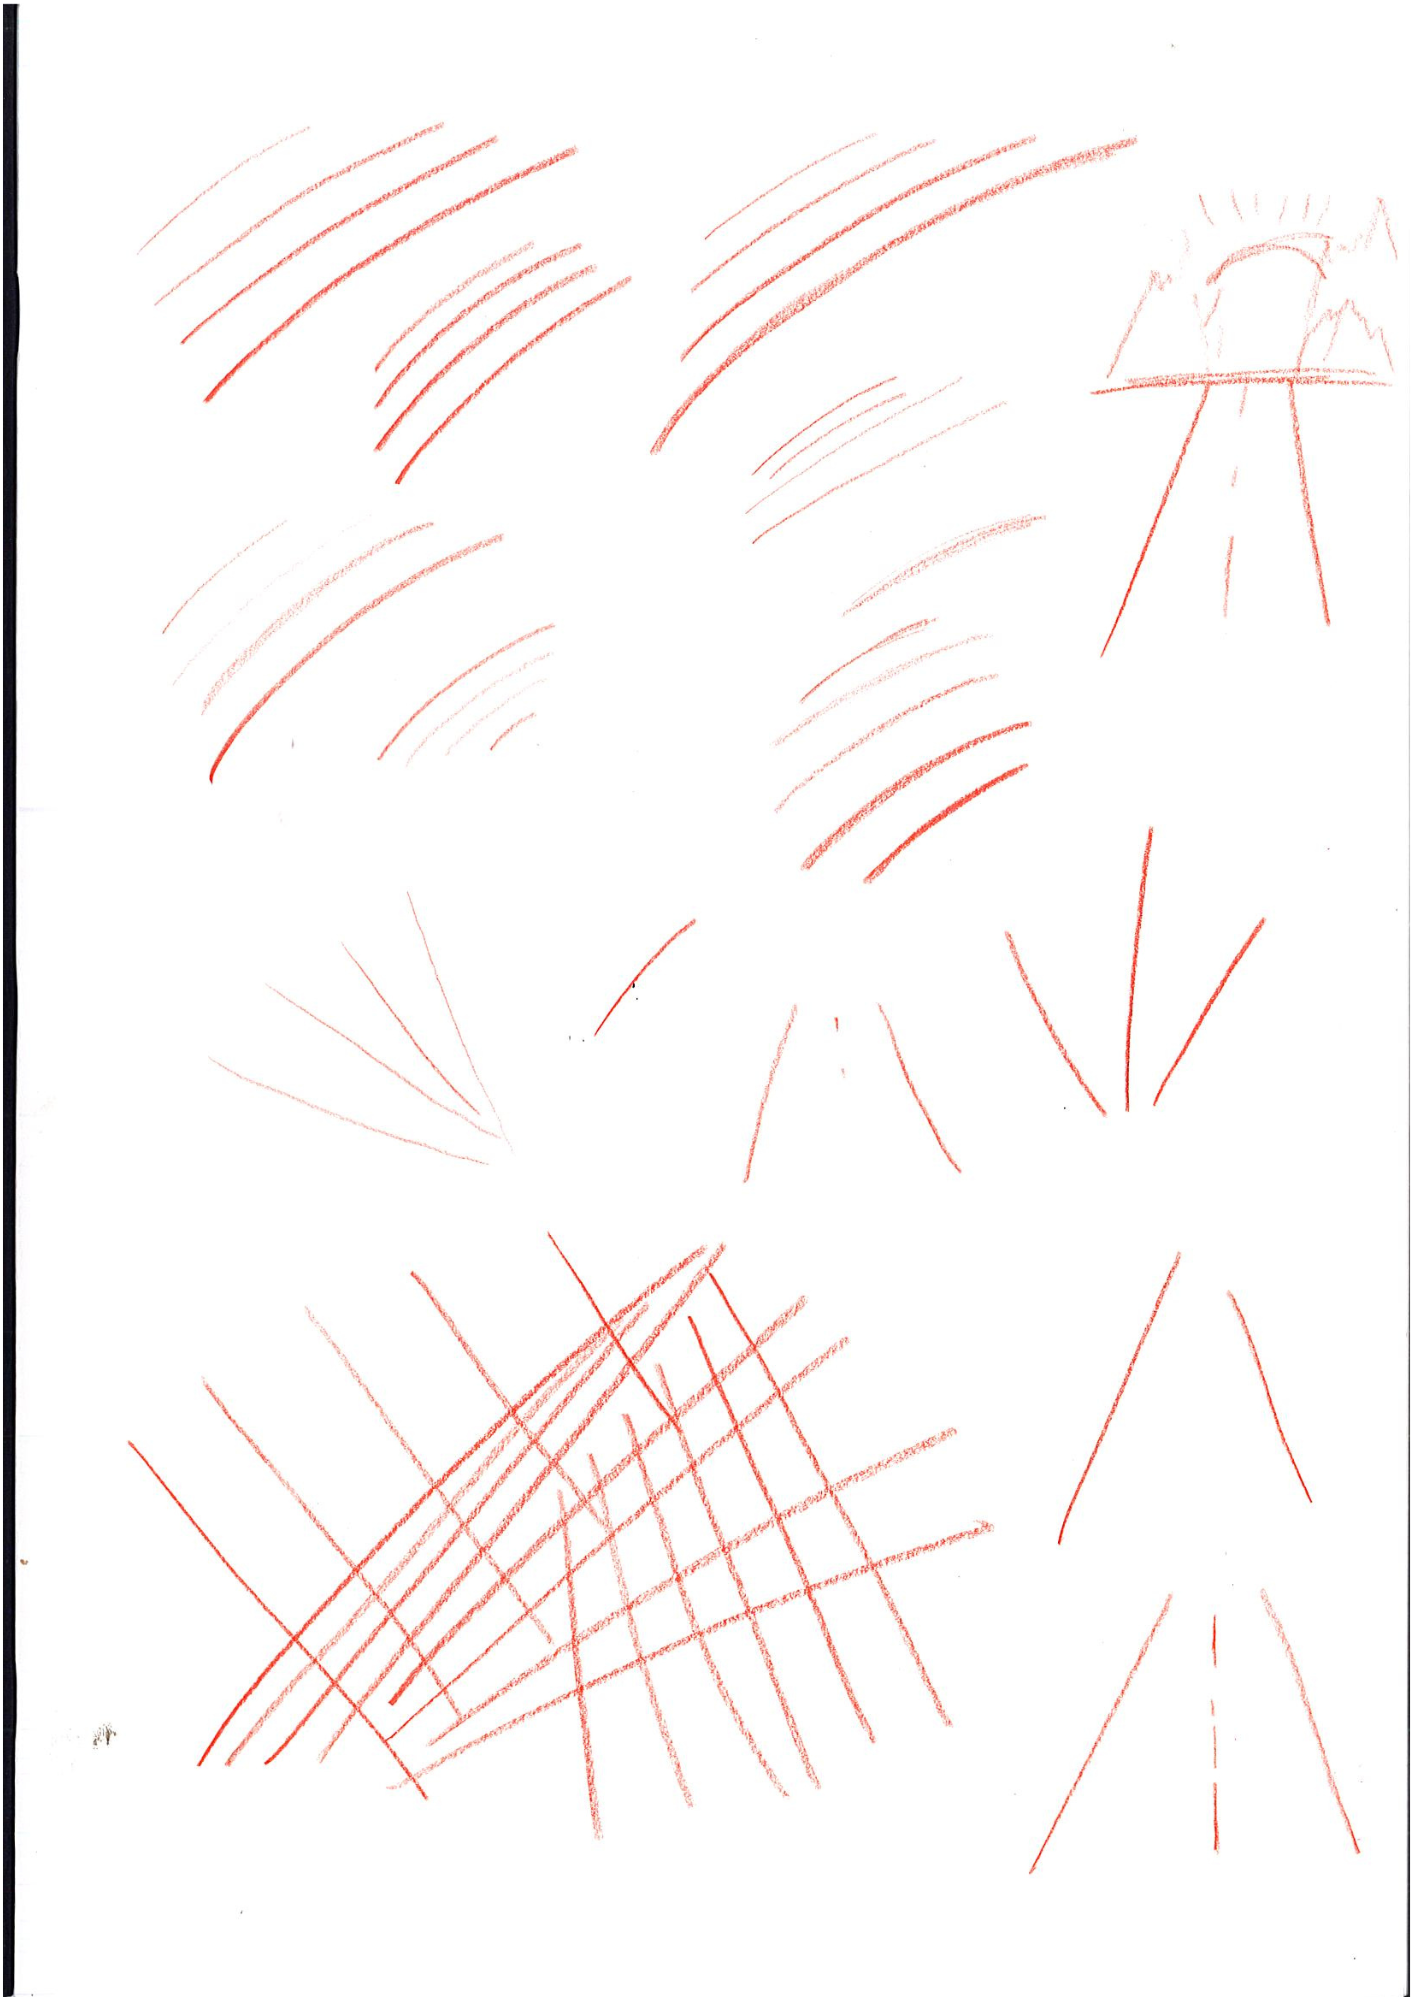
We kicked off our line workshop with some basic motor warm-ups, grabbing our pencils and laying down a variety of lines in different sizes. We played around with cross-hatching and even dabbled in a bit of perspective.
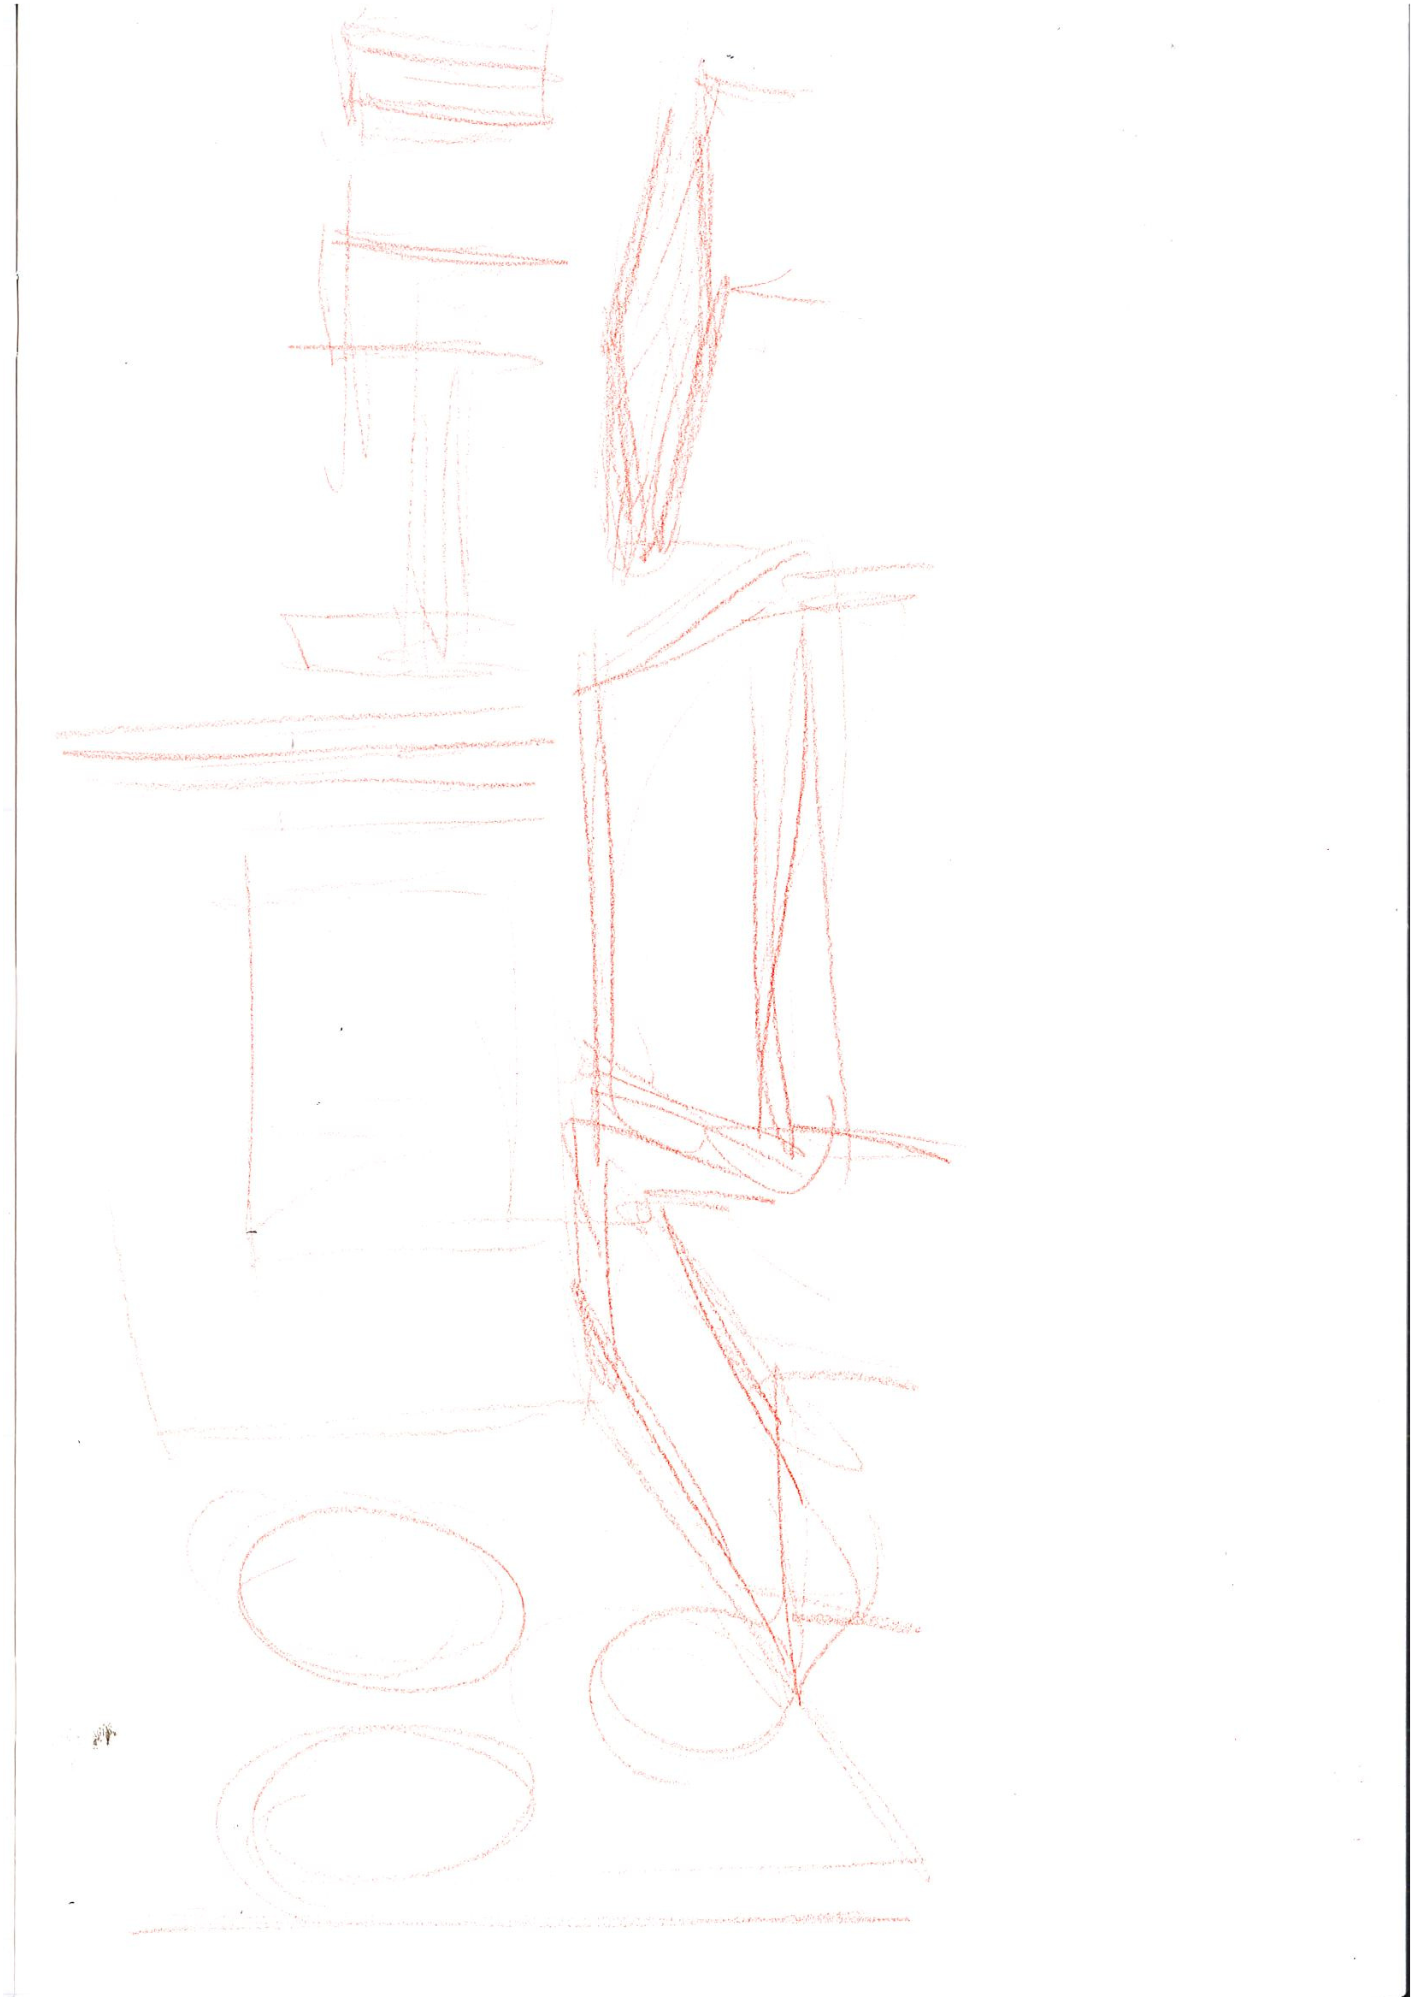
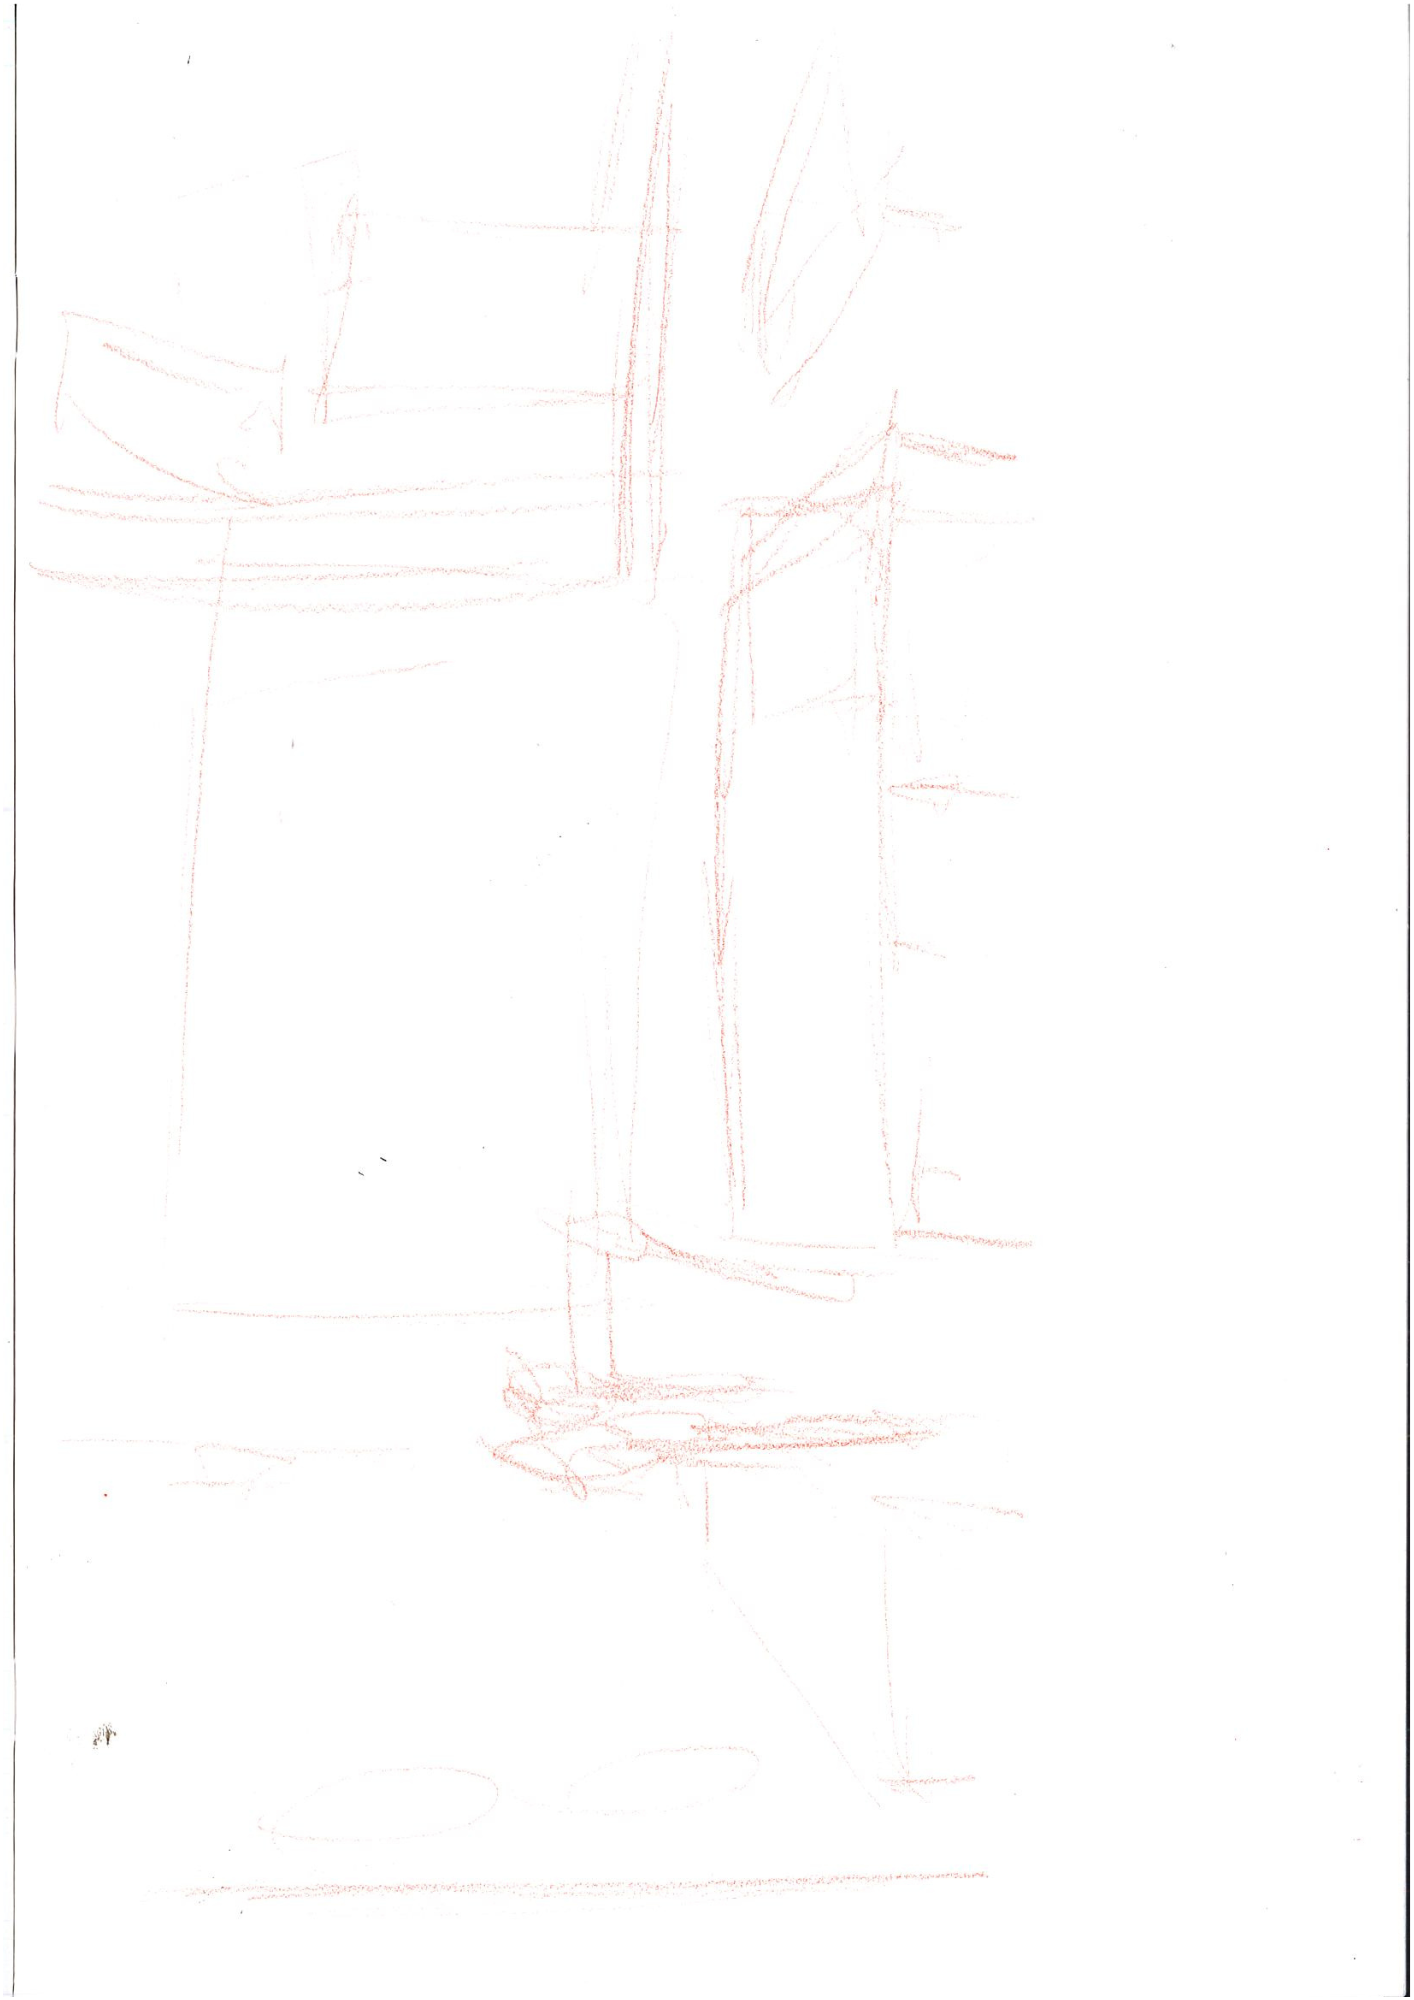
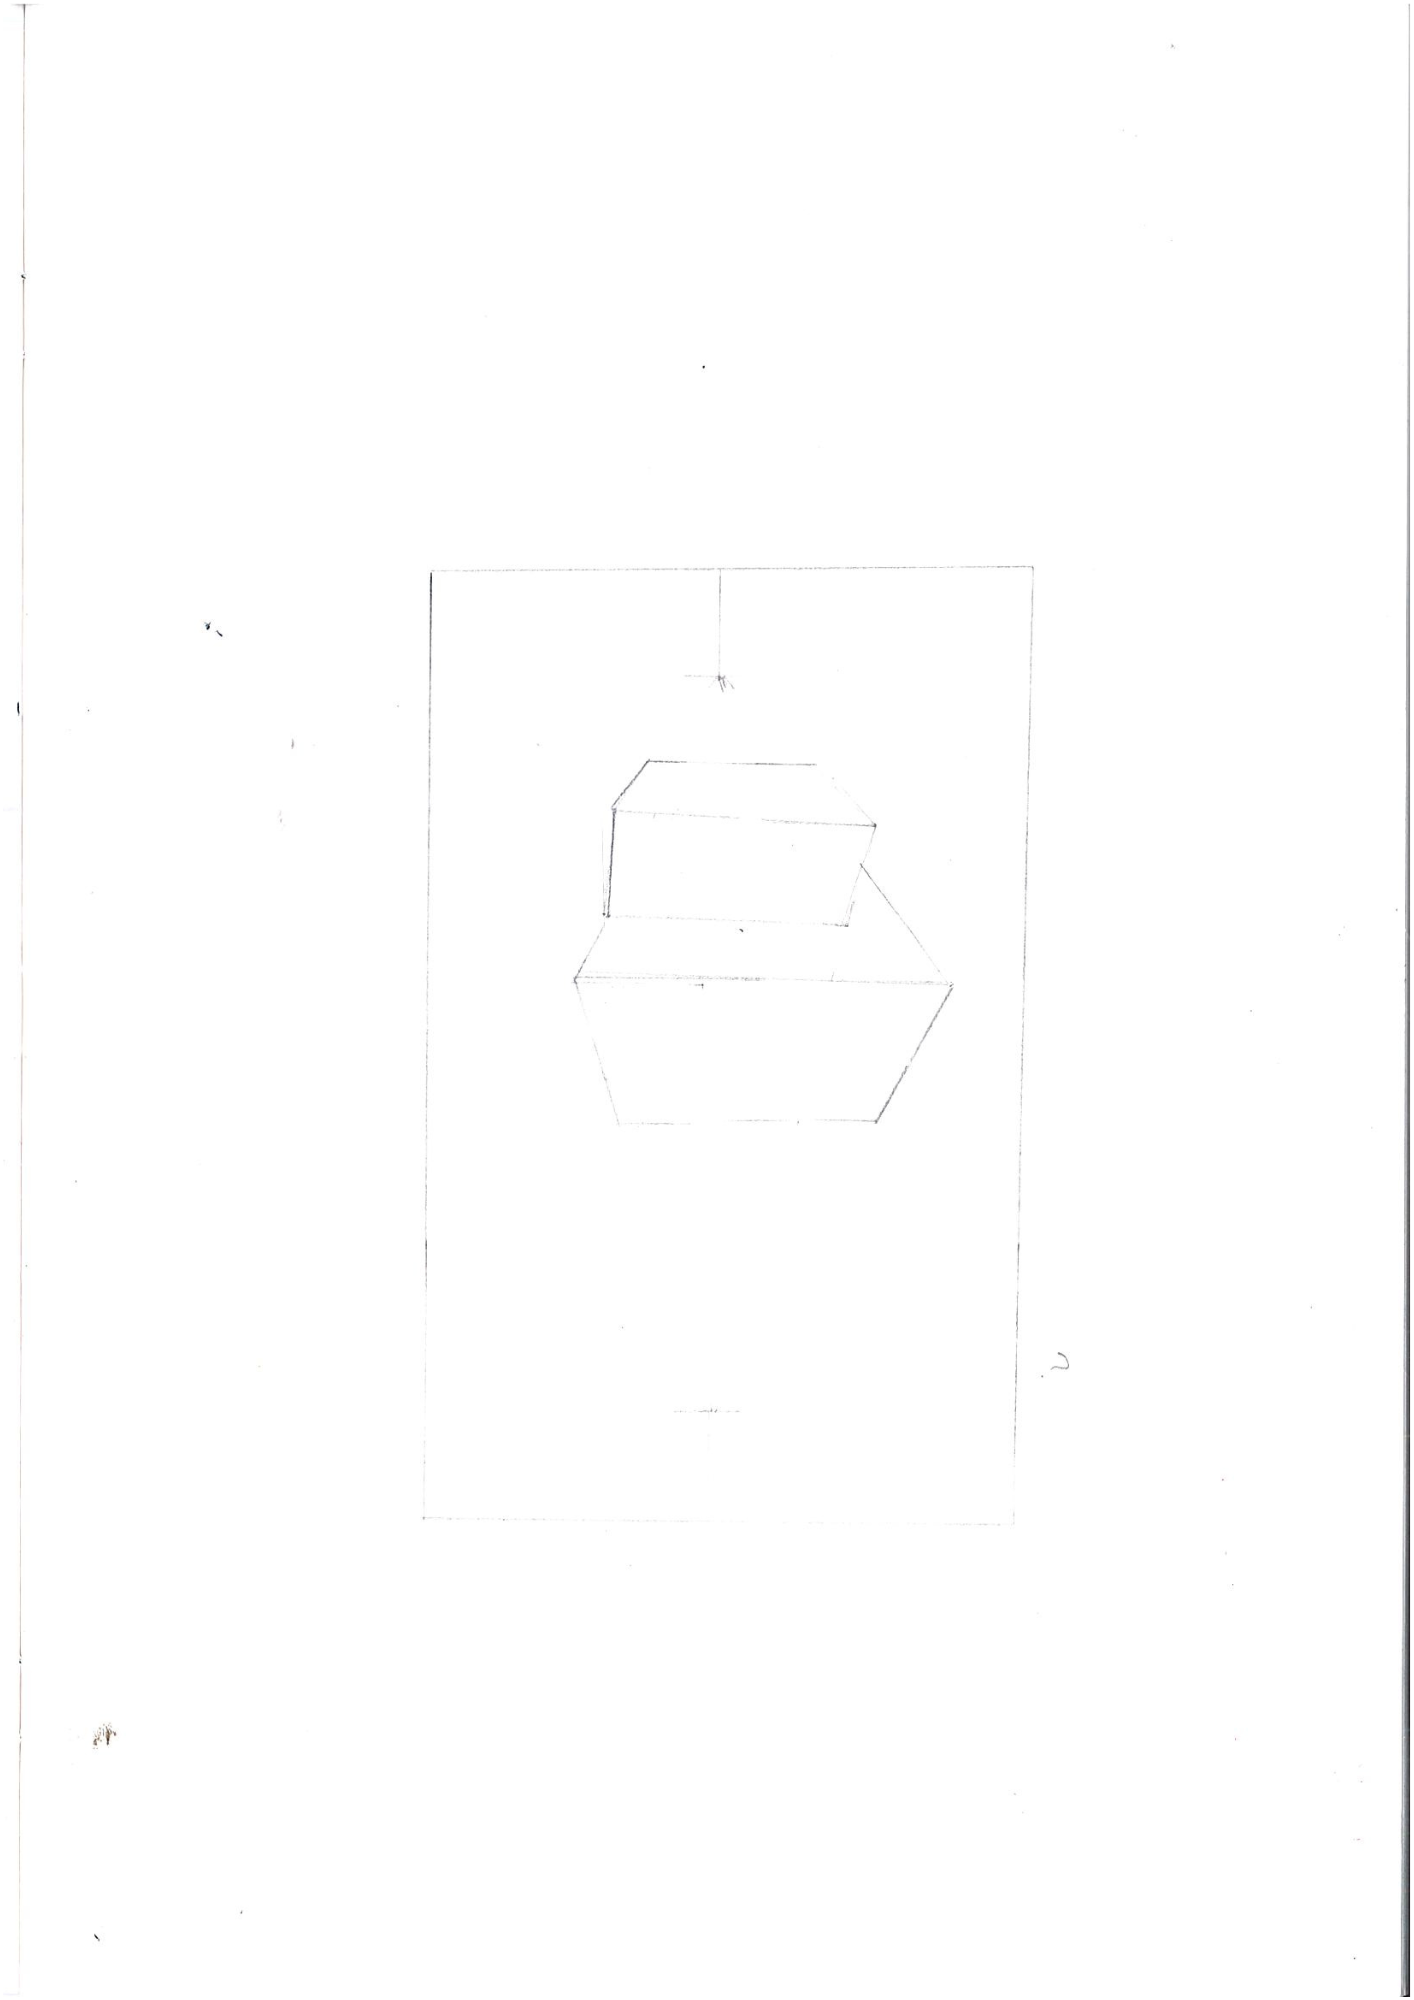
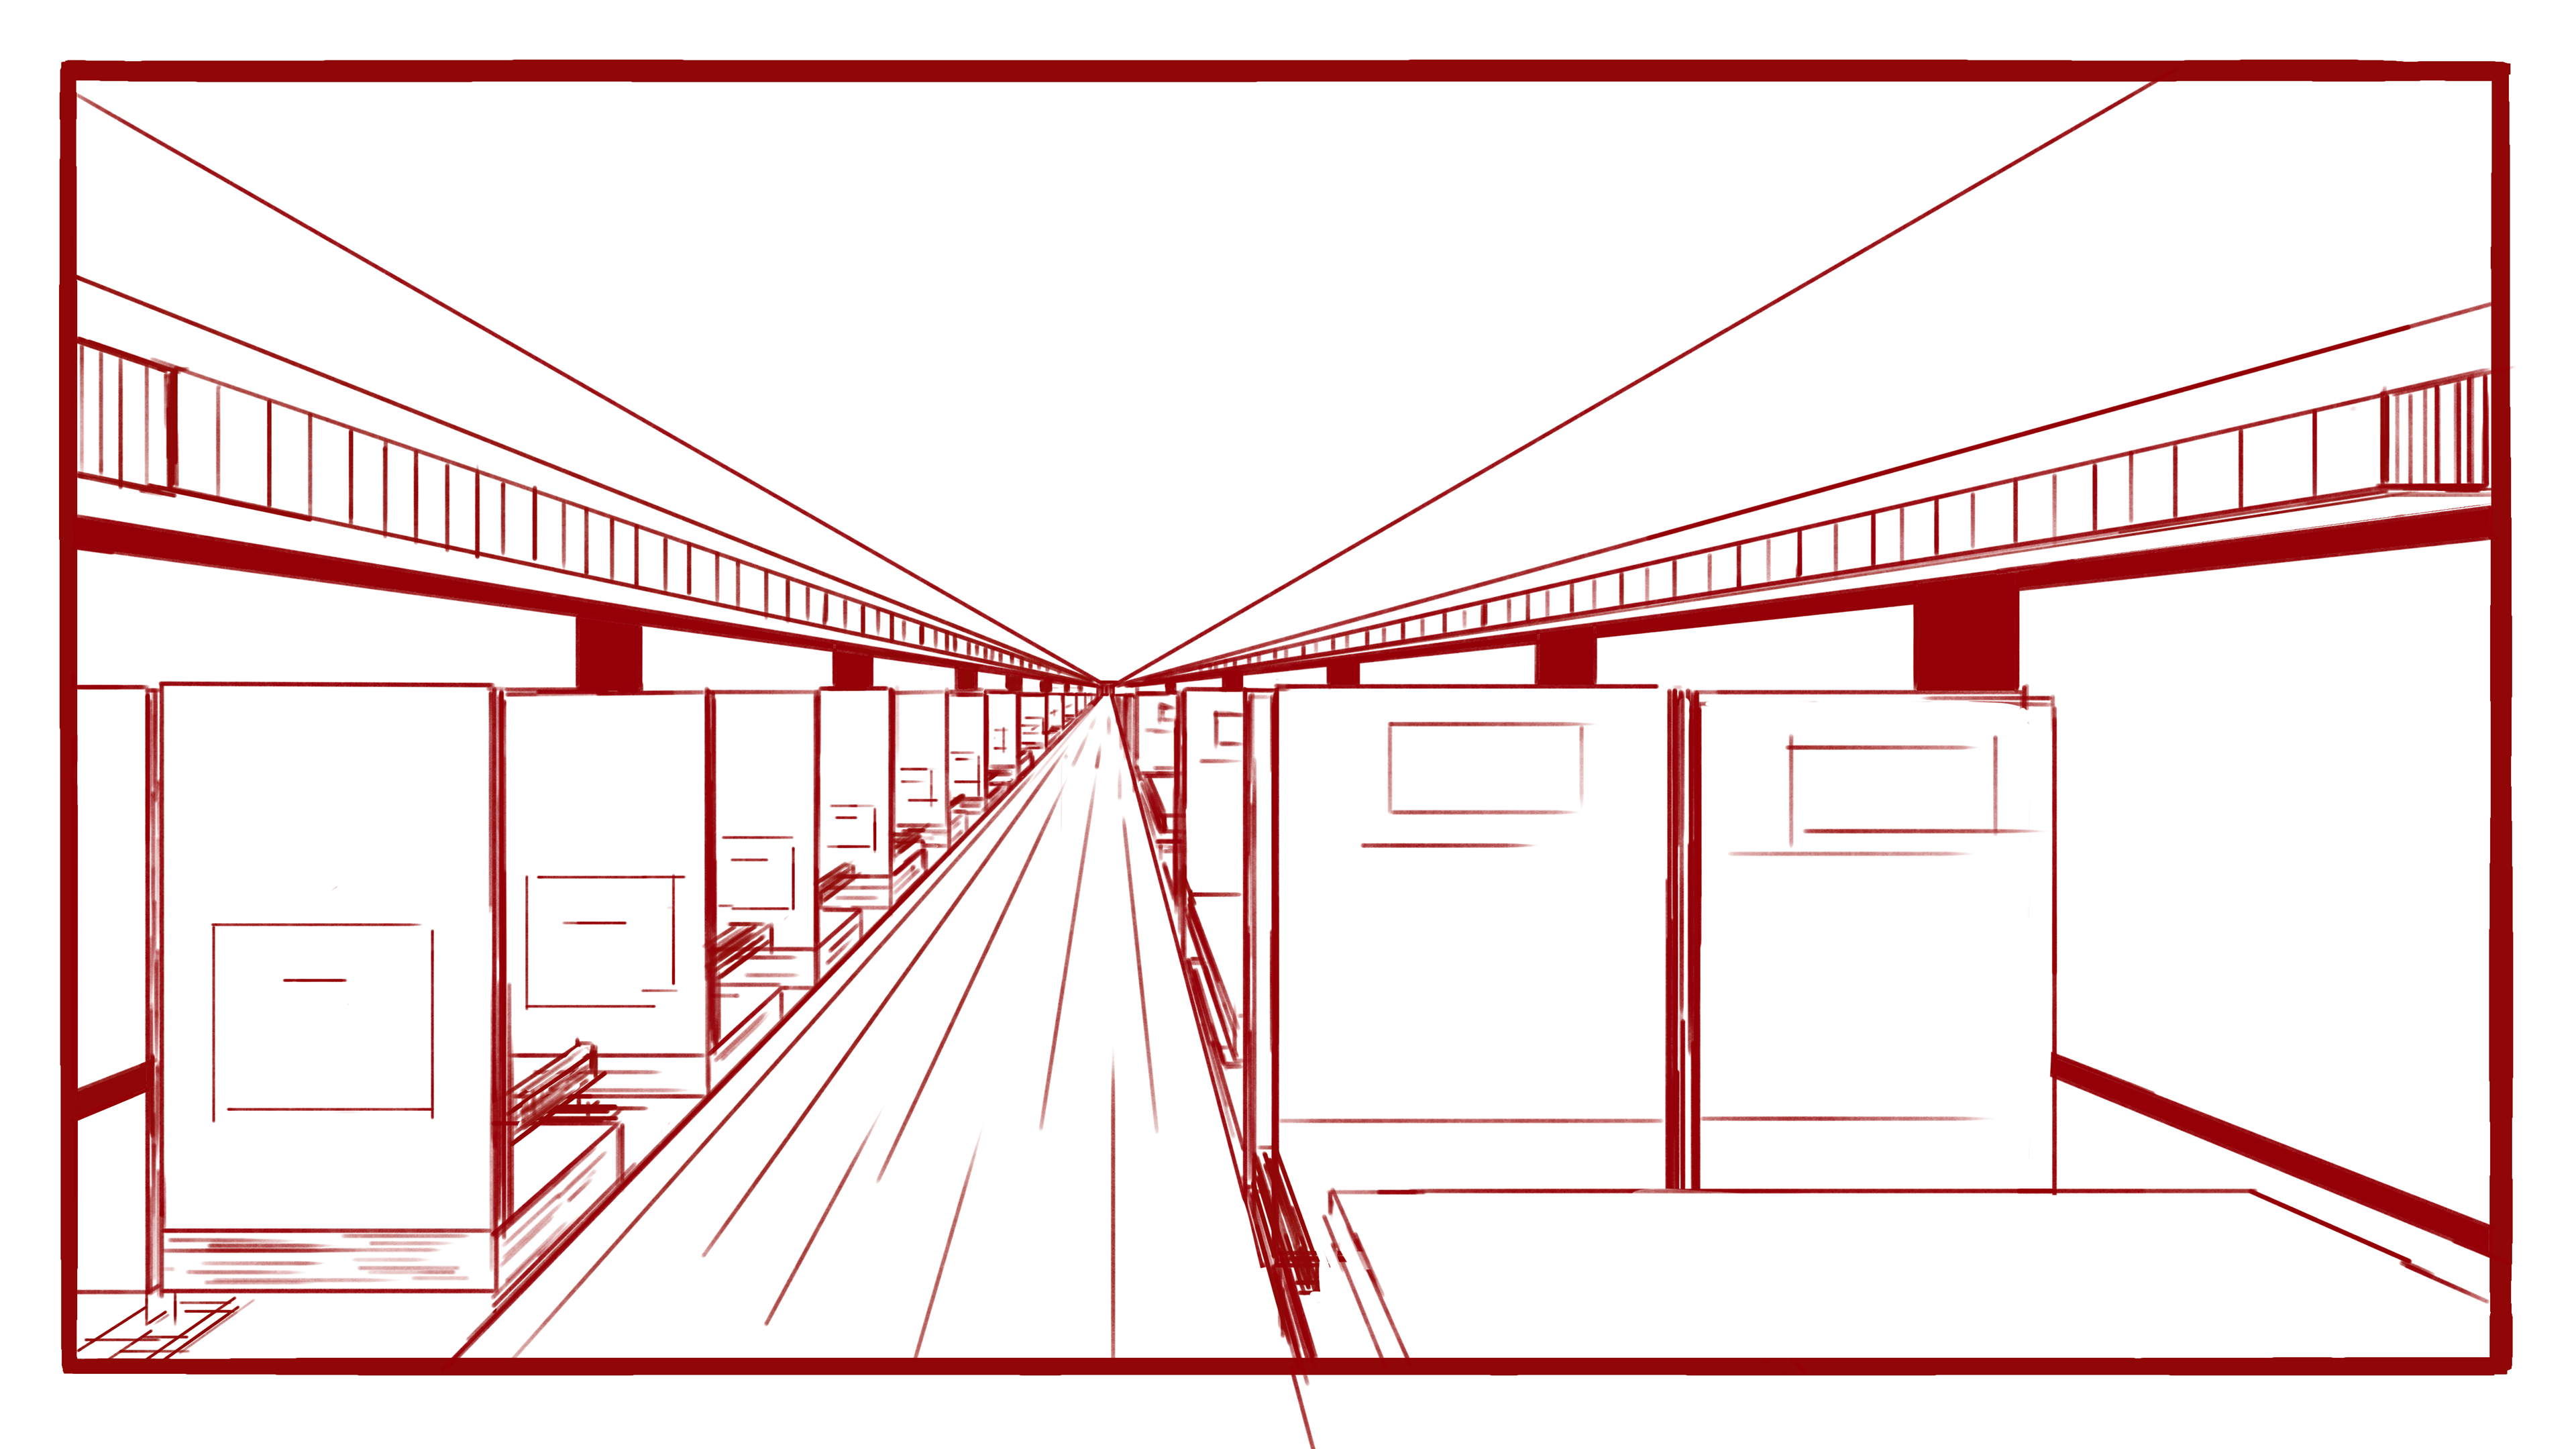
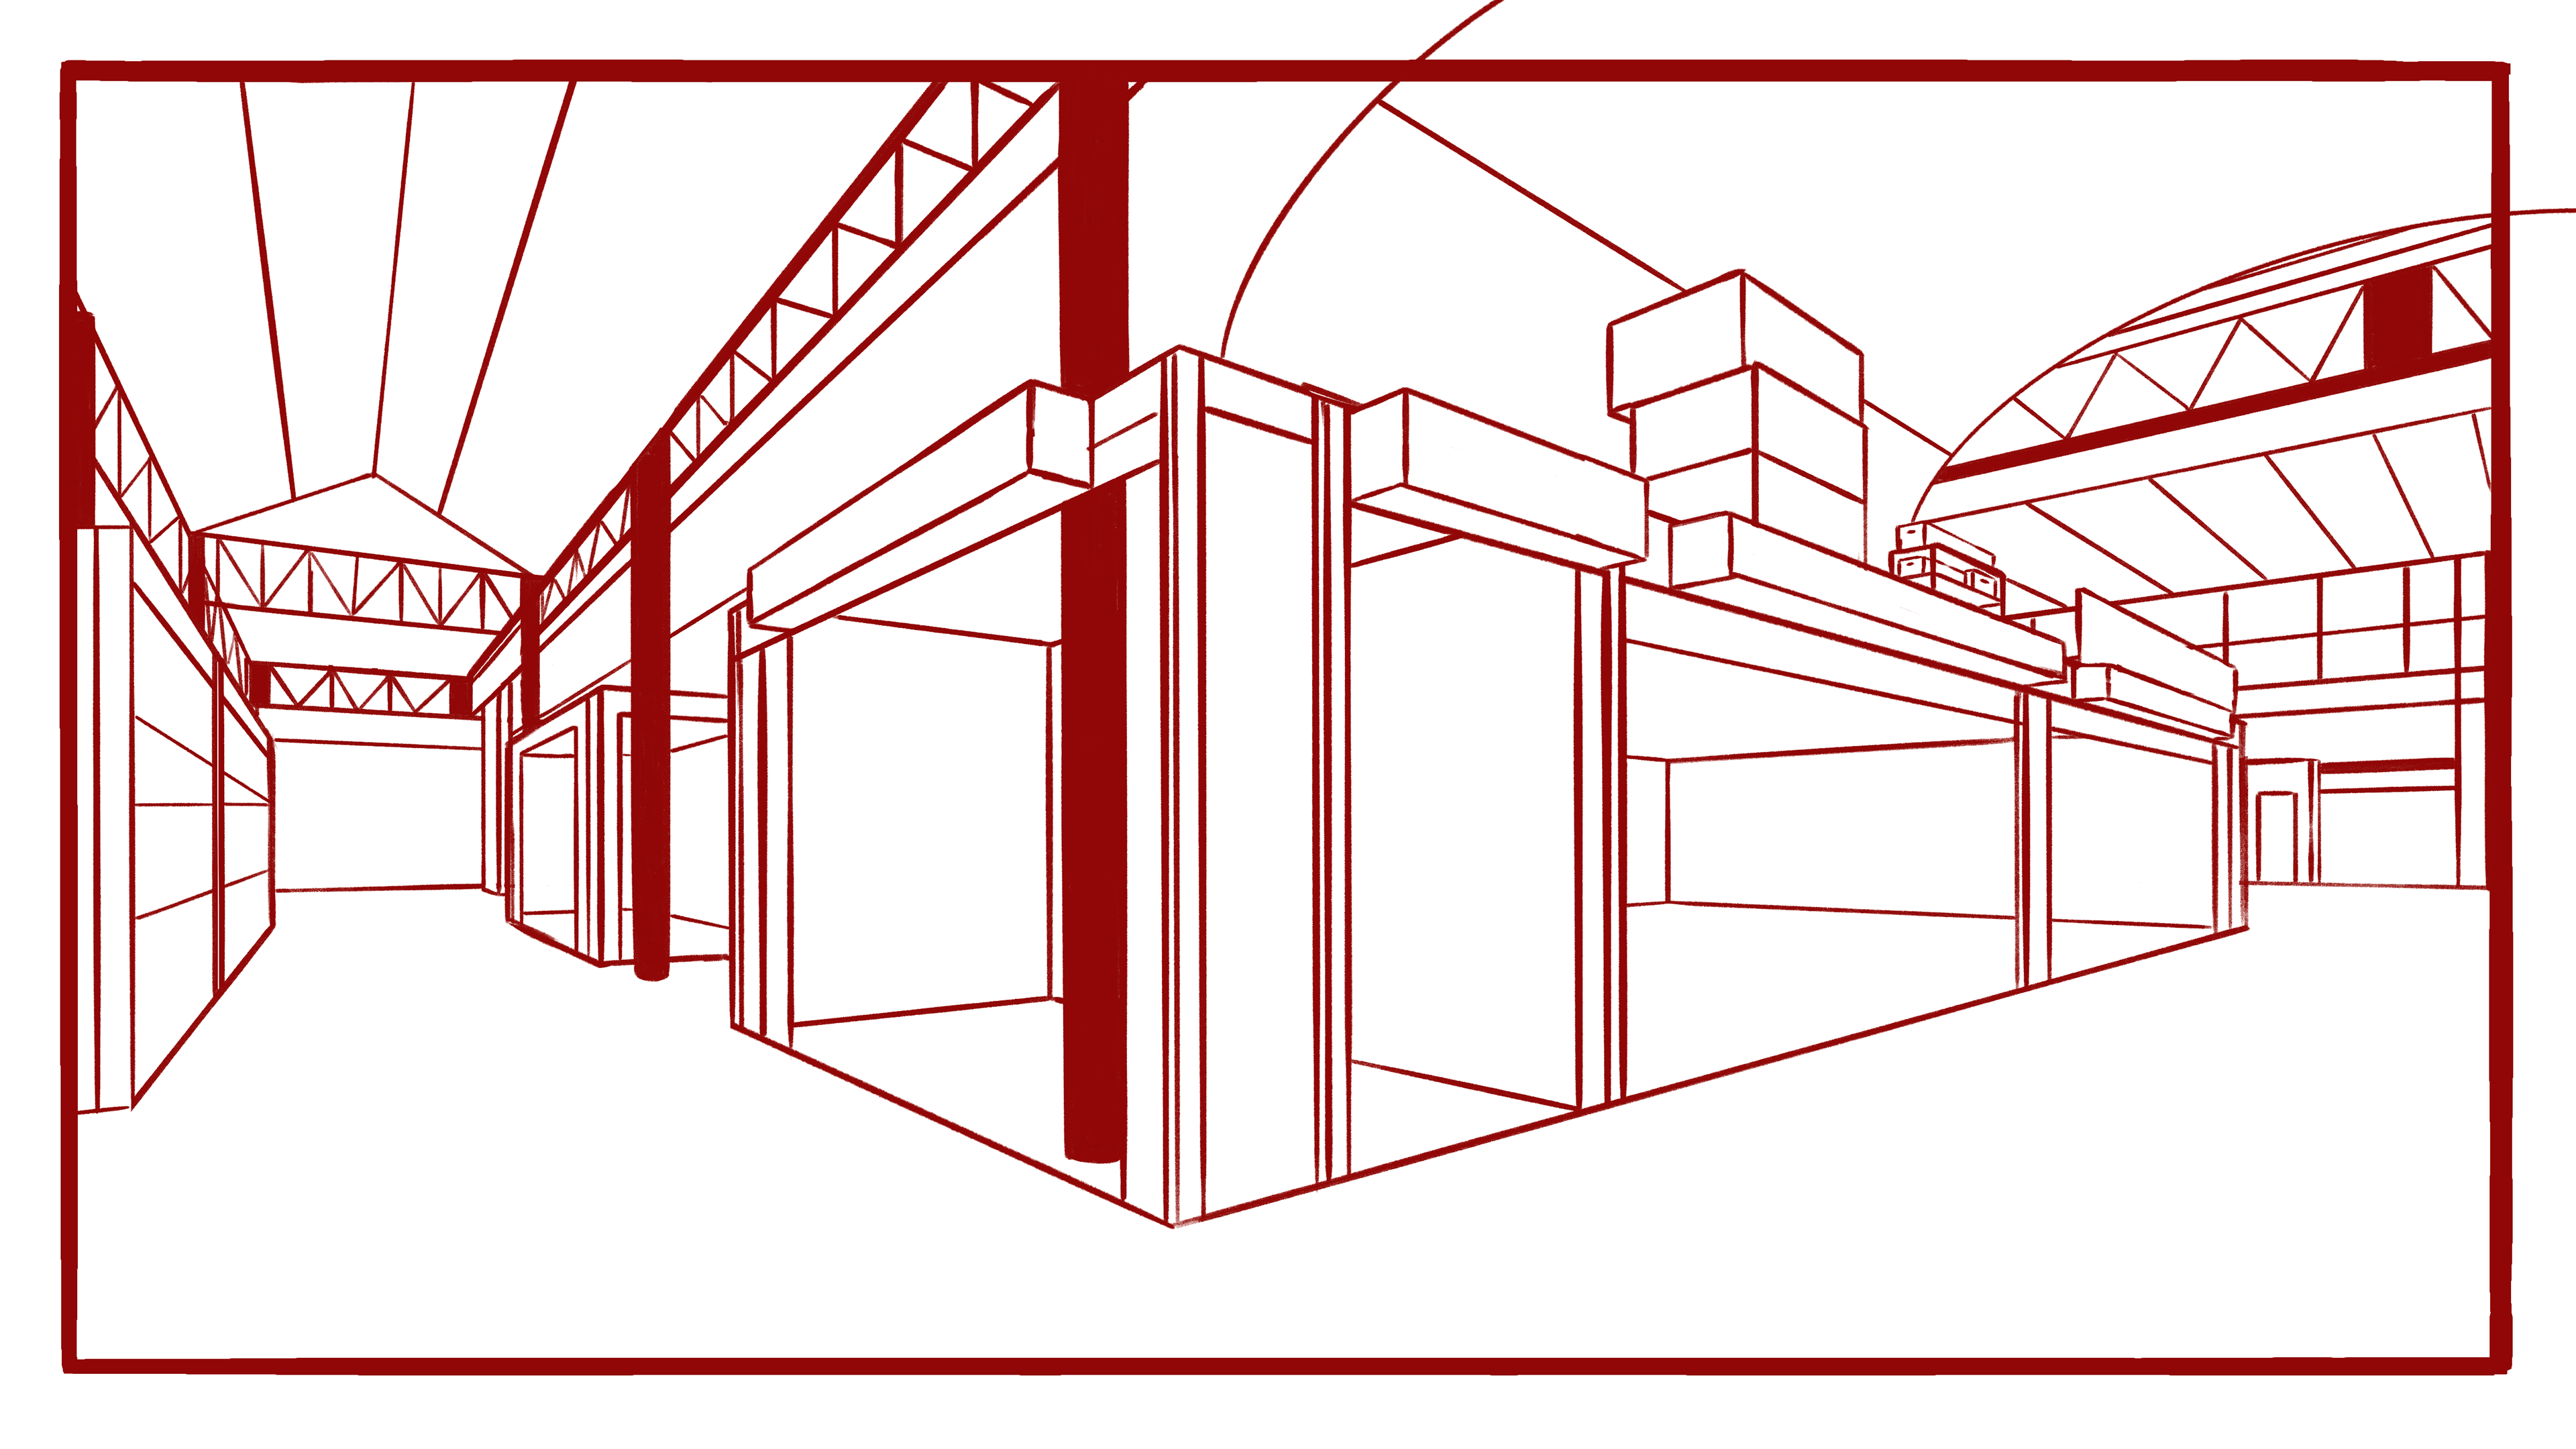
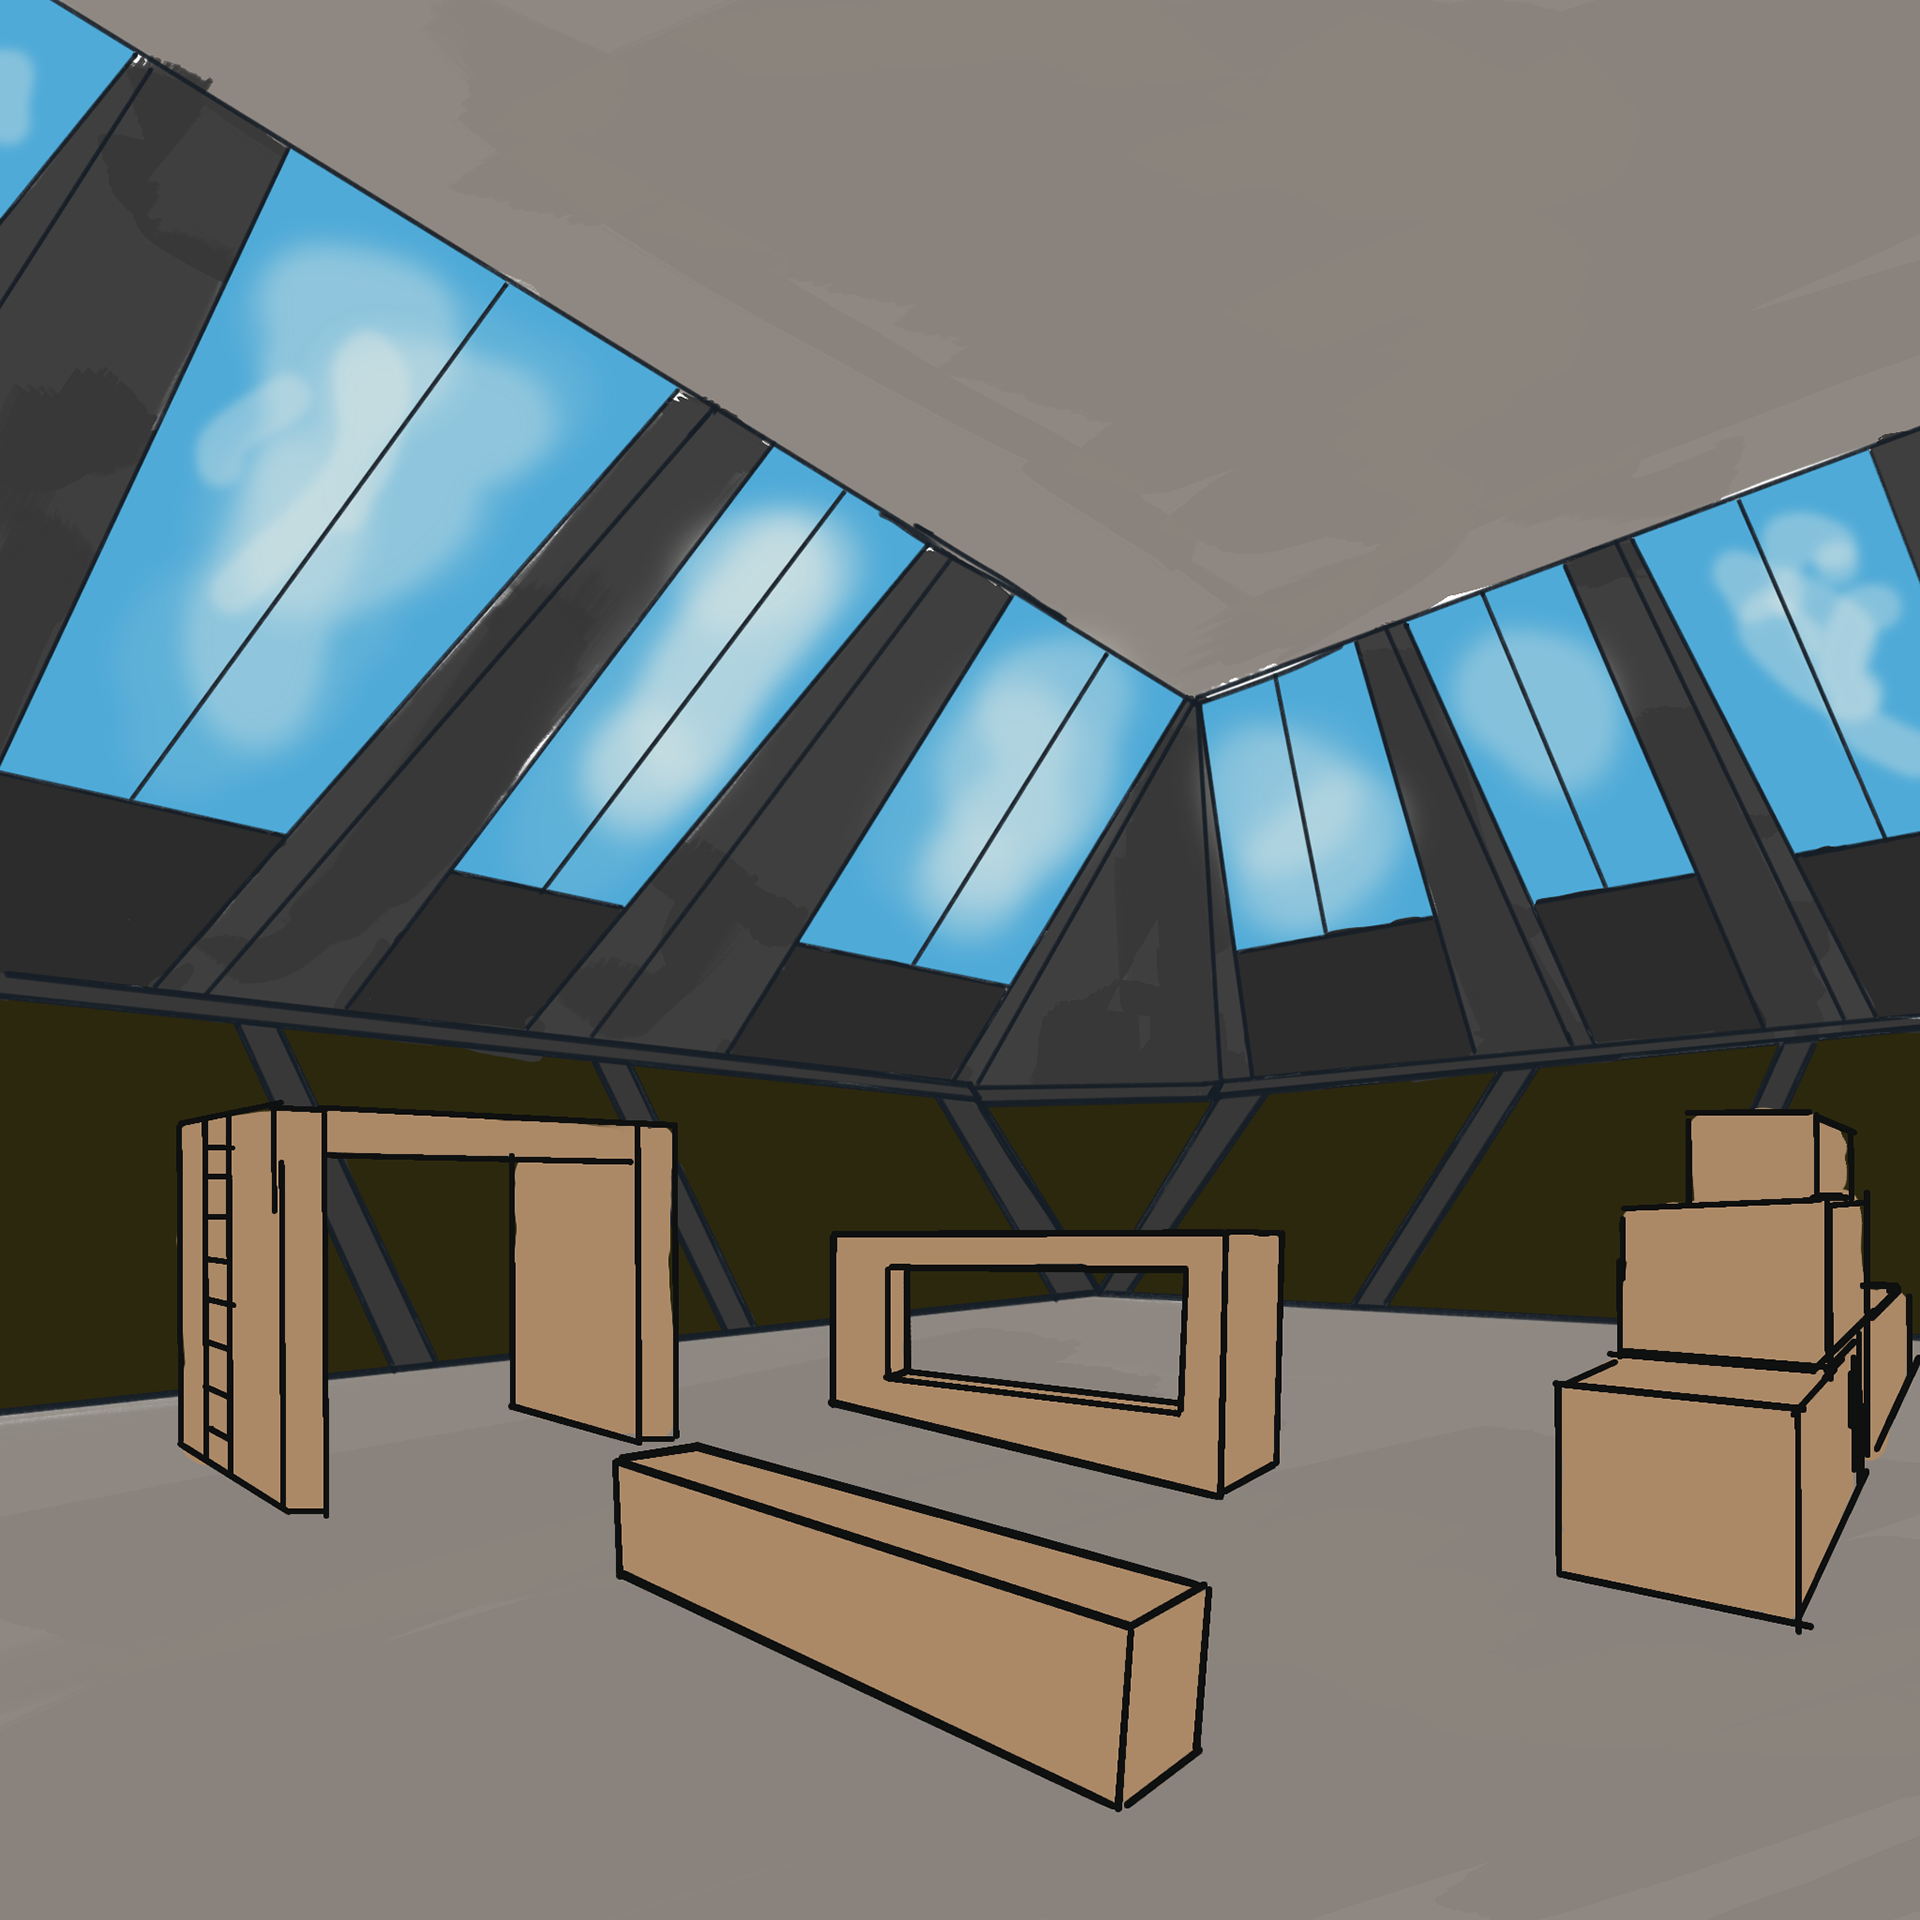
Following that, we undertook a really interesting, albeit challenging, workshop where we had to draw our 360° view. This view, in particular, was of the 903 classroom.

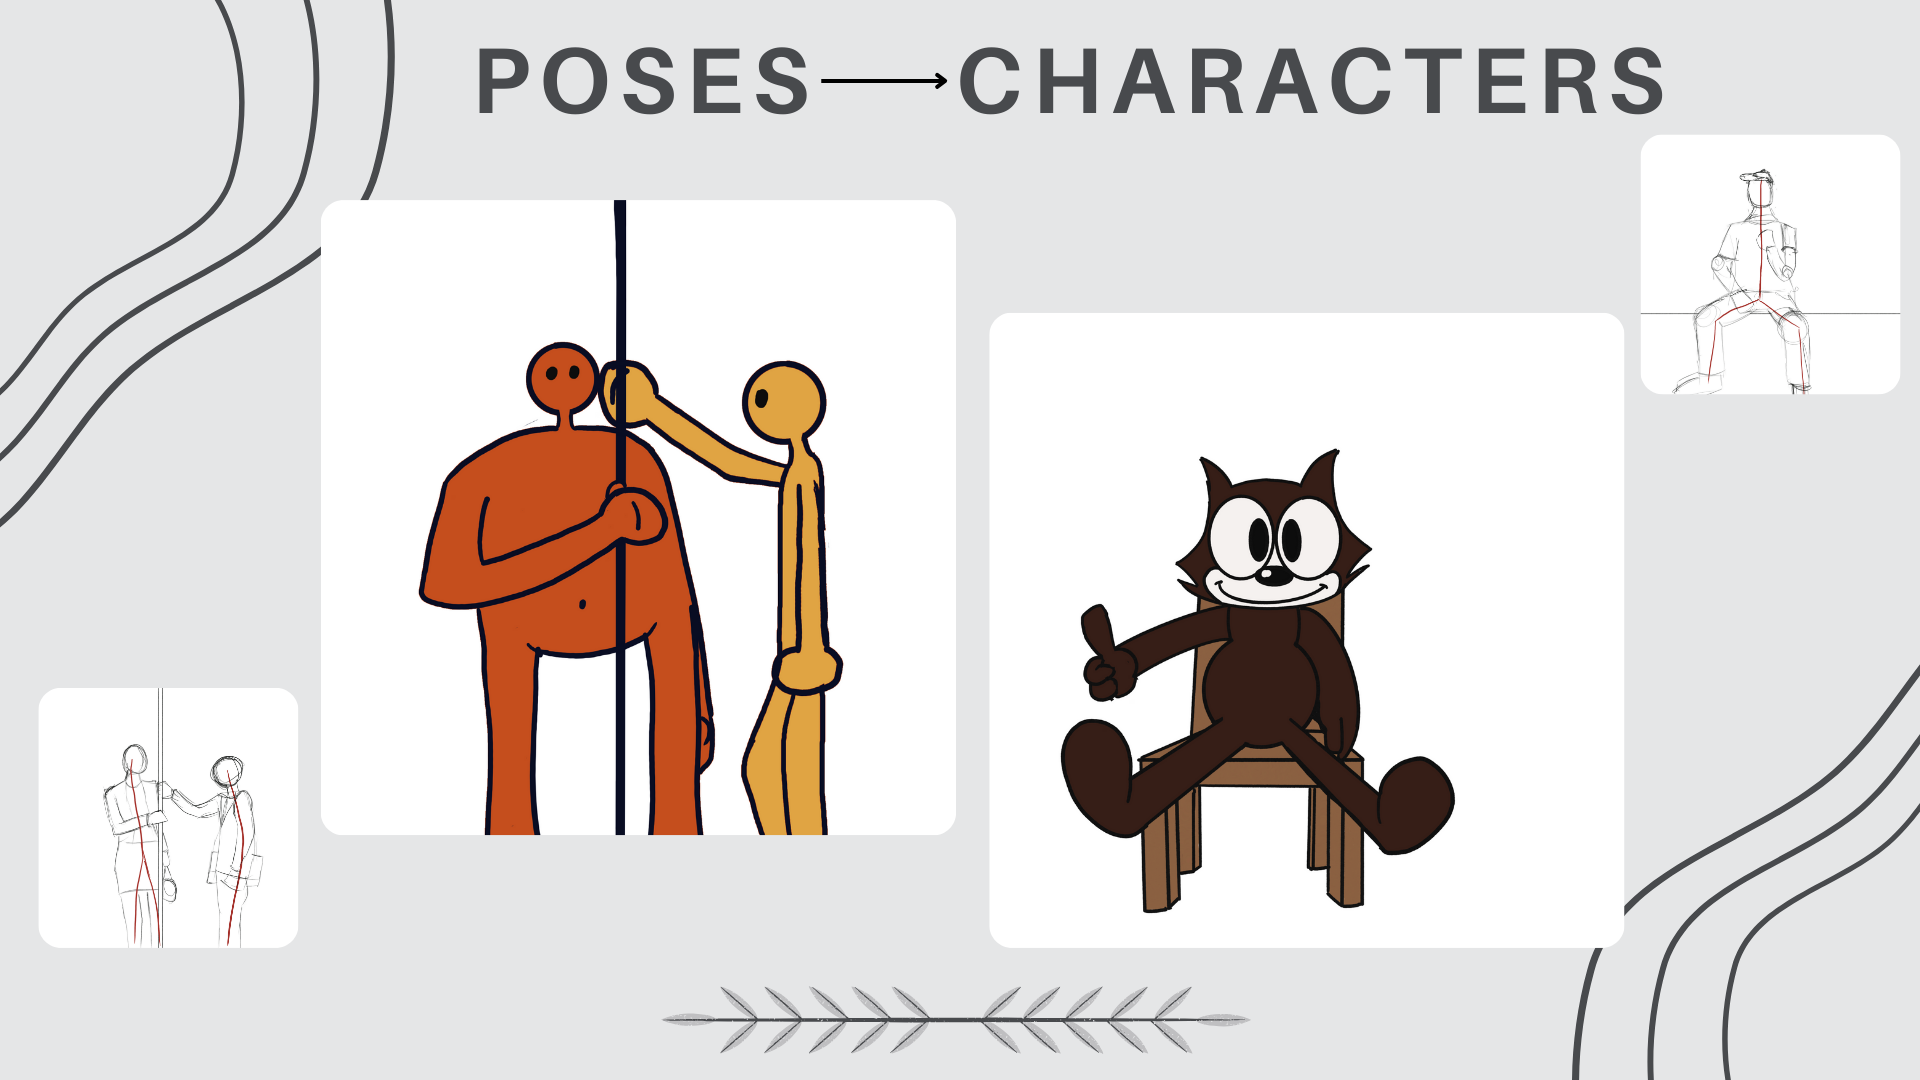
Then came a really entertaining challenge where we had to draw the person opposite us with one line, in 4 minutes. I ain't exactly known for my skill in drawing faces or people, but this one caught me off guard—in a good way. THUMBS UP!!!!
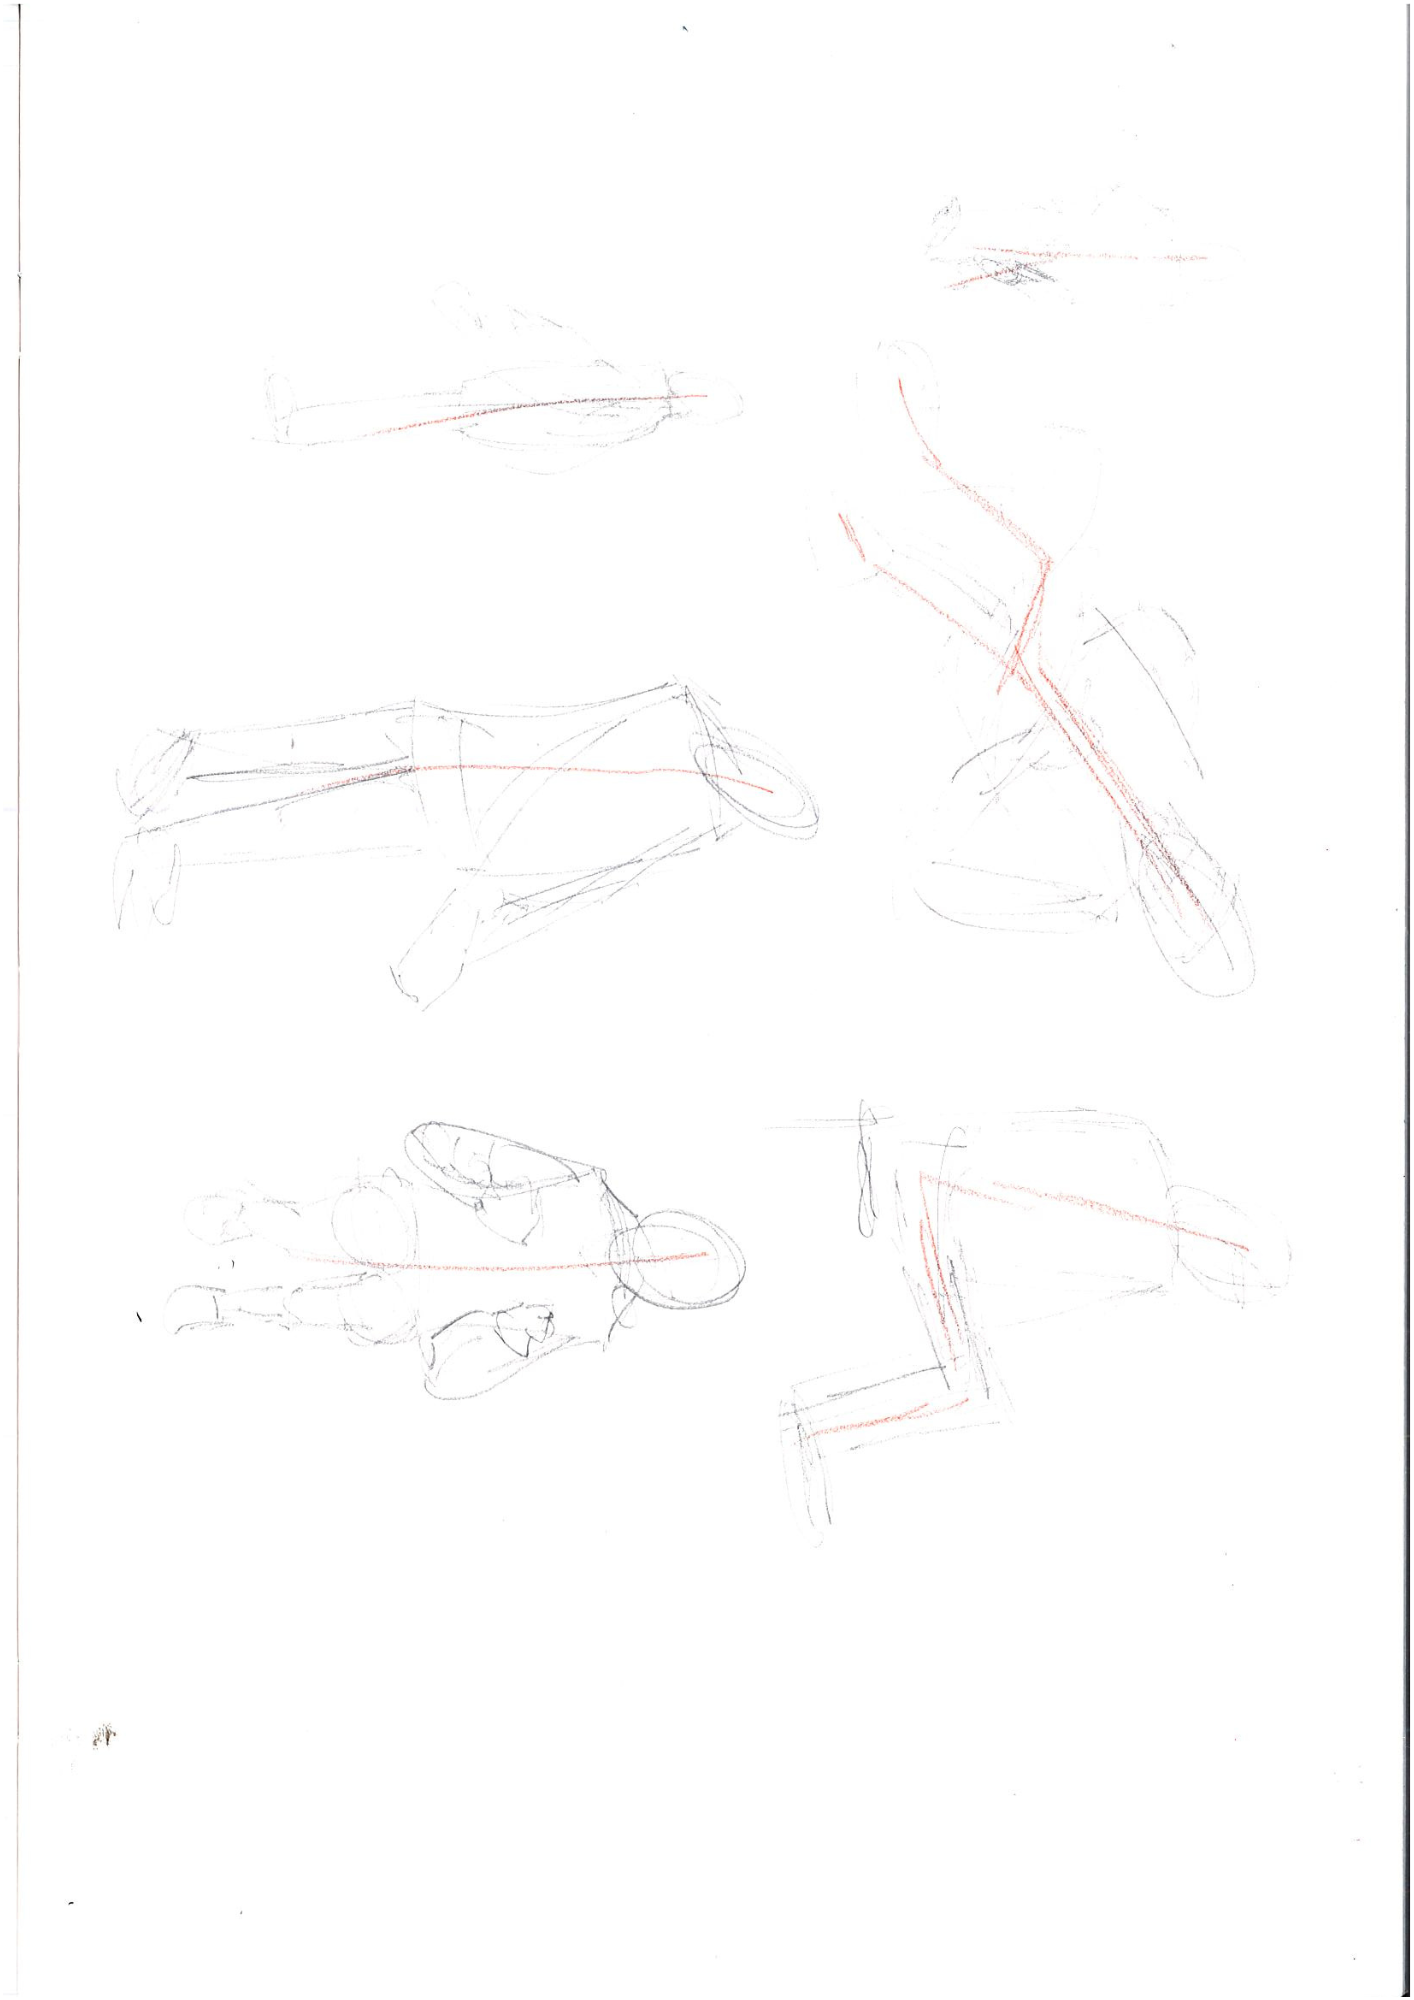
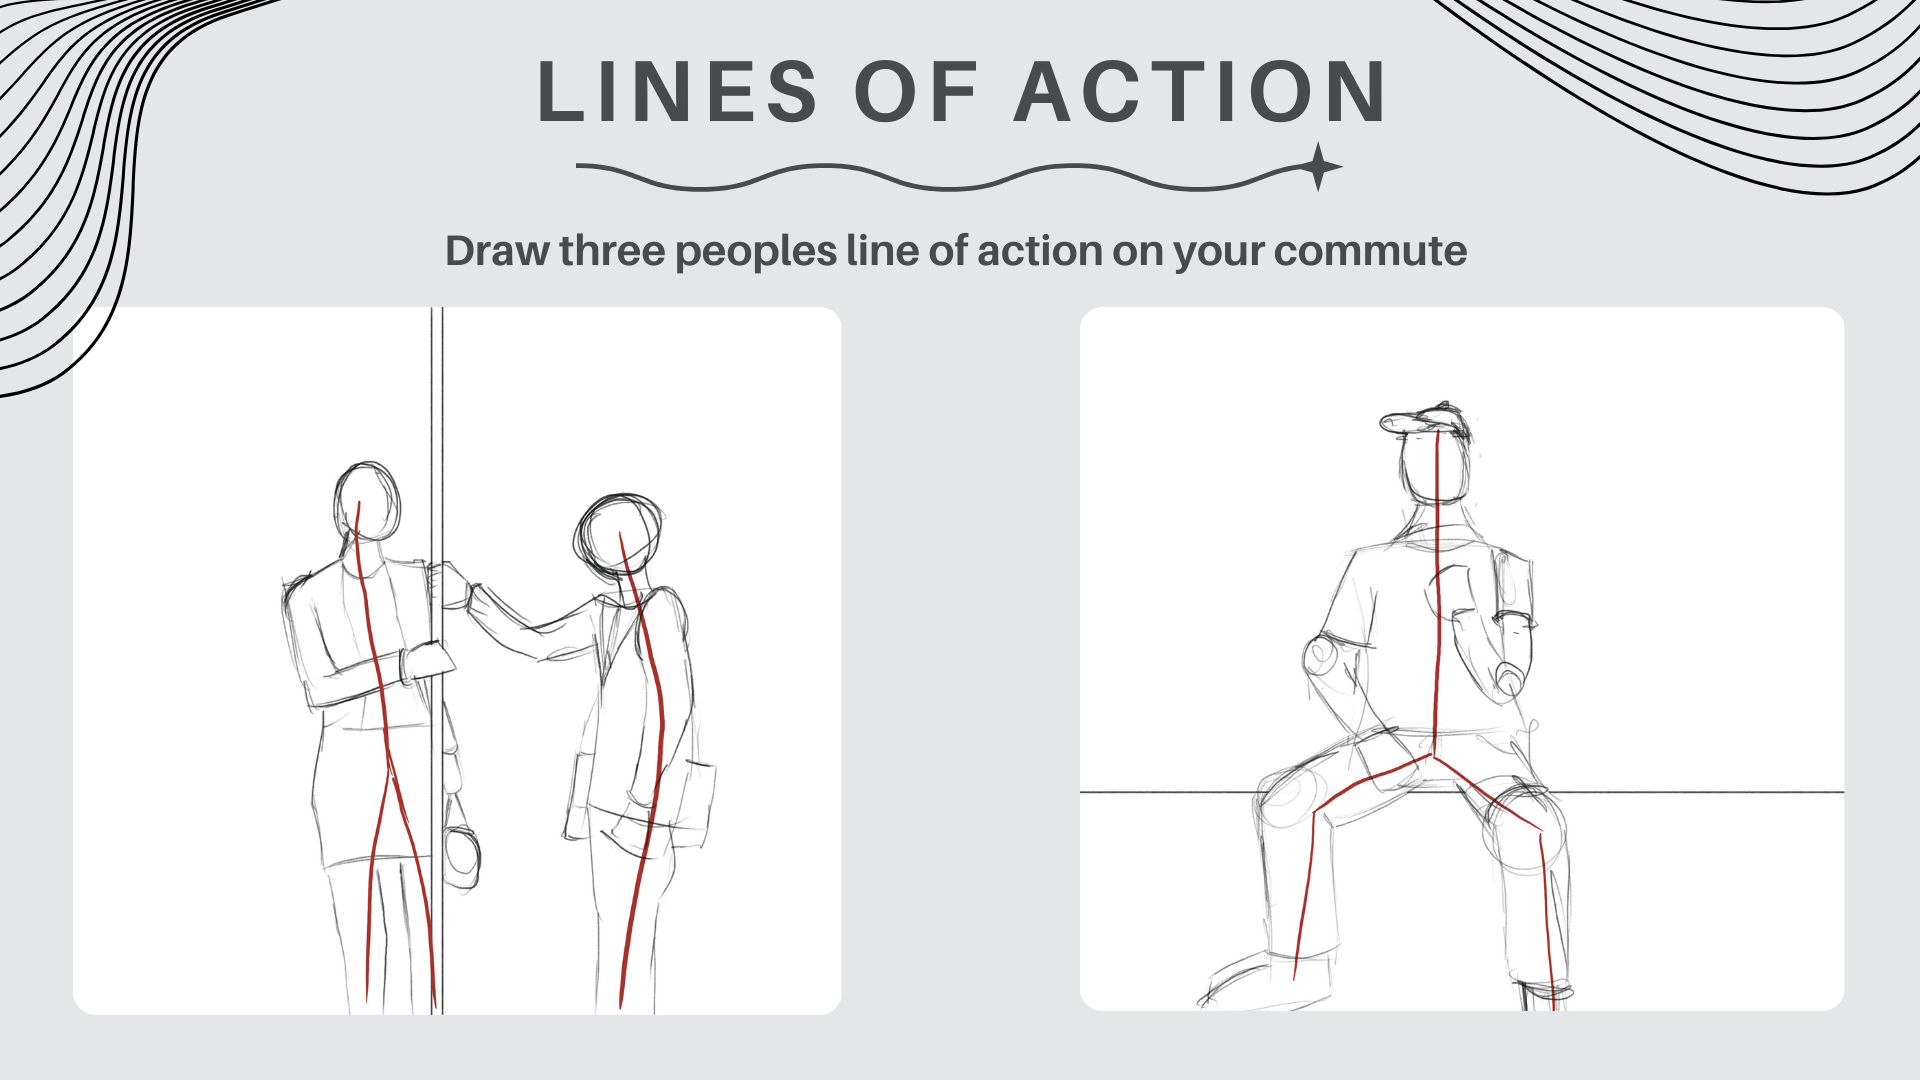
To cap off the day, we hit the streets with our sketchbooks, out to capture some strangers' lines of action.
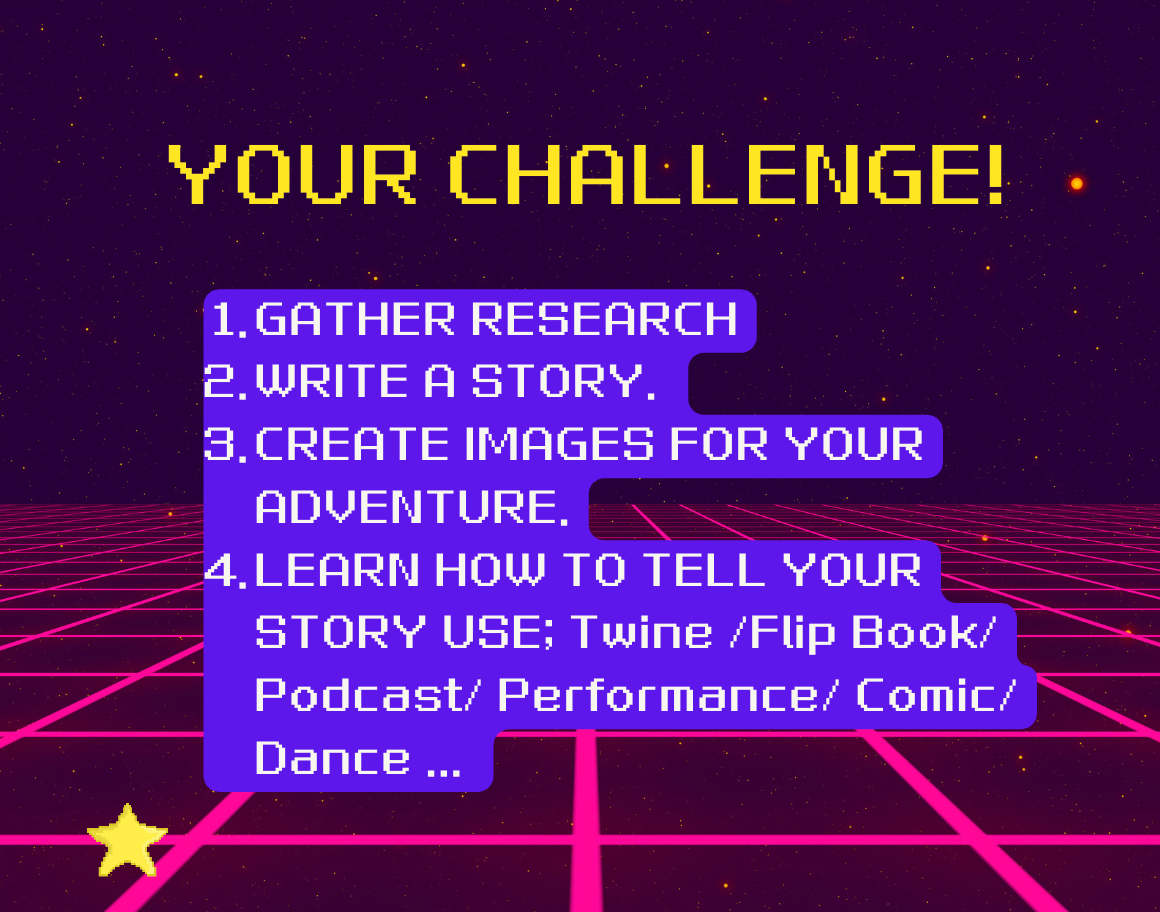
LAST BUT NOT LEAST, THE INFAMOUS SELF-DIRECTED project. It's time to show them what I'm made of, to blend the skills I've honed over the summer with the cunning and creativity that's been running in my family for generations. This isn't just art; it's a statement, a testament to where I come from and the legacy I'm building.


INT- ROOM 903 03 - 10 - 24
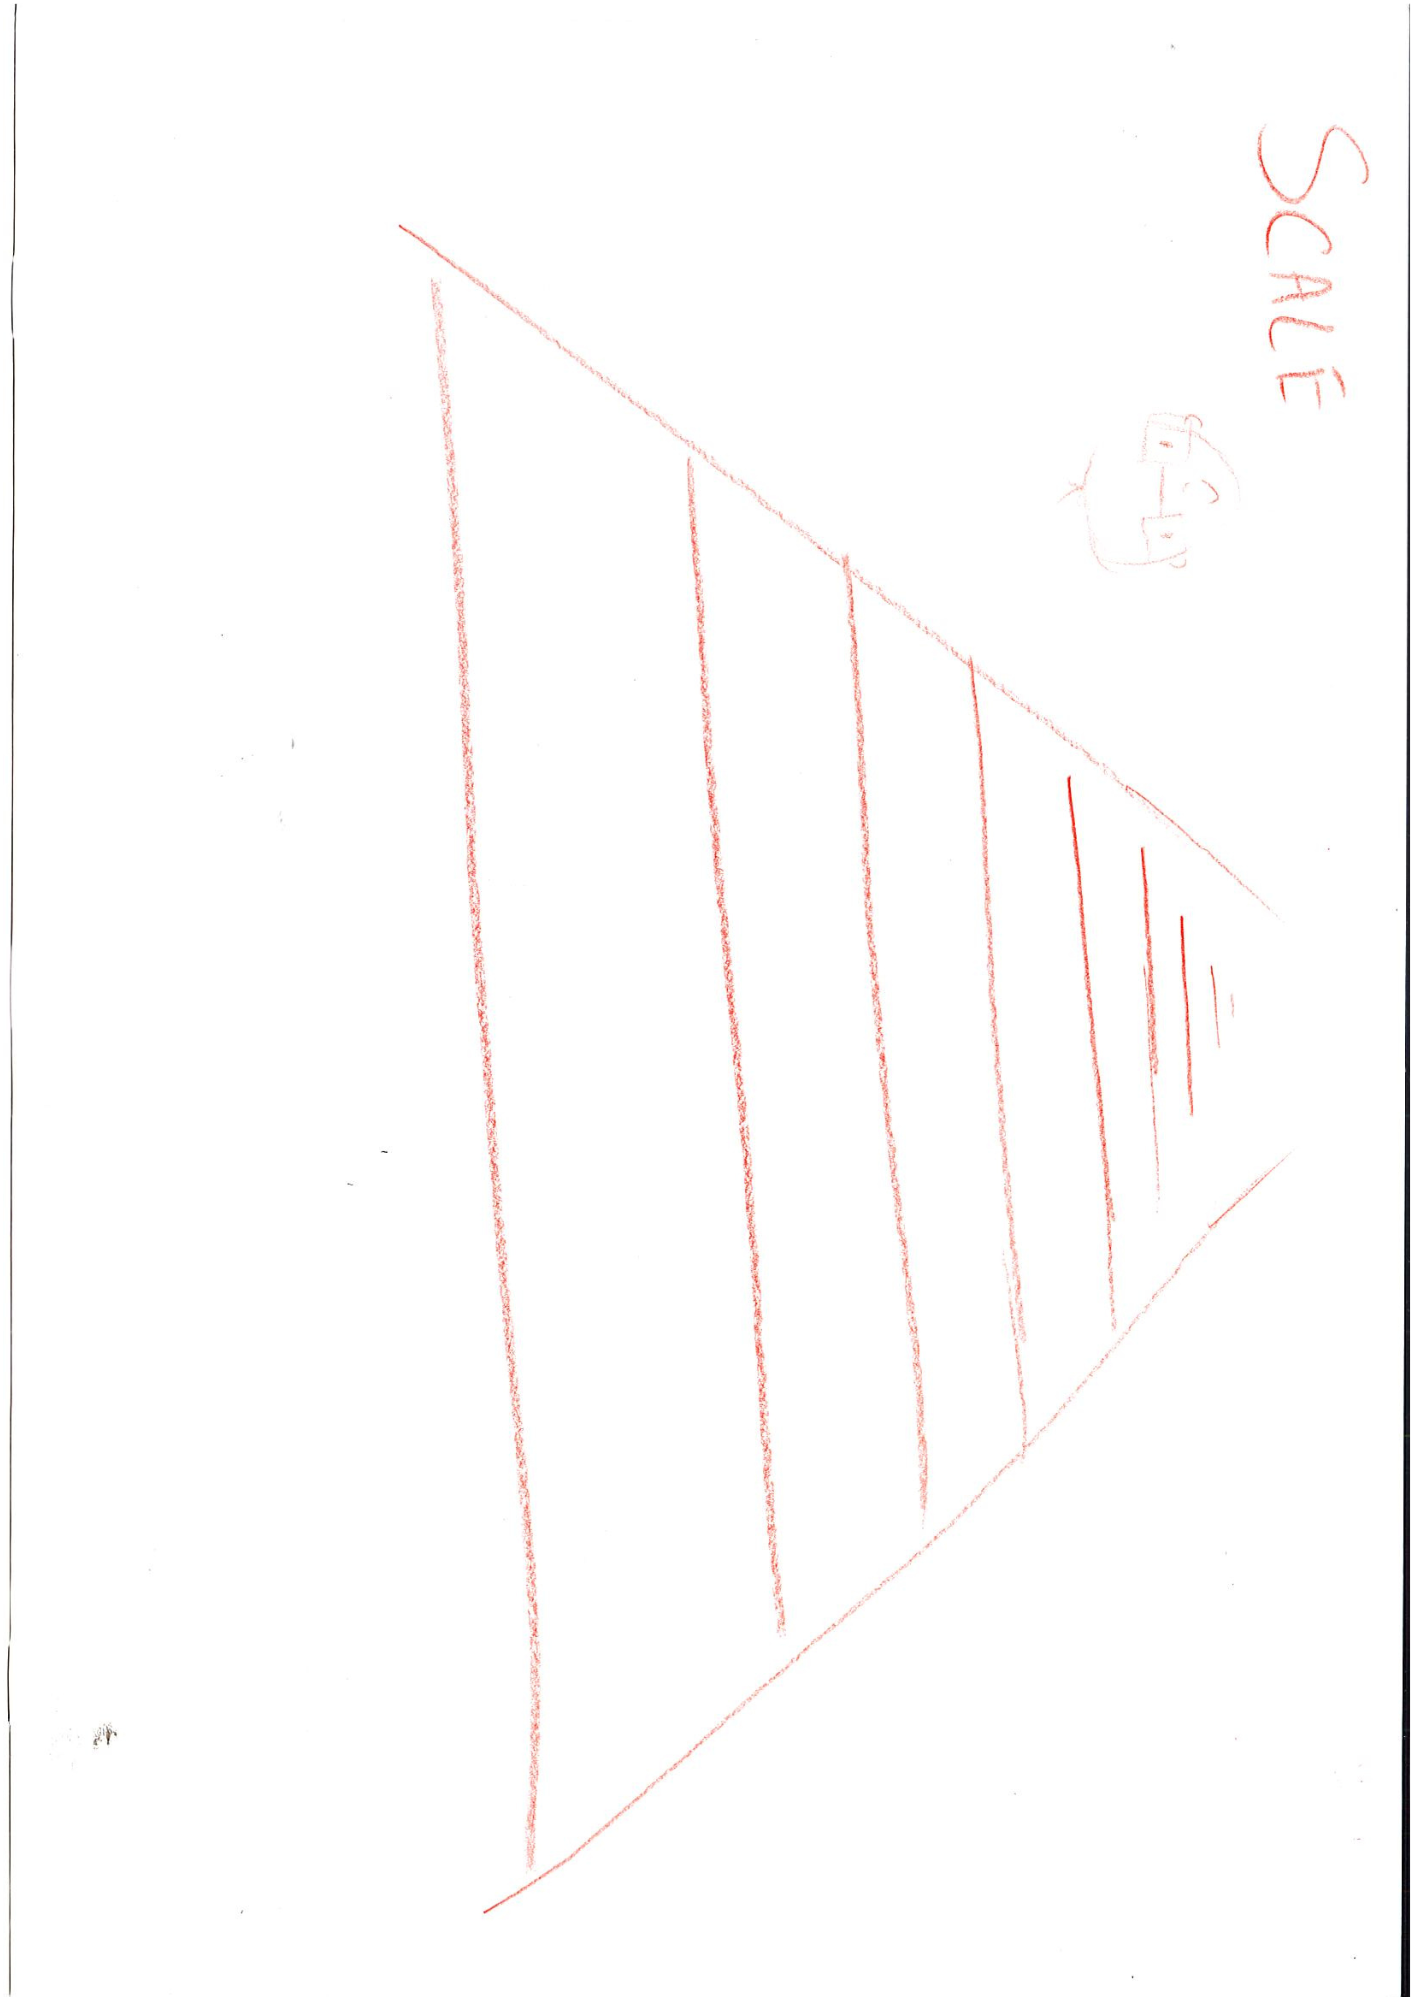
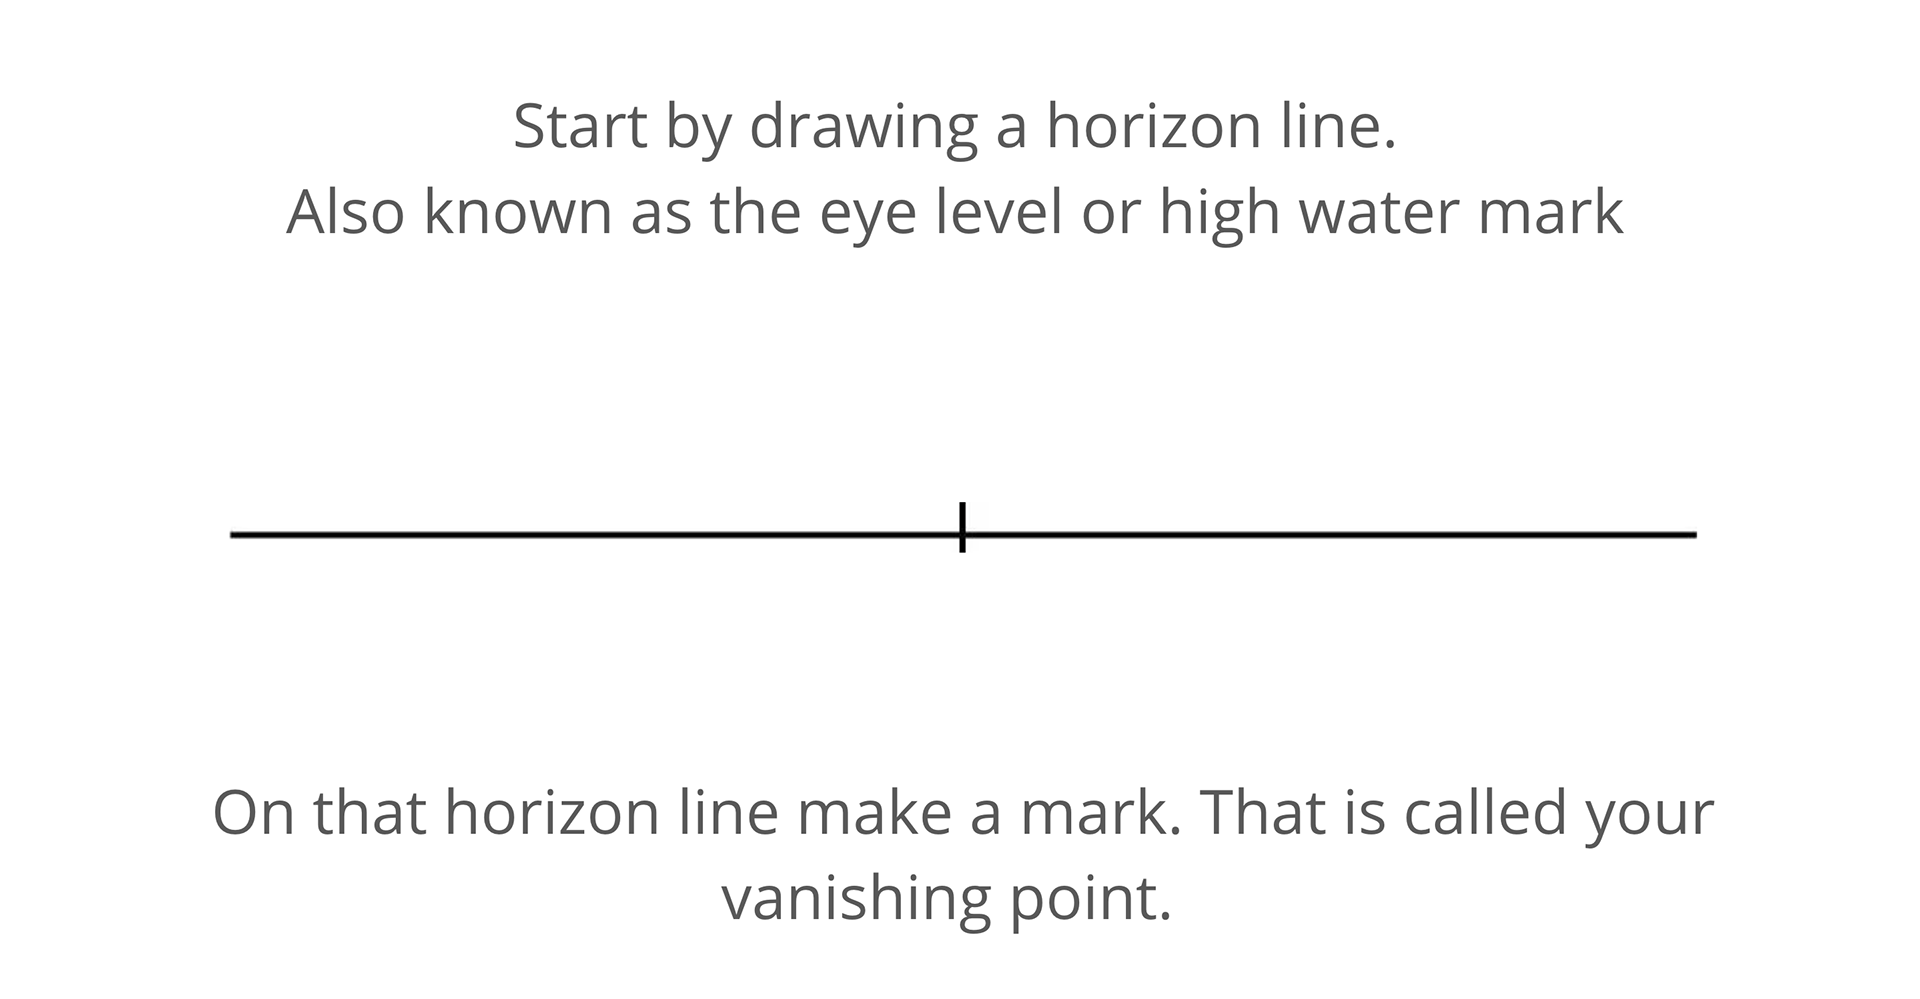
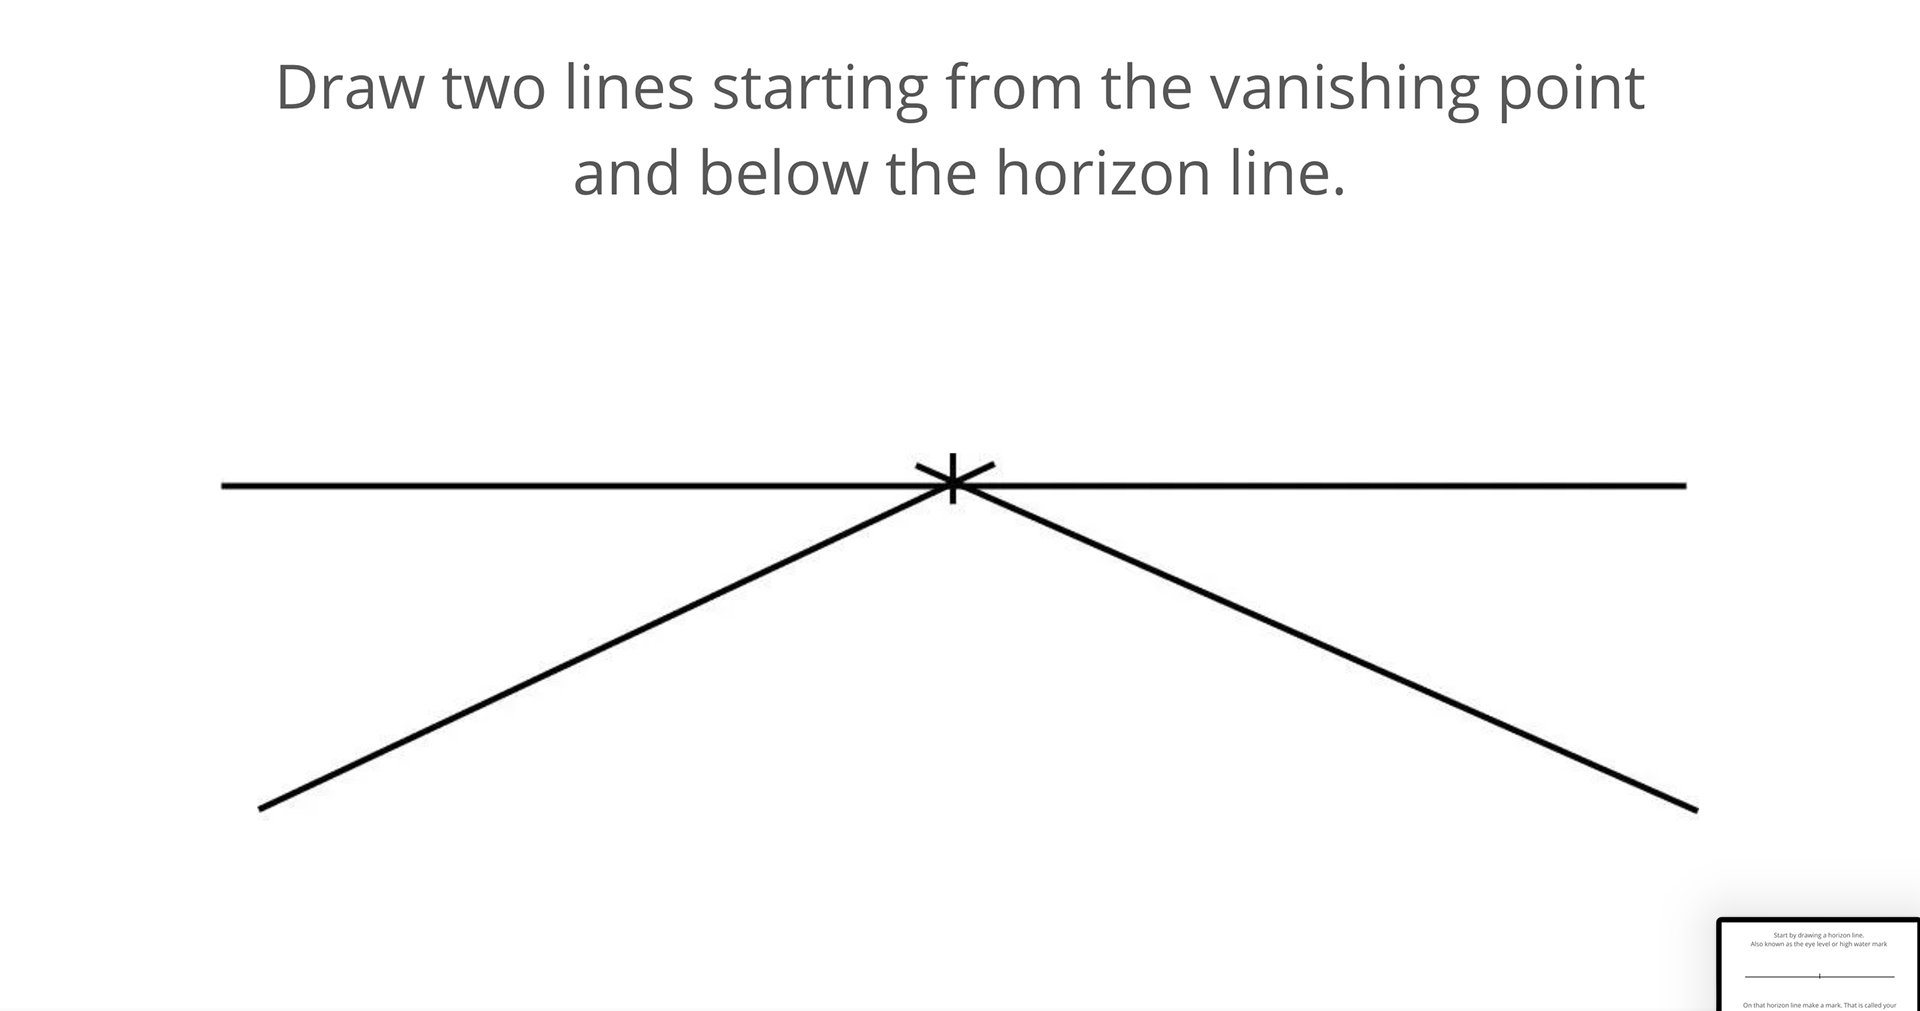
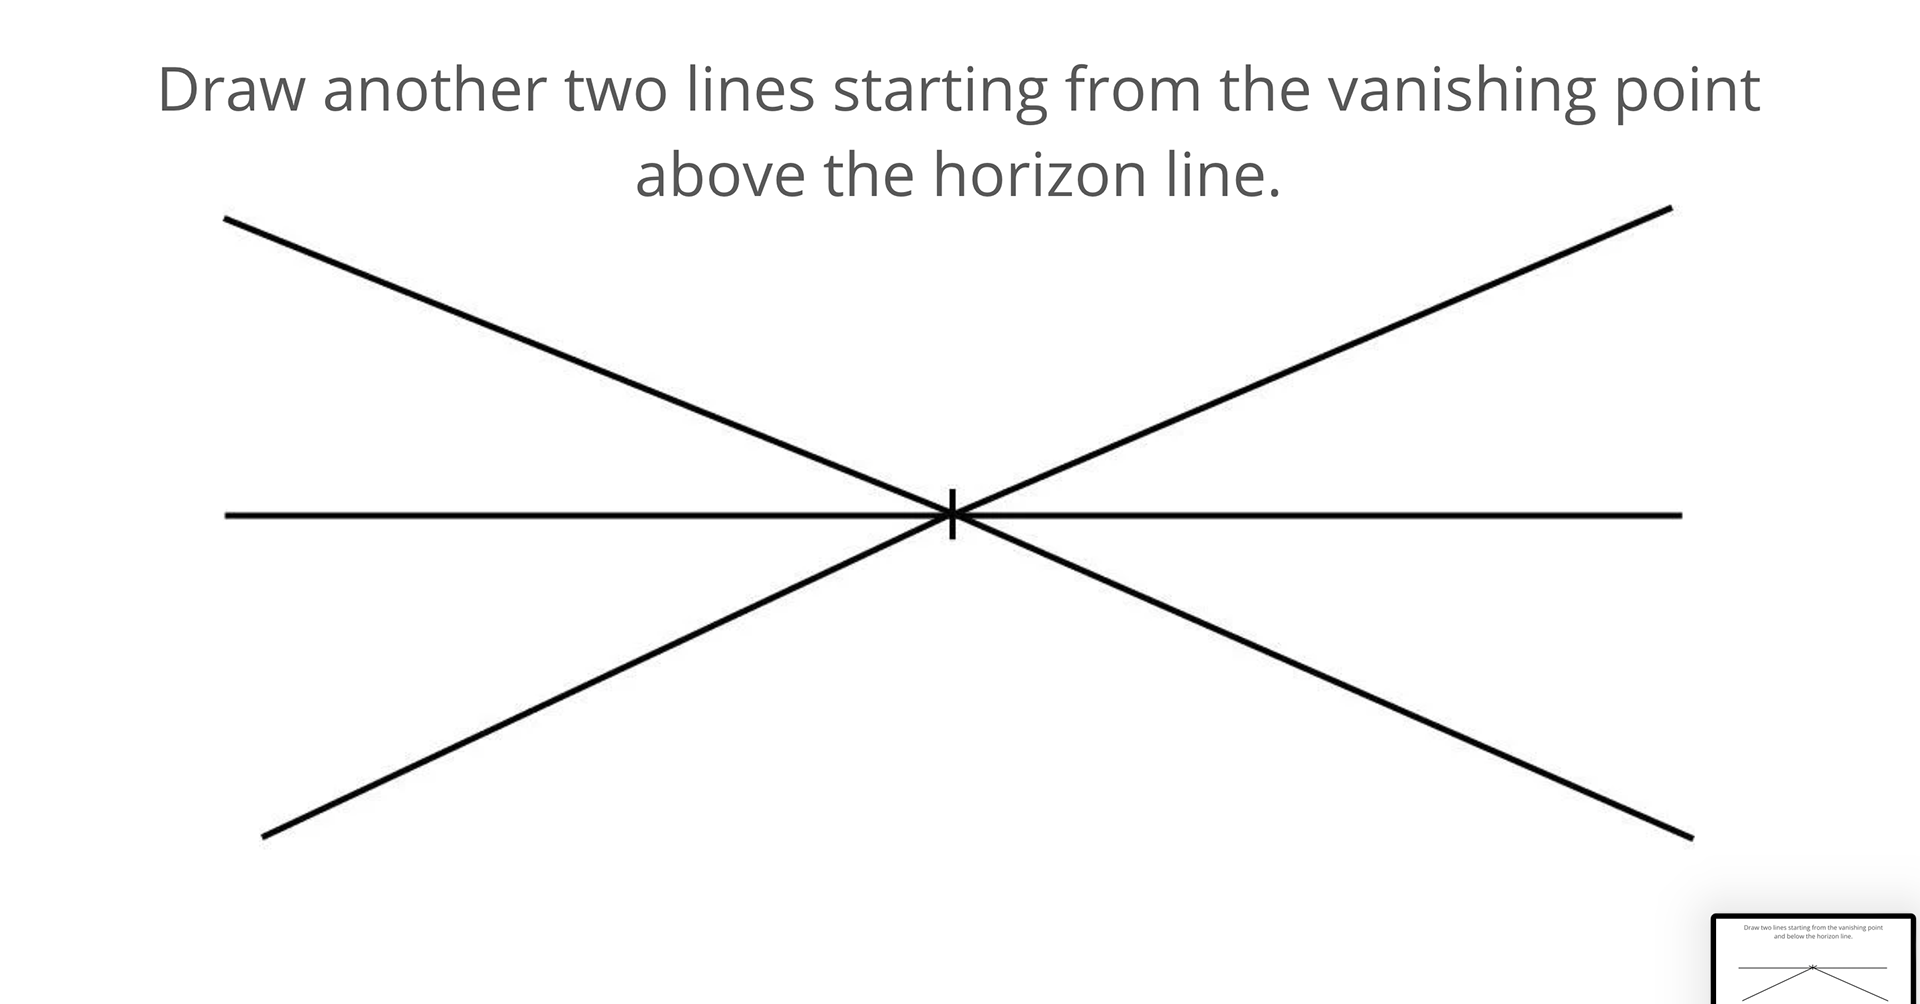
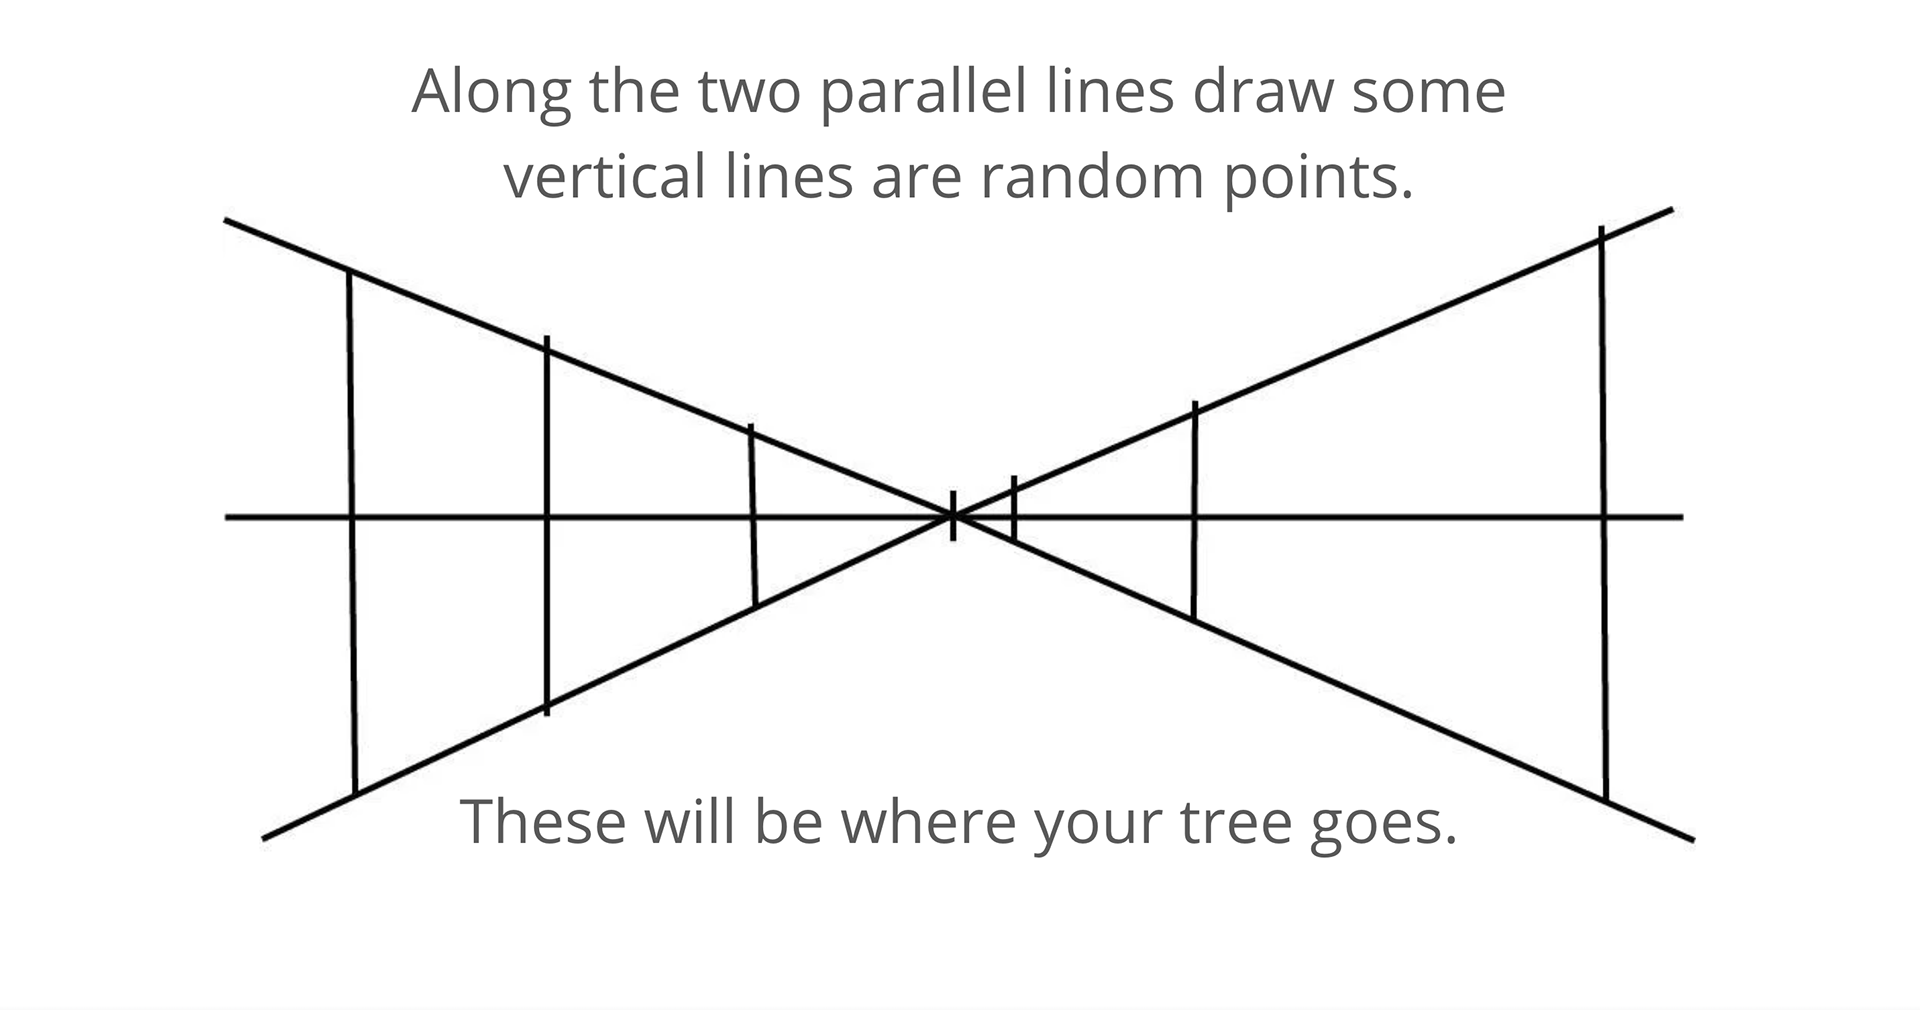
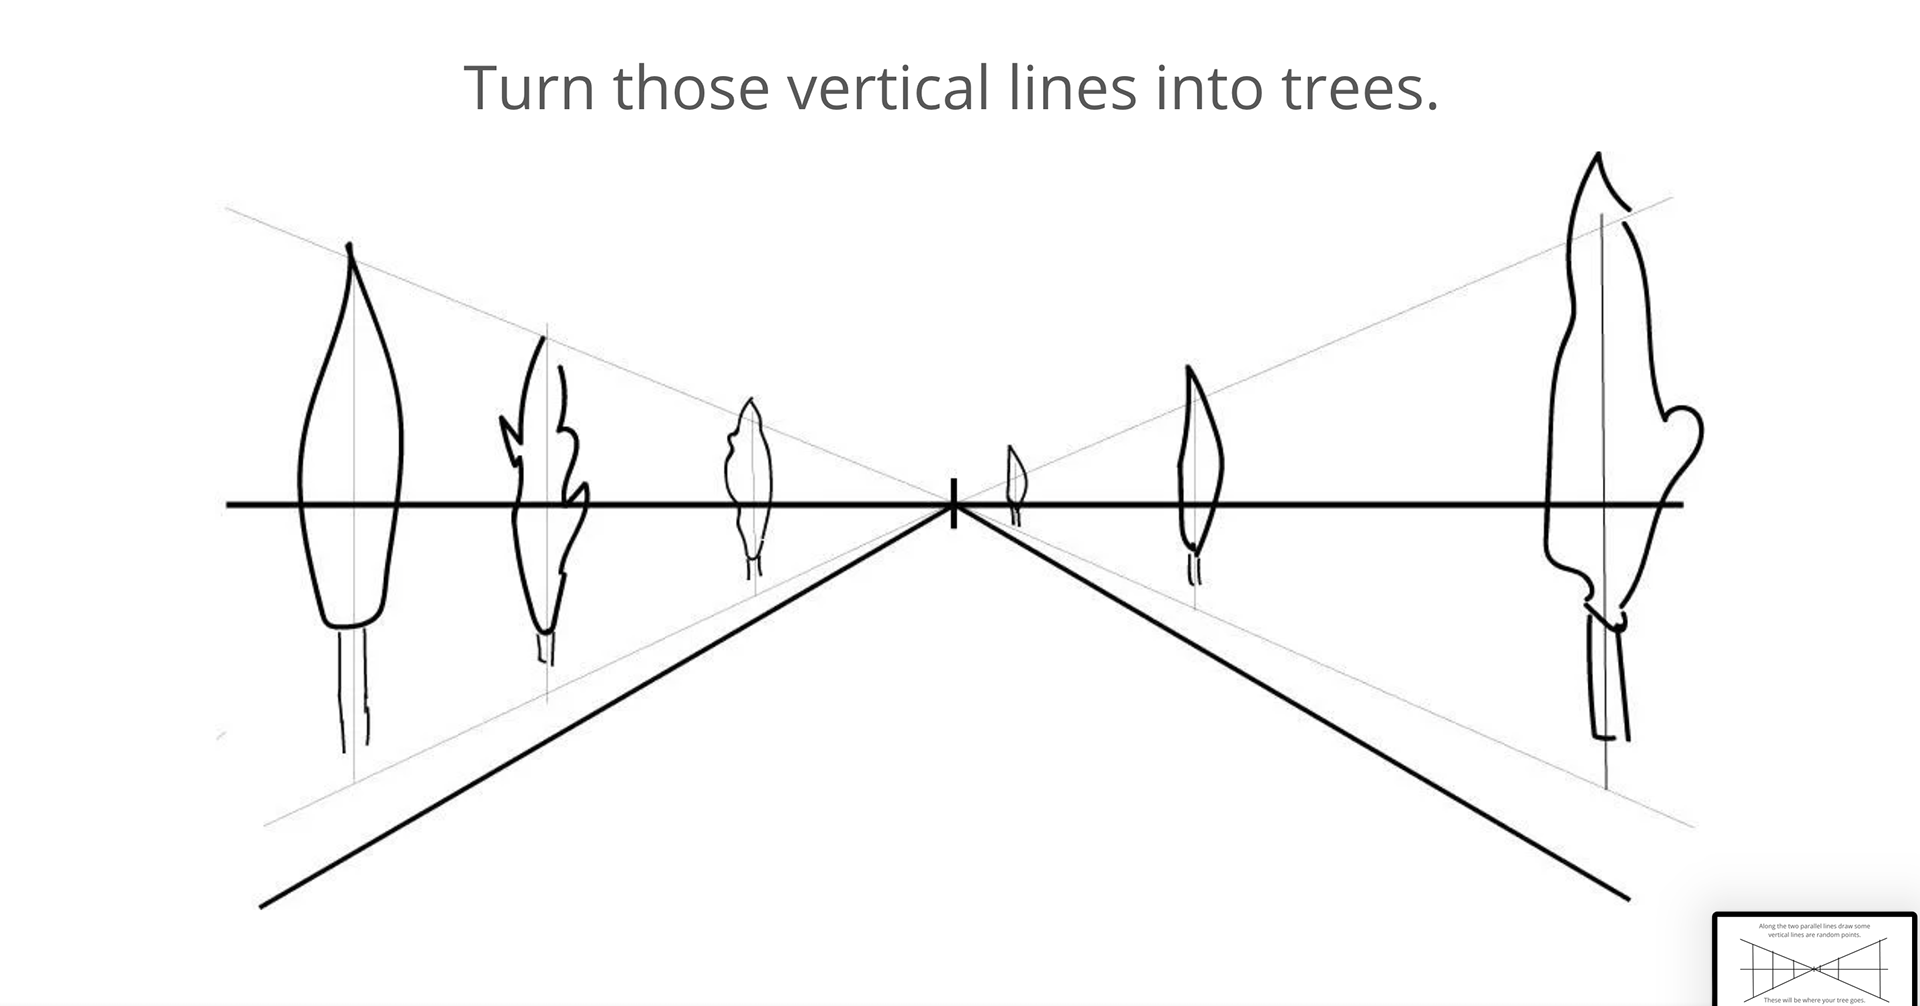
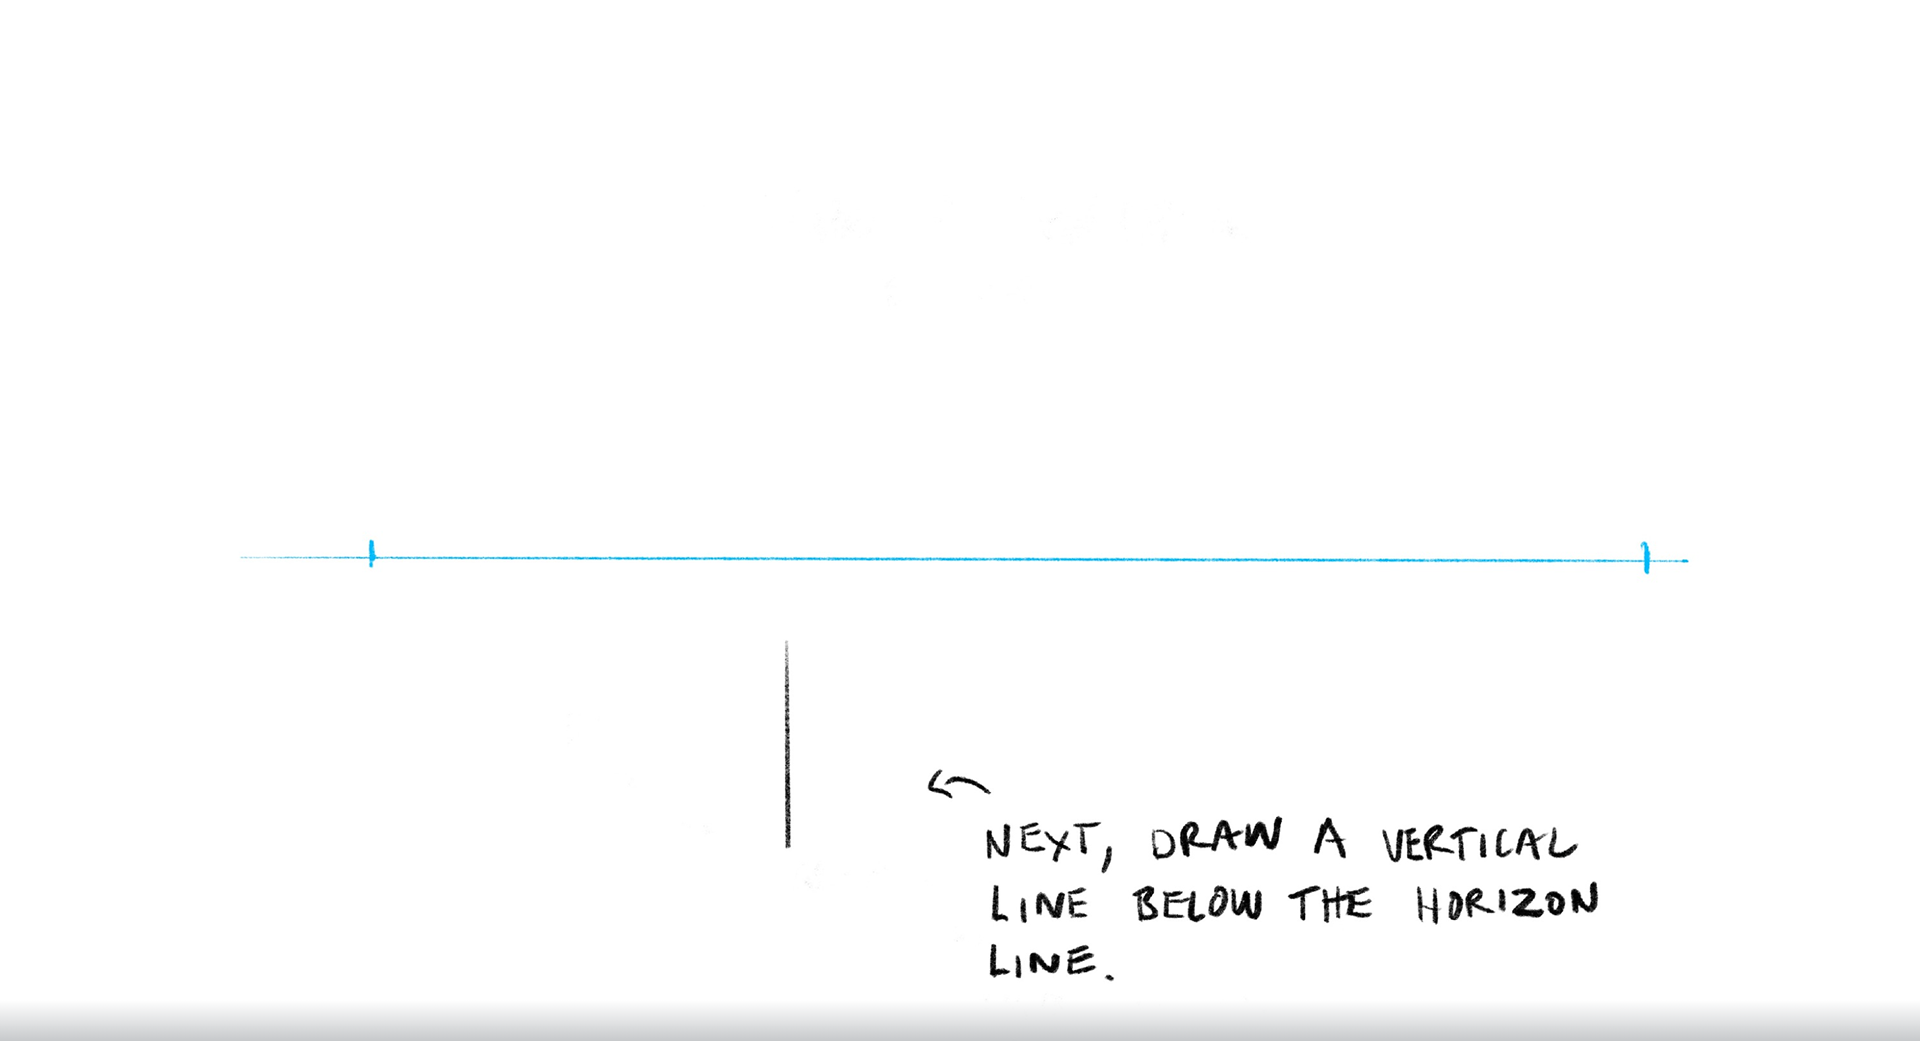
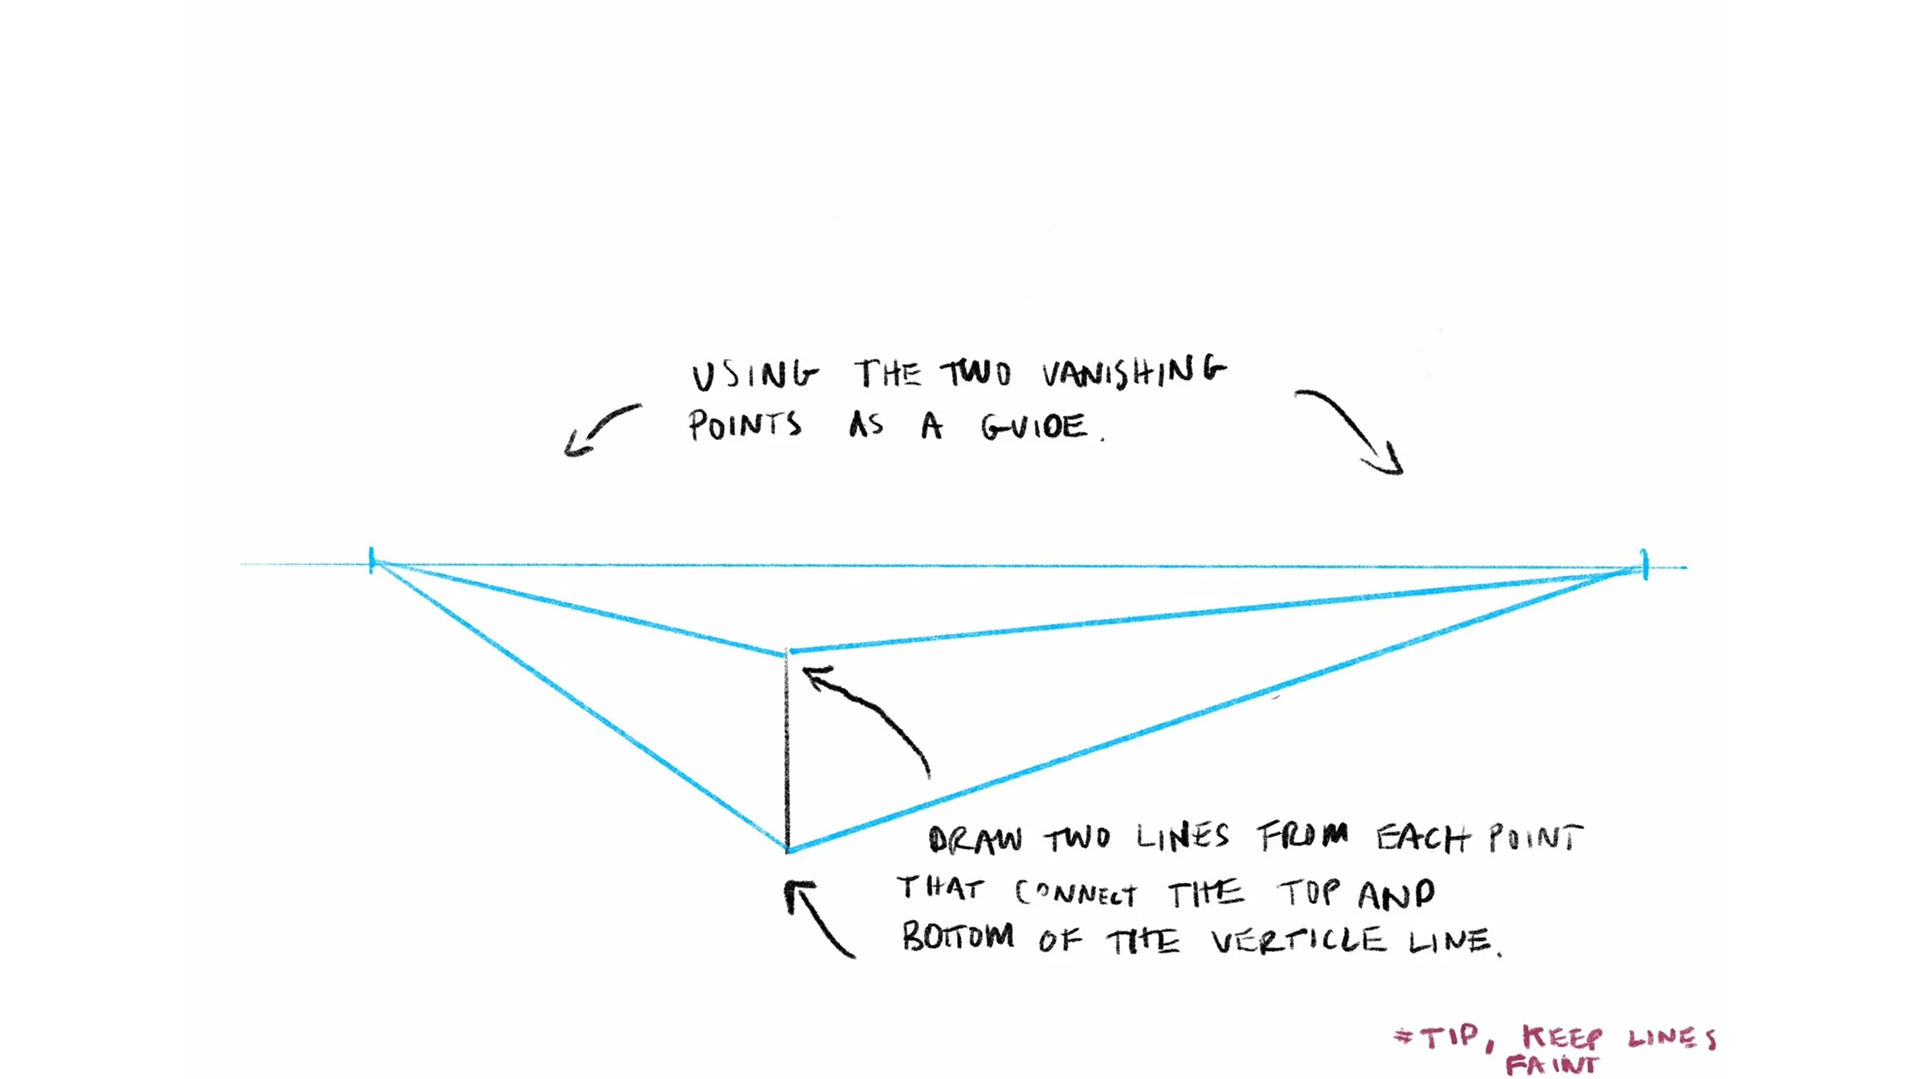
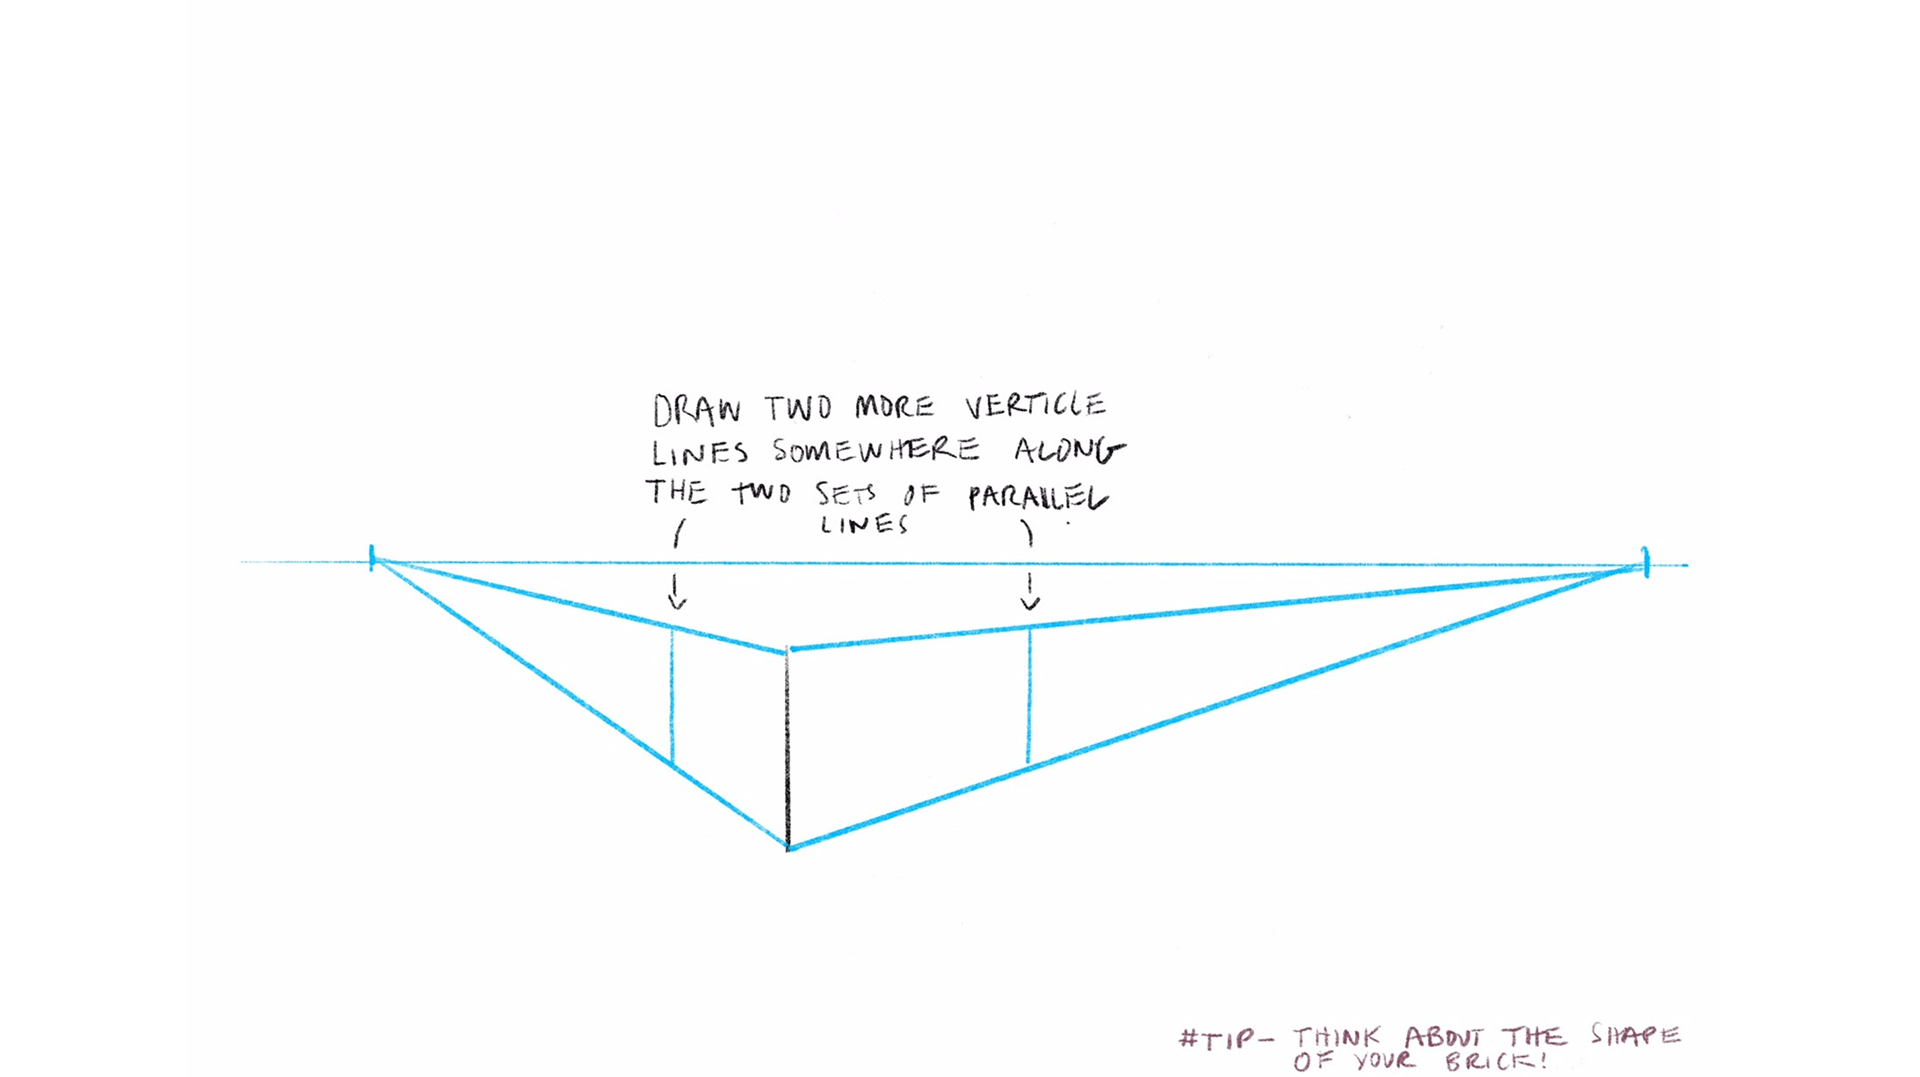
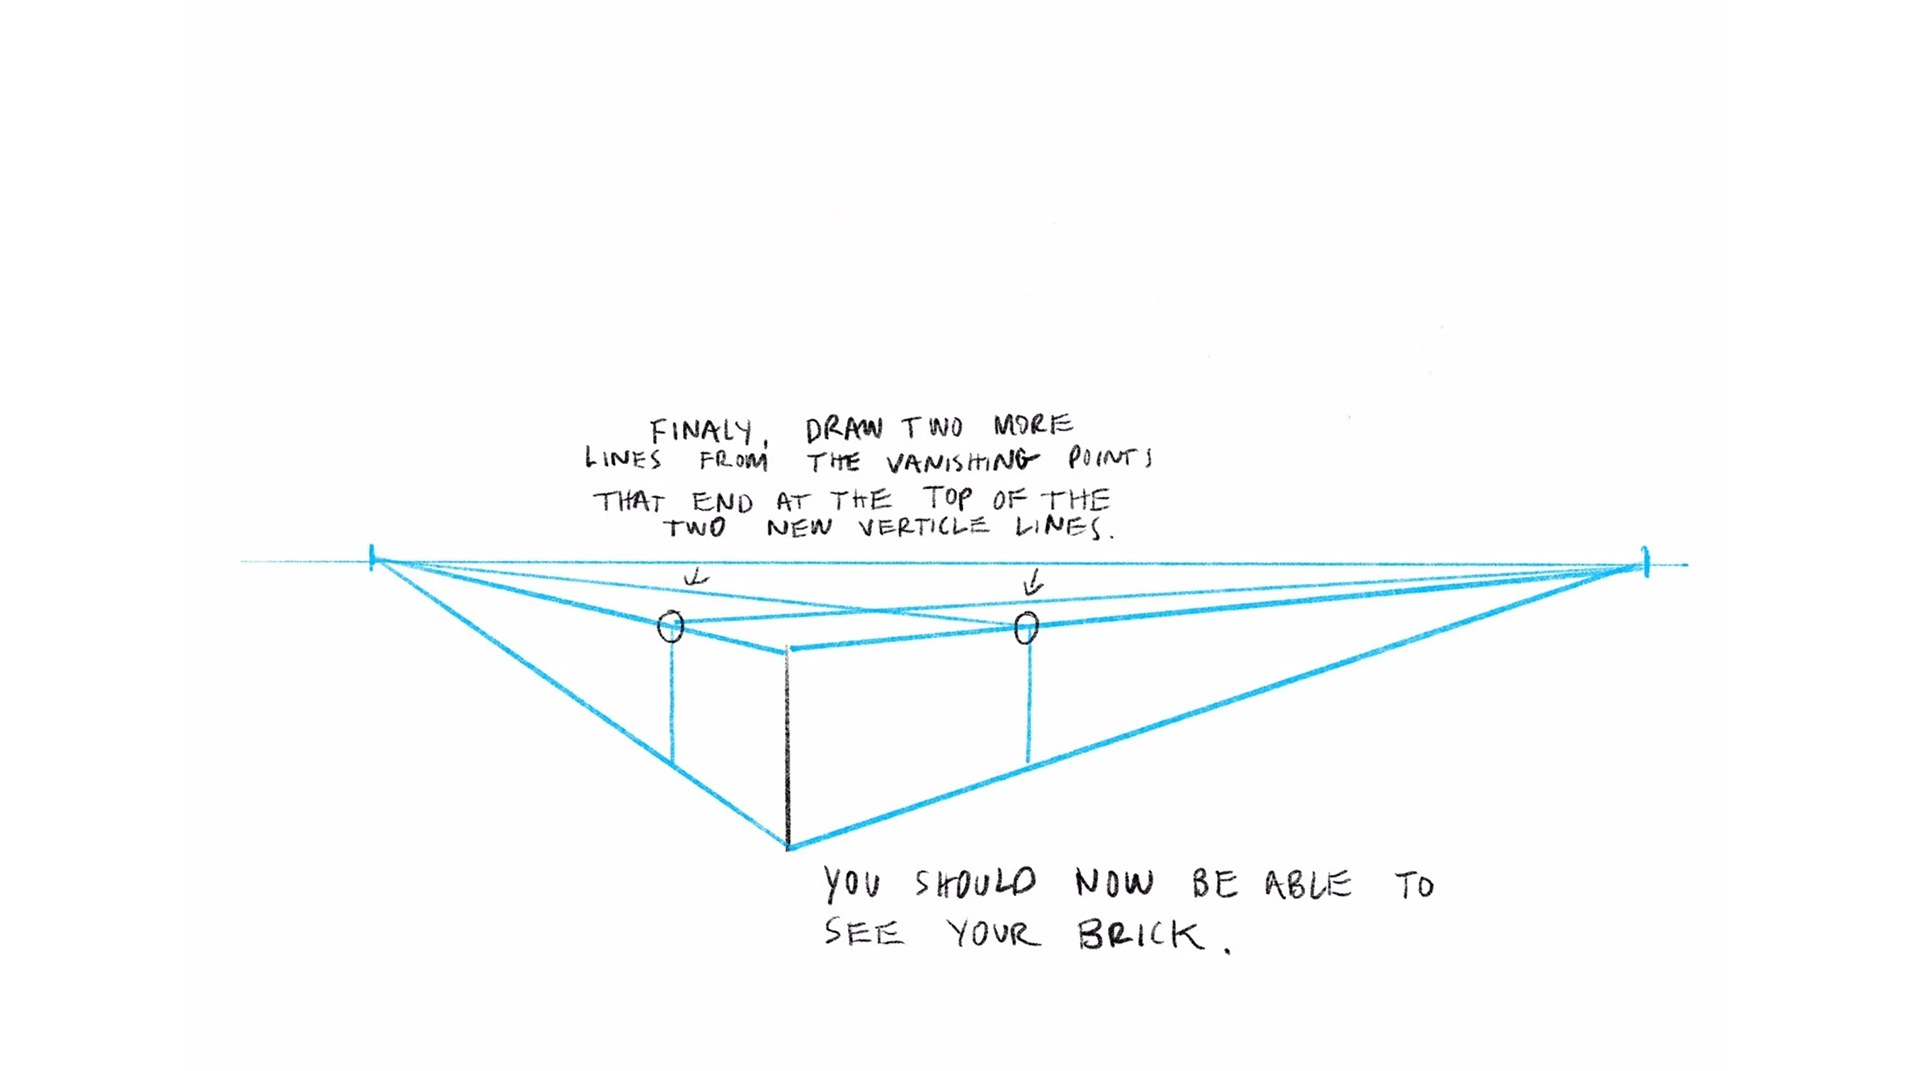
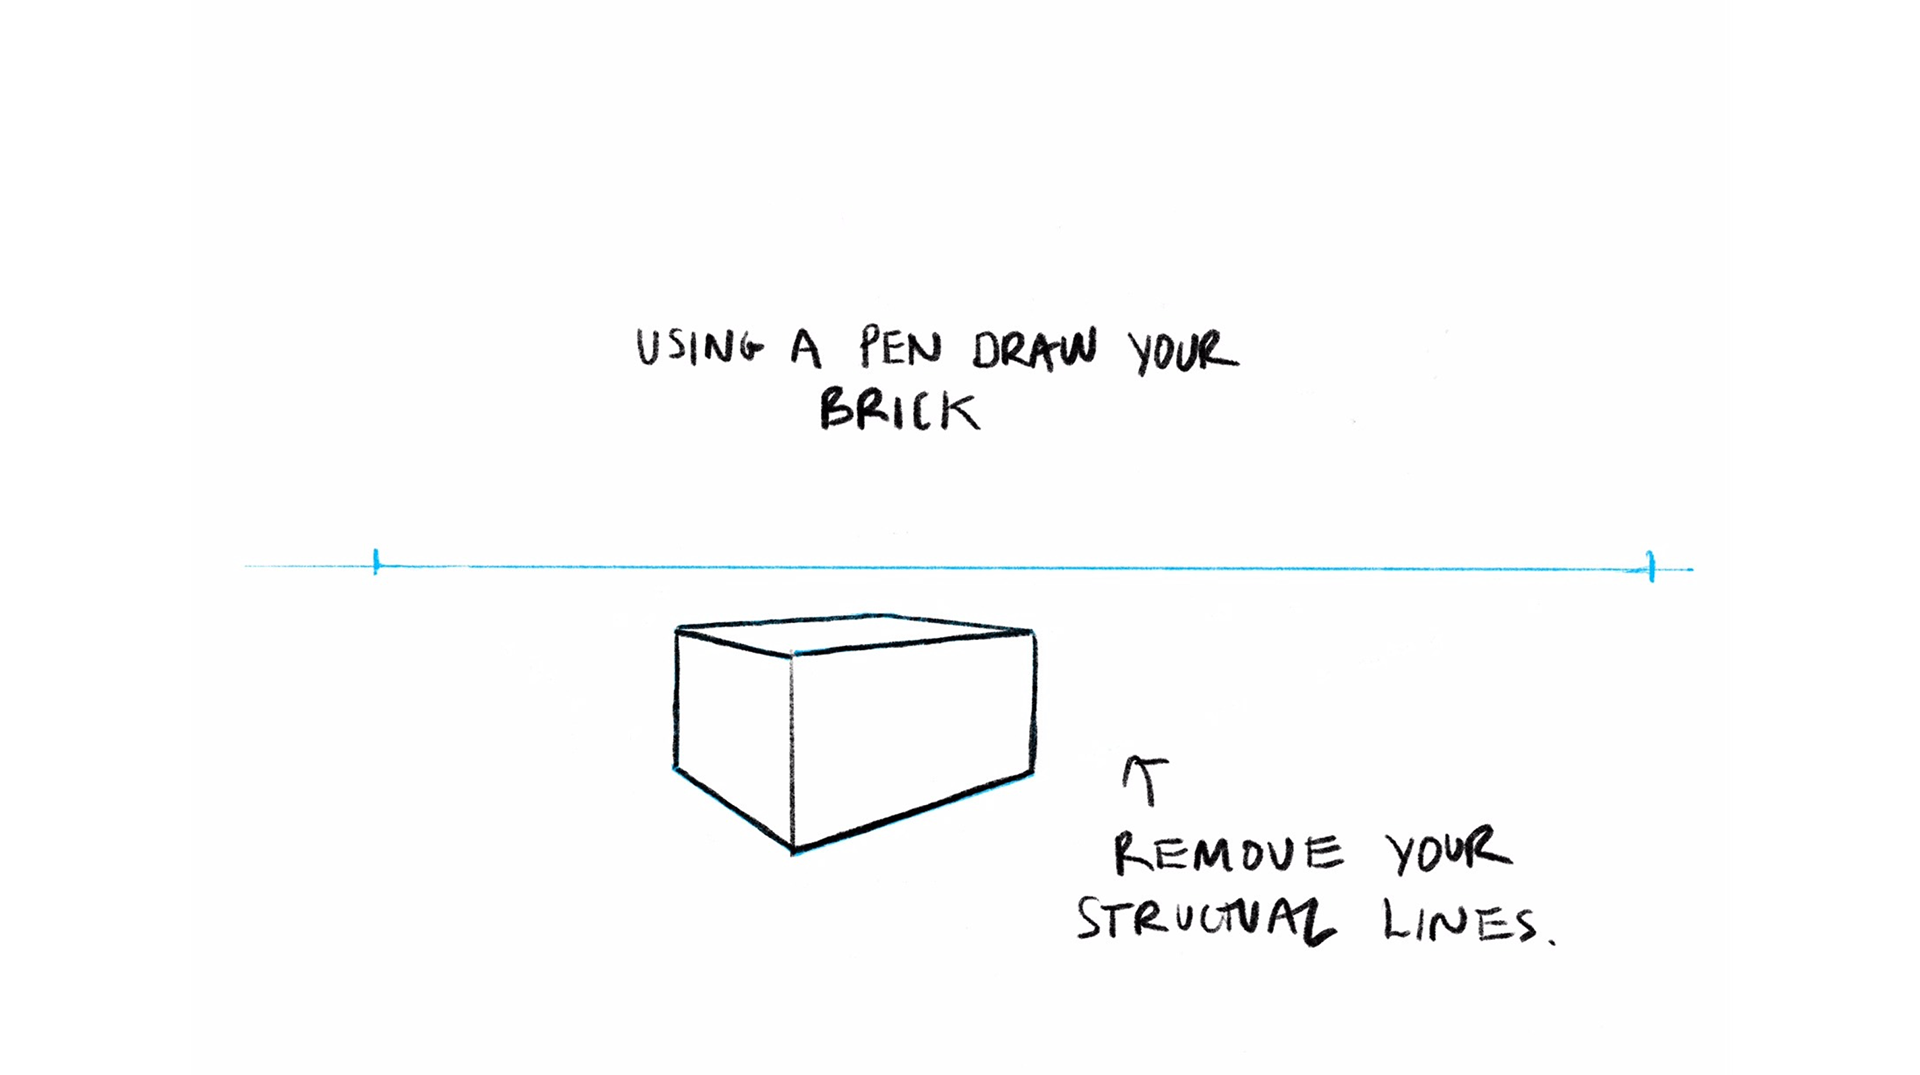
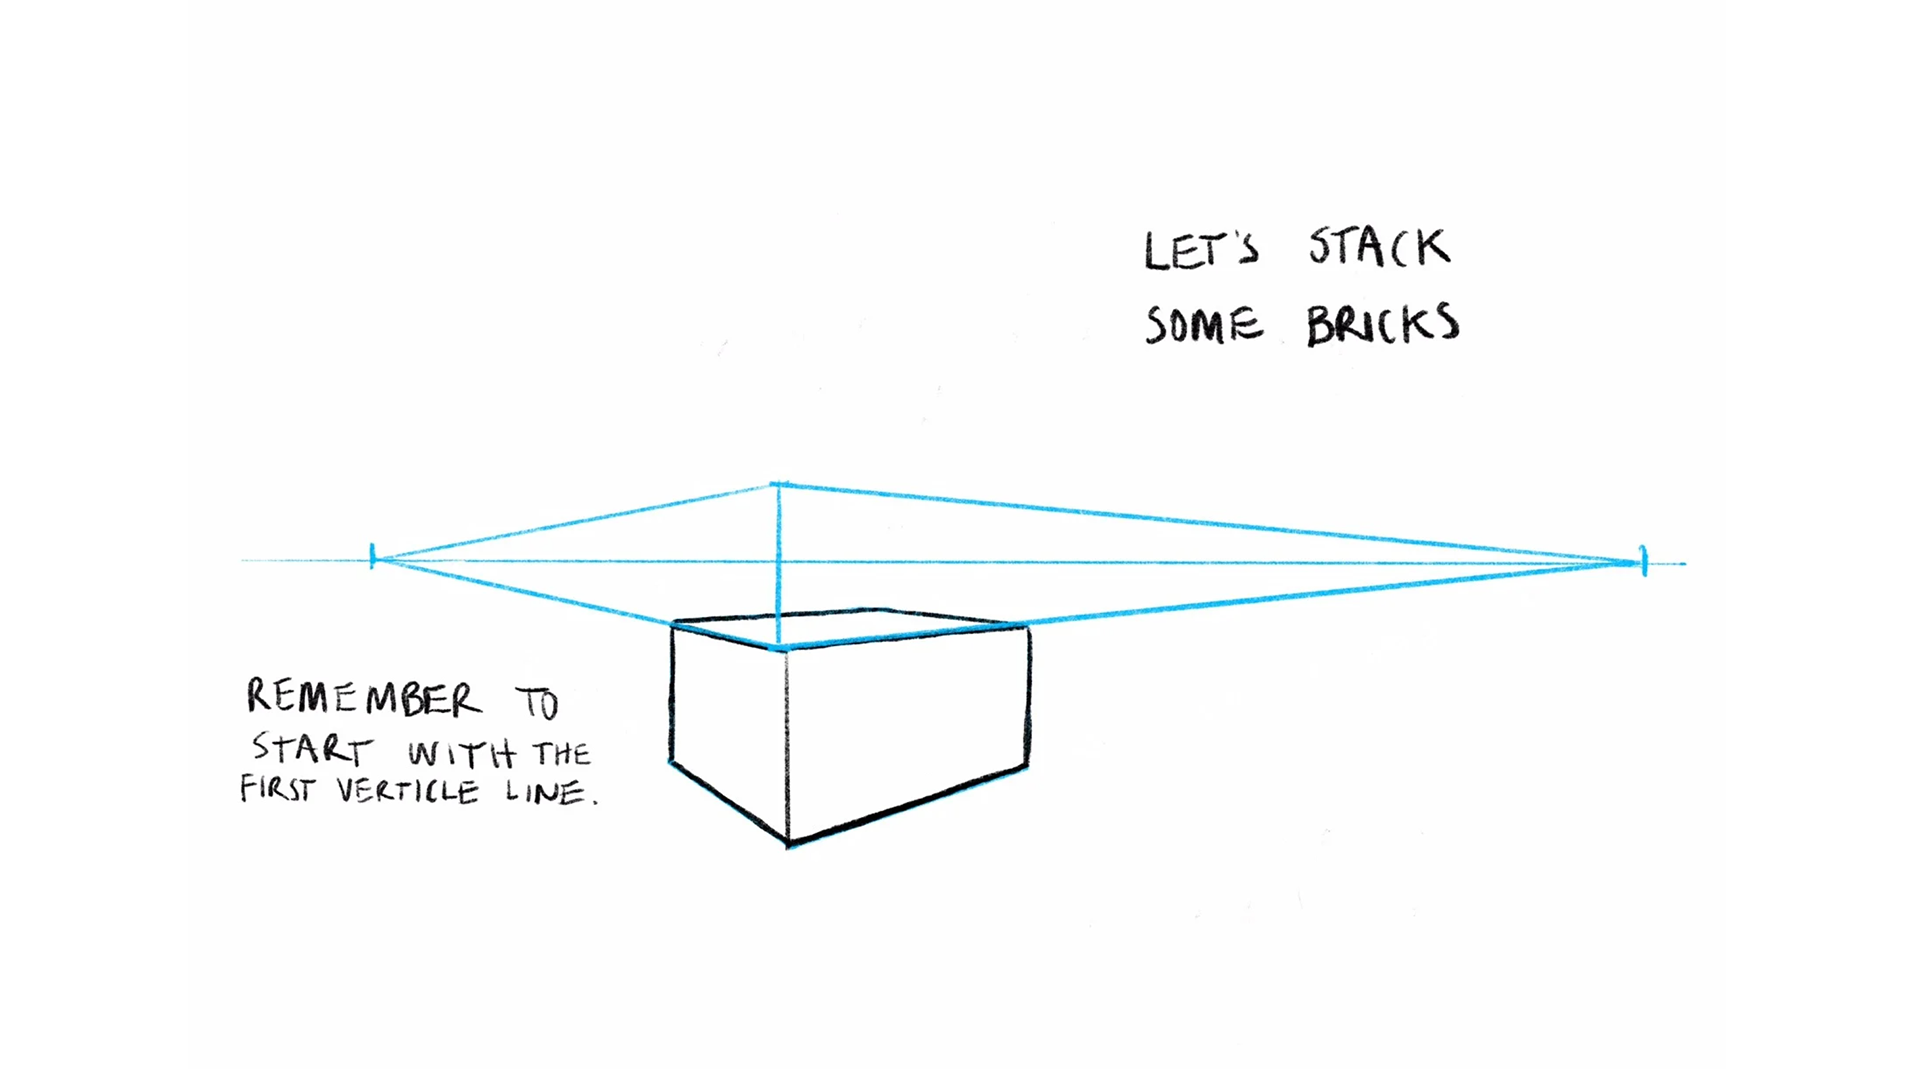
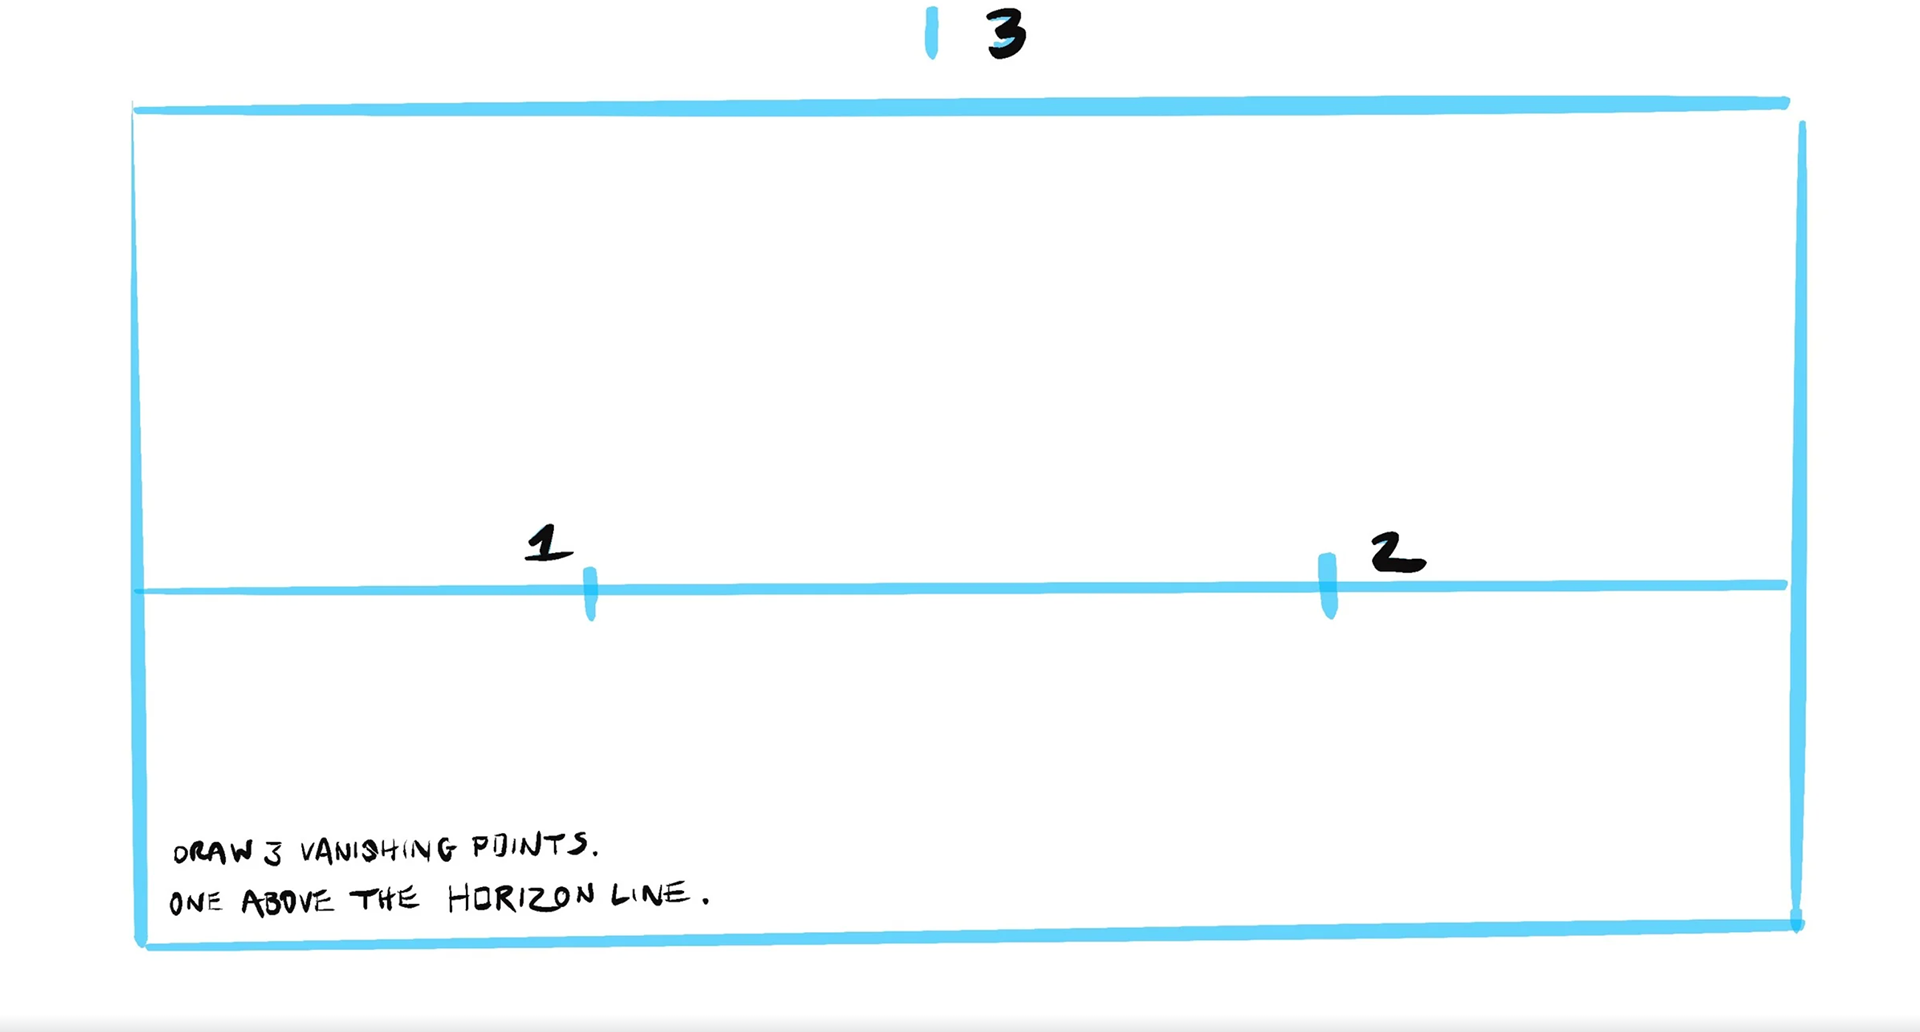
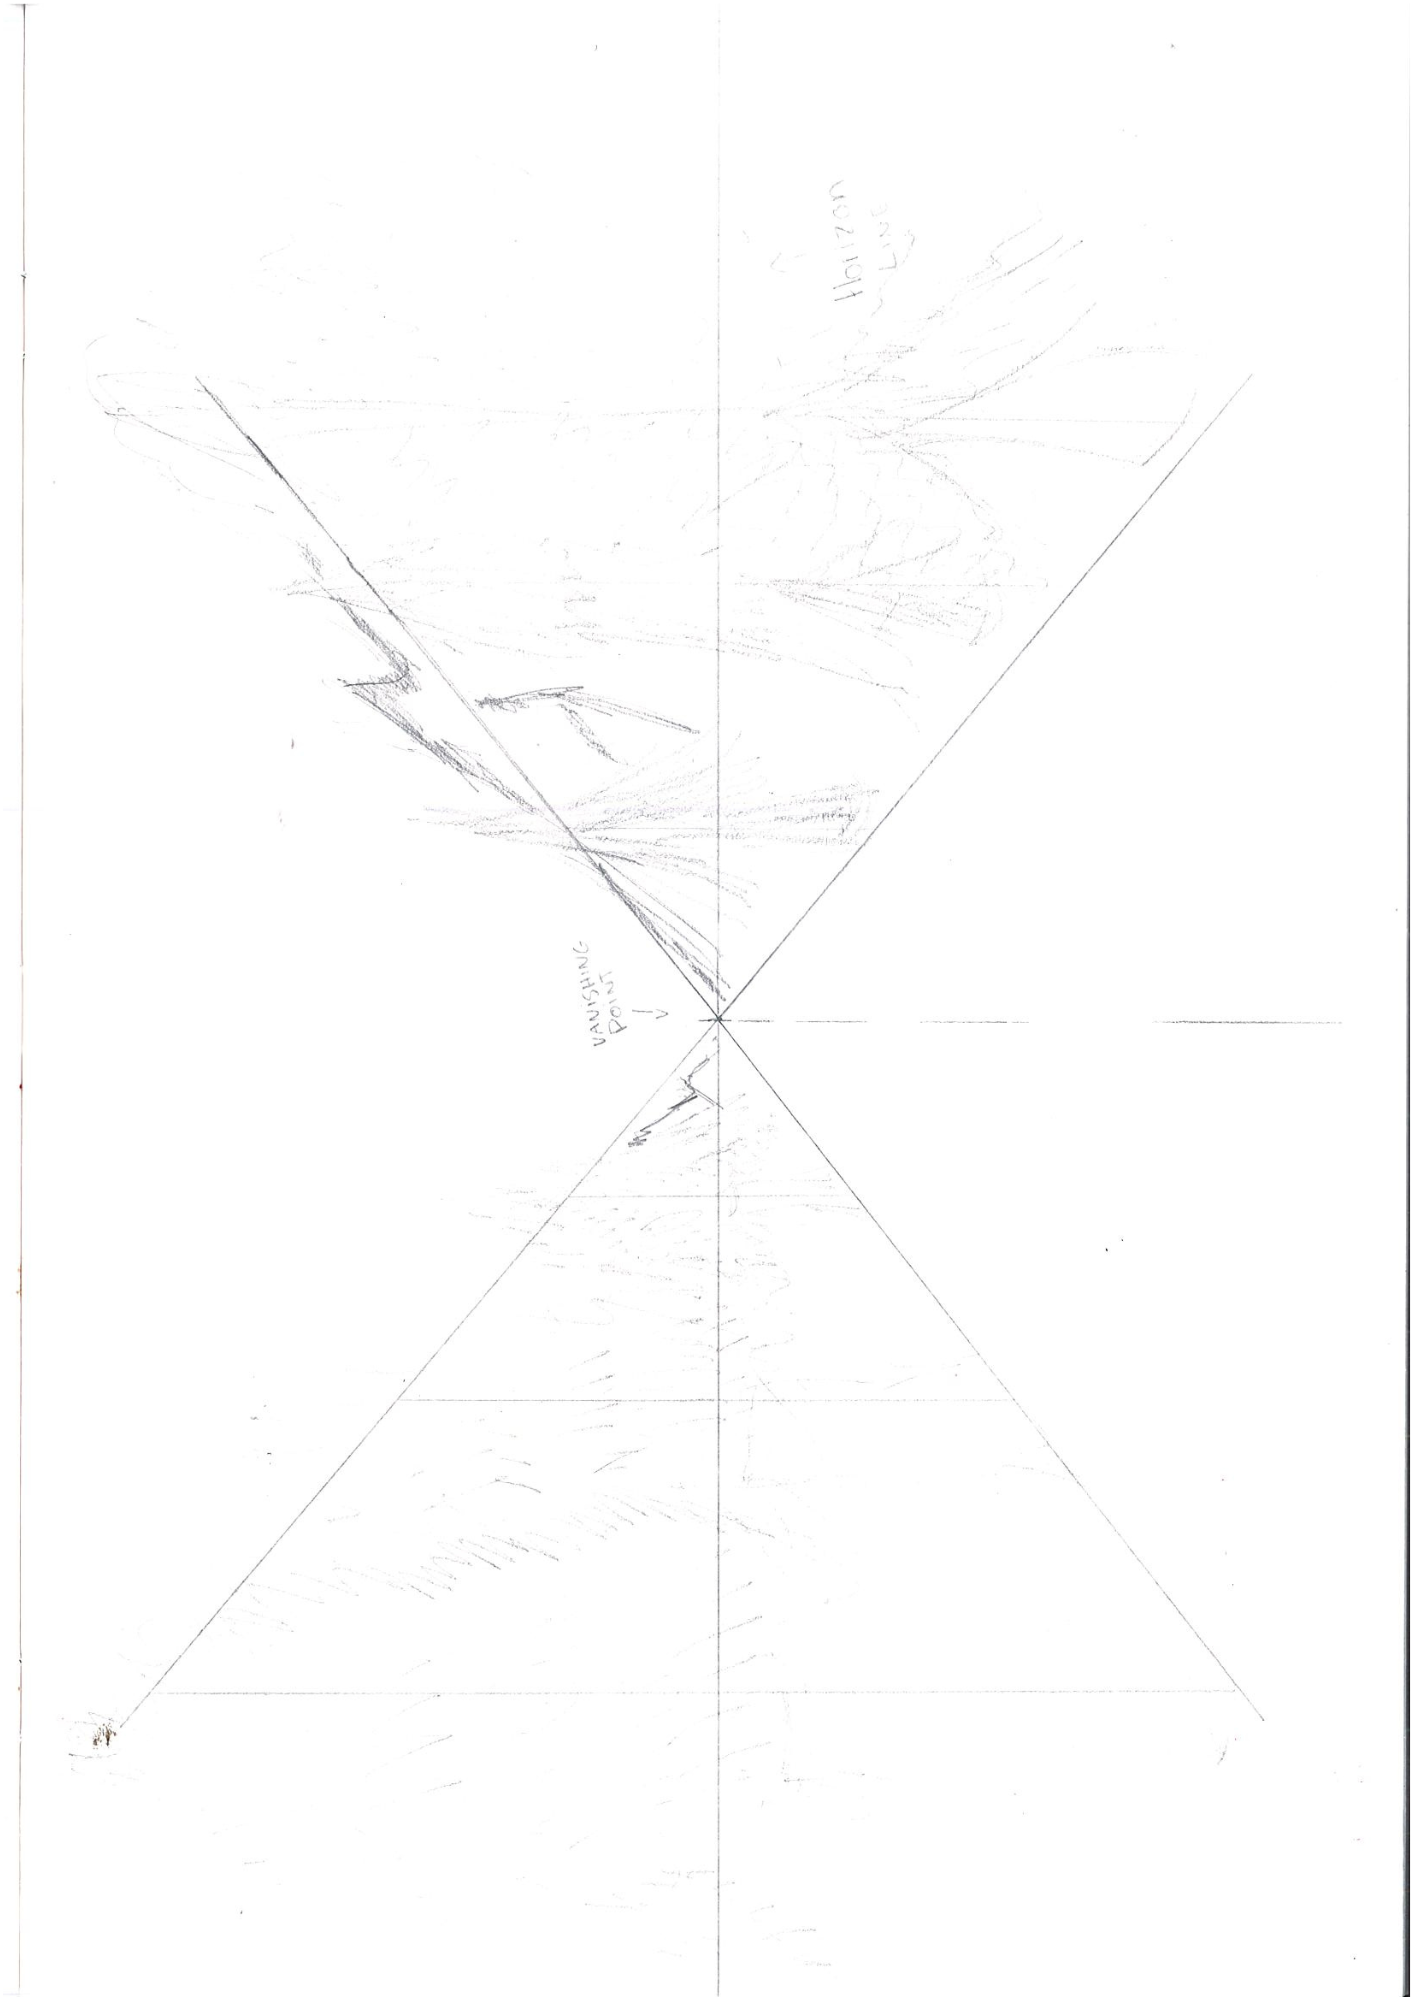
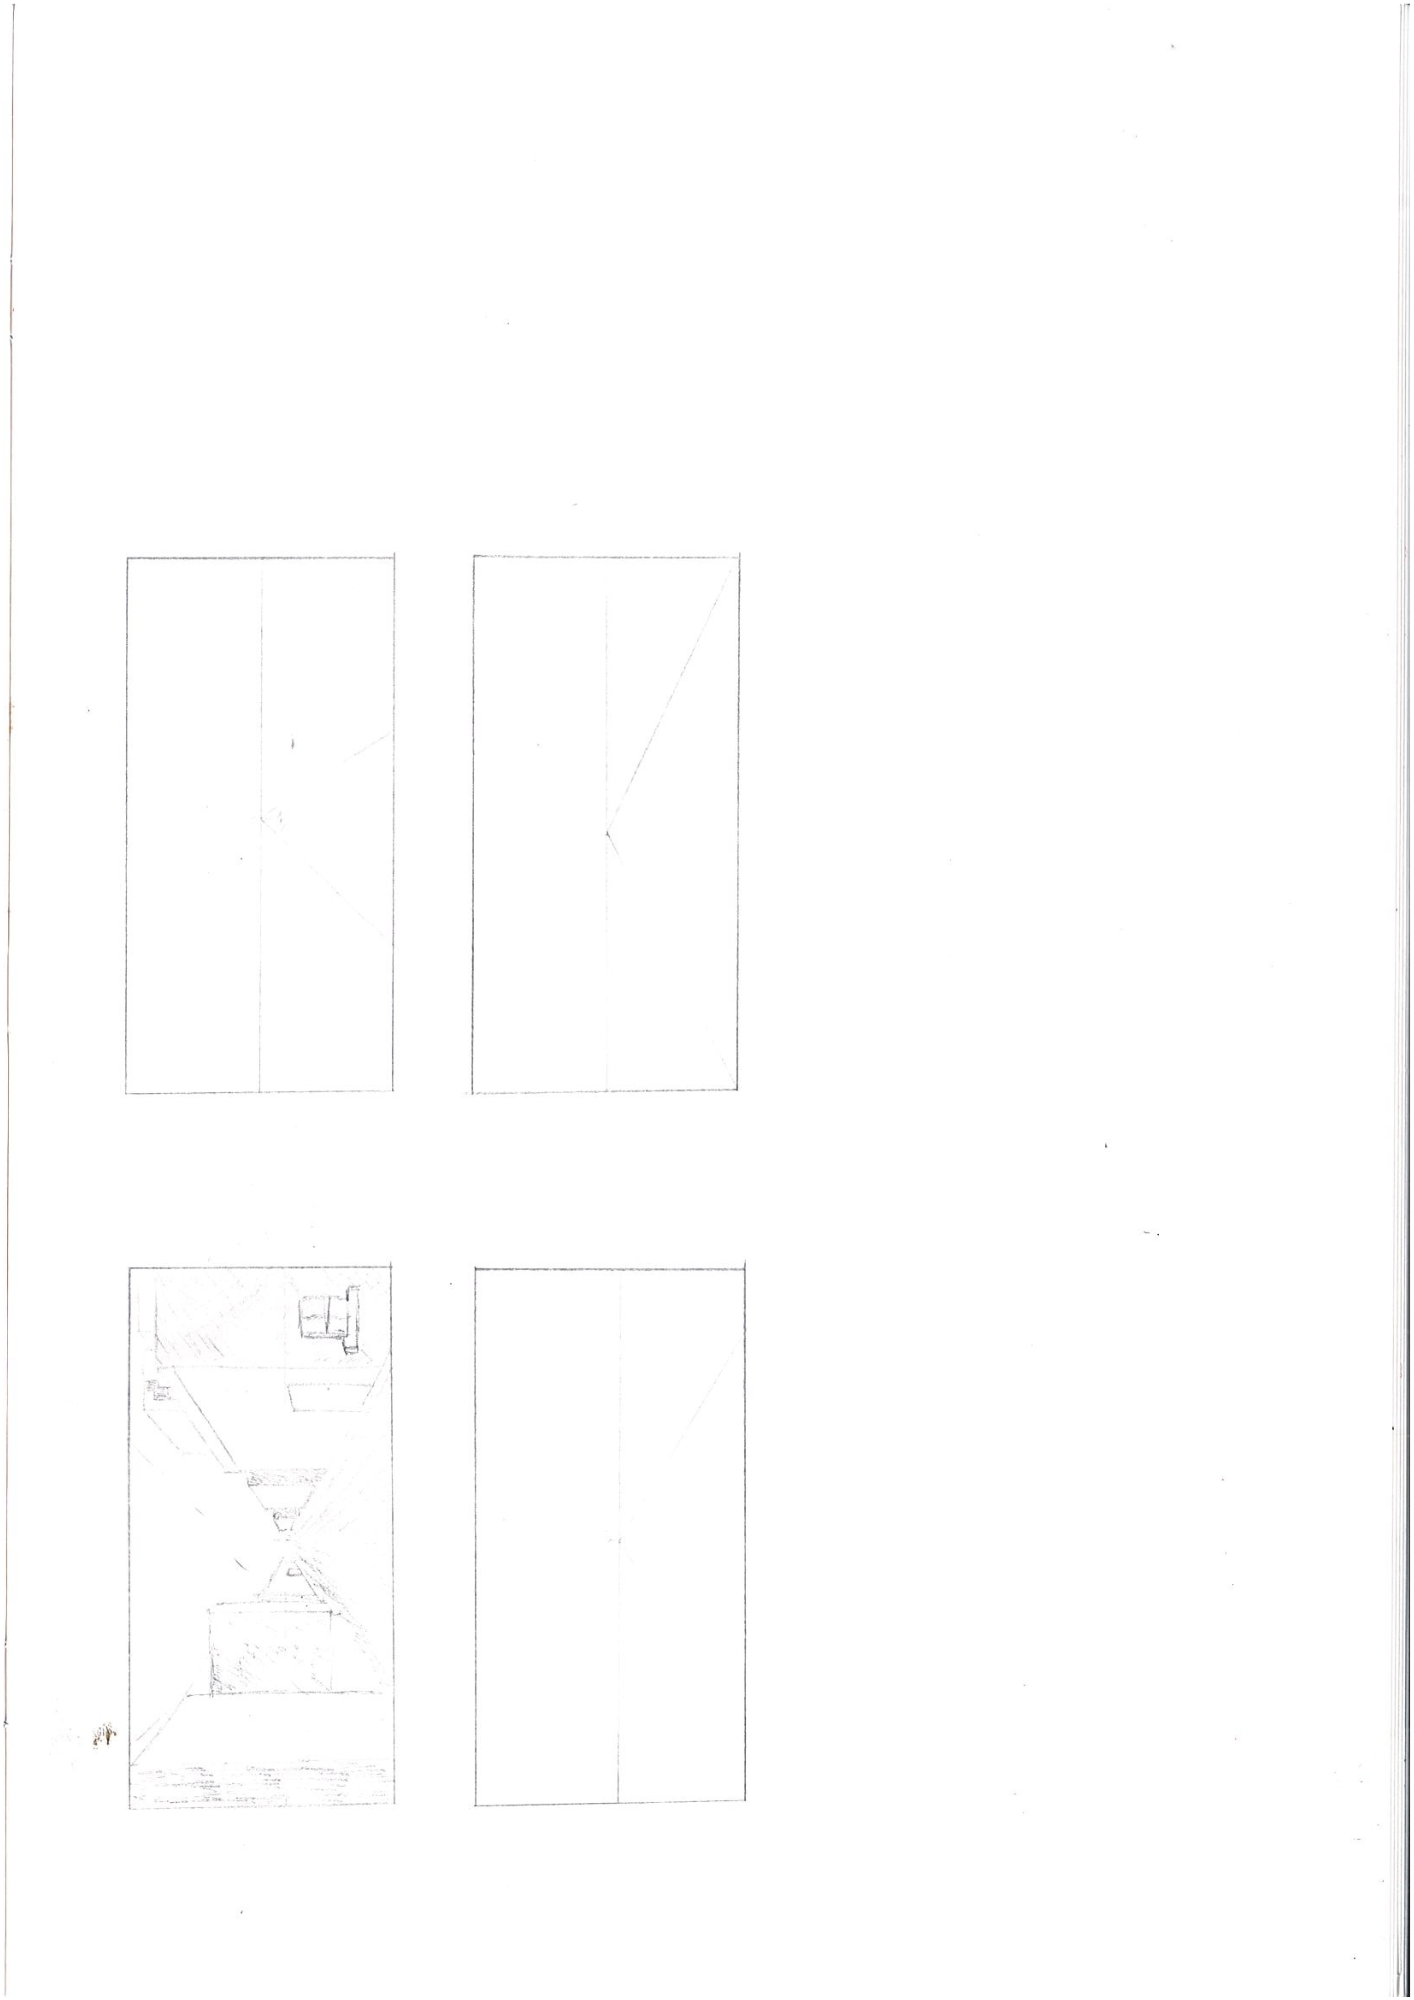
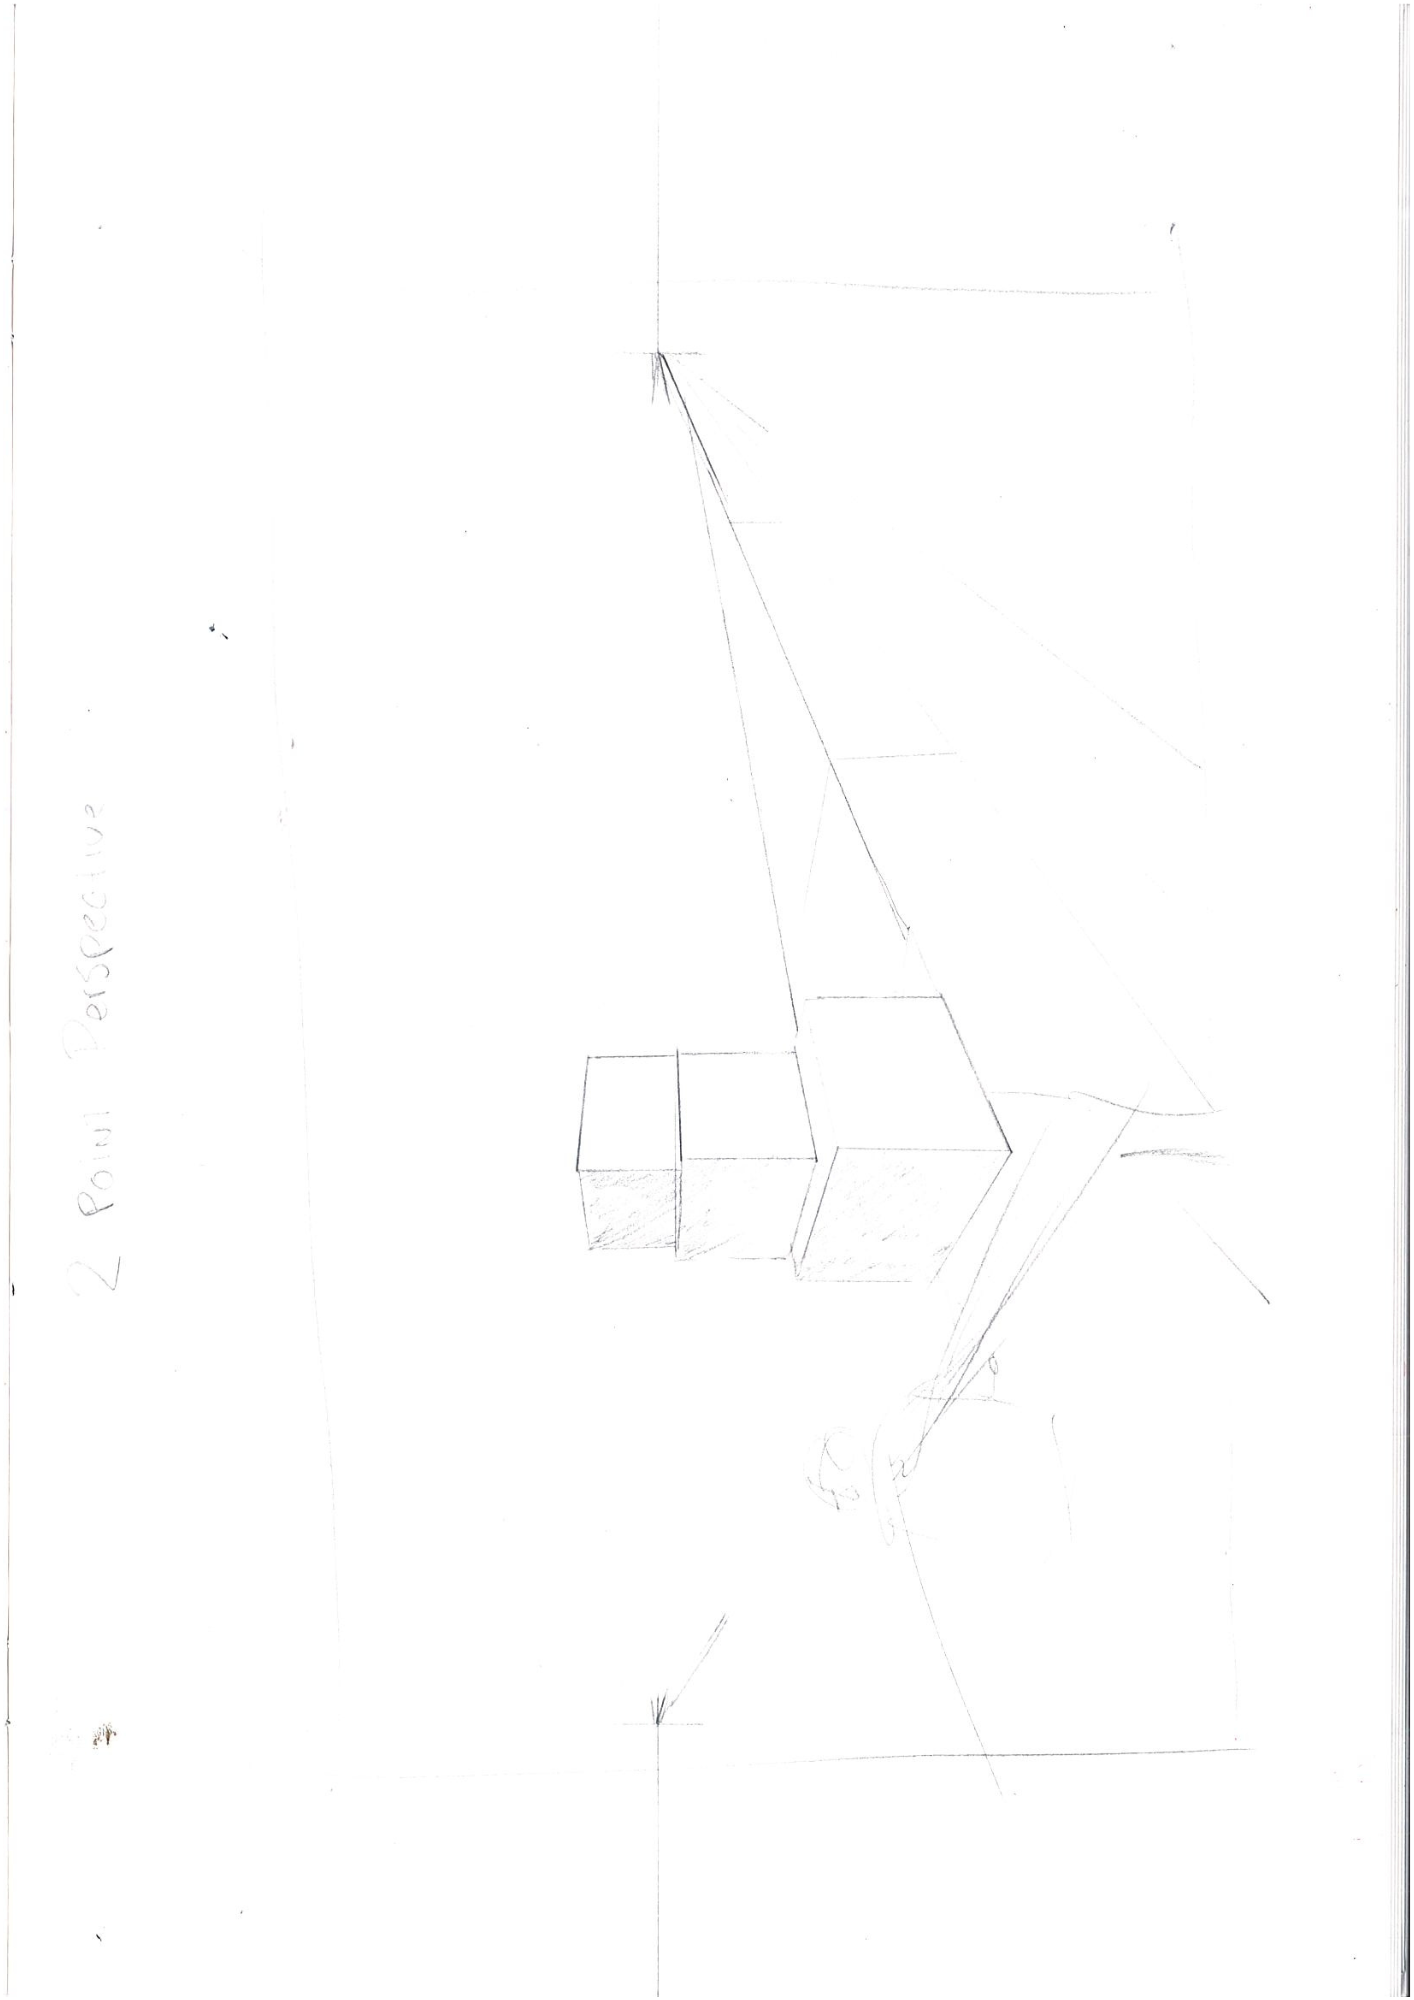
As the capo says, this week, we took a dive into the art of perspective, a craft I've had my troubles with, owing to the way my mind dances around the numbers and the angles. But today, something clicked, a bit of understanding in this world of lines and vanishing points.
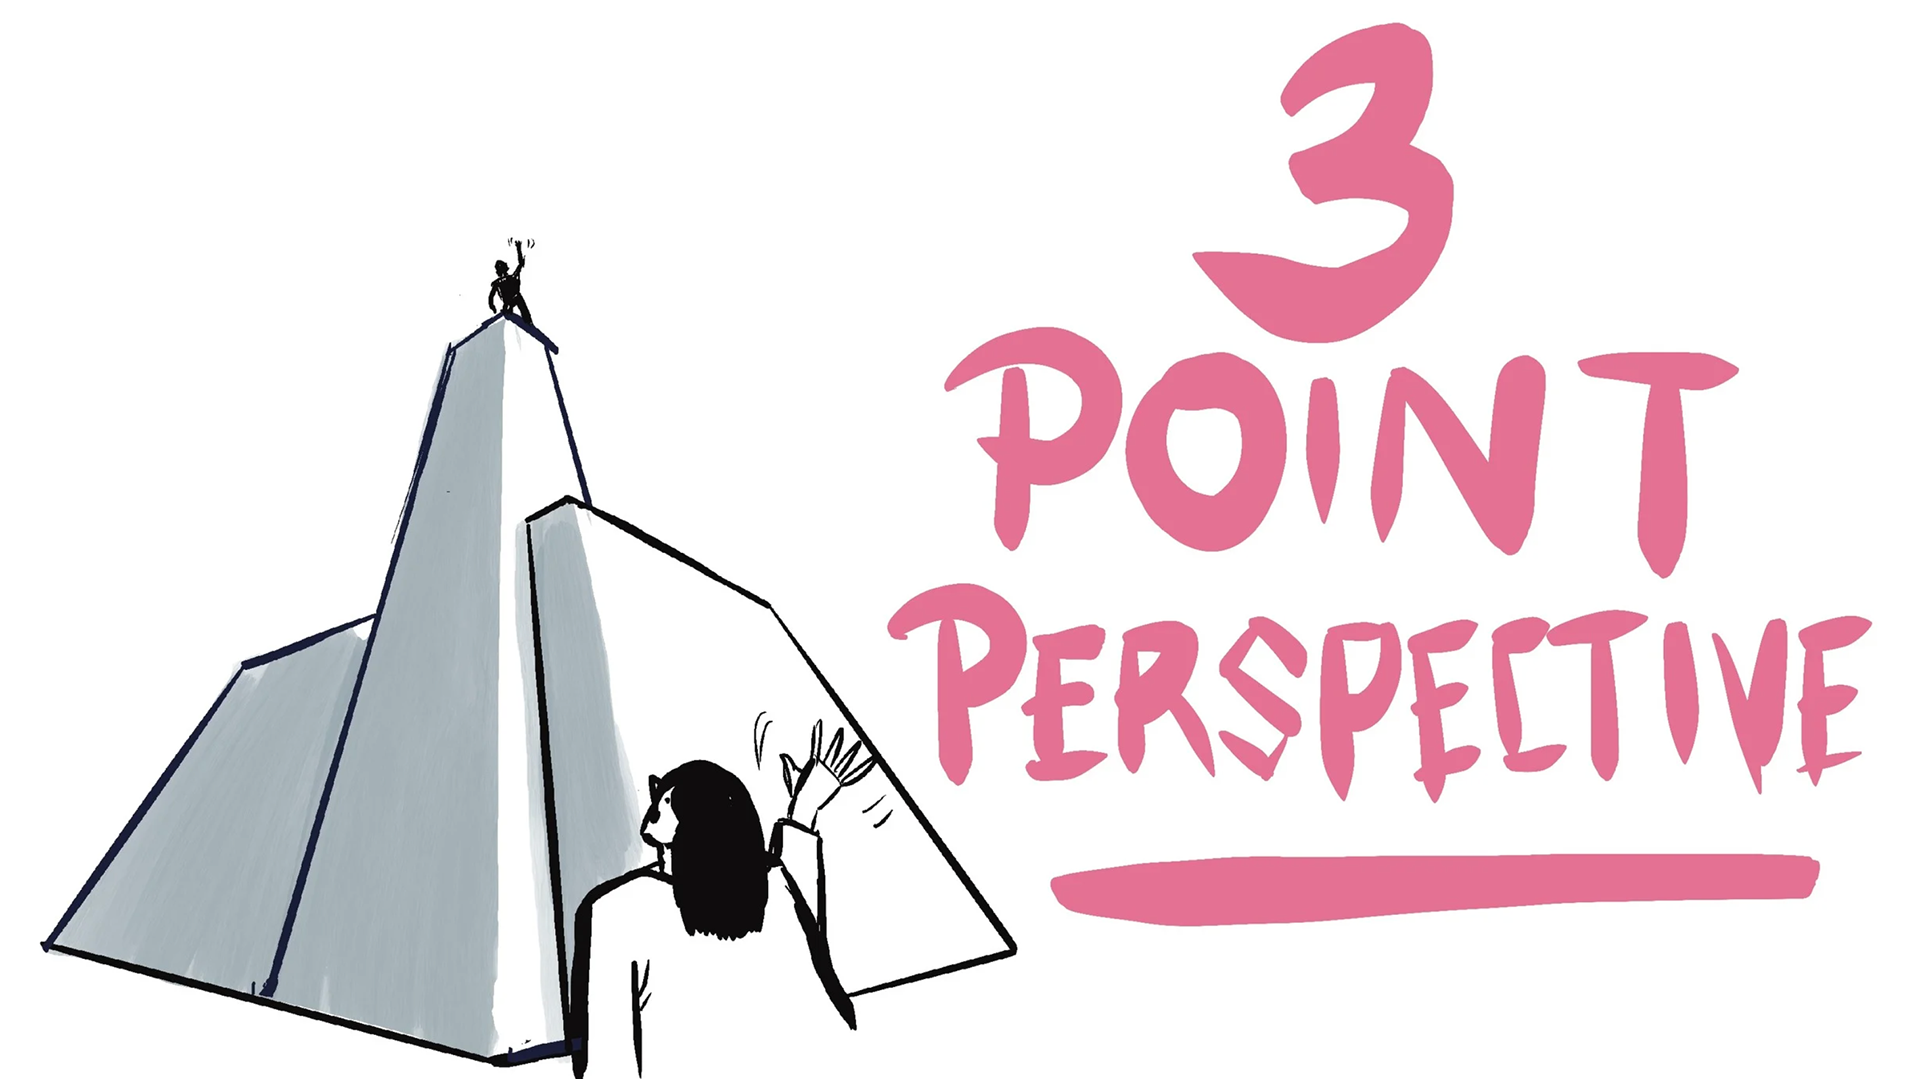
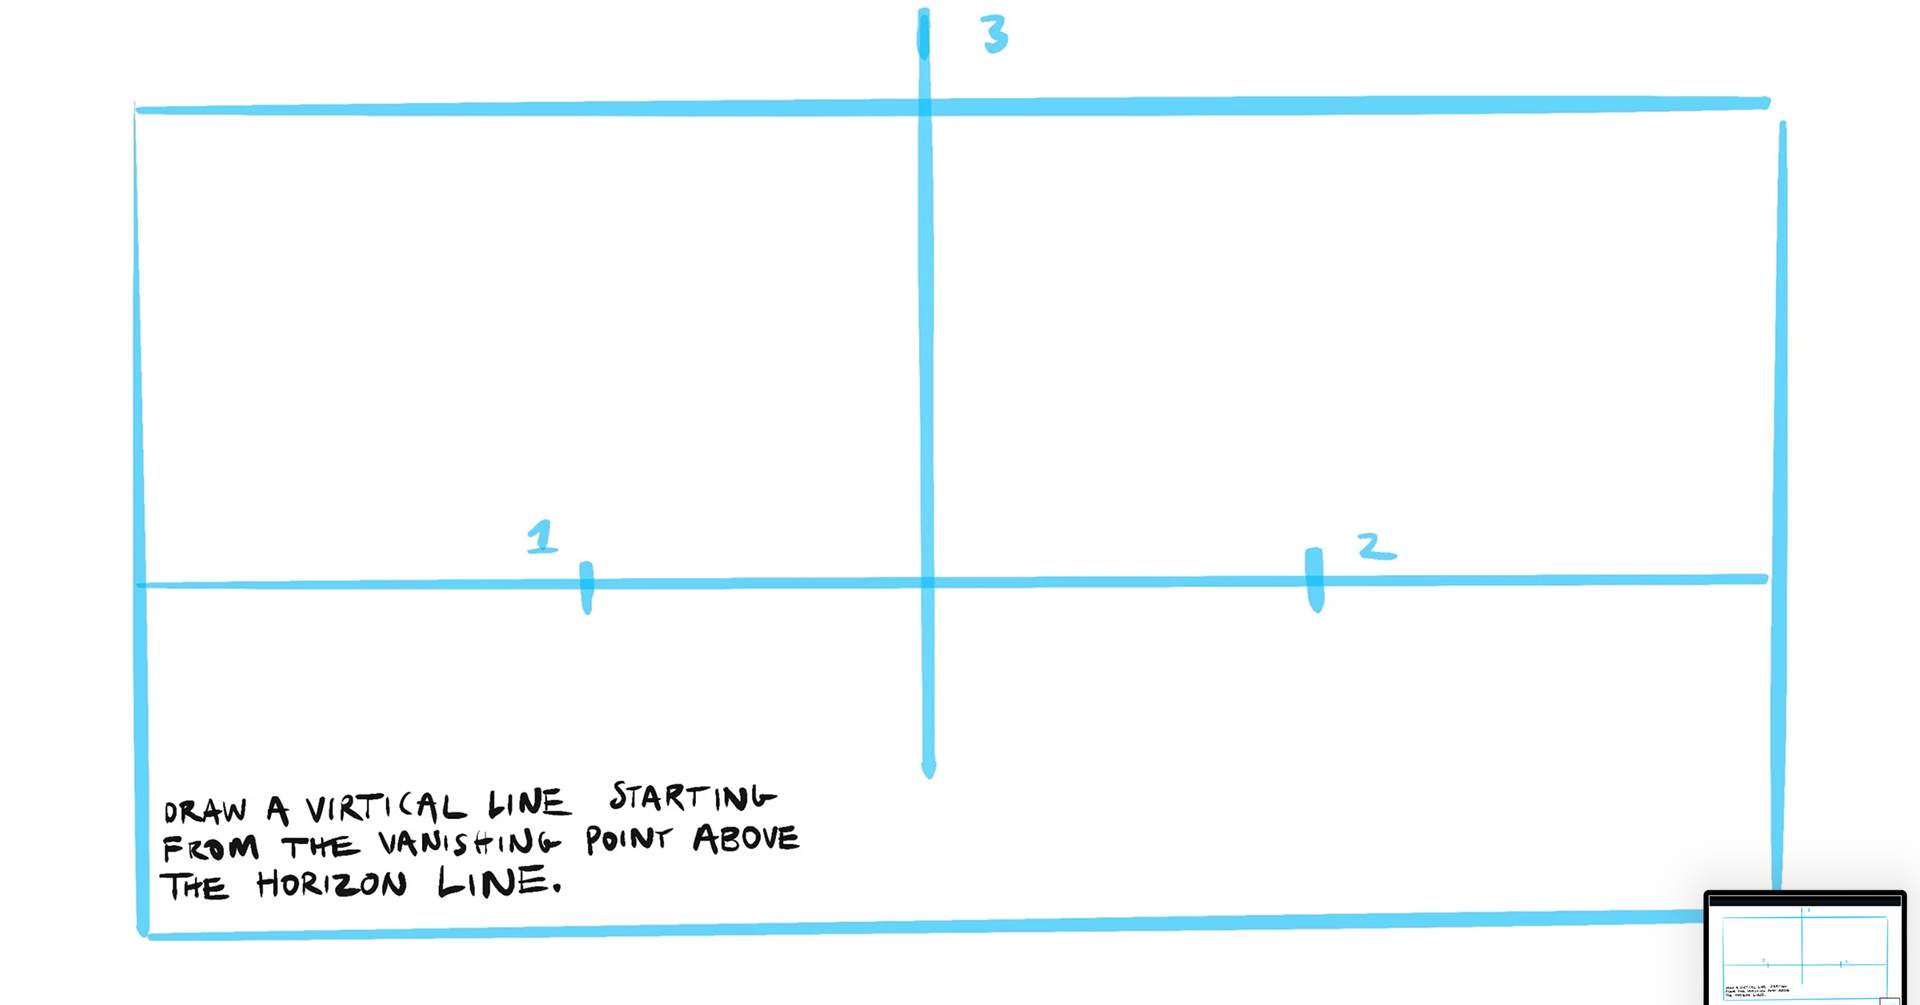
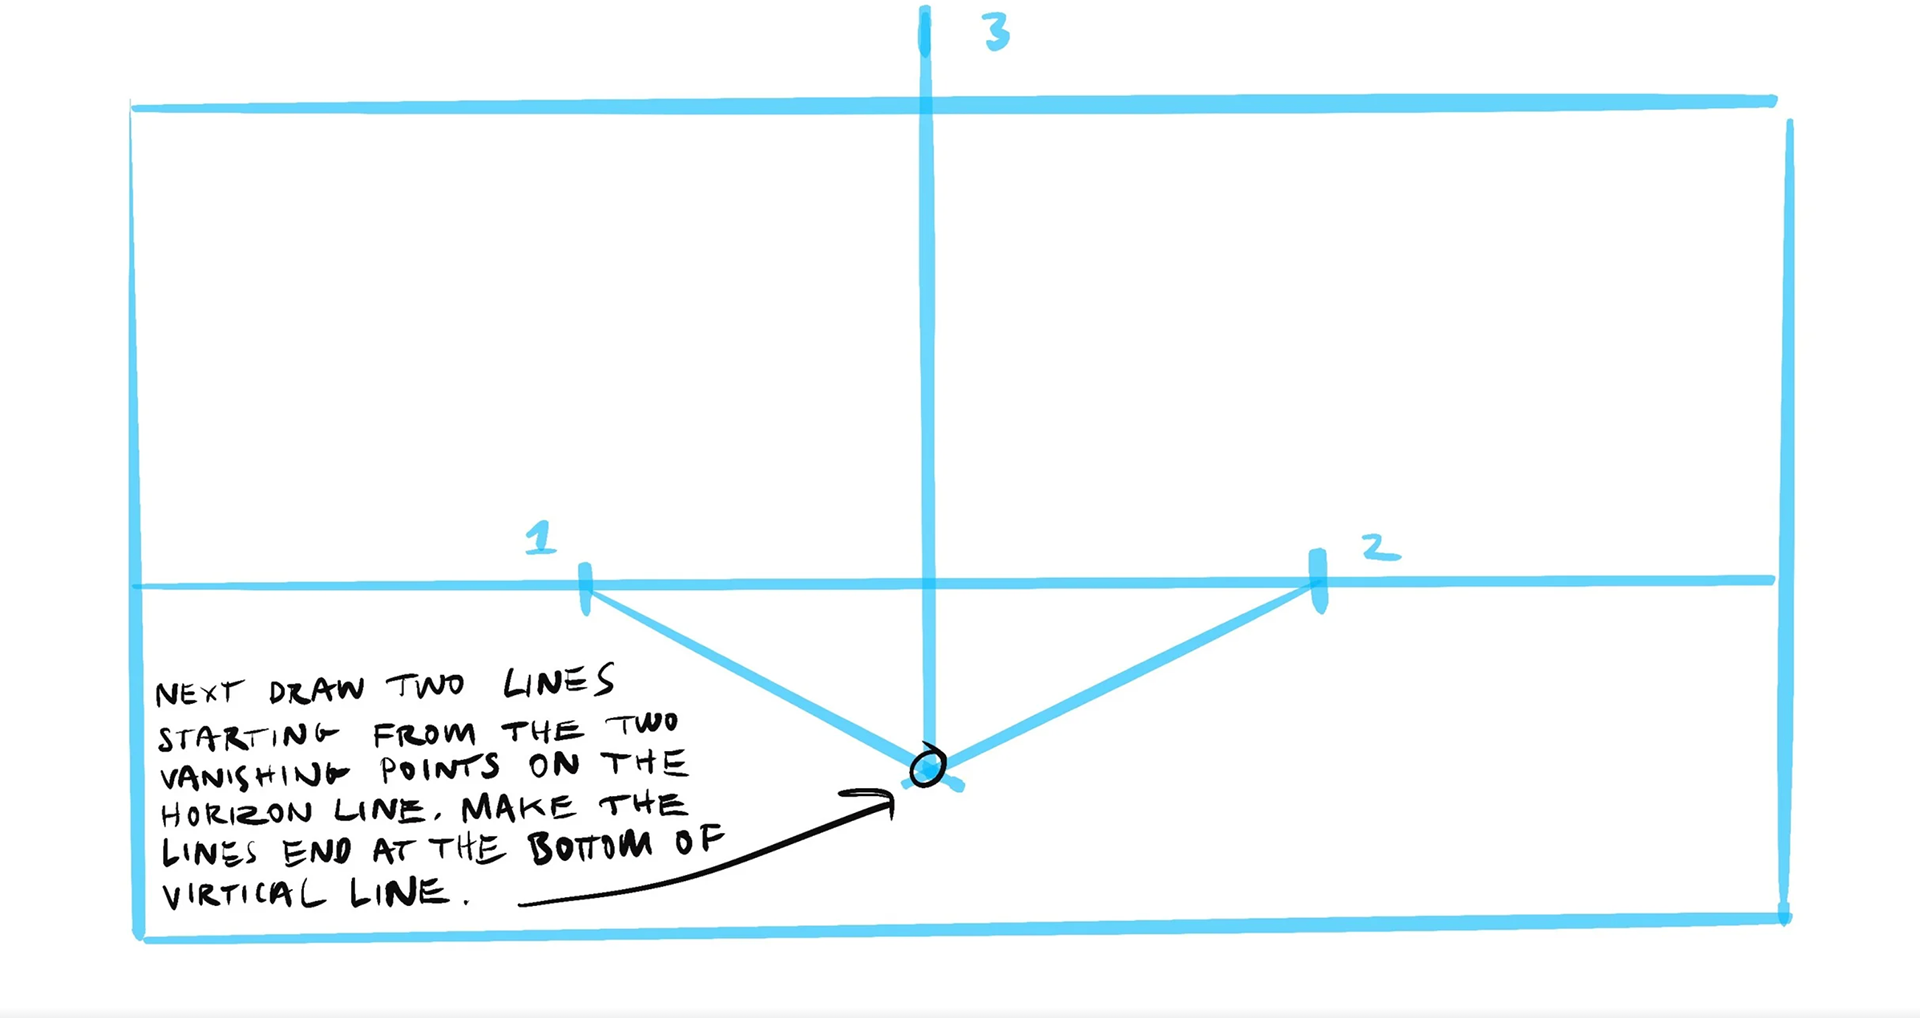
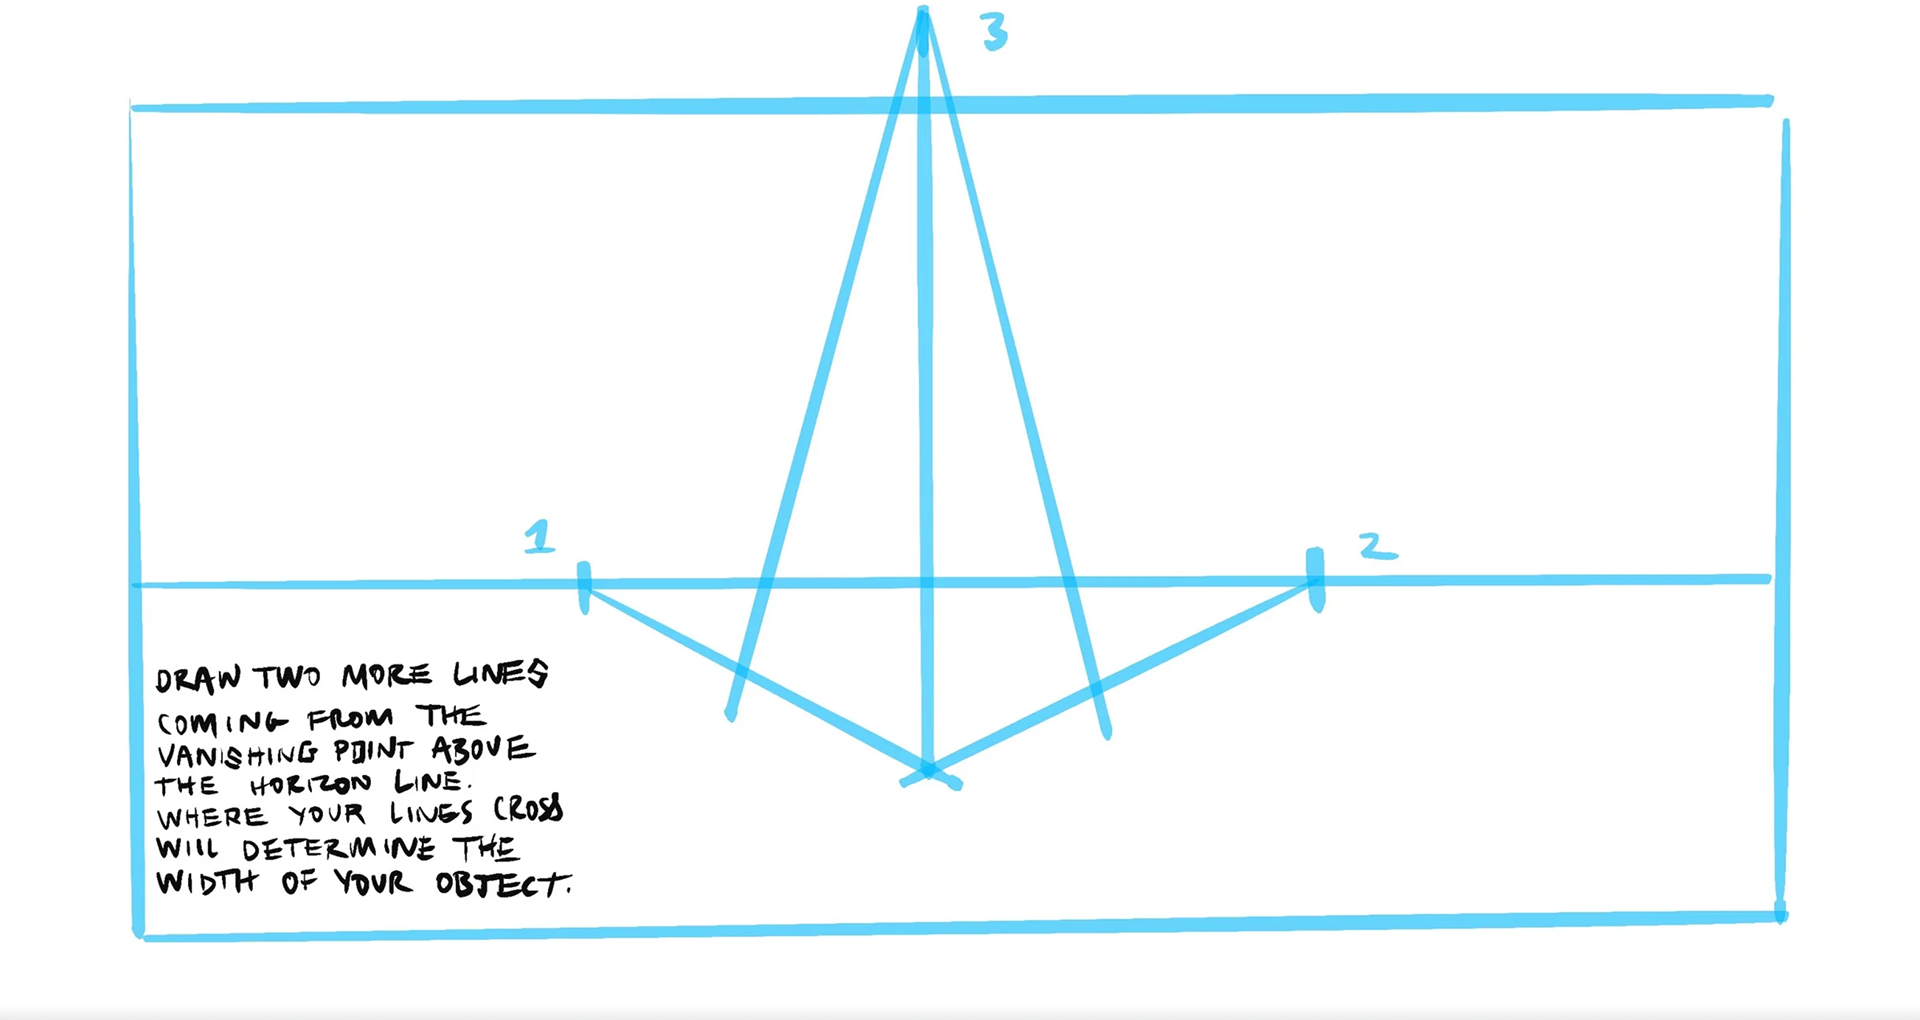
We explored the realms of one-point, two-point, and even the intricate three-point perspective.
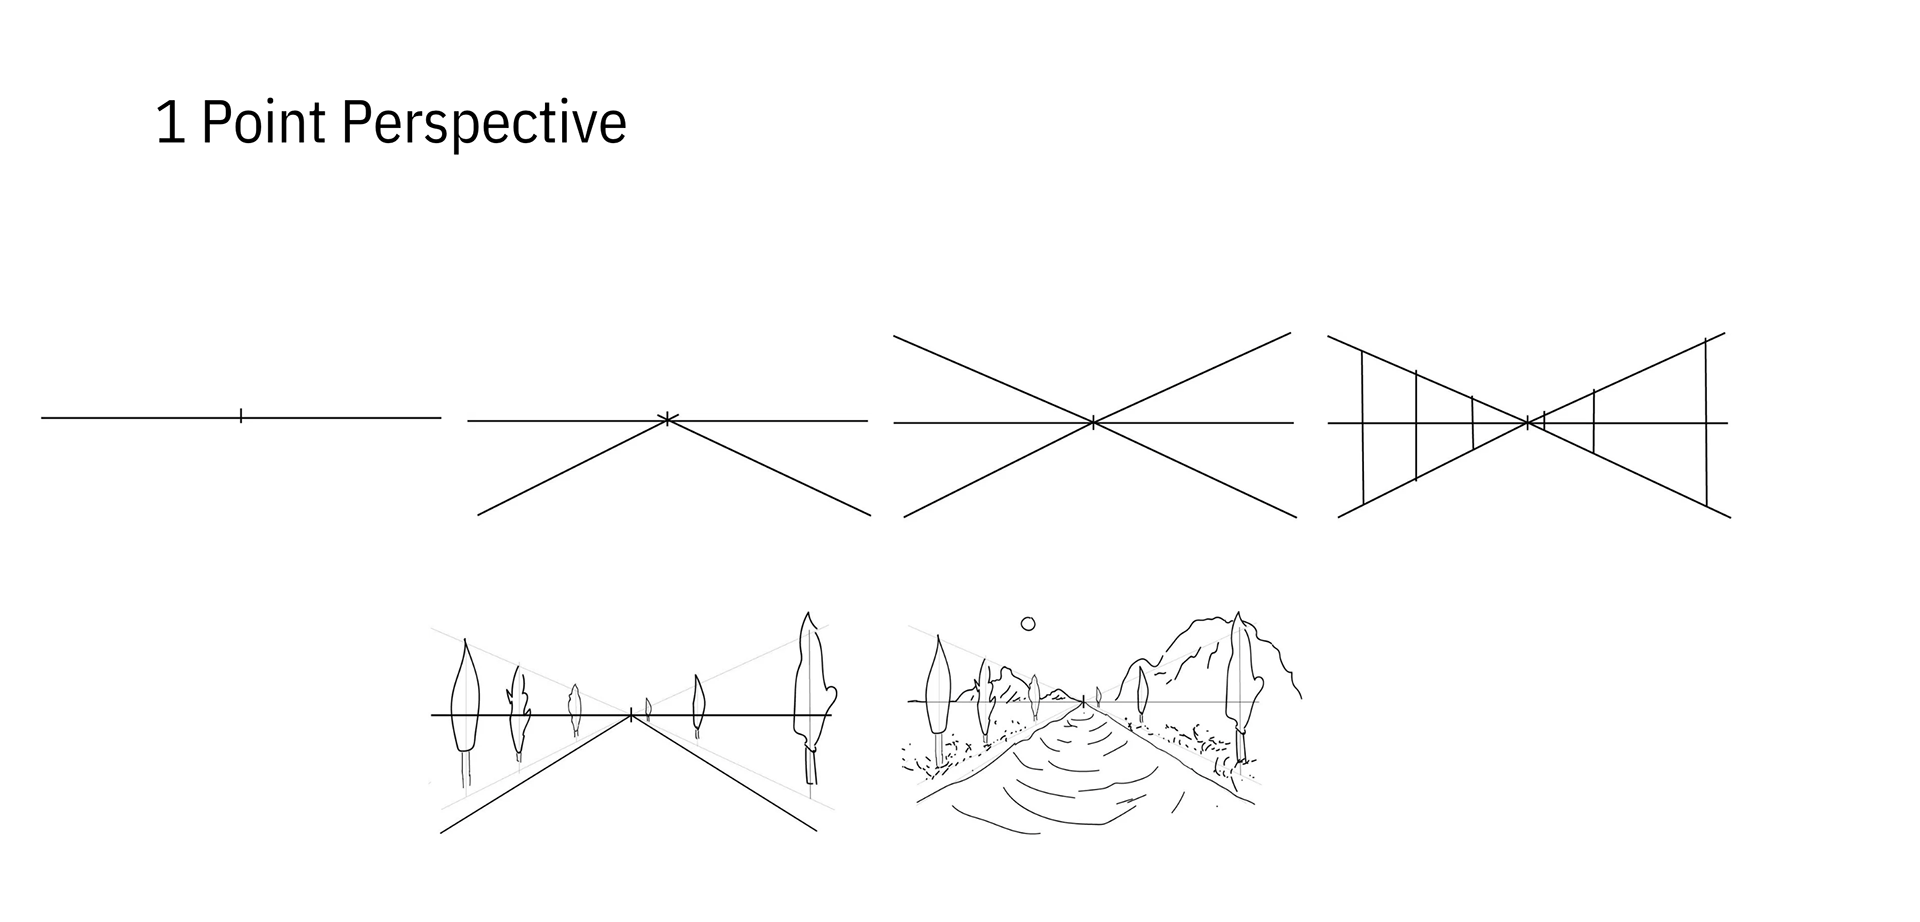

ONE POINT

TWO-POINT

THREE-POINT
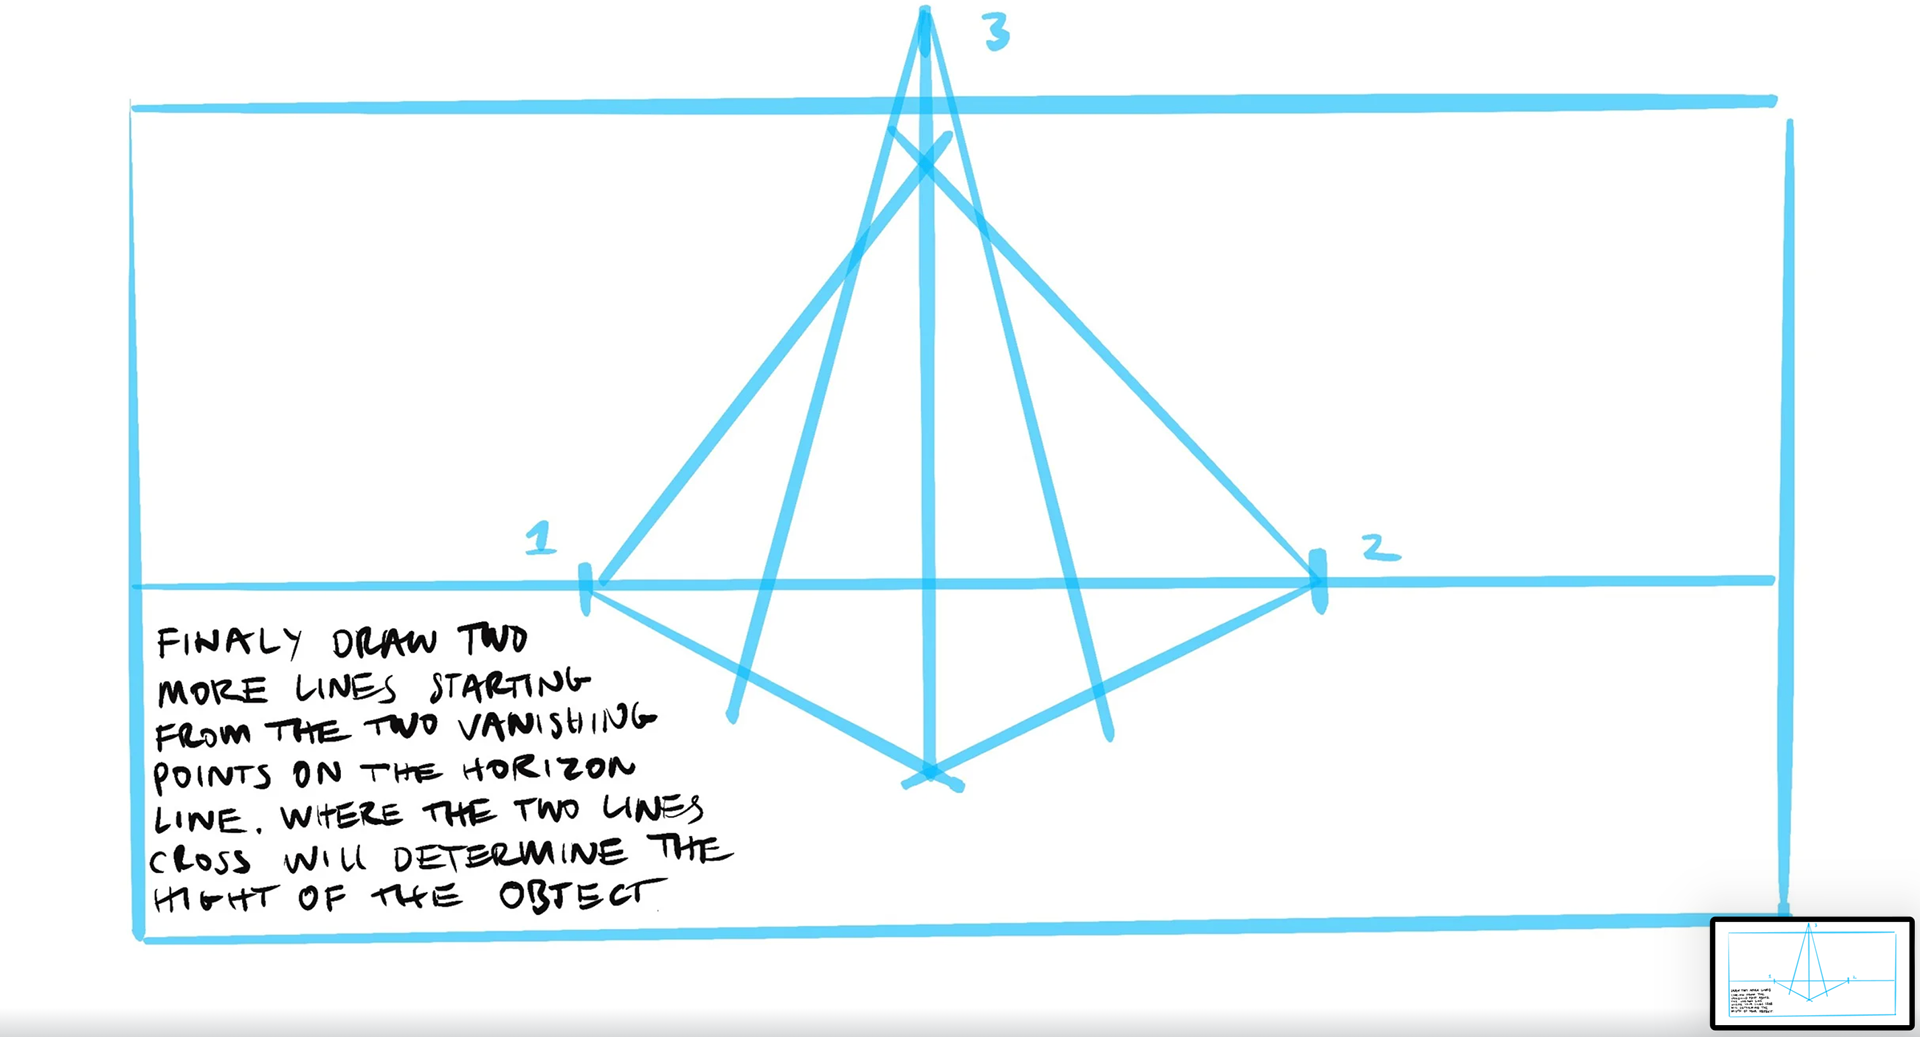
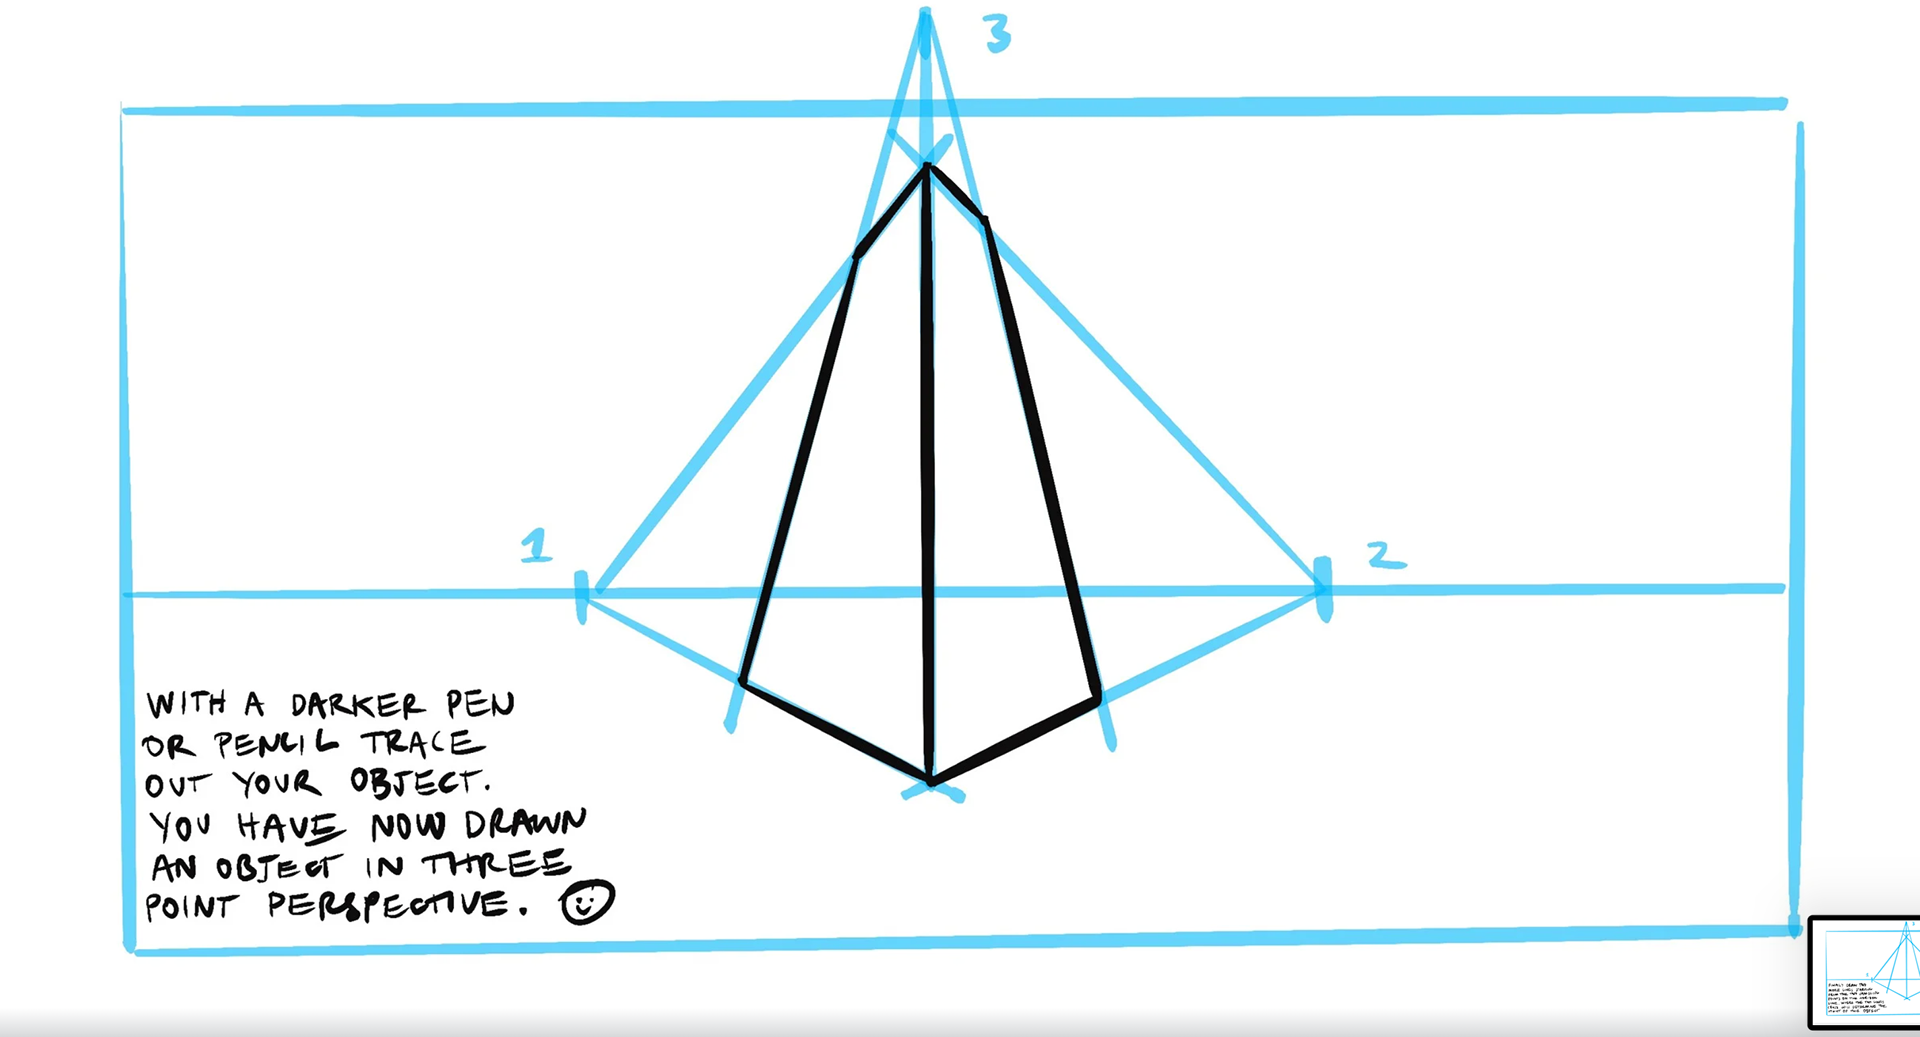
behold my endeavours:

I've been sharpening my skills in the workshops, beyond the lessons we've tackled in class. This craft, it's something I've set my sights on mastering.

Now, fuh my self-directed, capisce? It's alla 'bout takin' charge, makin' da moves dat need to be made, without waitin' for any go-ahead from da other guys.
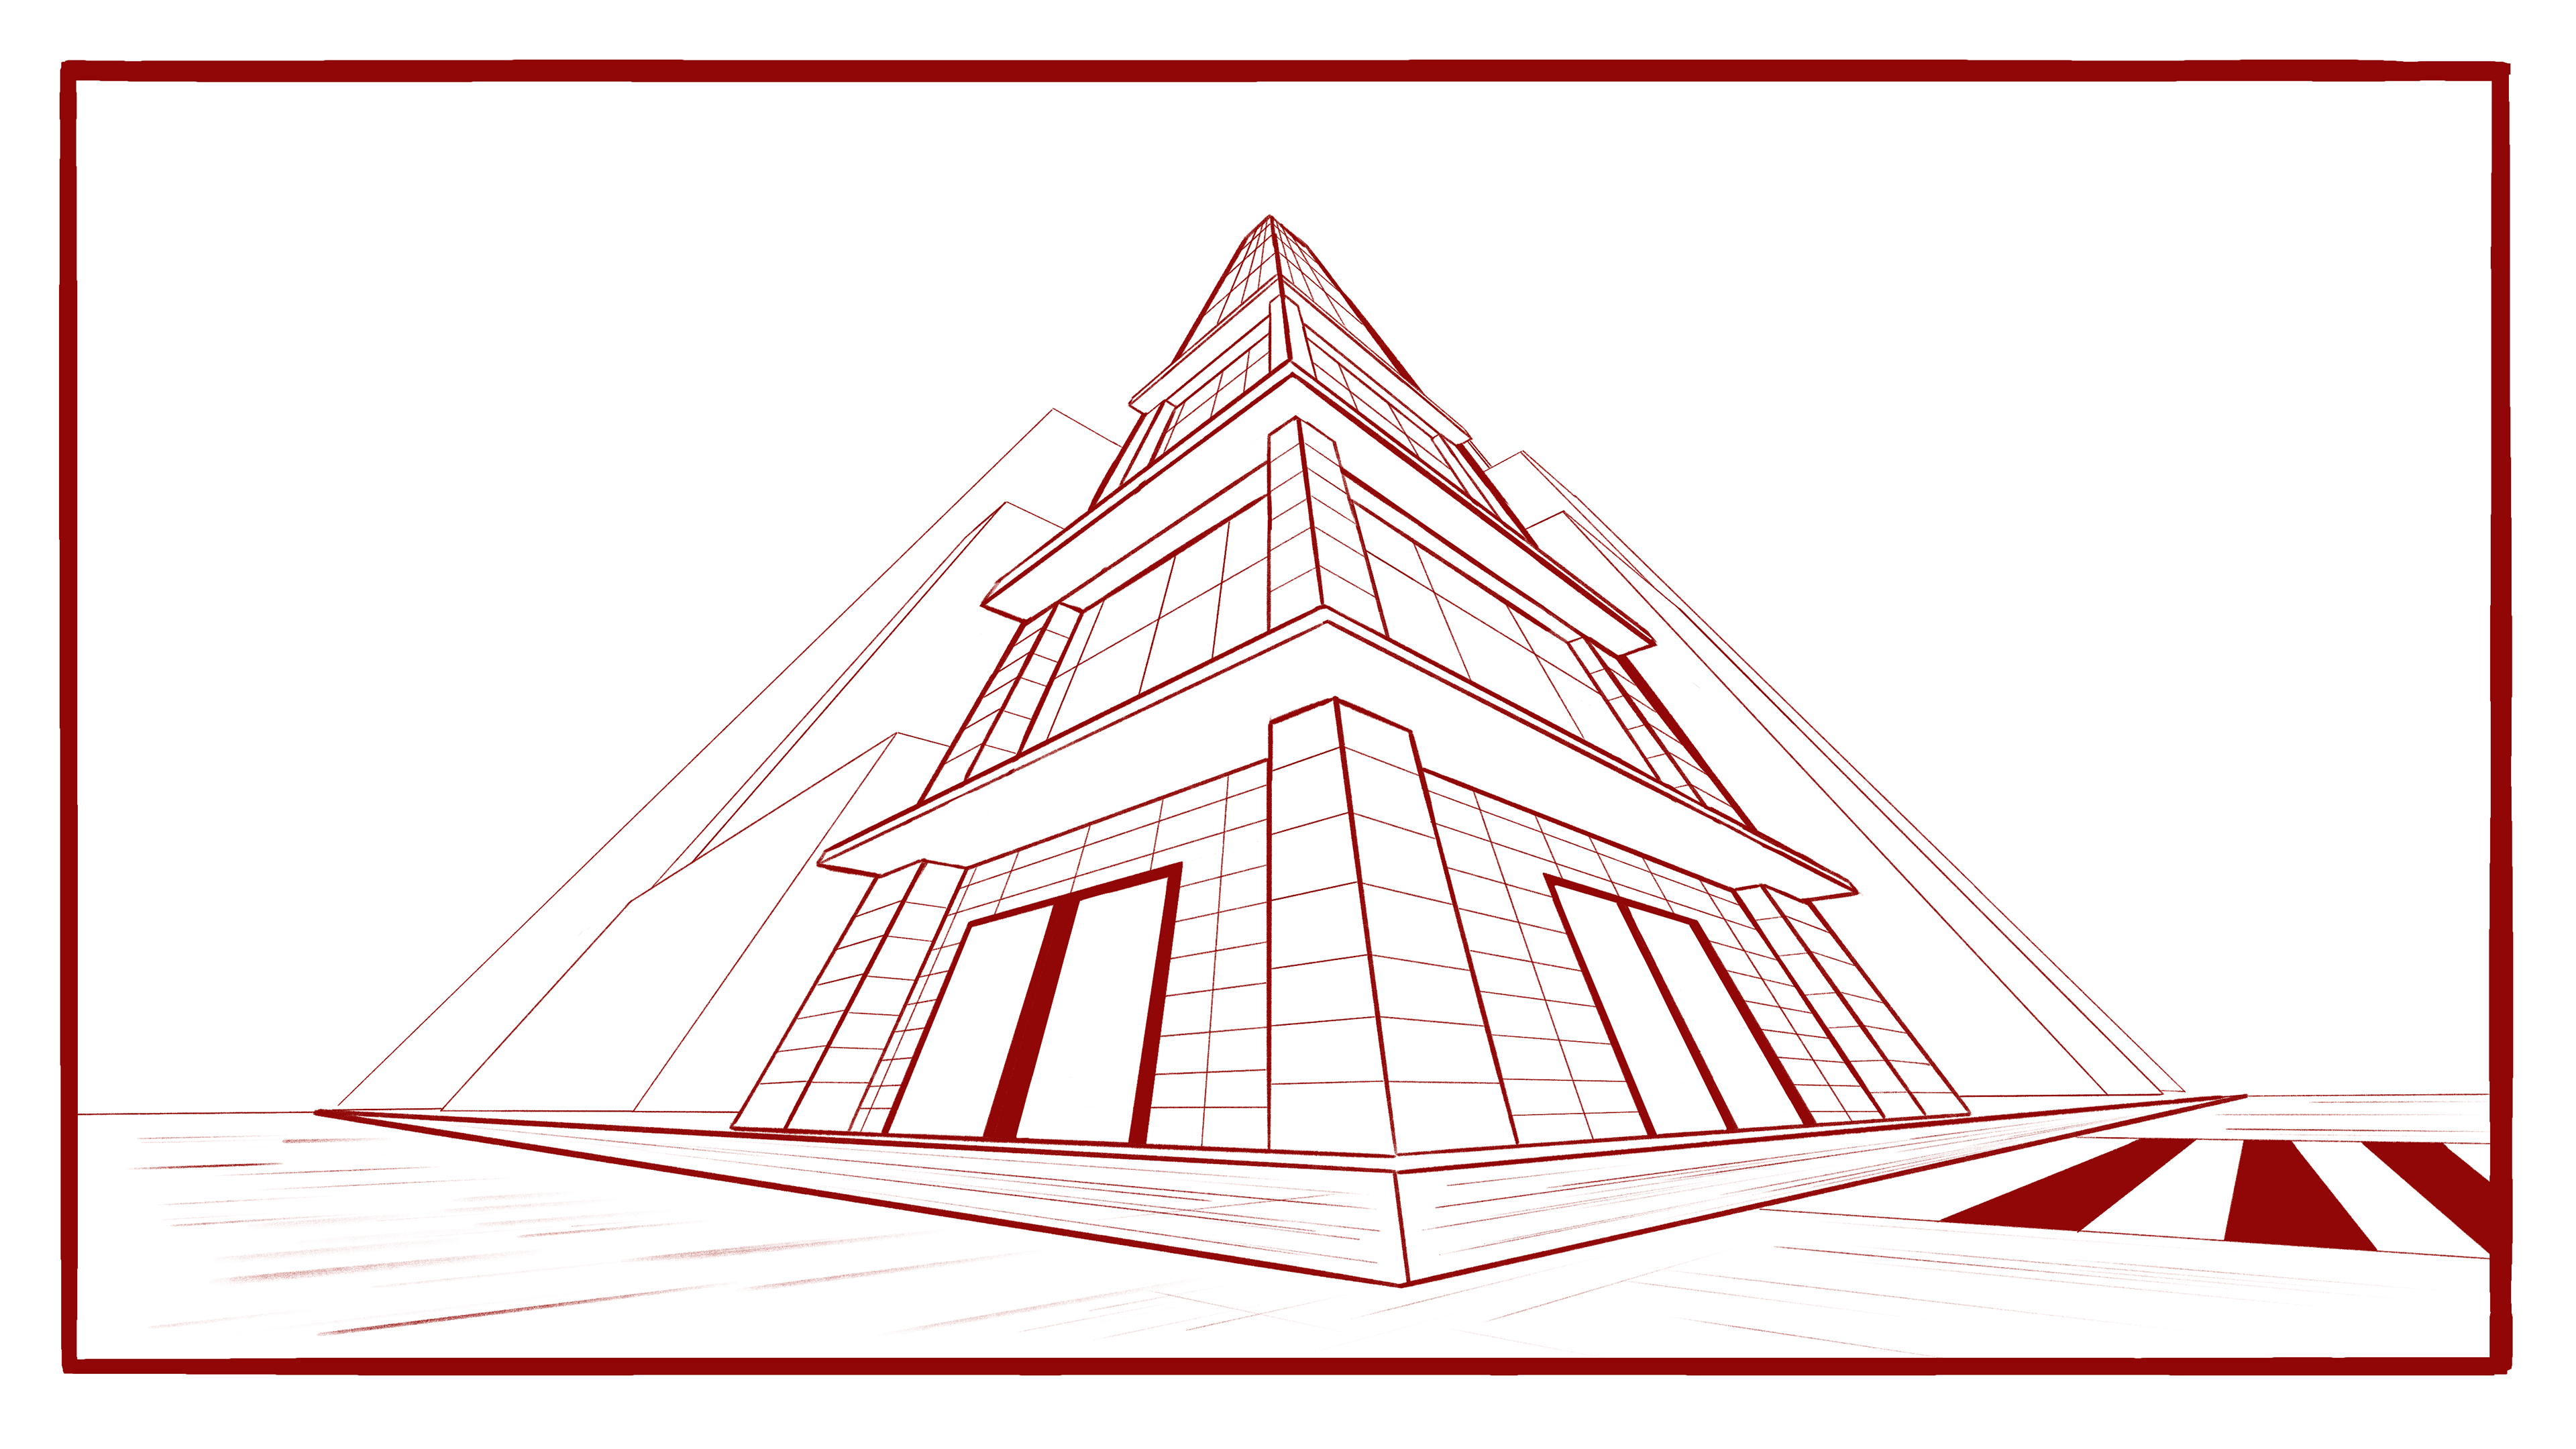
one point, two point and three point perspectives.


INT- ROOM 903 10 - 10 - 24
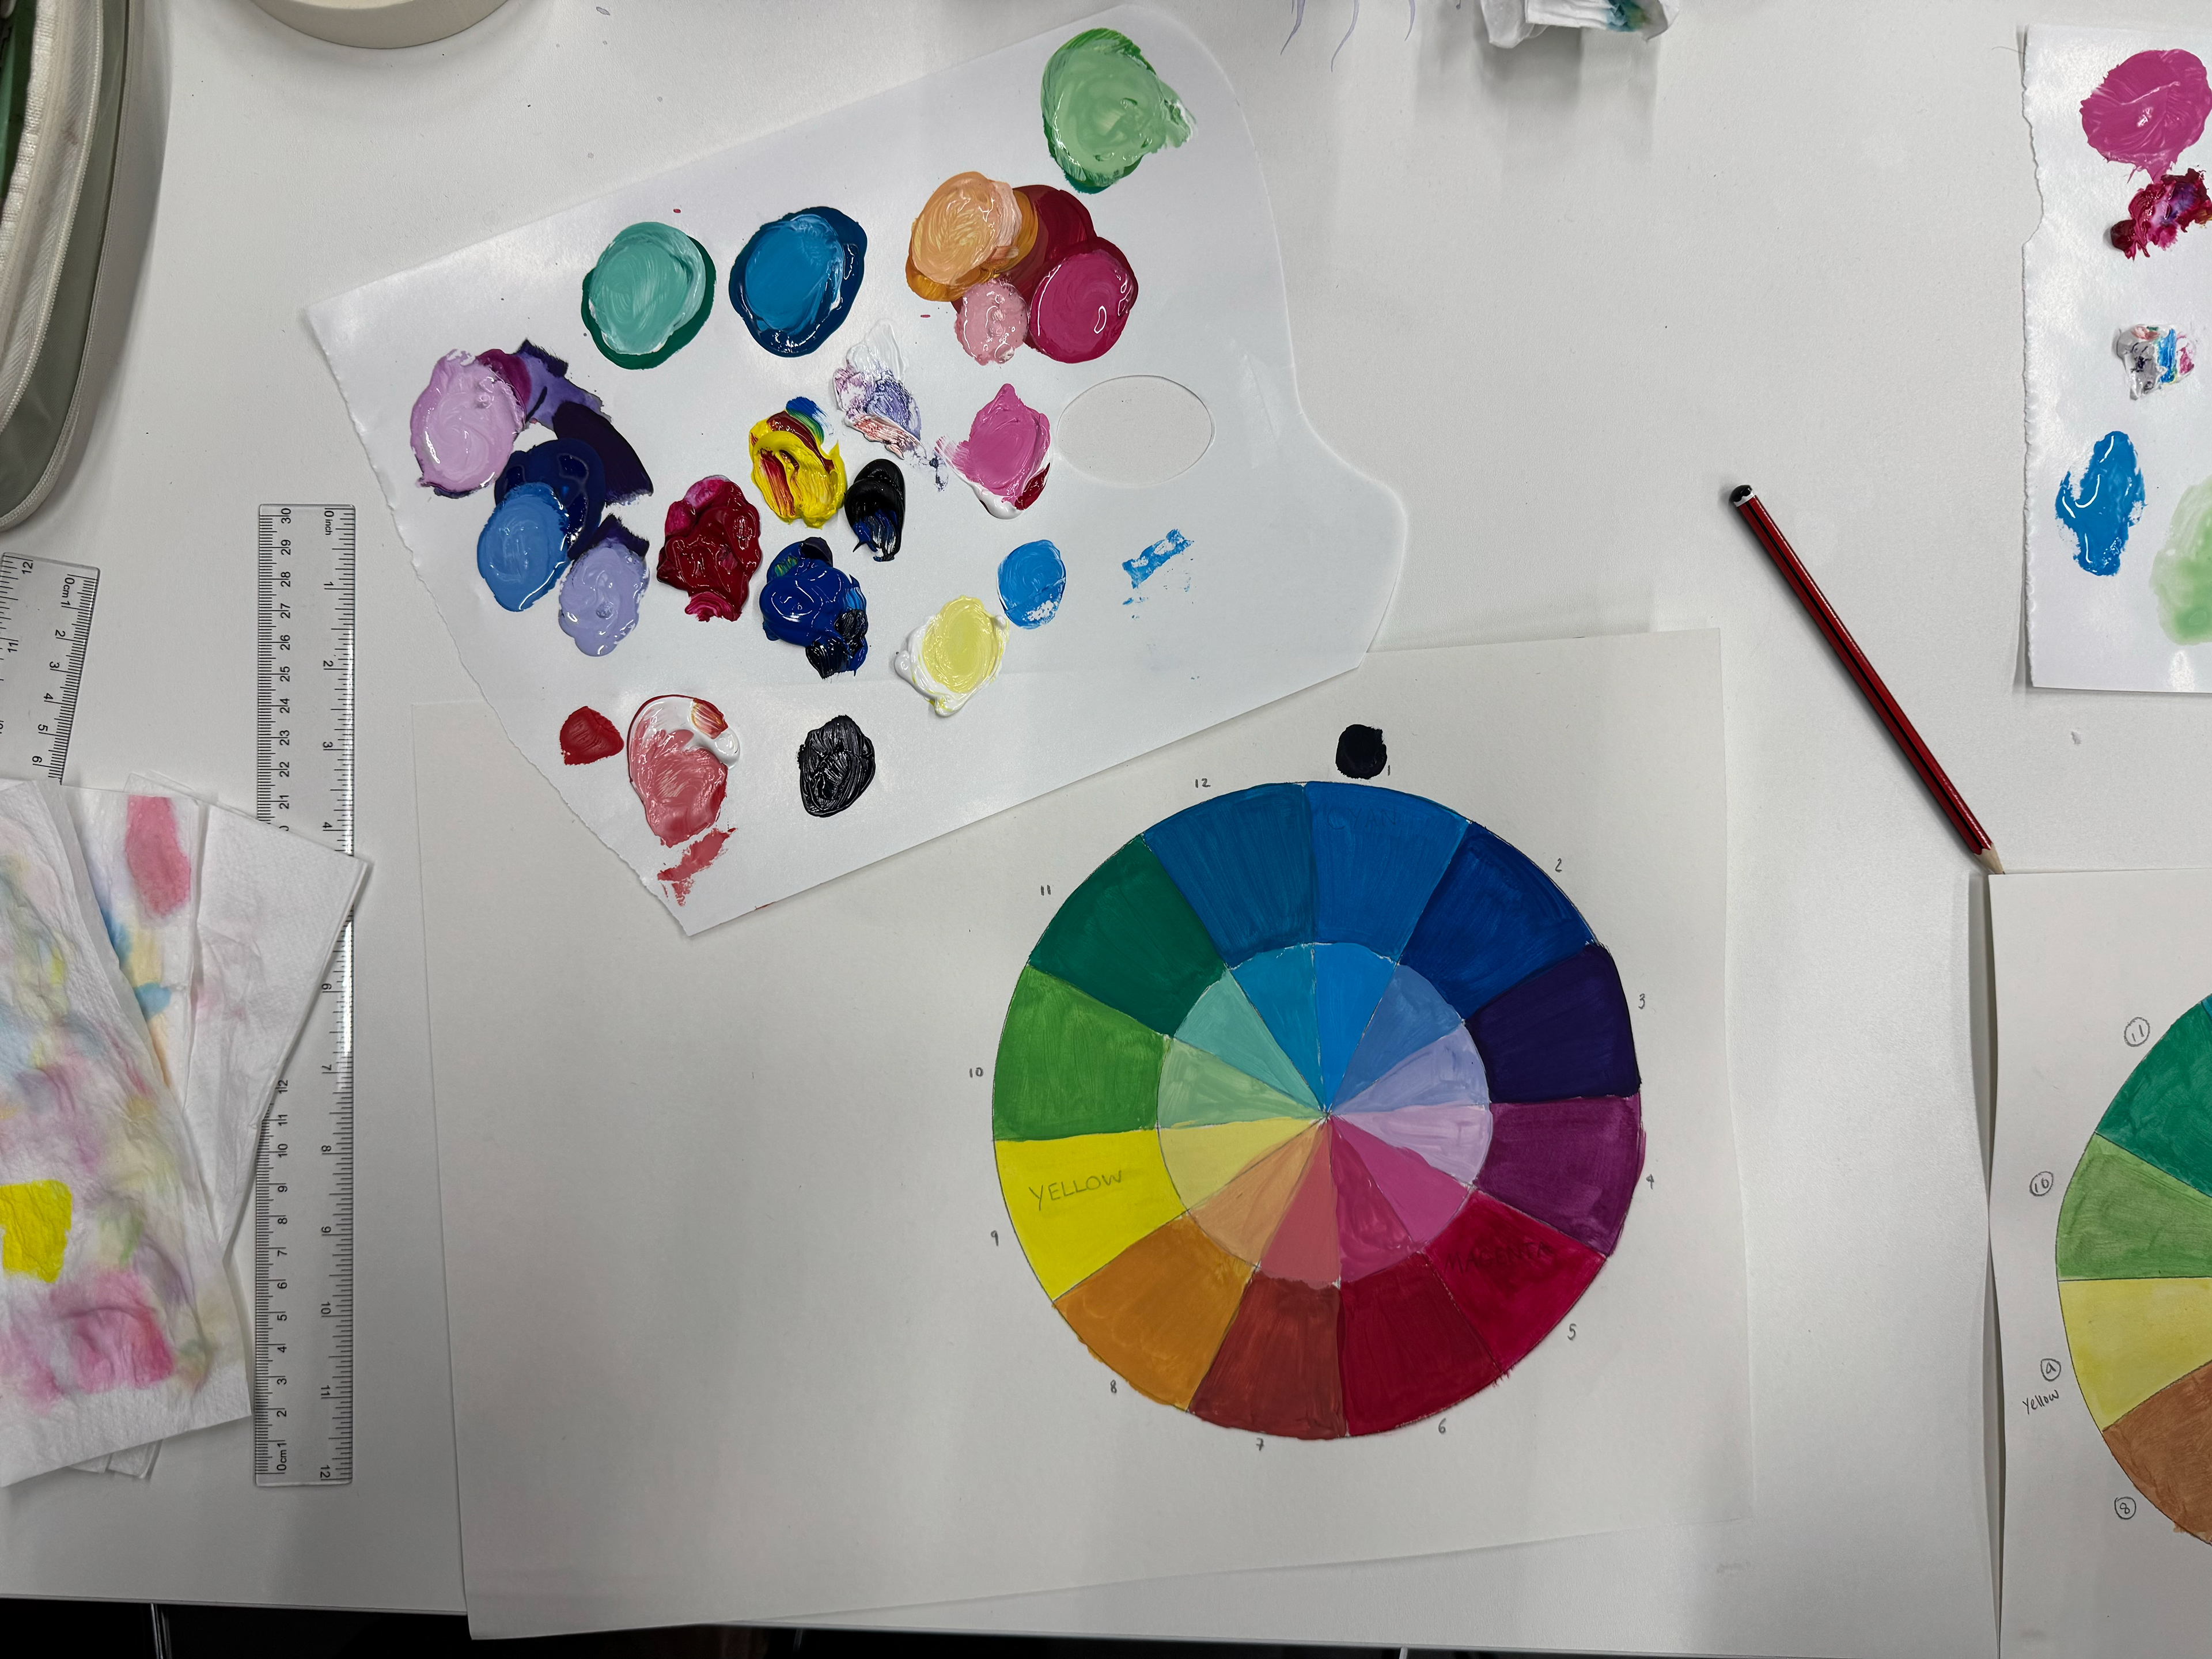
Today, it was all about the art of colour, learning the theory behind it while we got our hands dirty painting our own colour wheels. It was brilliant, a real nice way to mix learning with a bit of fun, capisce?
We kicked it off by sketching a circle, then we dived right into painting with the big three: Magenta, Cyan, and Yellow. After laying down those primary colours, we got busy mixing them, creating a symphony of colours on the wheel, blending this with that until the whole wheel was singing.

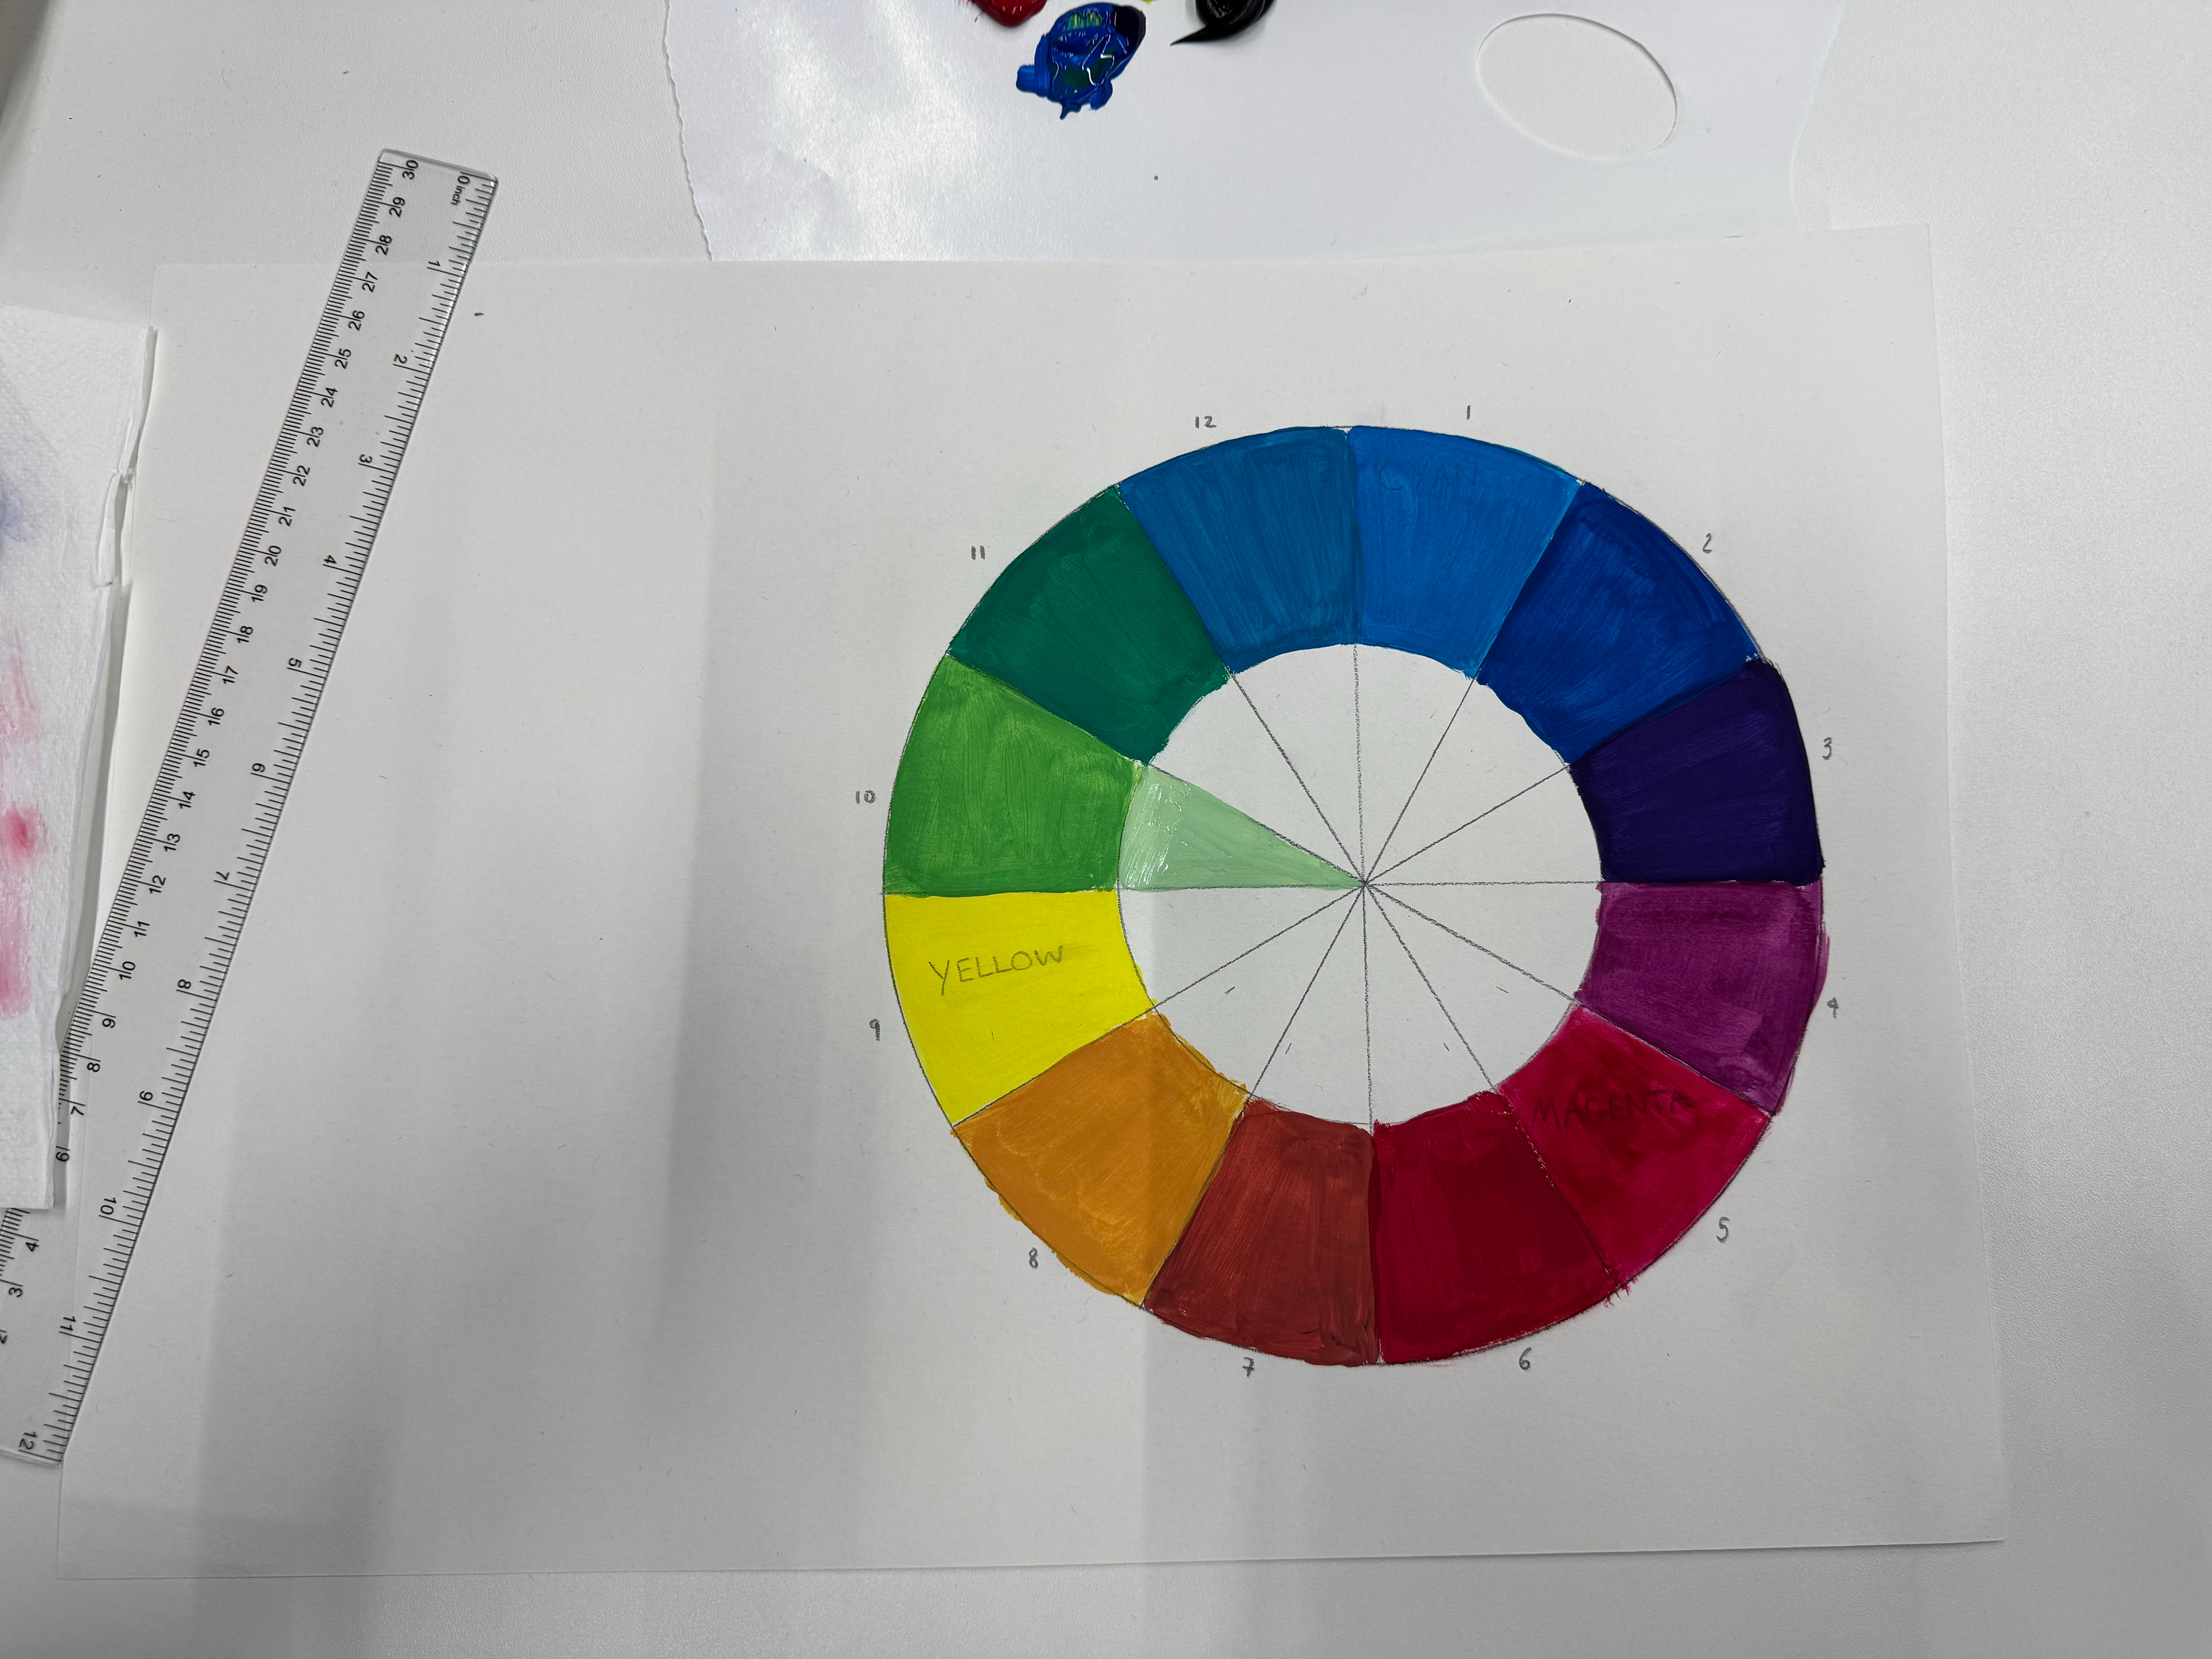
I should've taken snaps at each step of the process, but all I got is a before and after of the colour wheel, minus the pastel shades in the middle.
Then, I went ahead and filled in those pastel tones right at the heart of it, and let me tell you, the final piece turned out to be a masterpiece. A real work of art, if I do say so myself.

Now, I reckon, for our self-directed, we're meant to pick a single game and dissect five elements of it that are coloured by, well, colour. But, I found myself itching to explore this notion across a wider range of games rather than just stickin' to one.
Colours, they shape how a player might experience a thing - the mood, the atmosphere, the feelings stirring in their chest - they play a mighty big role.
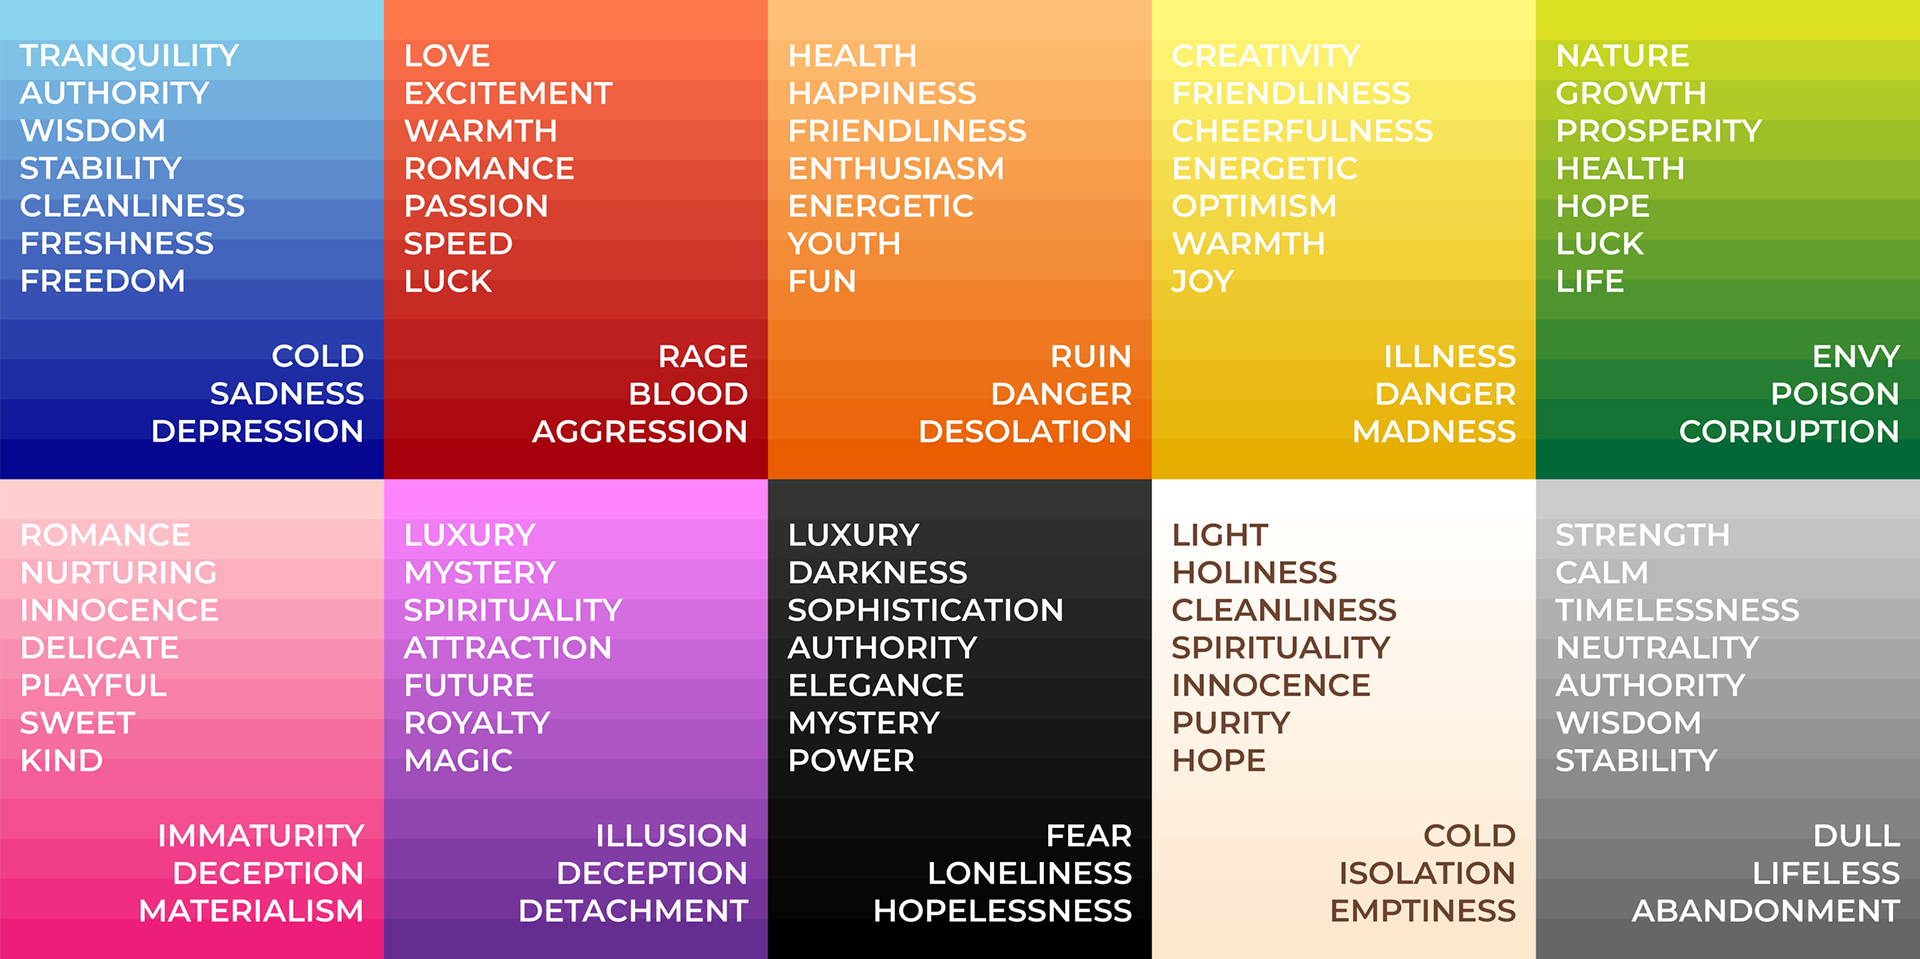
Red, now that's a colour of danger and anger, but in the realm of games, it can just as easily signify love and passion.
Green, the colour of nature and healing, but twist it a bit in a game, and it might just mean toxicity.
Yellow and orange, hues of happiness and positivity, but in the world of gaming, they're often there to signal to the player 'bout dangers lurking ahead.
Colours ain't just about painting the scene, they change the very way a player engages with the game.
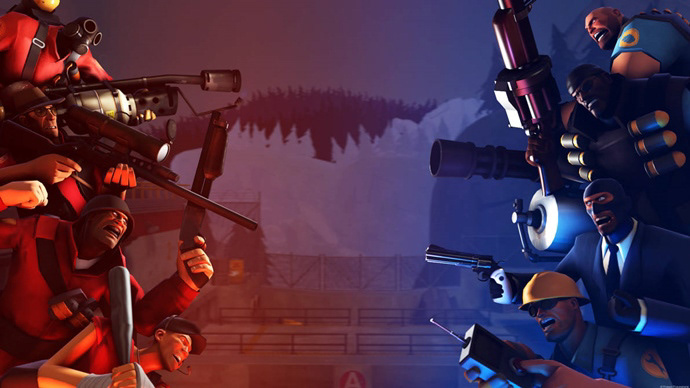

TF2 PORTAL
Red stirs up a desire to compete, Yellow & Red help with memorisation, and blue, well, it enhances creativity and intellect.
That's why, if you're crafting a puzzle game, you might lean heavy on the blue, and for a Zero-Sum Game, splash in plenty of red.
In the end, colour's got the reins, guiding the player's attention where it needs to go or what they need to do.


Pictured above, from 1-4
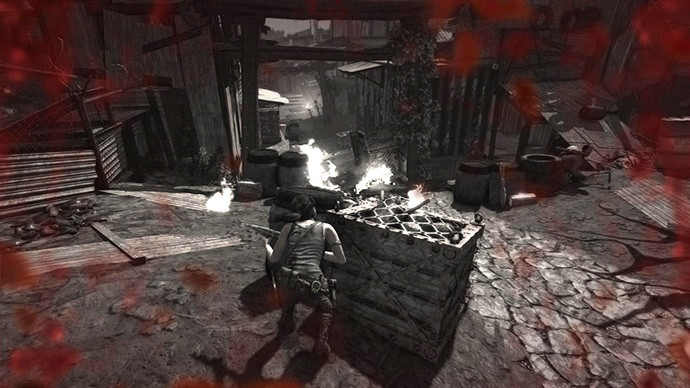
1. Let's start with Tomb Raider, capisce? They use red, the colour of blood, the very essence of life and danger, to let you know you're in a tight spot. Your health is hanging by a thread, and the whole world fades to shades of desperation, except for that blood splatter, screaming at you to take cover.
2. Now, Cyberpunk 2077, that's another beast. You step into enemy turf, and bam, you're greeted with these yellow-orange lights. It ain't a warm welcome, it's a warning - danger's lurking around every corner, ready to dance.
3. Moving on to Forever Skies. Green usually means nature, life, but here, it's a signal of death, toxic clouds choking the sky. It's a twisted use of colour, making what's normally comforting into something that spells doom.
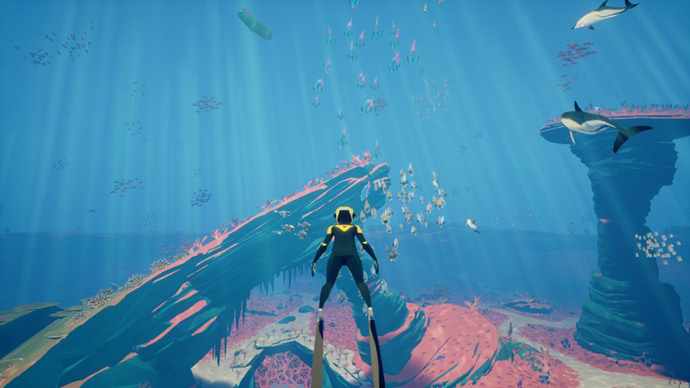
4. Lastly, we dive deep with Abzu. Blue, the colour of the sea, endless and calming. It ain't about the rush, the fight, it's about the peace it brings to your soul, exploring the depths without a care in the world.
Remember, it's all about the colours, the signals. They guide us, warn us, and sometimes, they offer us a moment of peace in the chaos. That's the art of it.


EXT- V&A MUSEUM 17 - 10 - 24
TRIP DAY! Well, let me and tony take you for a little walk.
THE BRIEF.

Listen up, If you ain't seen it yet, go have a look at my week 4 on the PLP Module page. That's where the real details are for this little operation of ours. For now, let’s talk about my end—the art side of things, got it?
We split up the responsibilities, see? I’m handling the environmental art, Liliana’s taking care of the characters, and Jacob and Greg are focused on shaping the narrative and gameplay.
Let me give you a quick rundown—while we were chatting about characters and the storyline, we didn’t dive too deep into the environments. Once the narrative was finally set, I felt like I was left out in the cold with no direction.
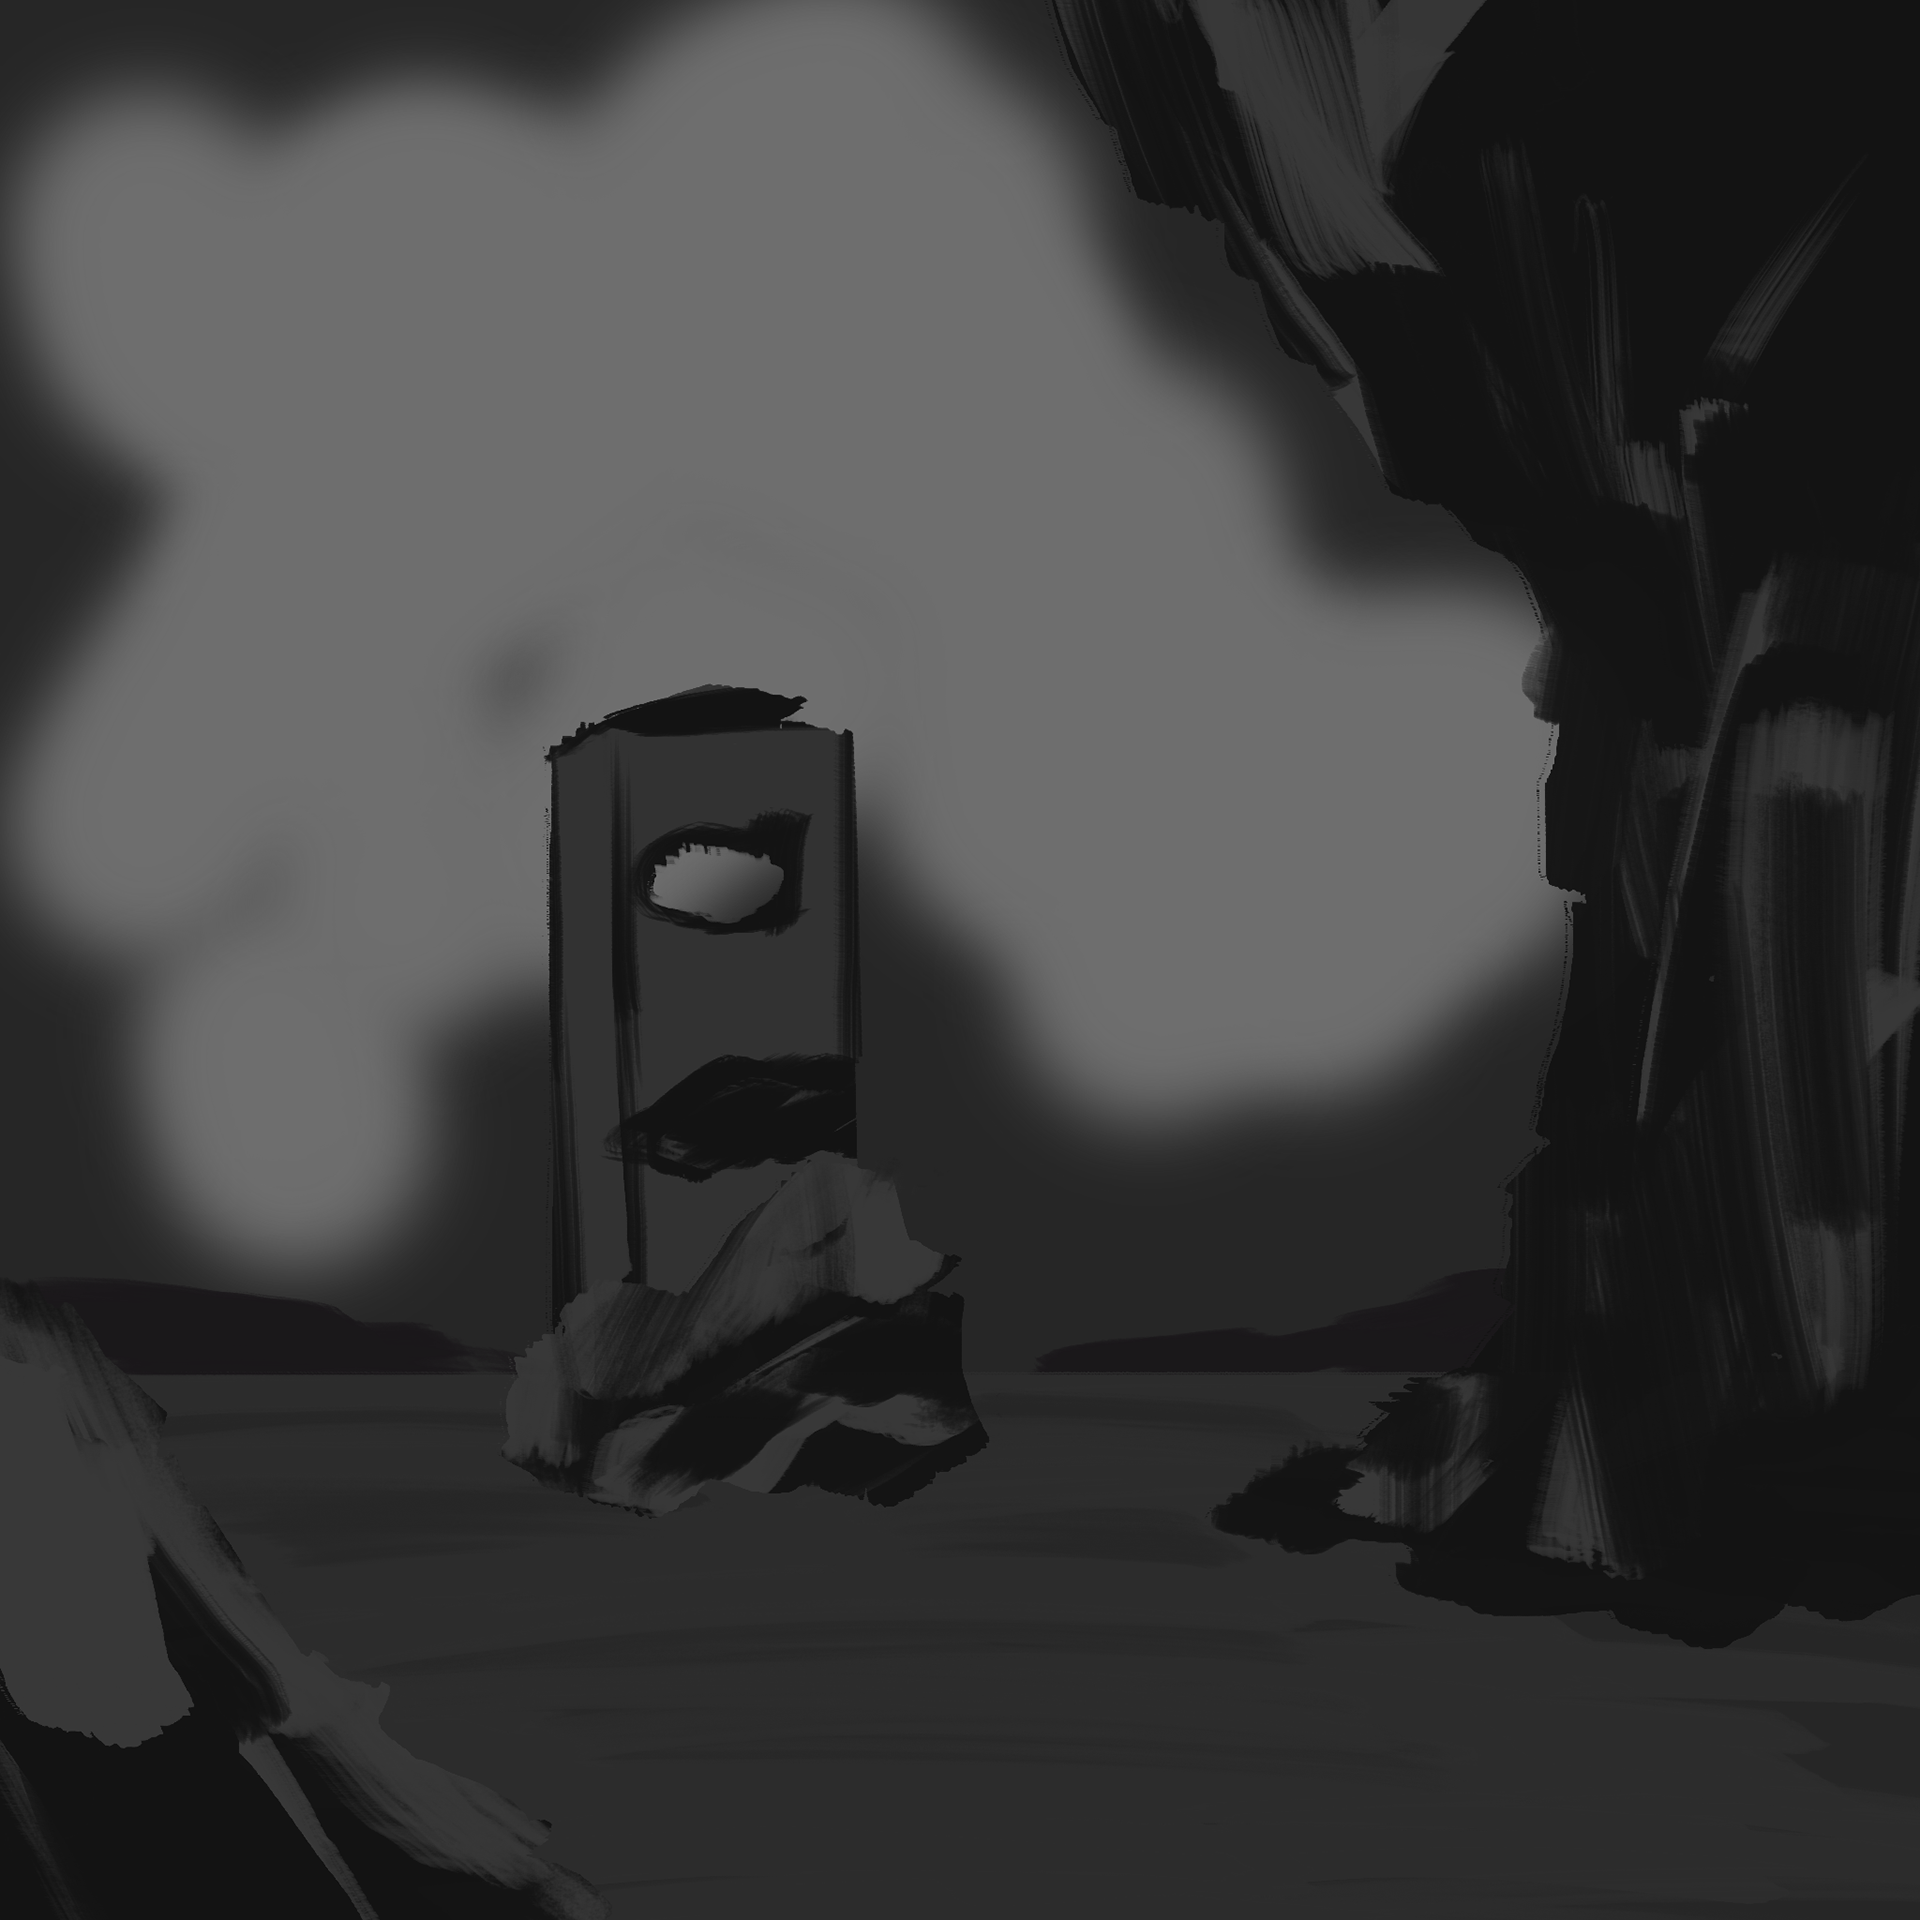
So, what did I do? I started throwing out my own ideas like it was a gift. My first thought was about a mountain concept with a tower.
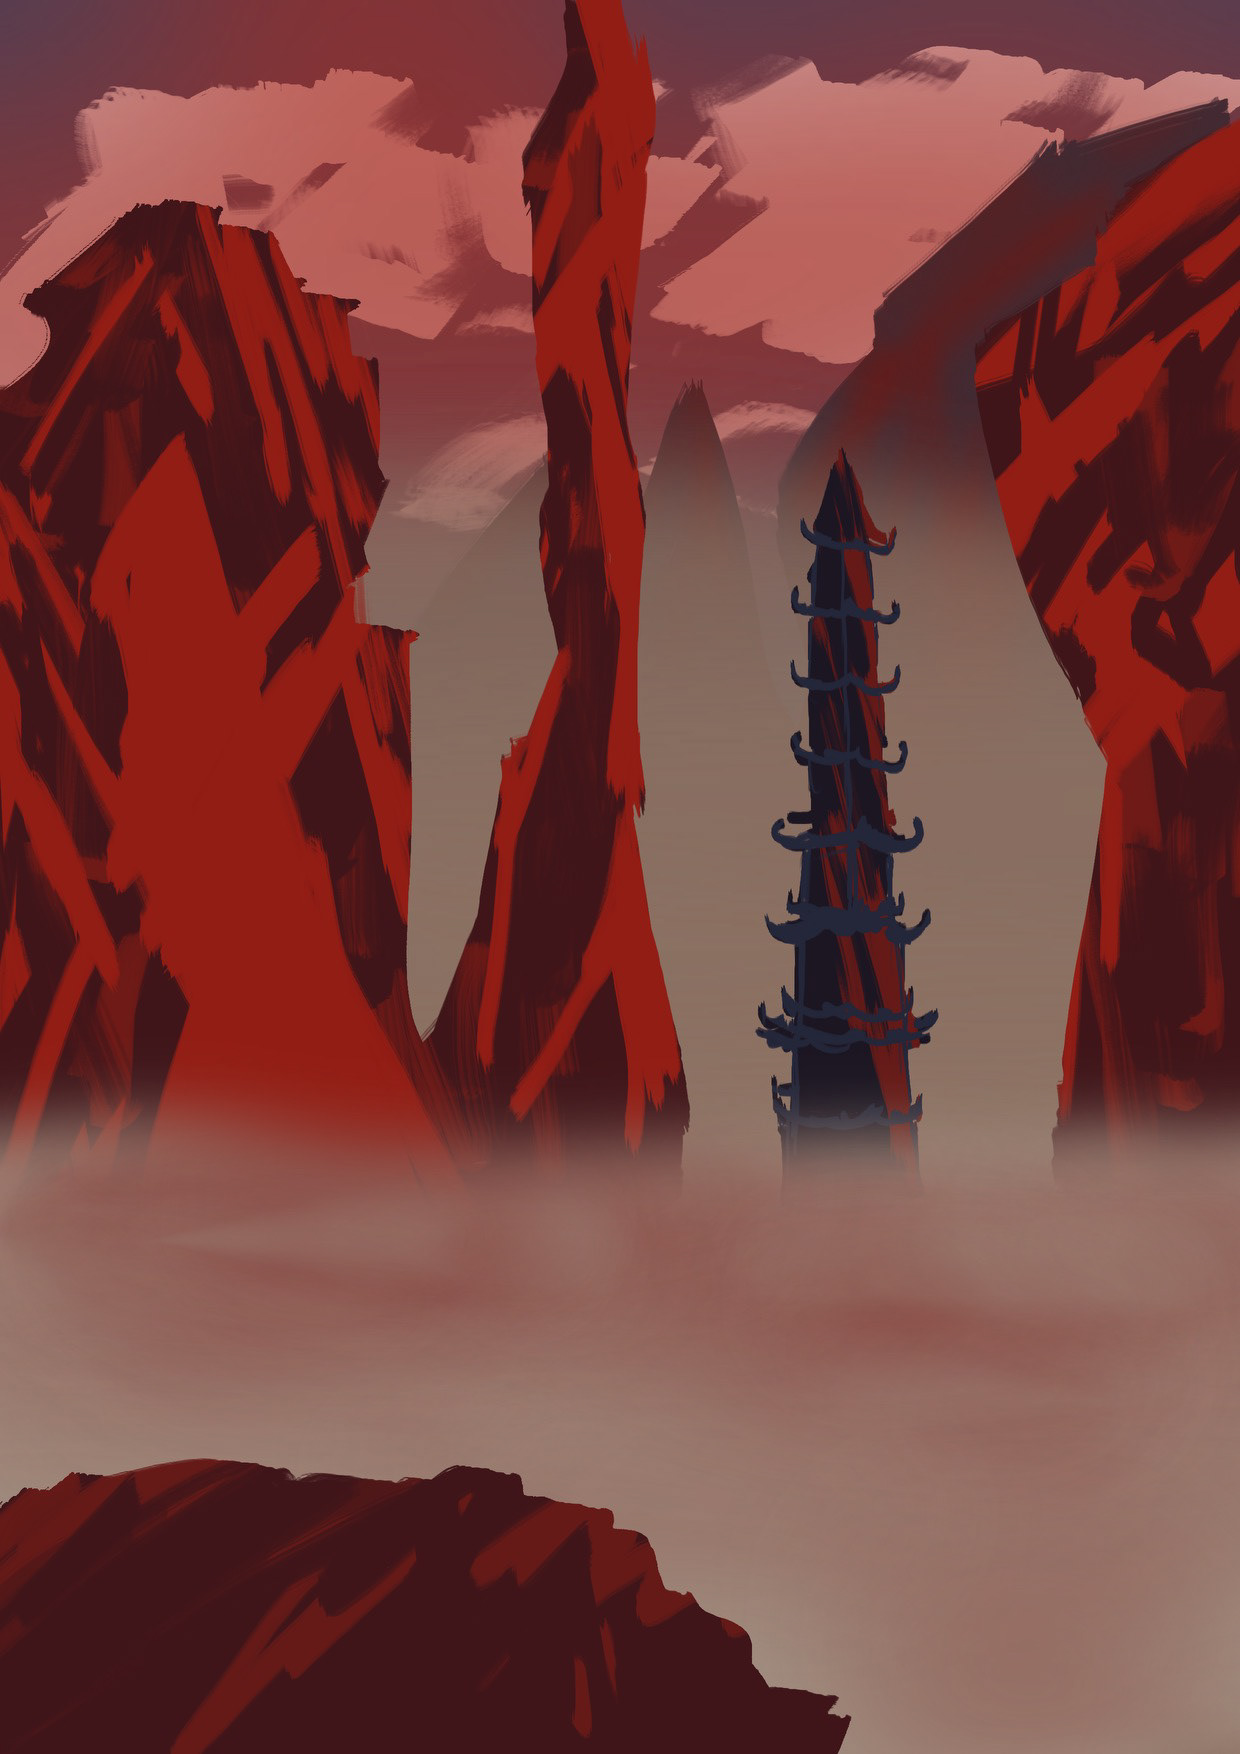
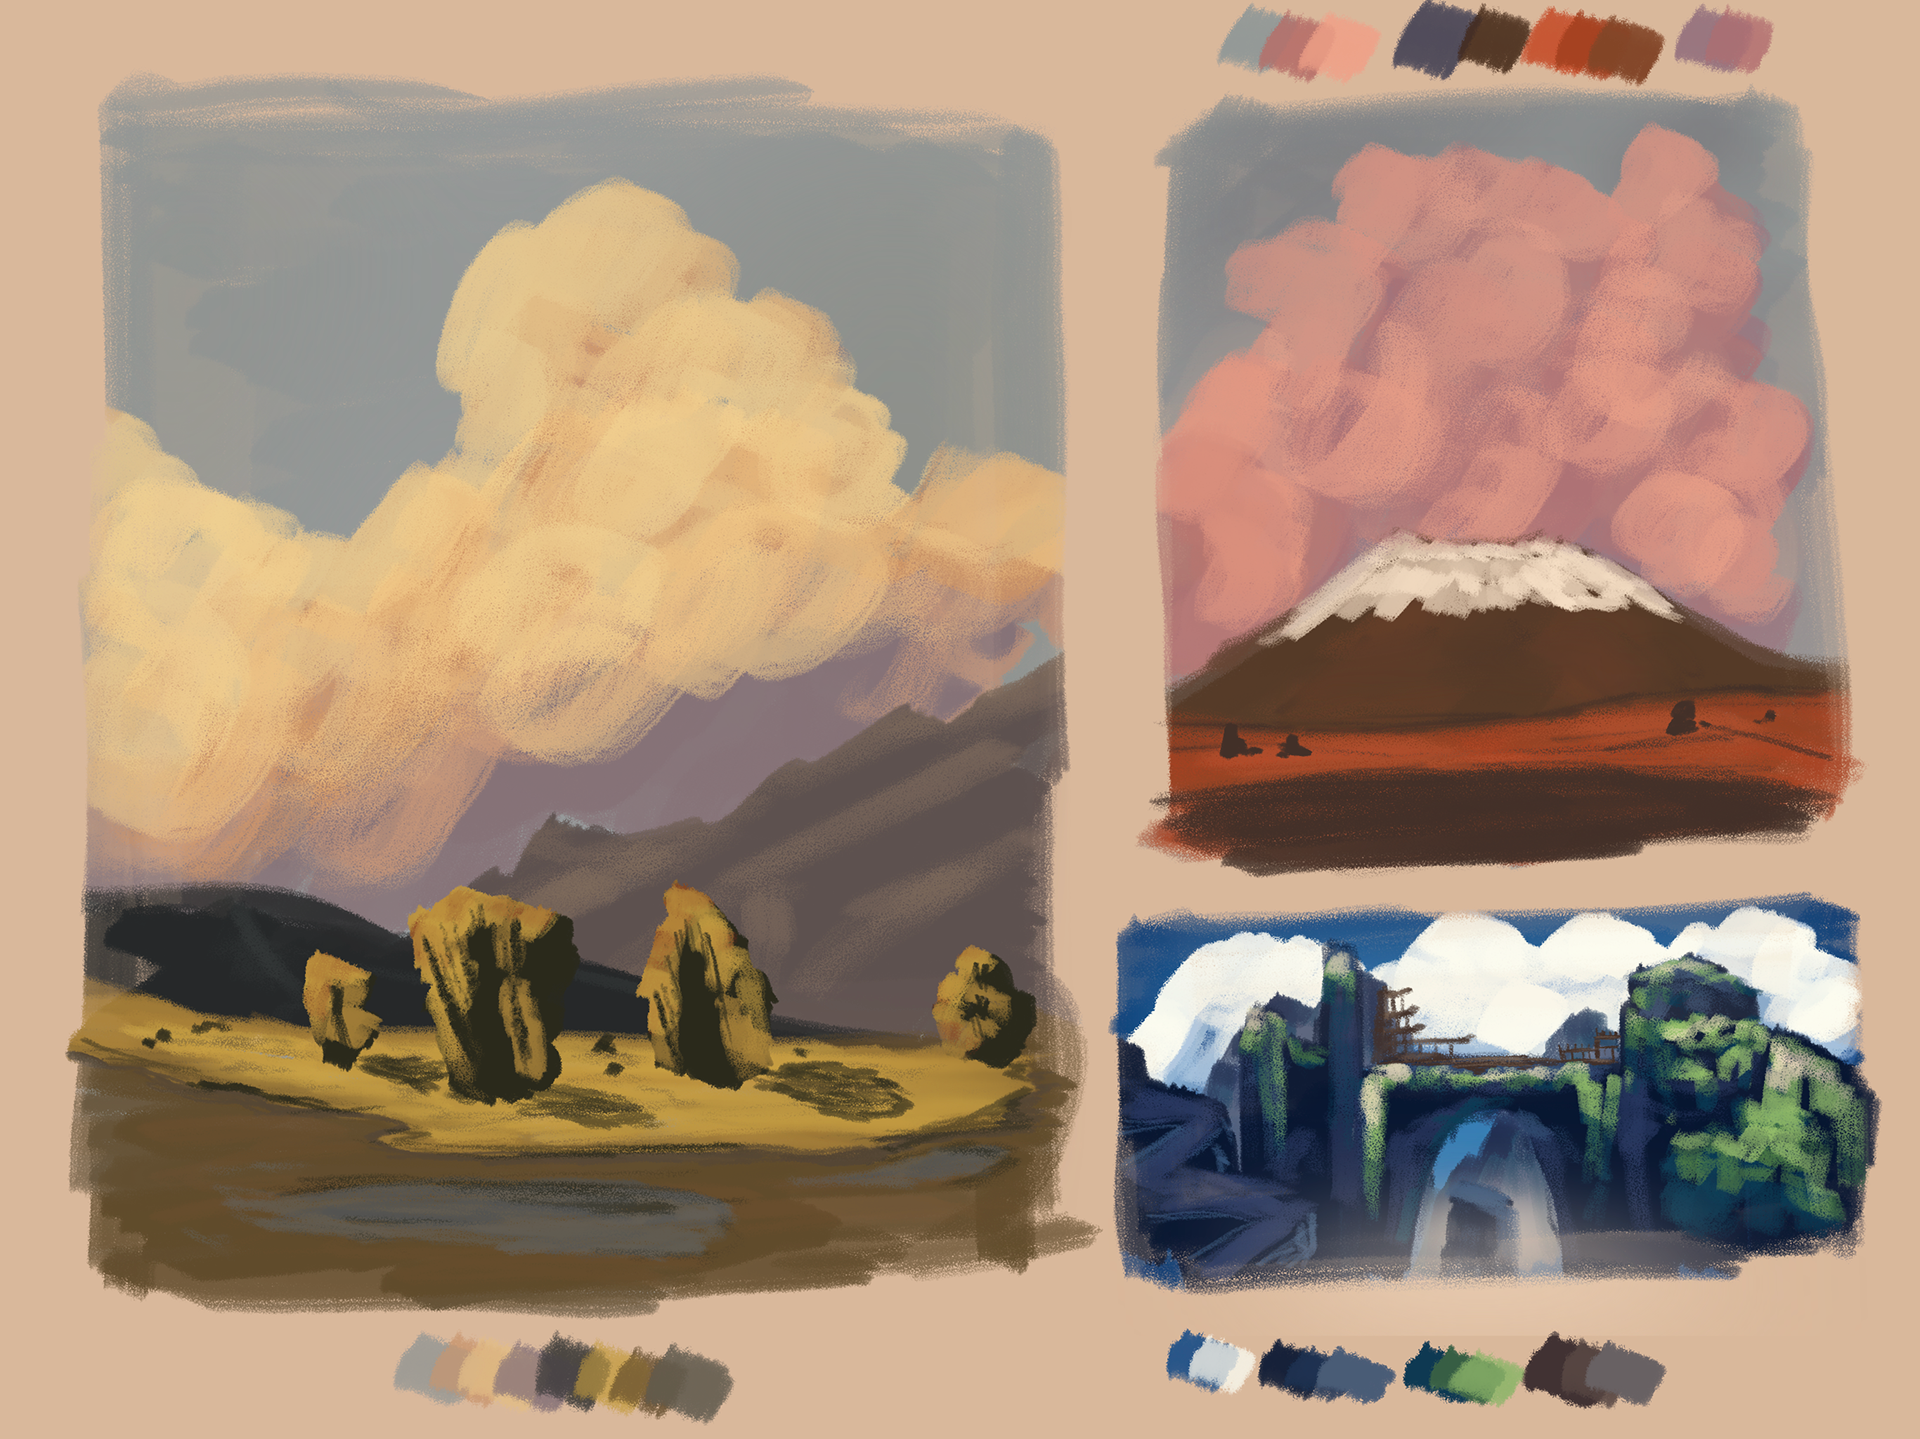
Then we kicked around the idea of presenting the story like a storybook. I figured I'd make my art match that vibe, so I pulled some inspiration from different places and came up with a few thumbnails.
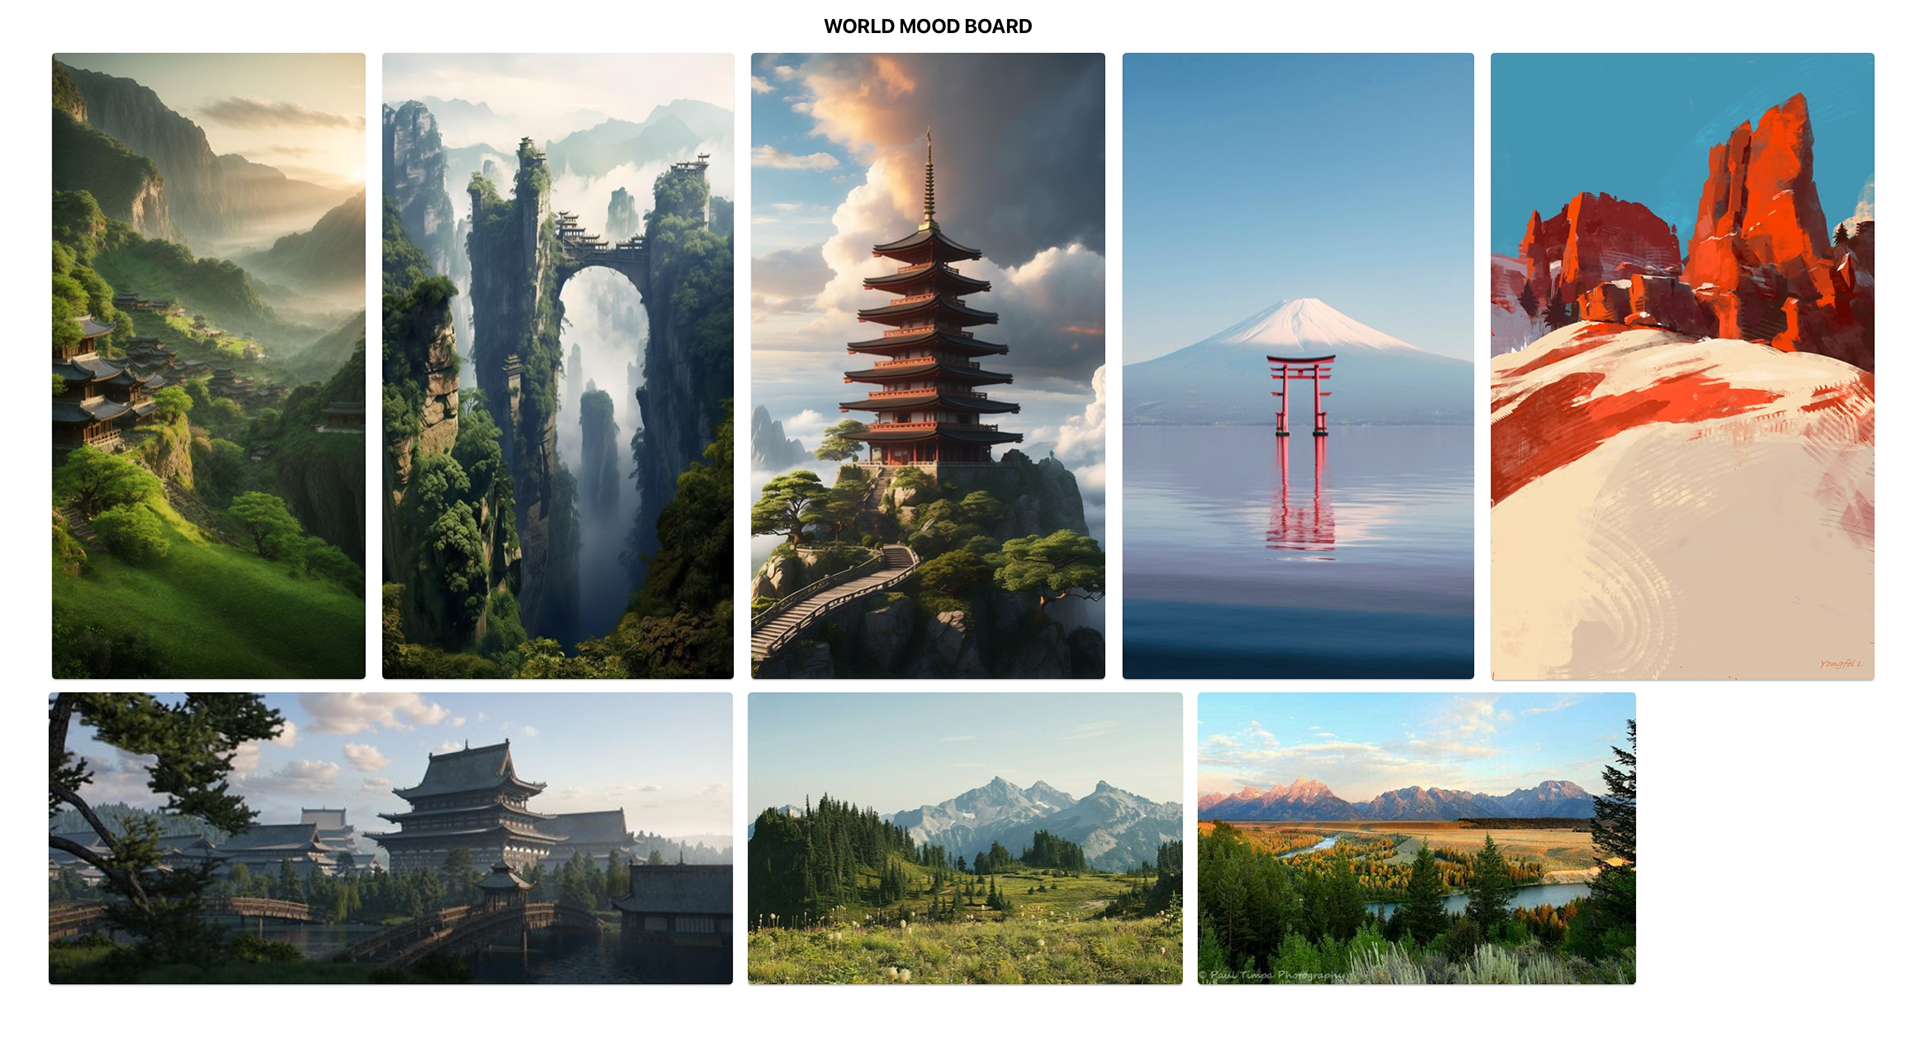
Check out the artwork below—this task turned out to be a blast, even with the limited info I had. I ended up loving these pieces, especially the one in the bottom right corner. The way it all came together? Just beautiful, the colours were perfect. I’m itching to develop them more on my own time, you know what I’m saying?


INT- ROOM 903 24 - 10 - 24
Alright, listen up, folks. Today, we’re talkin' about shapes—yeah, those little things that make our drawings come alive.
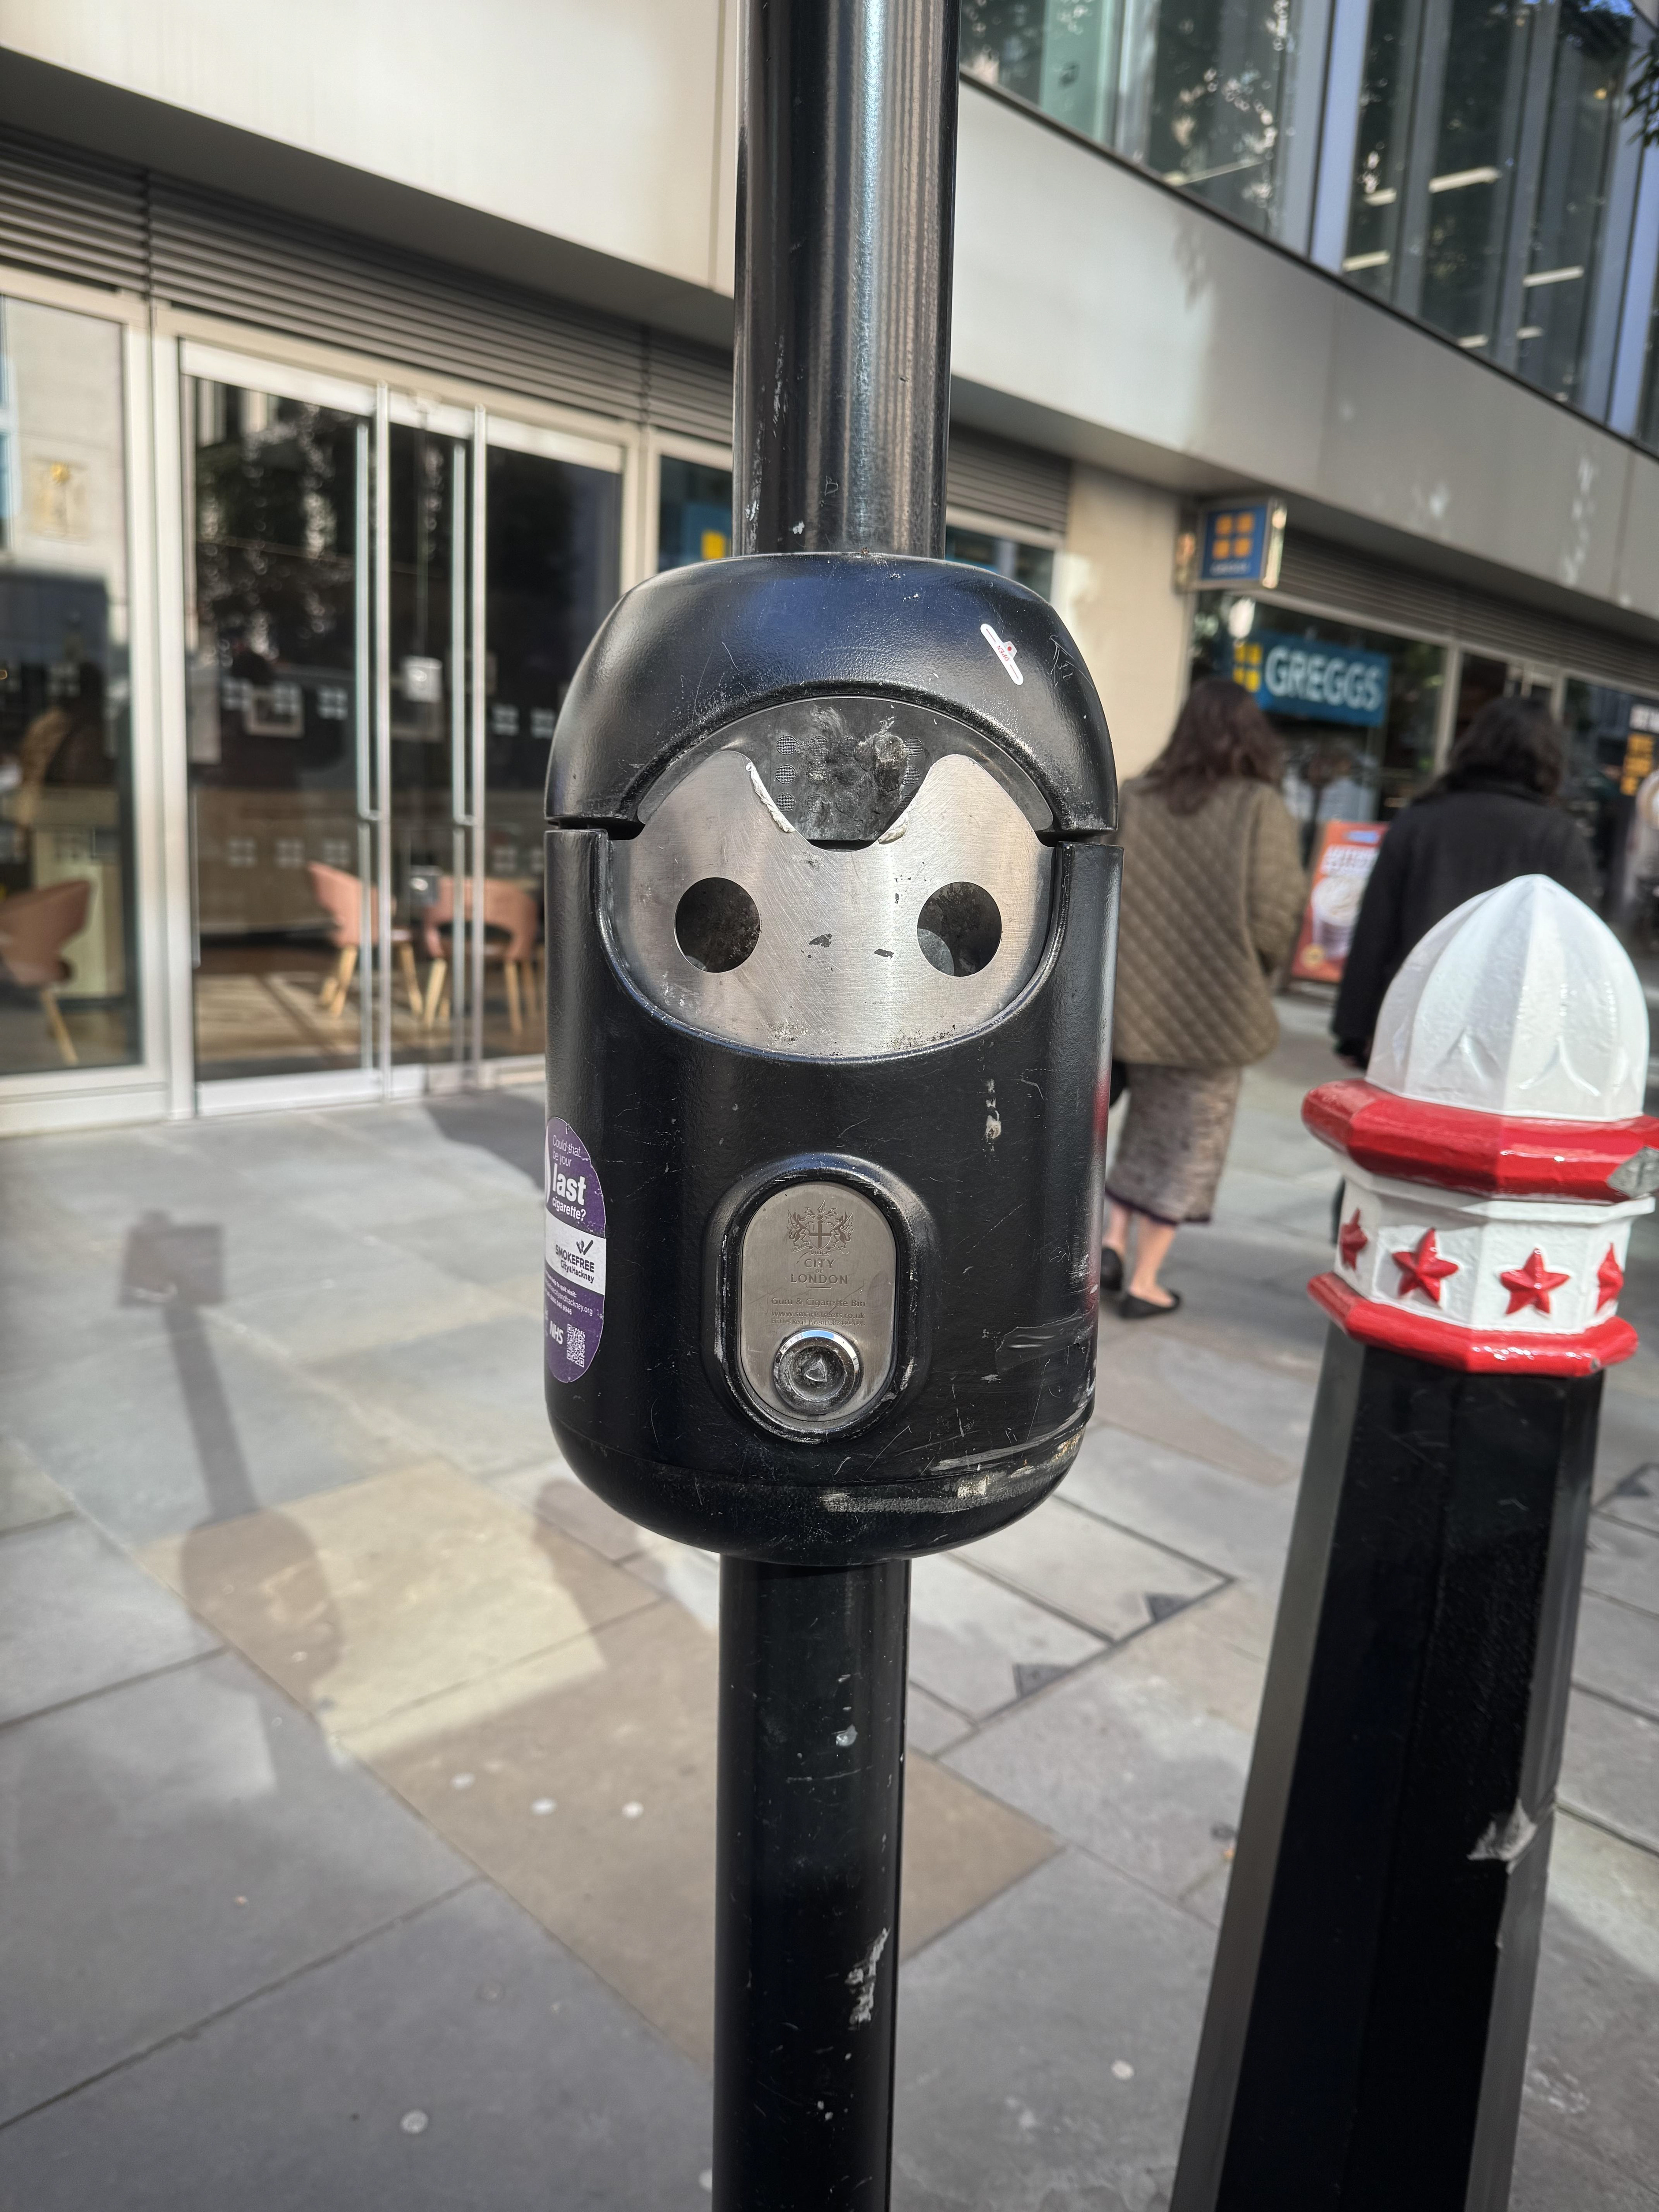
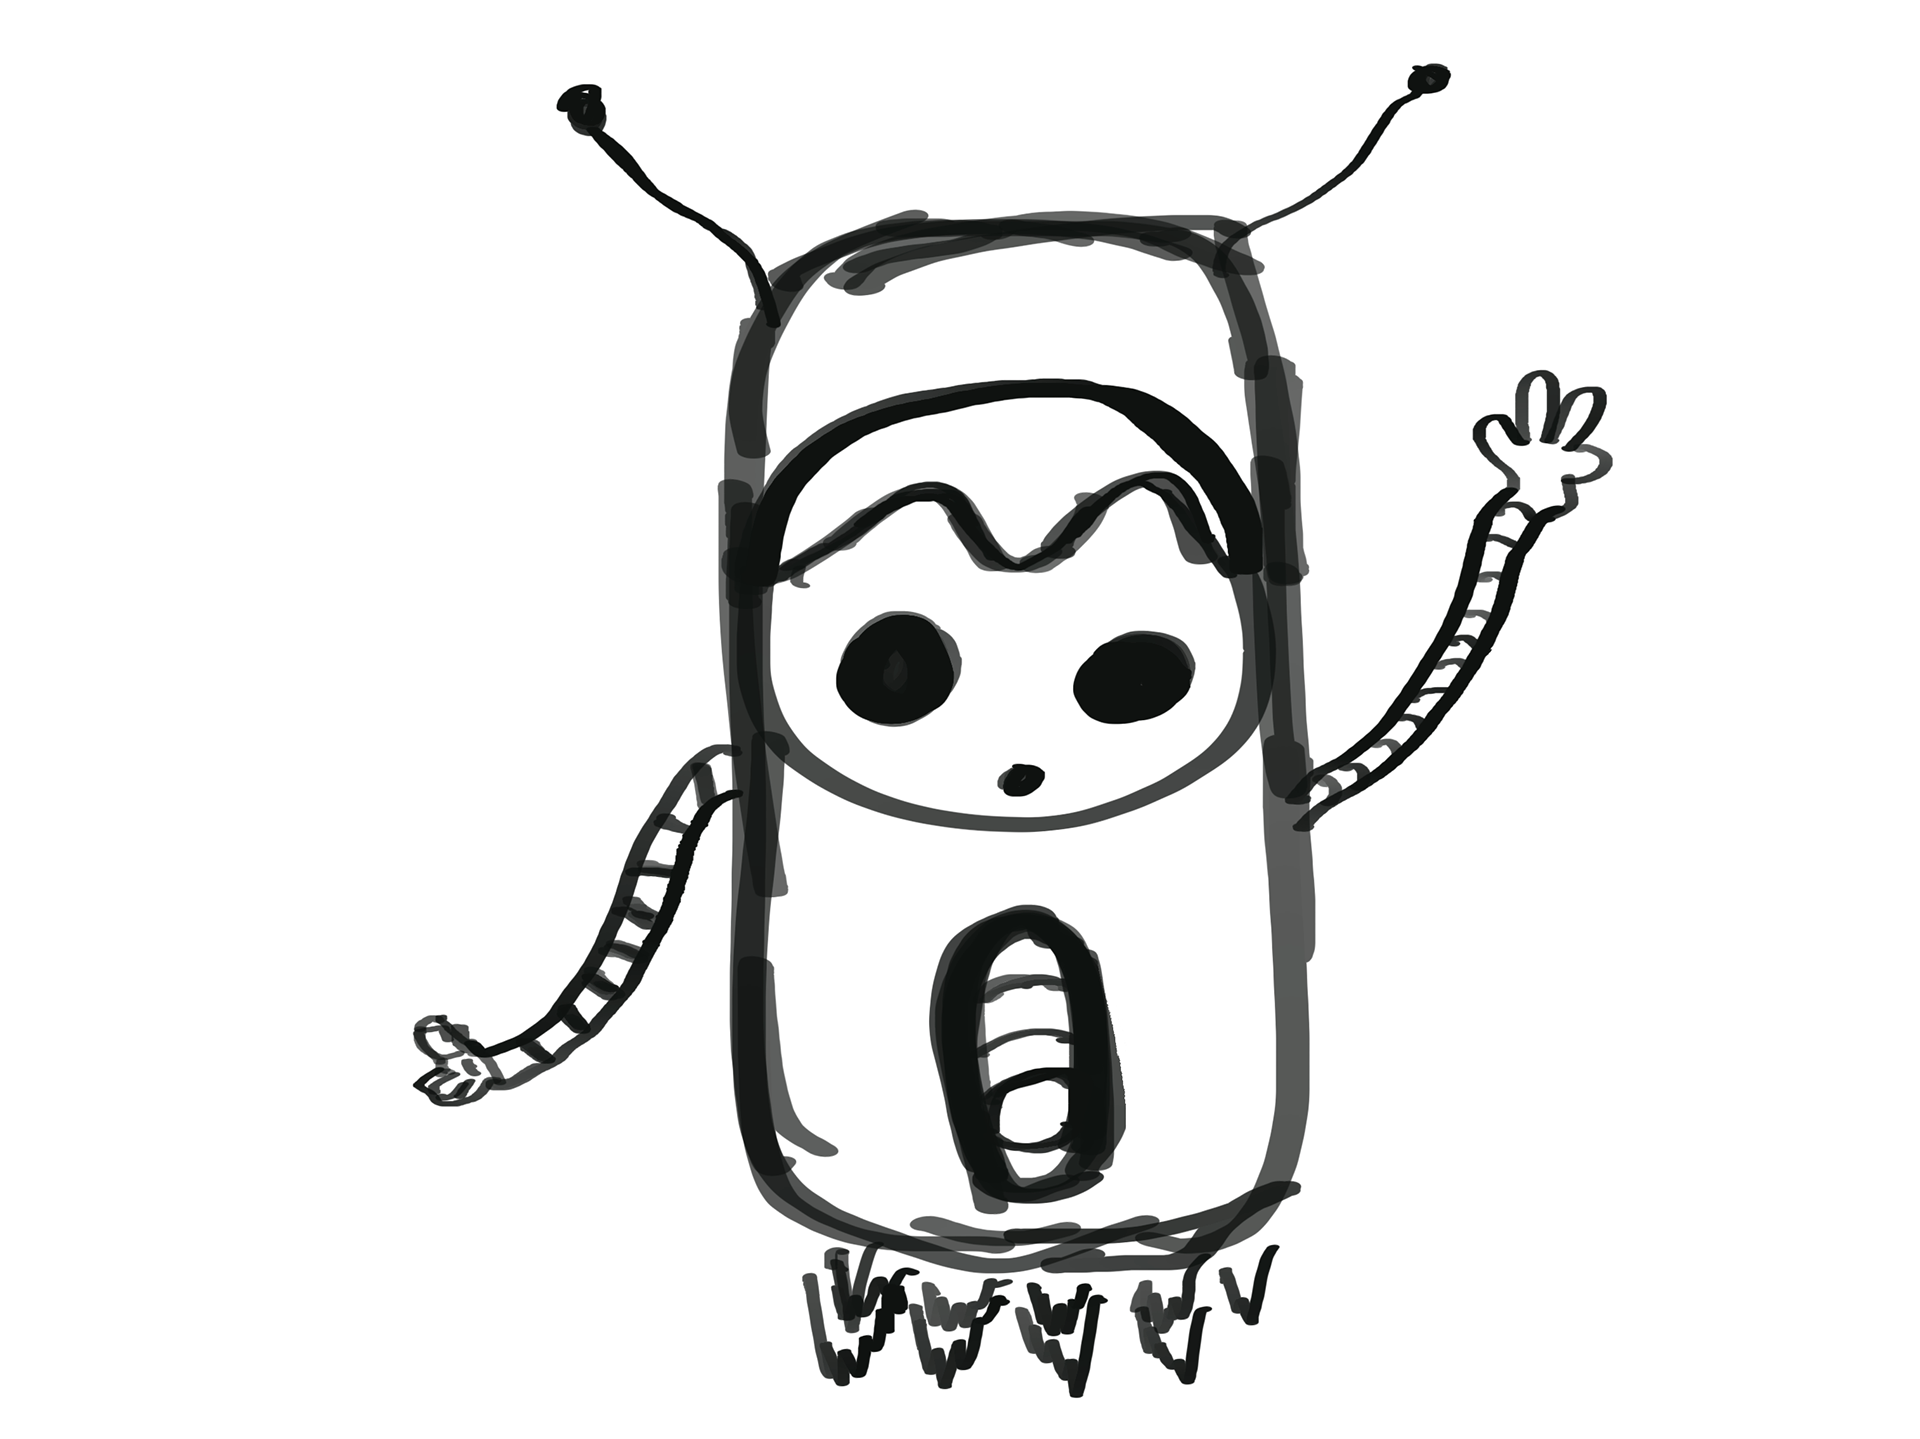
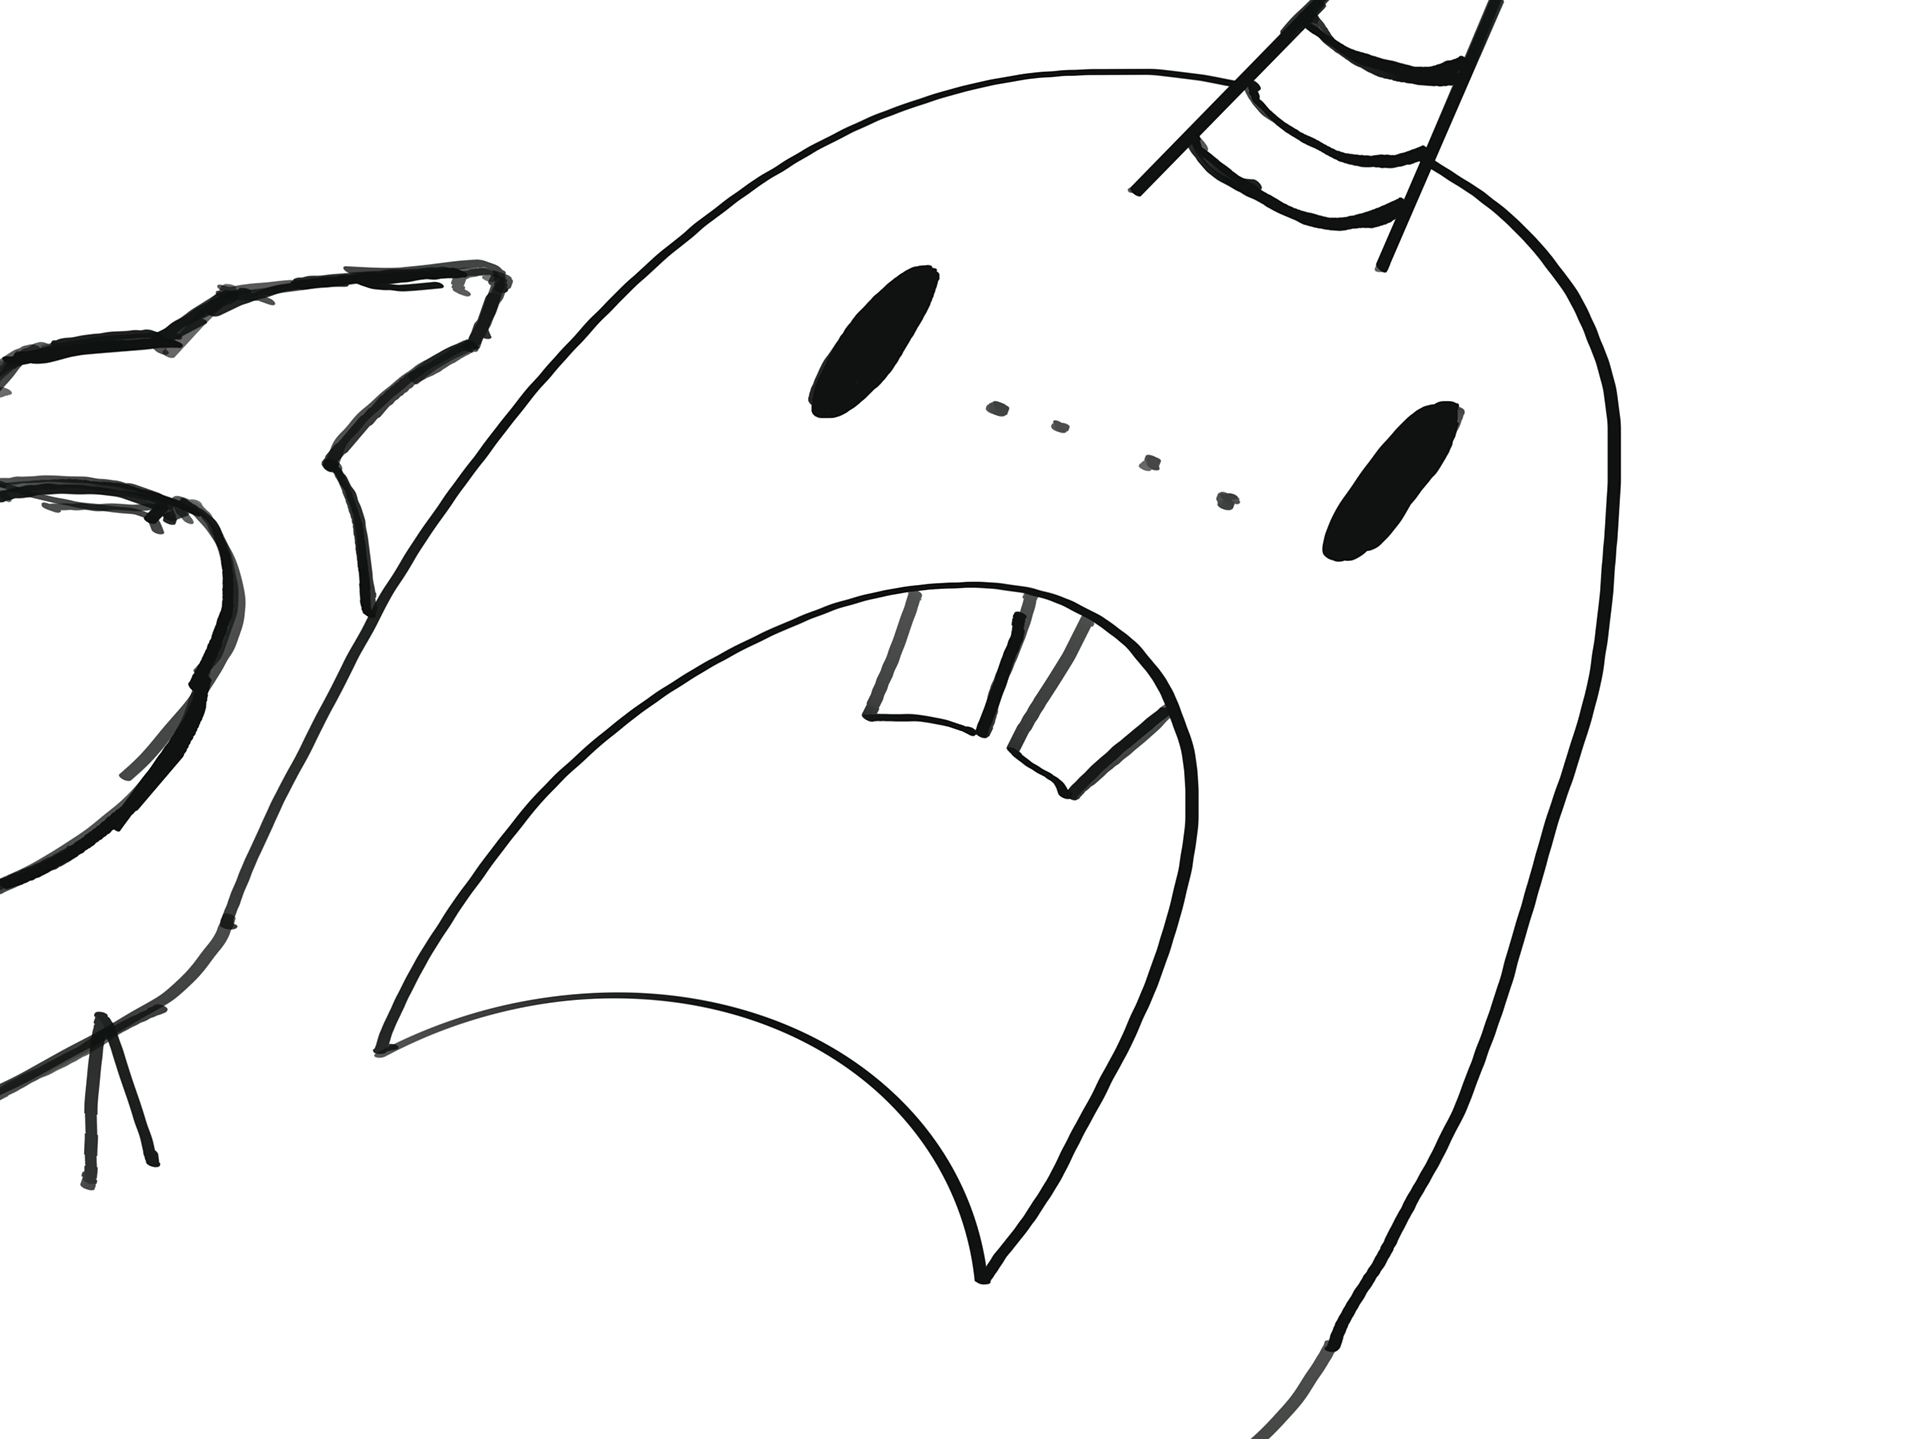
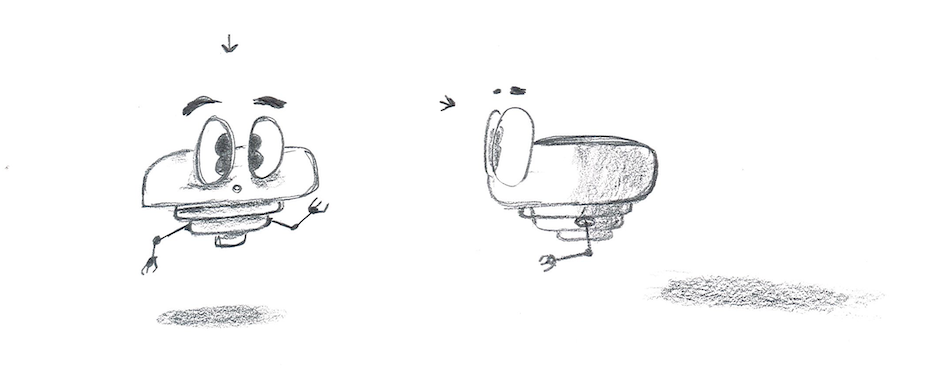
Let’s get into it. We kicked off the day with a warm-up, somethin’ called ‘pareidolia.’ You know what that is? It’s when you see a face on that garbage can or a toaster.
So, they told everyone to go out there, find some objects, and turn 'em into characters.
Reminds me of a couple days ago when I spotted this little bin. It looked just like a robot, I swear! Dug through my photos, brought him to life.
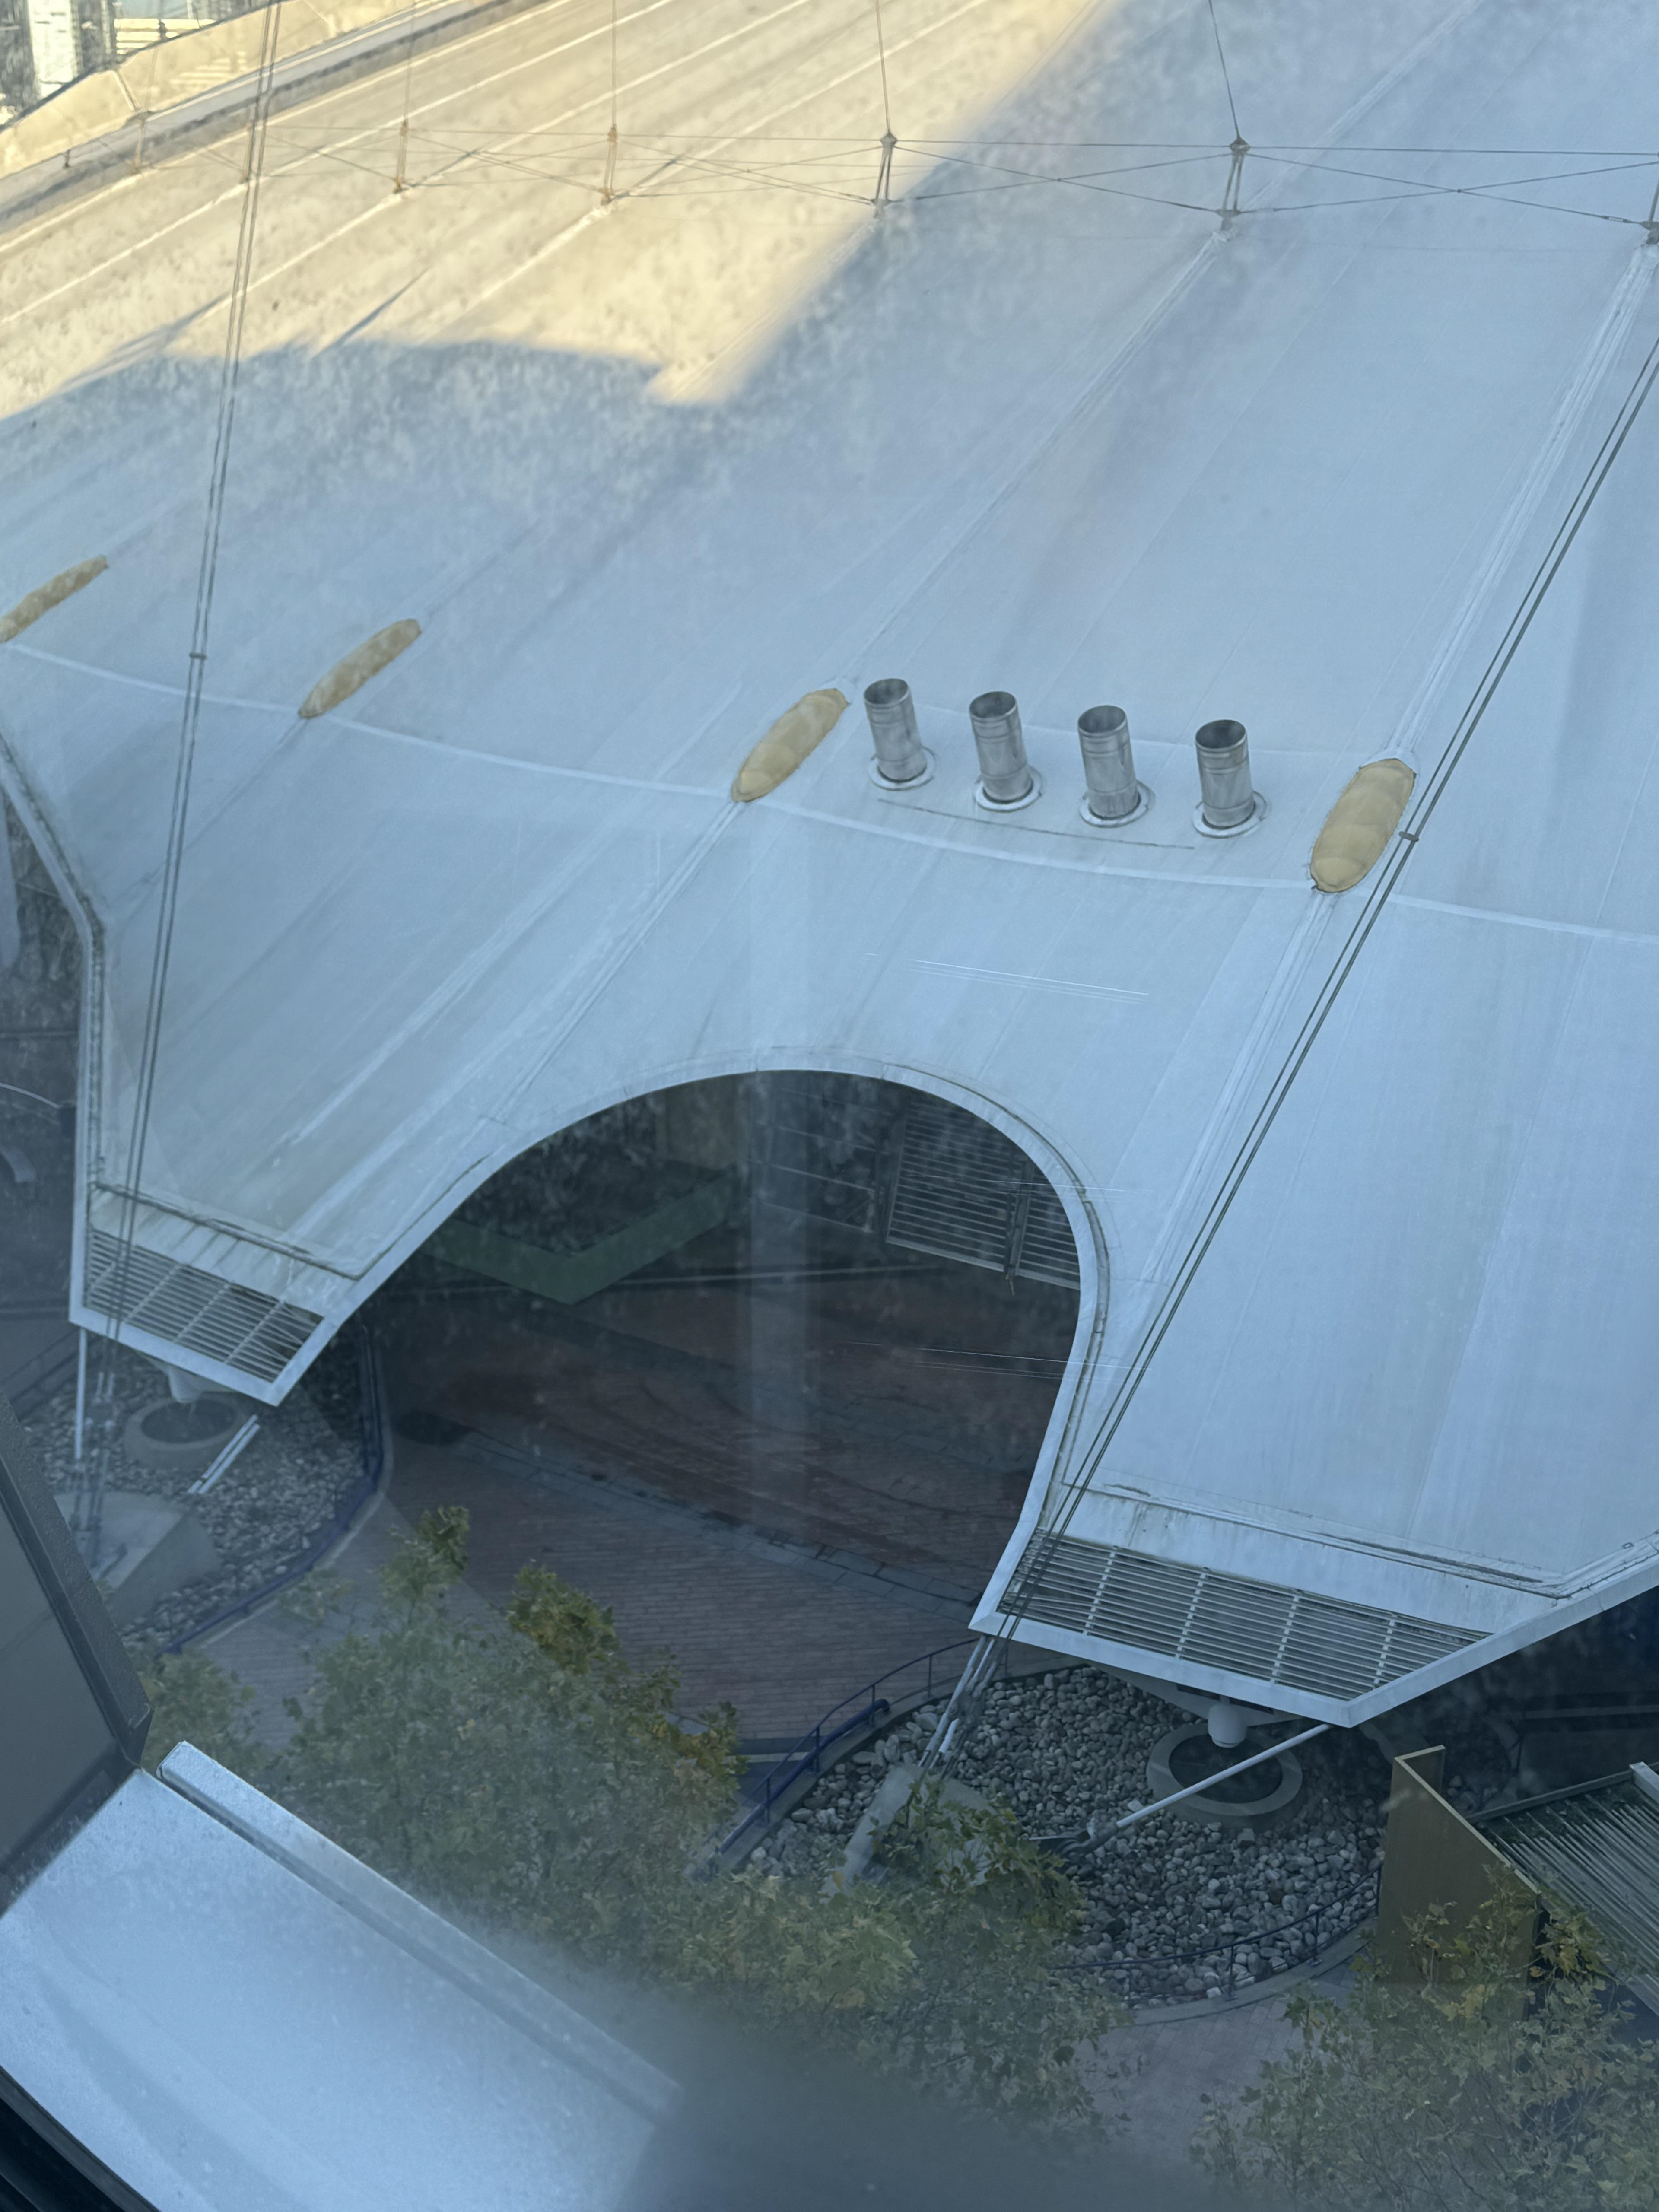
Then, I'm sittin' in class, lookin' out the window, and bam! I see a narwhal hiding in the O2 arena structure. Can't make this stuff up!
Now, onto the workshop, capisce? I’ll be honest, I wasn’t too impressed with what I produced in class, so I’m gonna tackle this again on my own time.
I'll show you both—one from class and the other, my upgraded version.
We started by sketching as many simple shapes as we could think of. You know, playin' around with that shape language—gettin' creative.
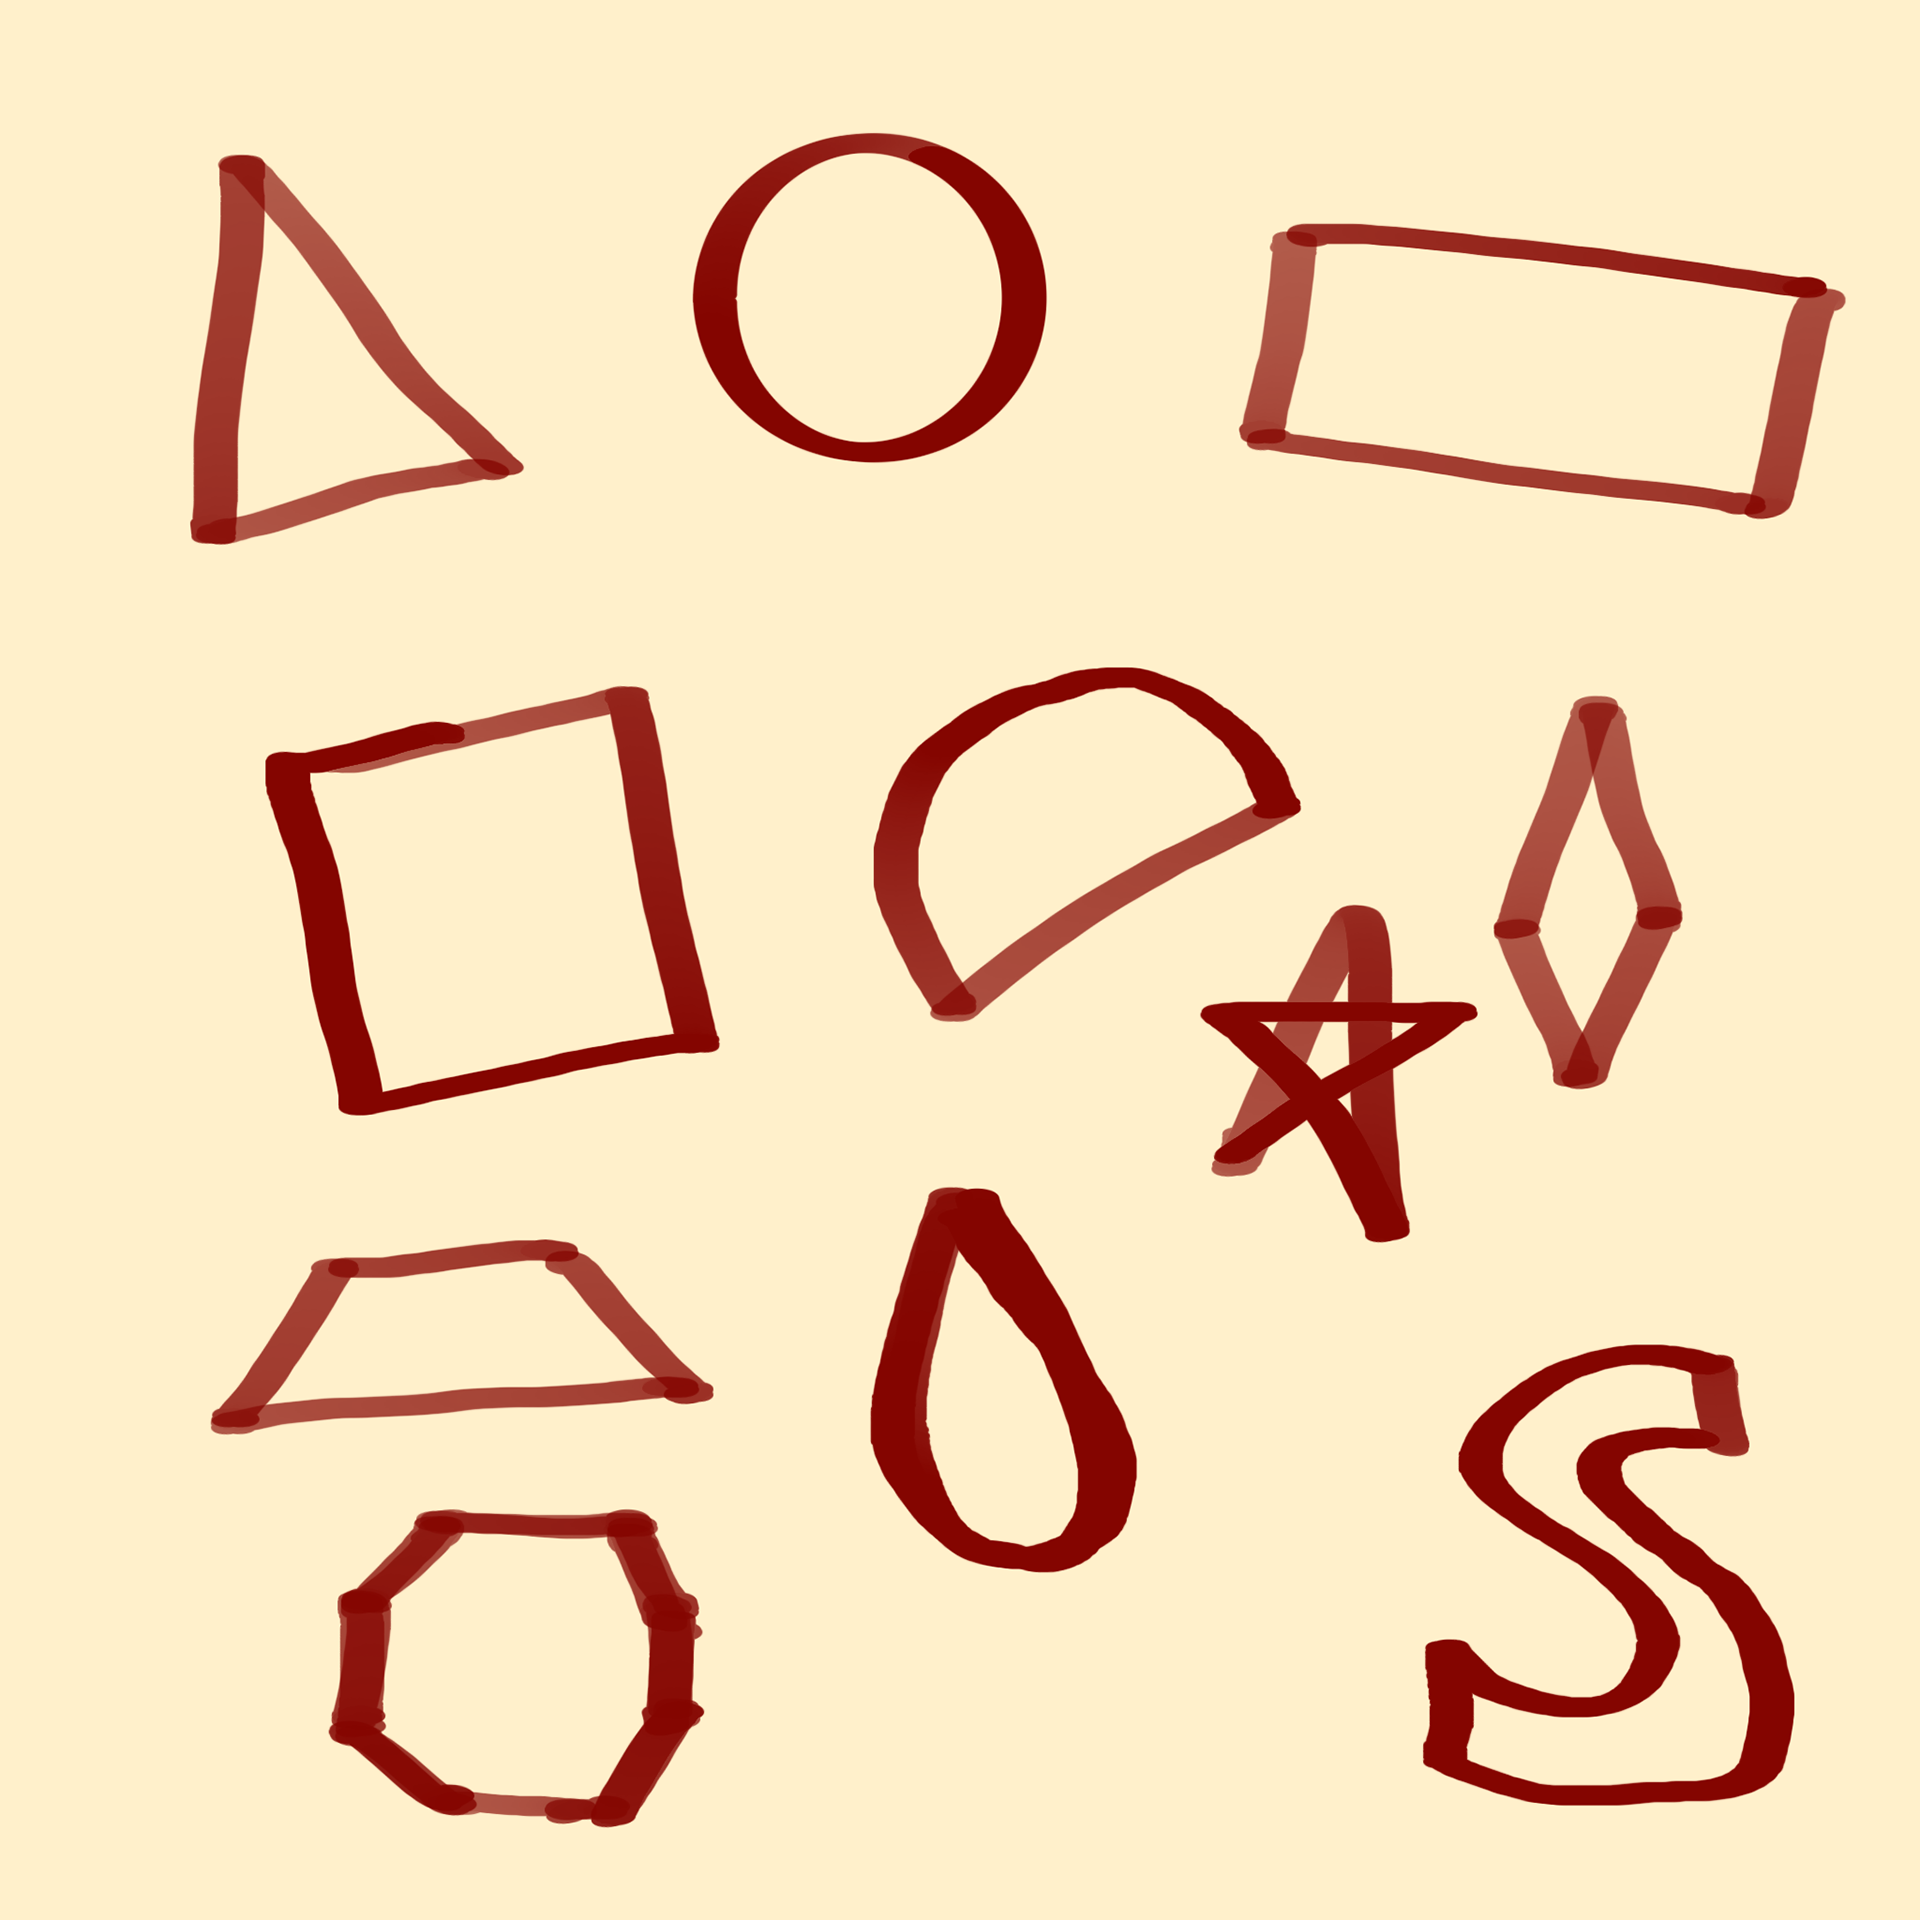
Then we had to whip up characters from those shapes and pick the one we liked the most.
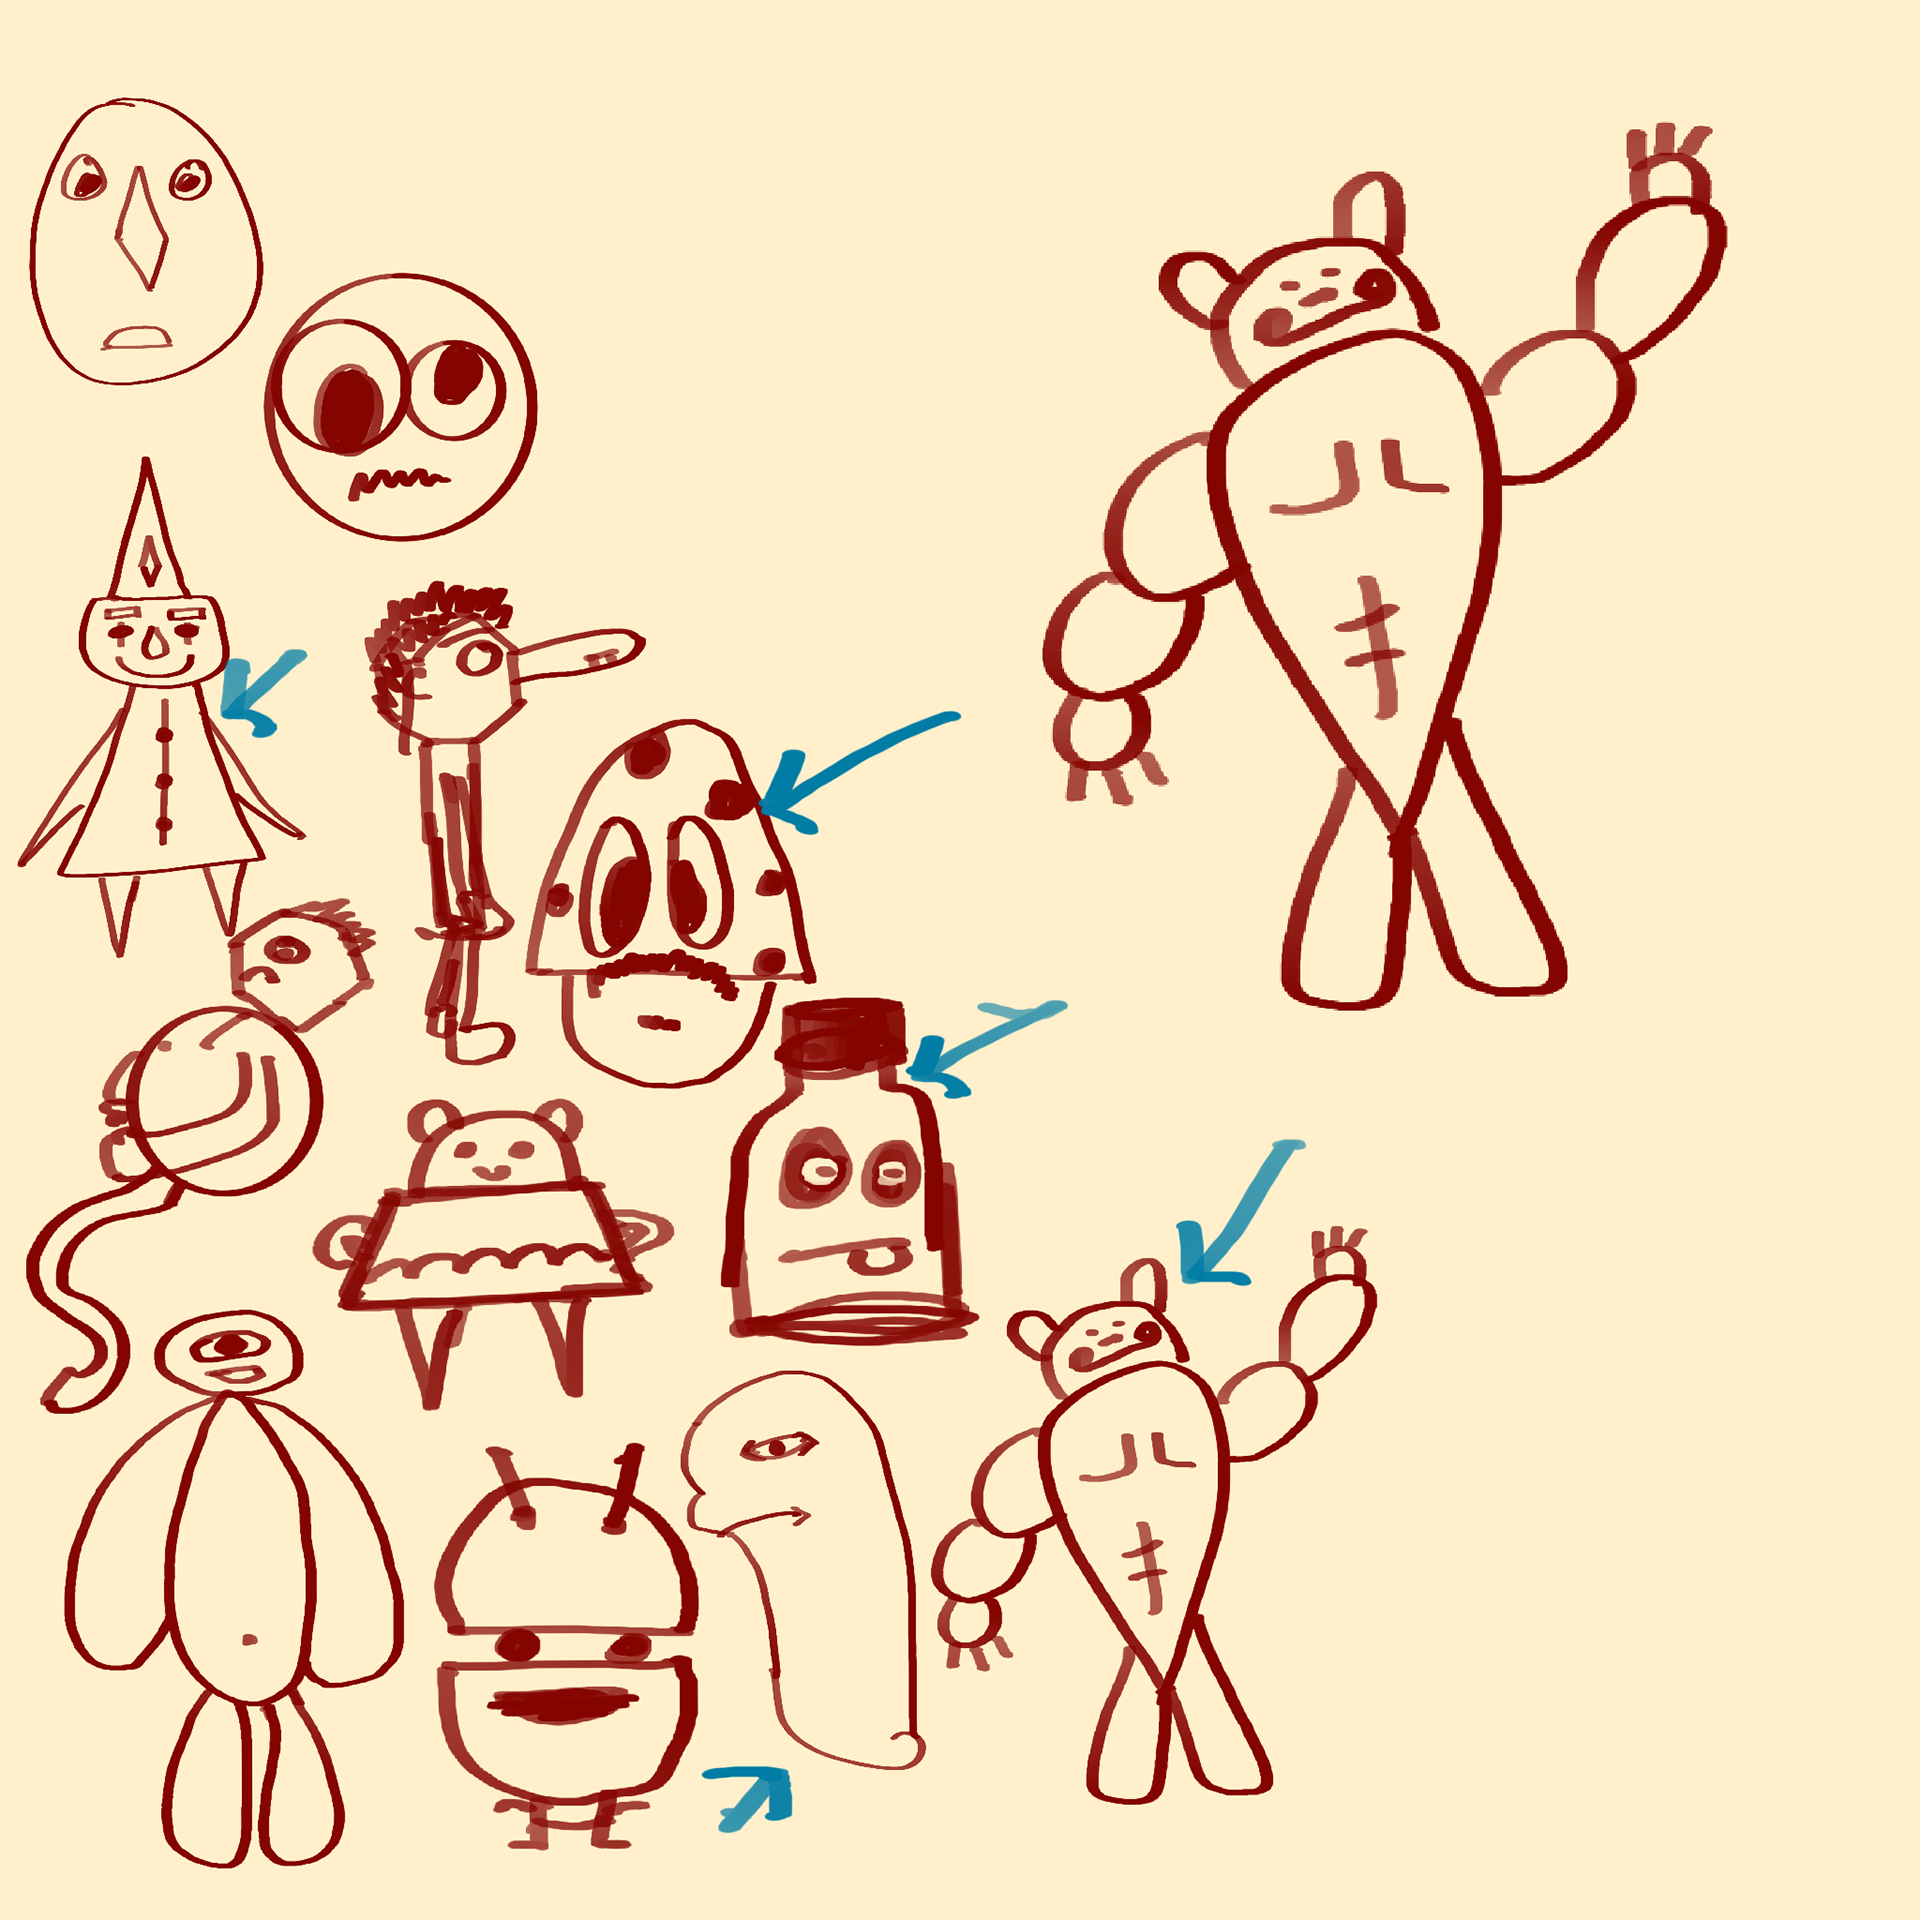
Play with the shape language, break it down and then make more variations
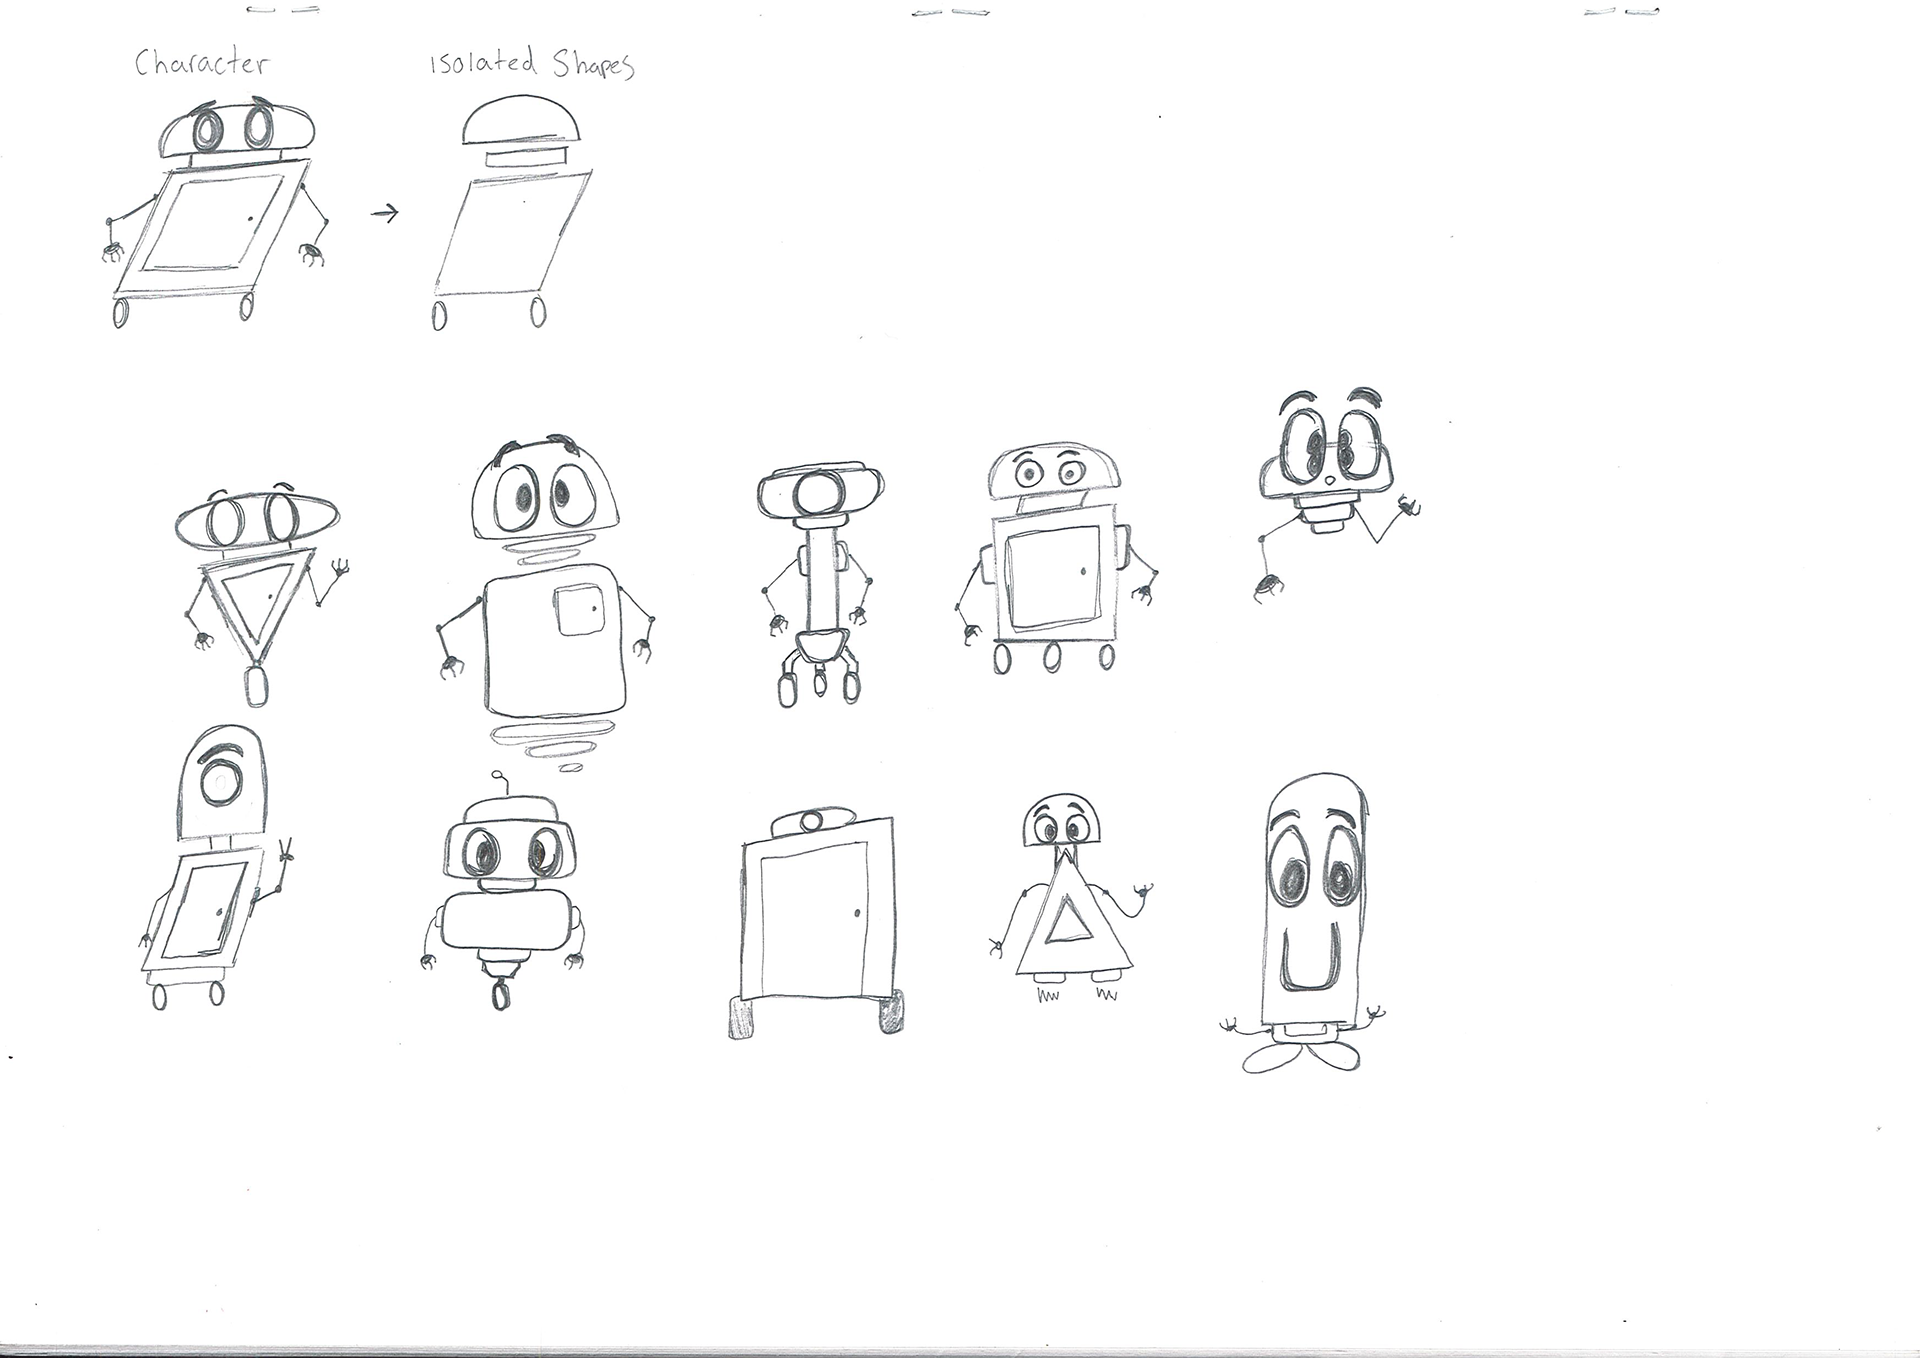
After that, we dove into shadows, giving our pieces some depth.

Last but not least, we made our characters pop by addin' a little 3D magic with those shadows.
That’s how we do it in this familia. Got it? Good.

INT- ROOM 801 07 - 11 - 24
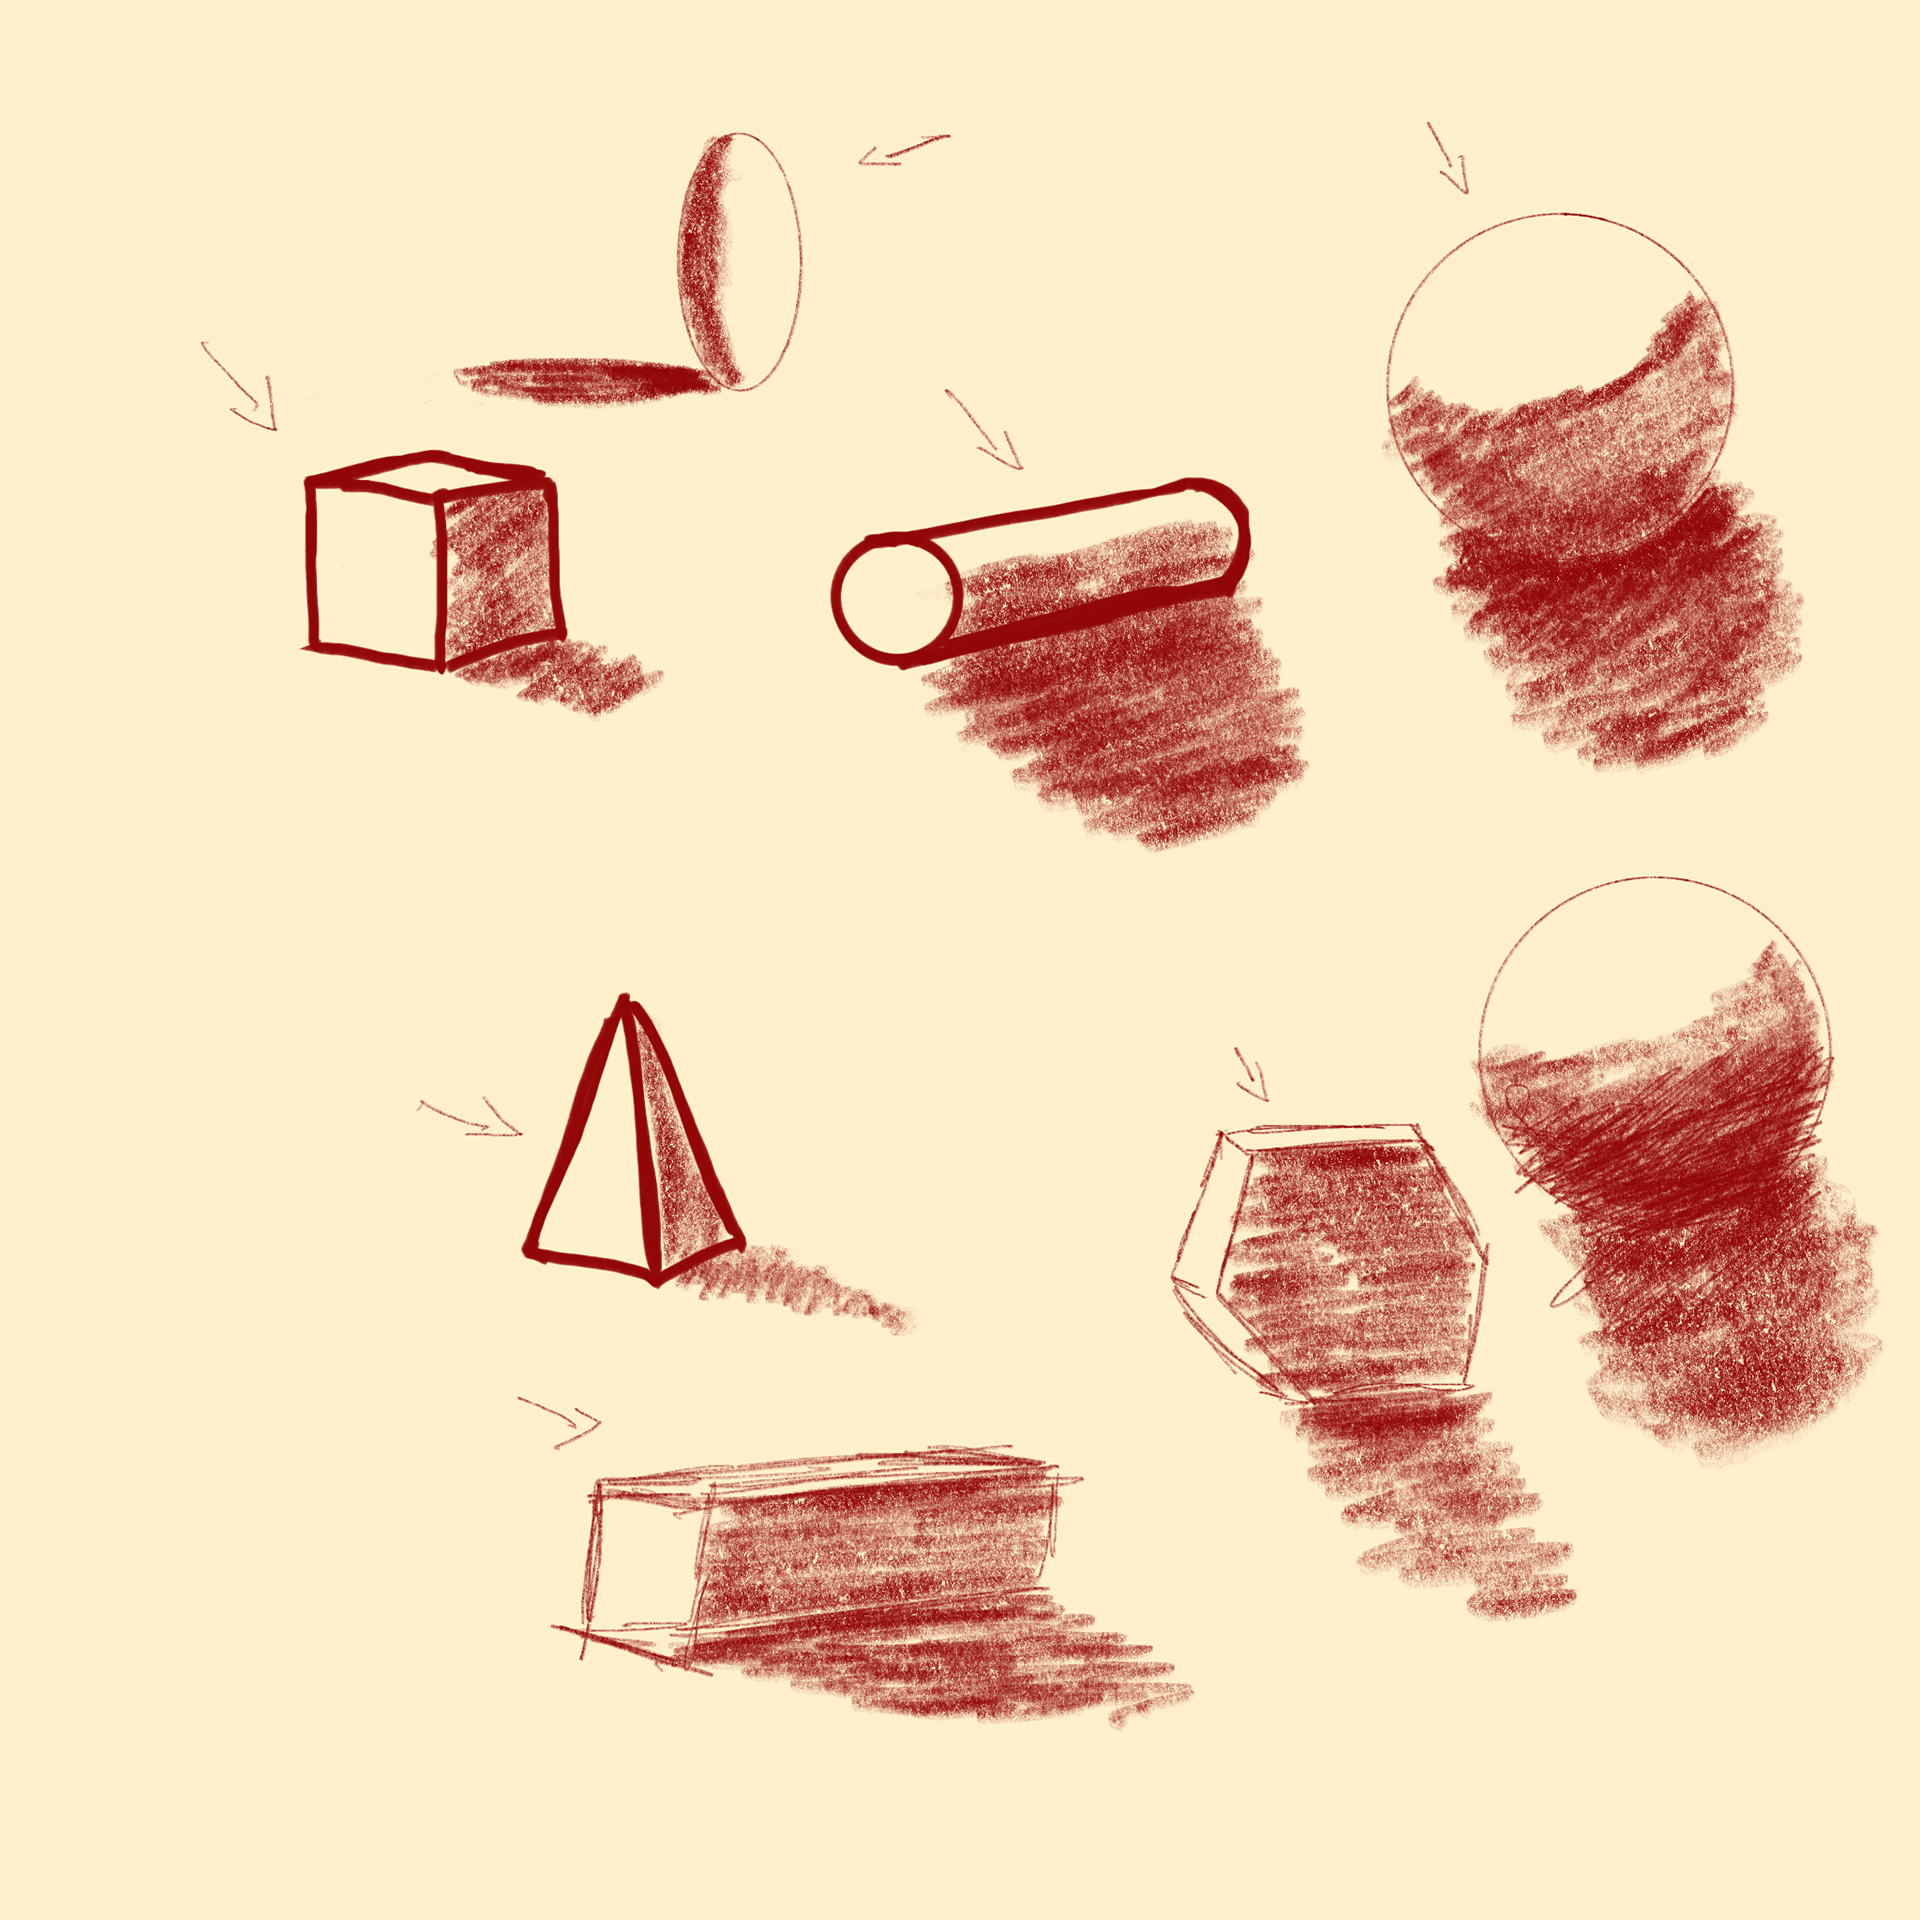
Our workshops in class were straightforward and focused on form and movement.
we started
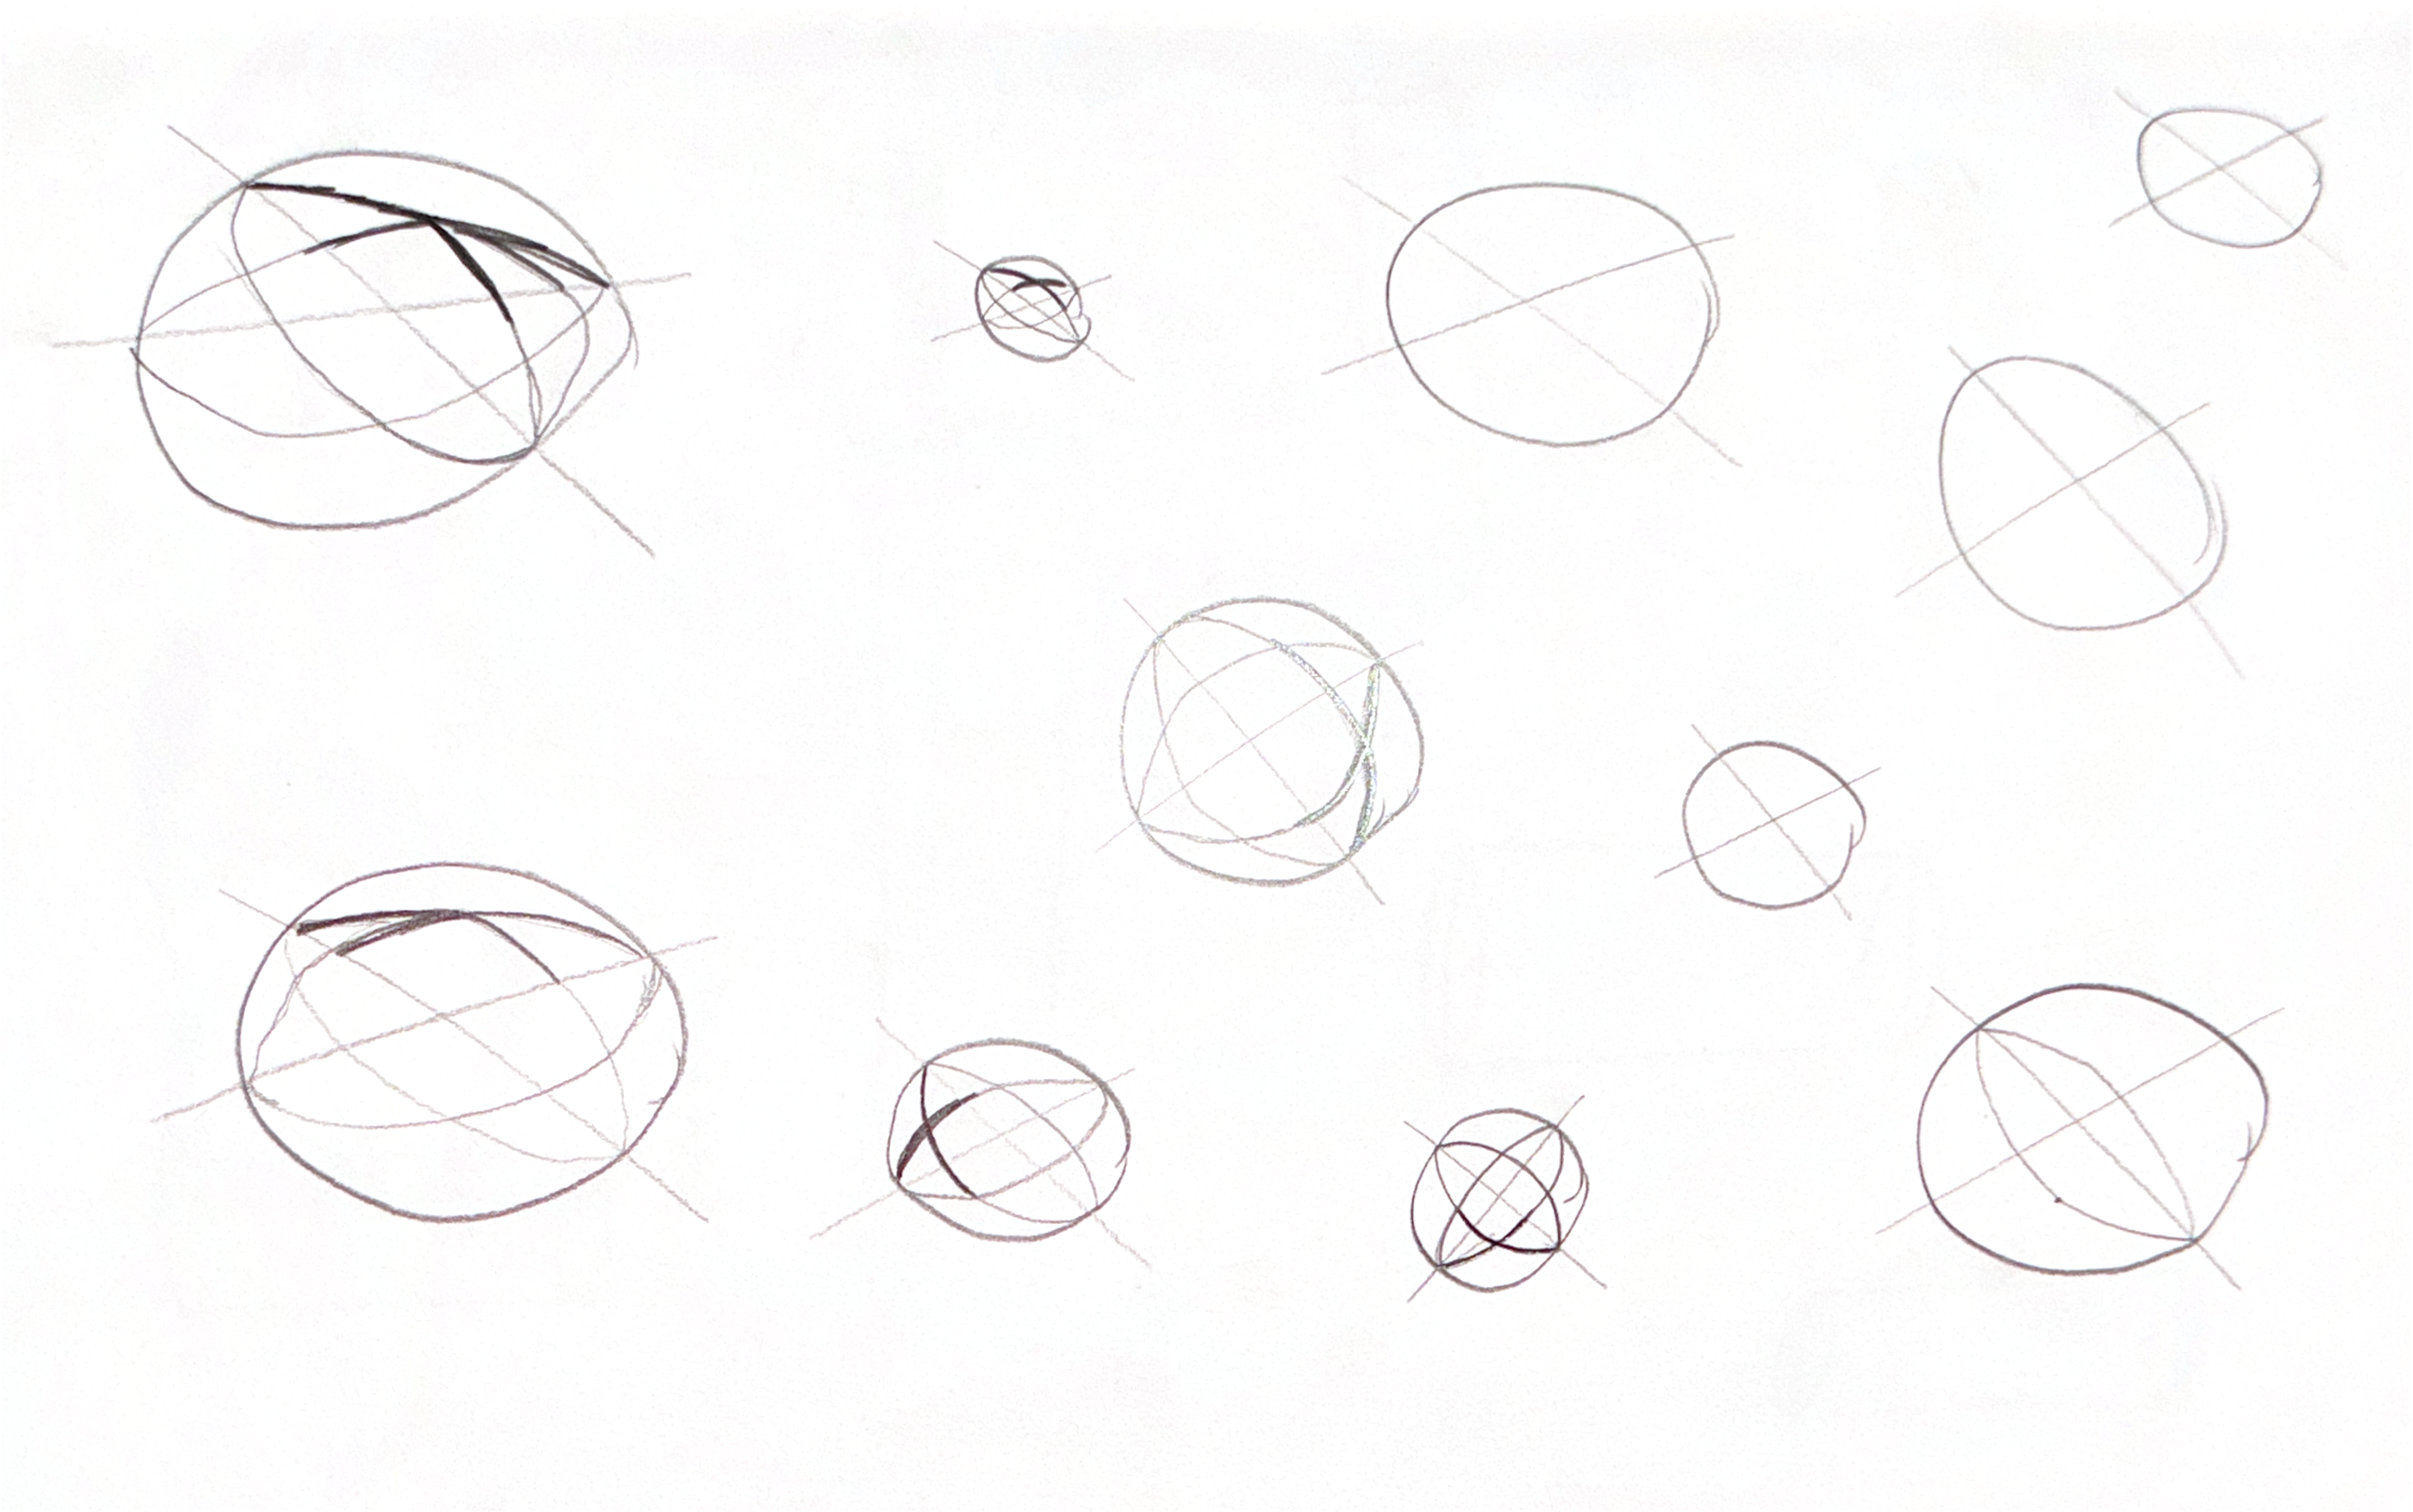
We drew various circles and then created a cross pattern across all of them. Next, we added an oval shape inside the circle. The intersections of the lines provided a good foundation for a potential facial drawing. I found this workshop interesting, but I probably wouldn't use the technique again. (Sorry!)
We then proceeded to do the same thing, except with rectangles to make cylinders.
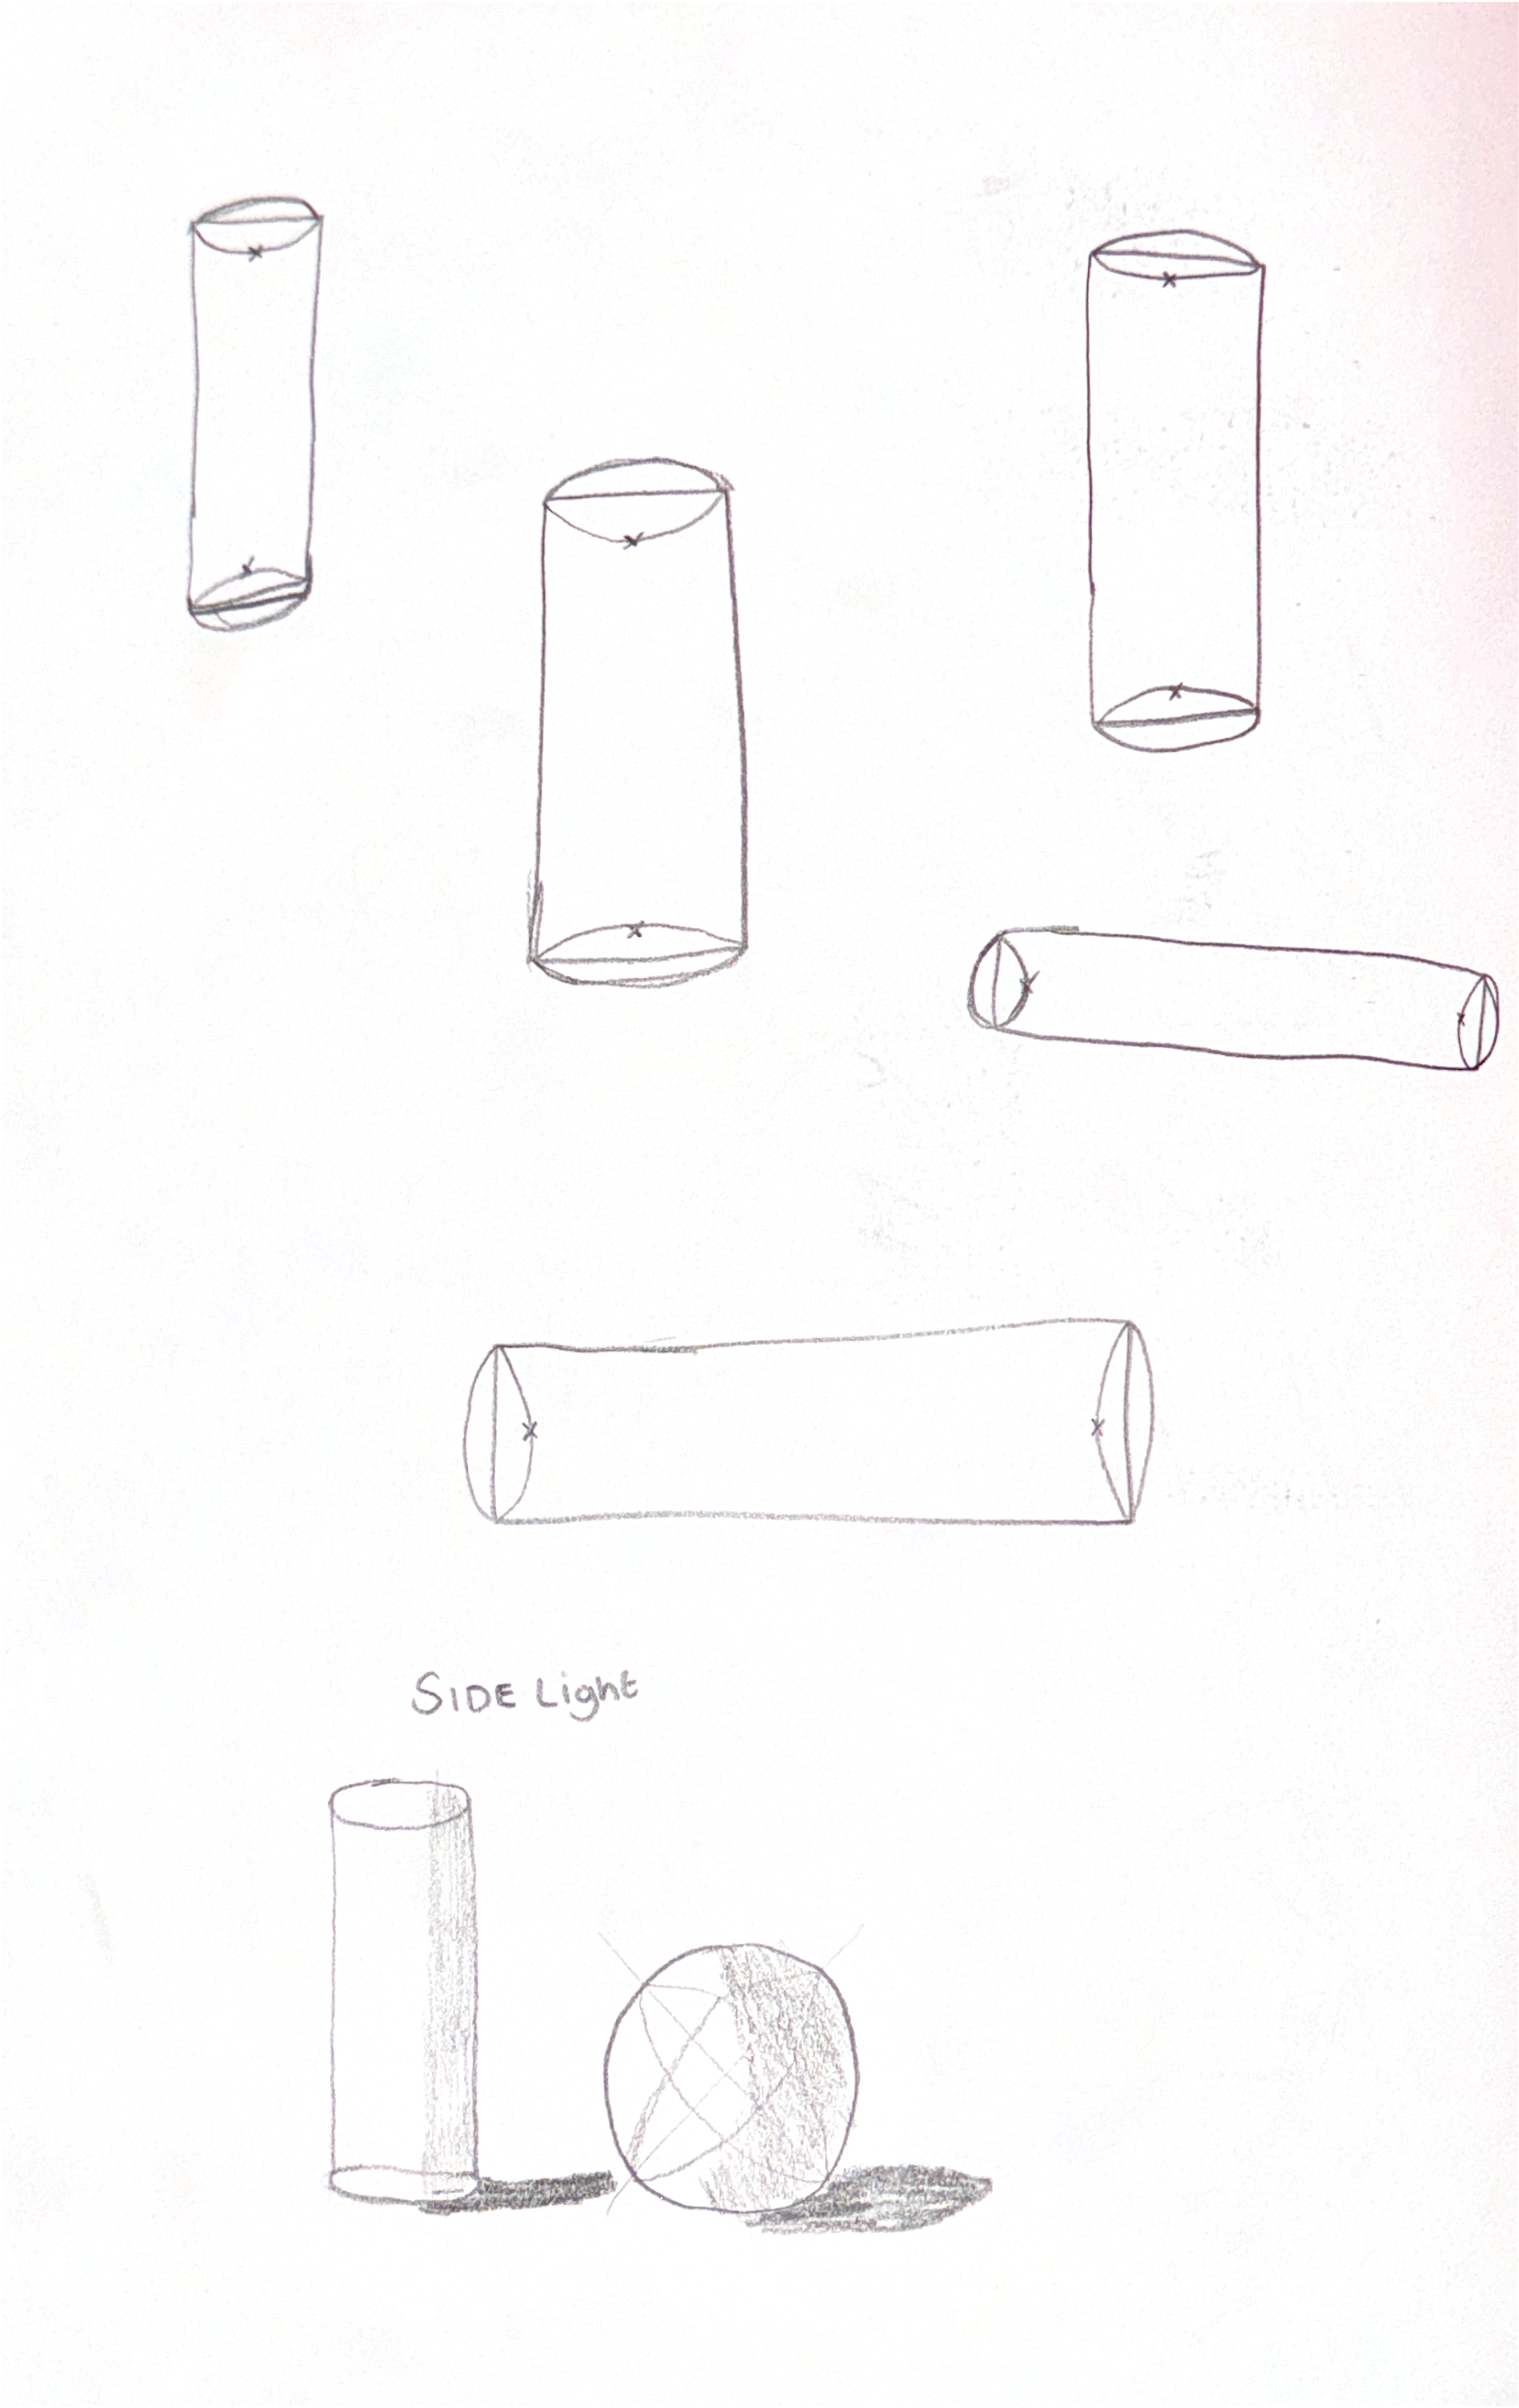
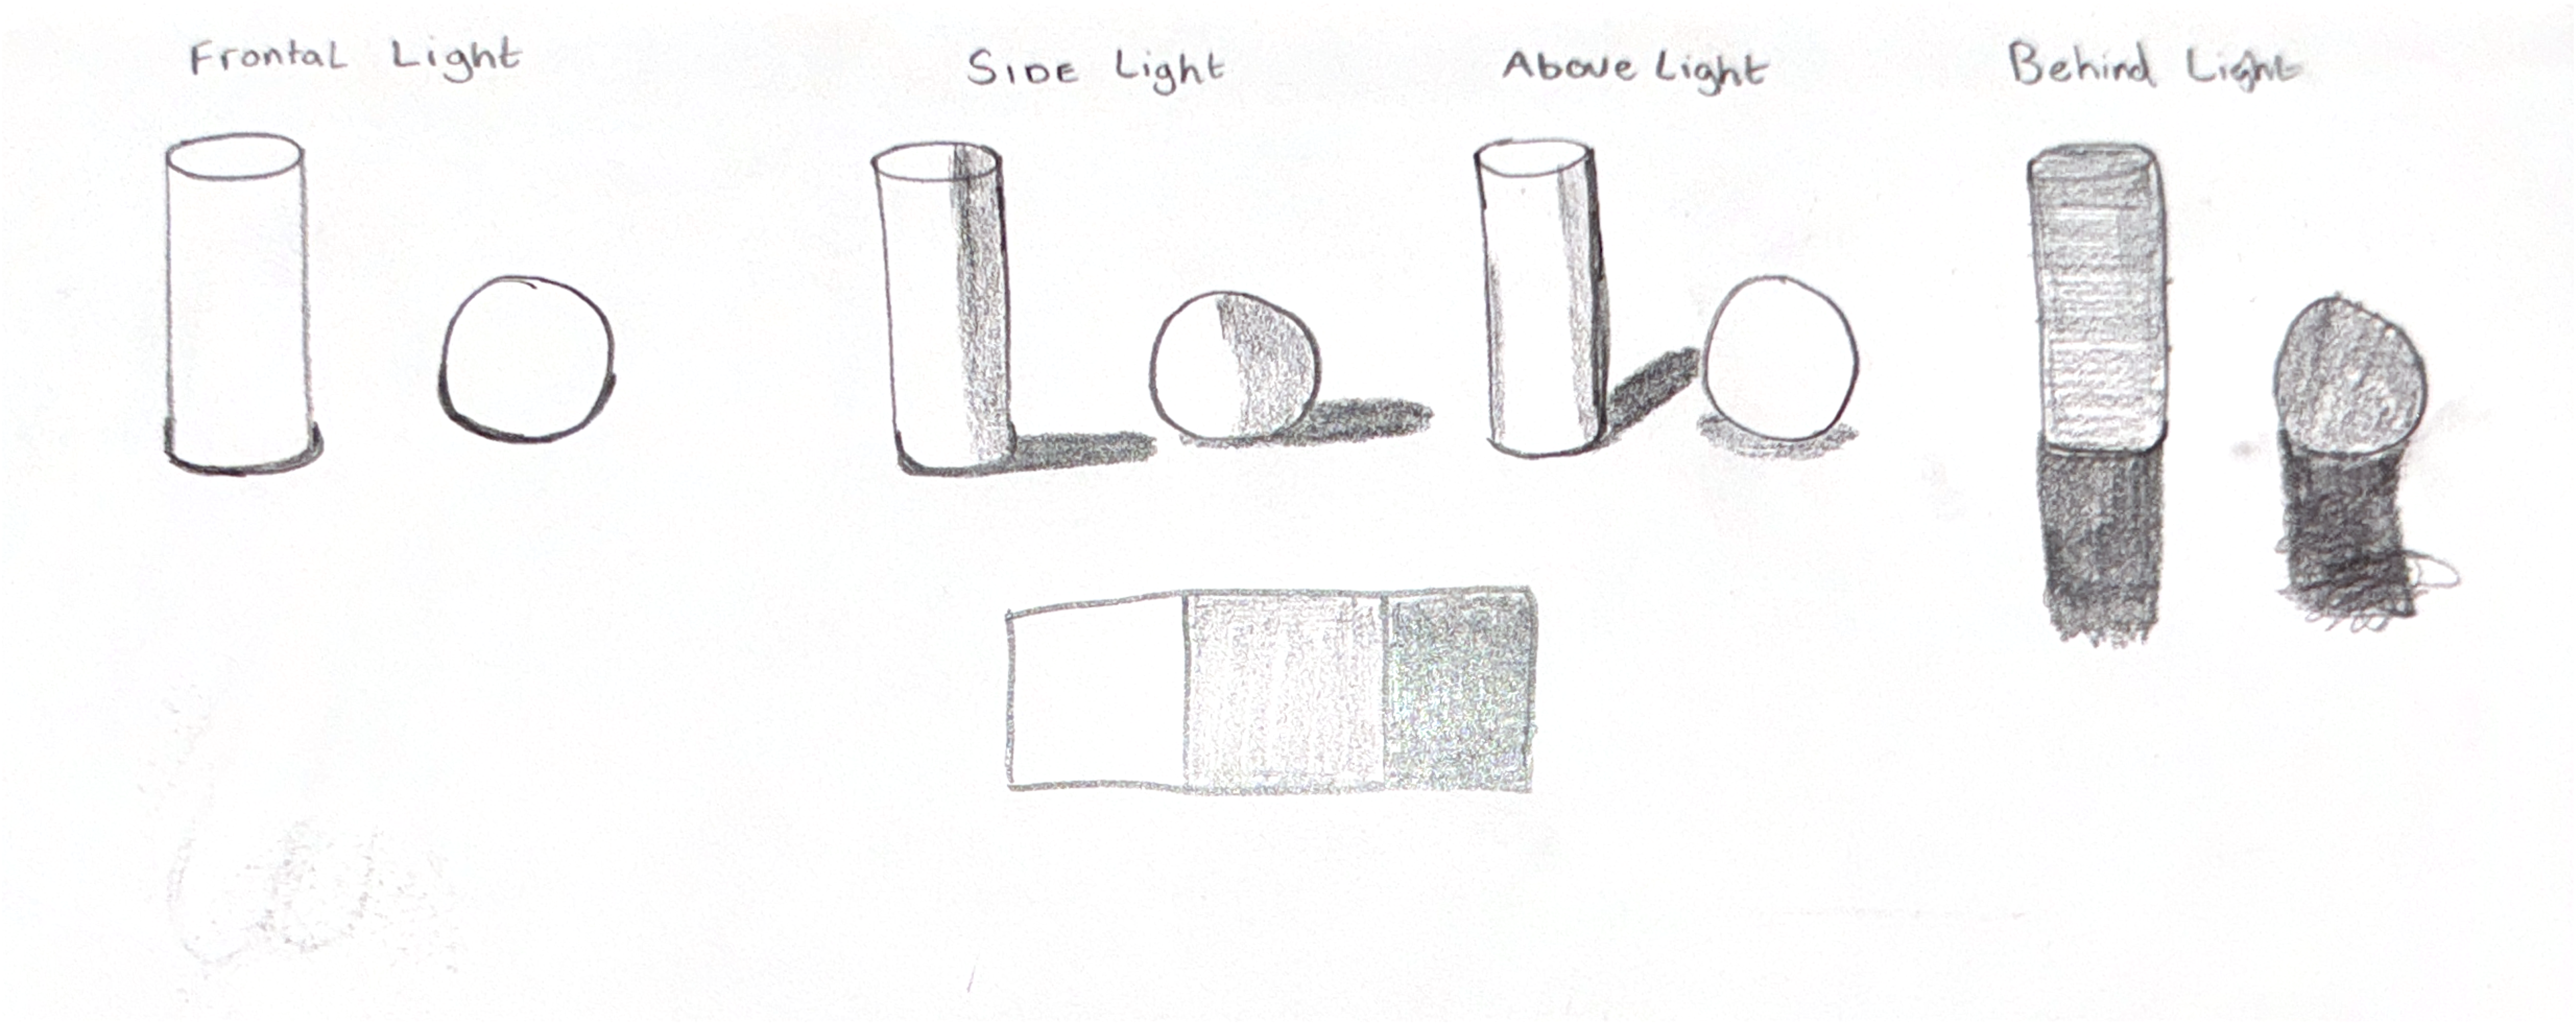
Adding light at different angles
After this workshop, we focused more on movement and were assigned a line of action task.

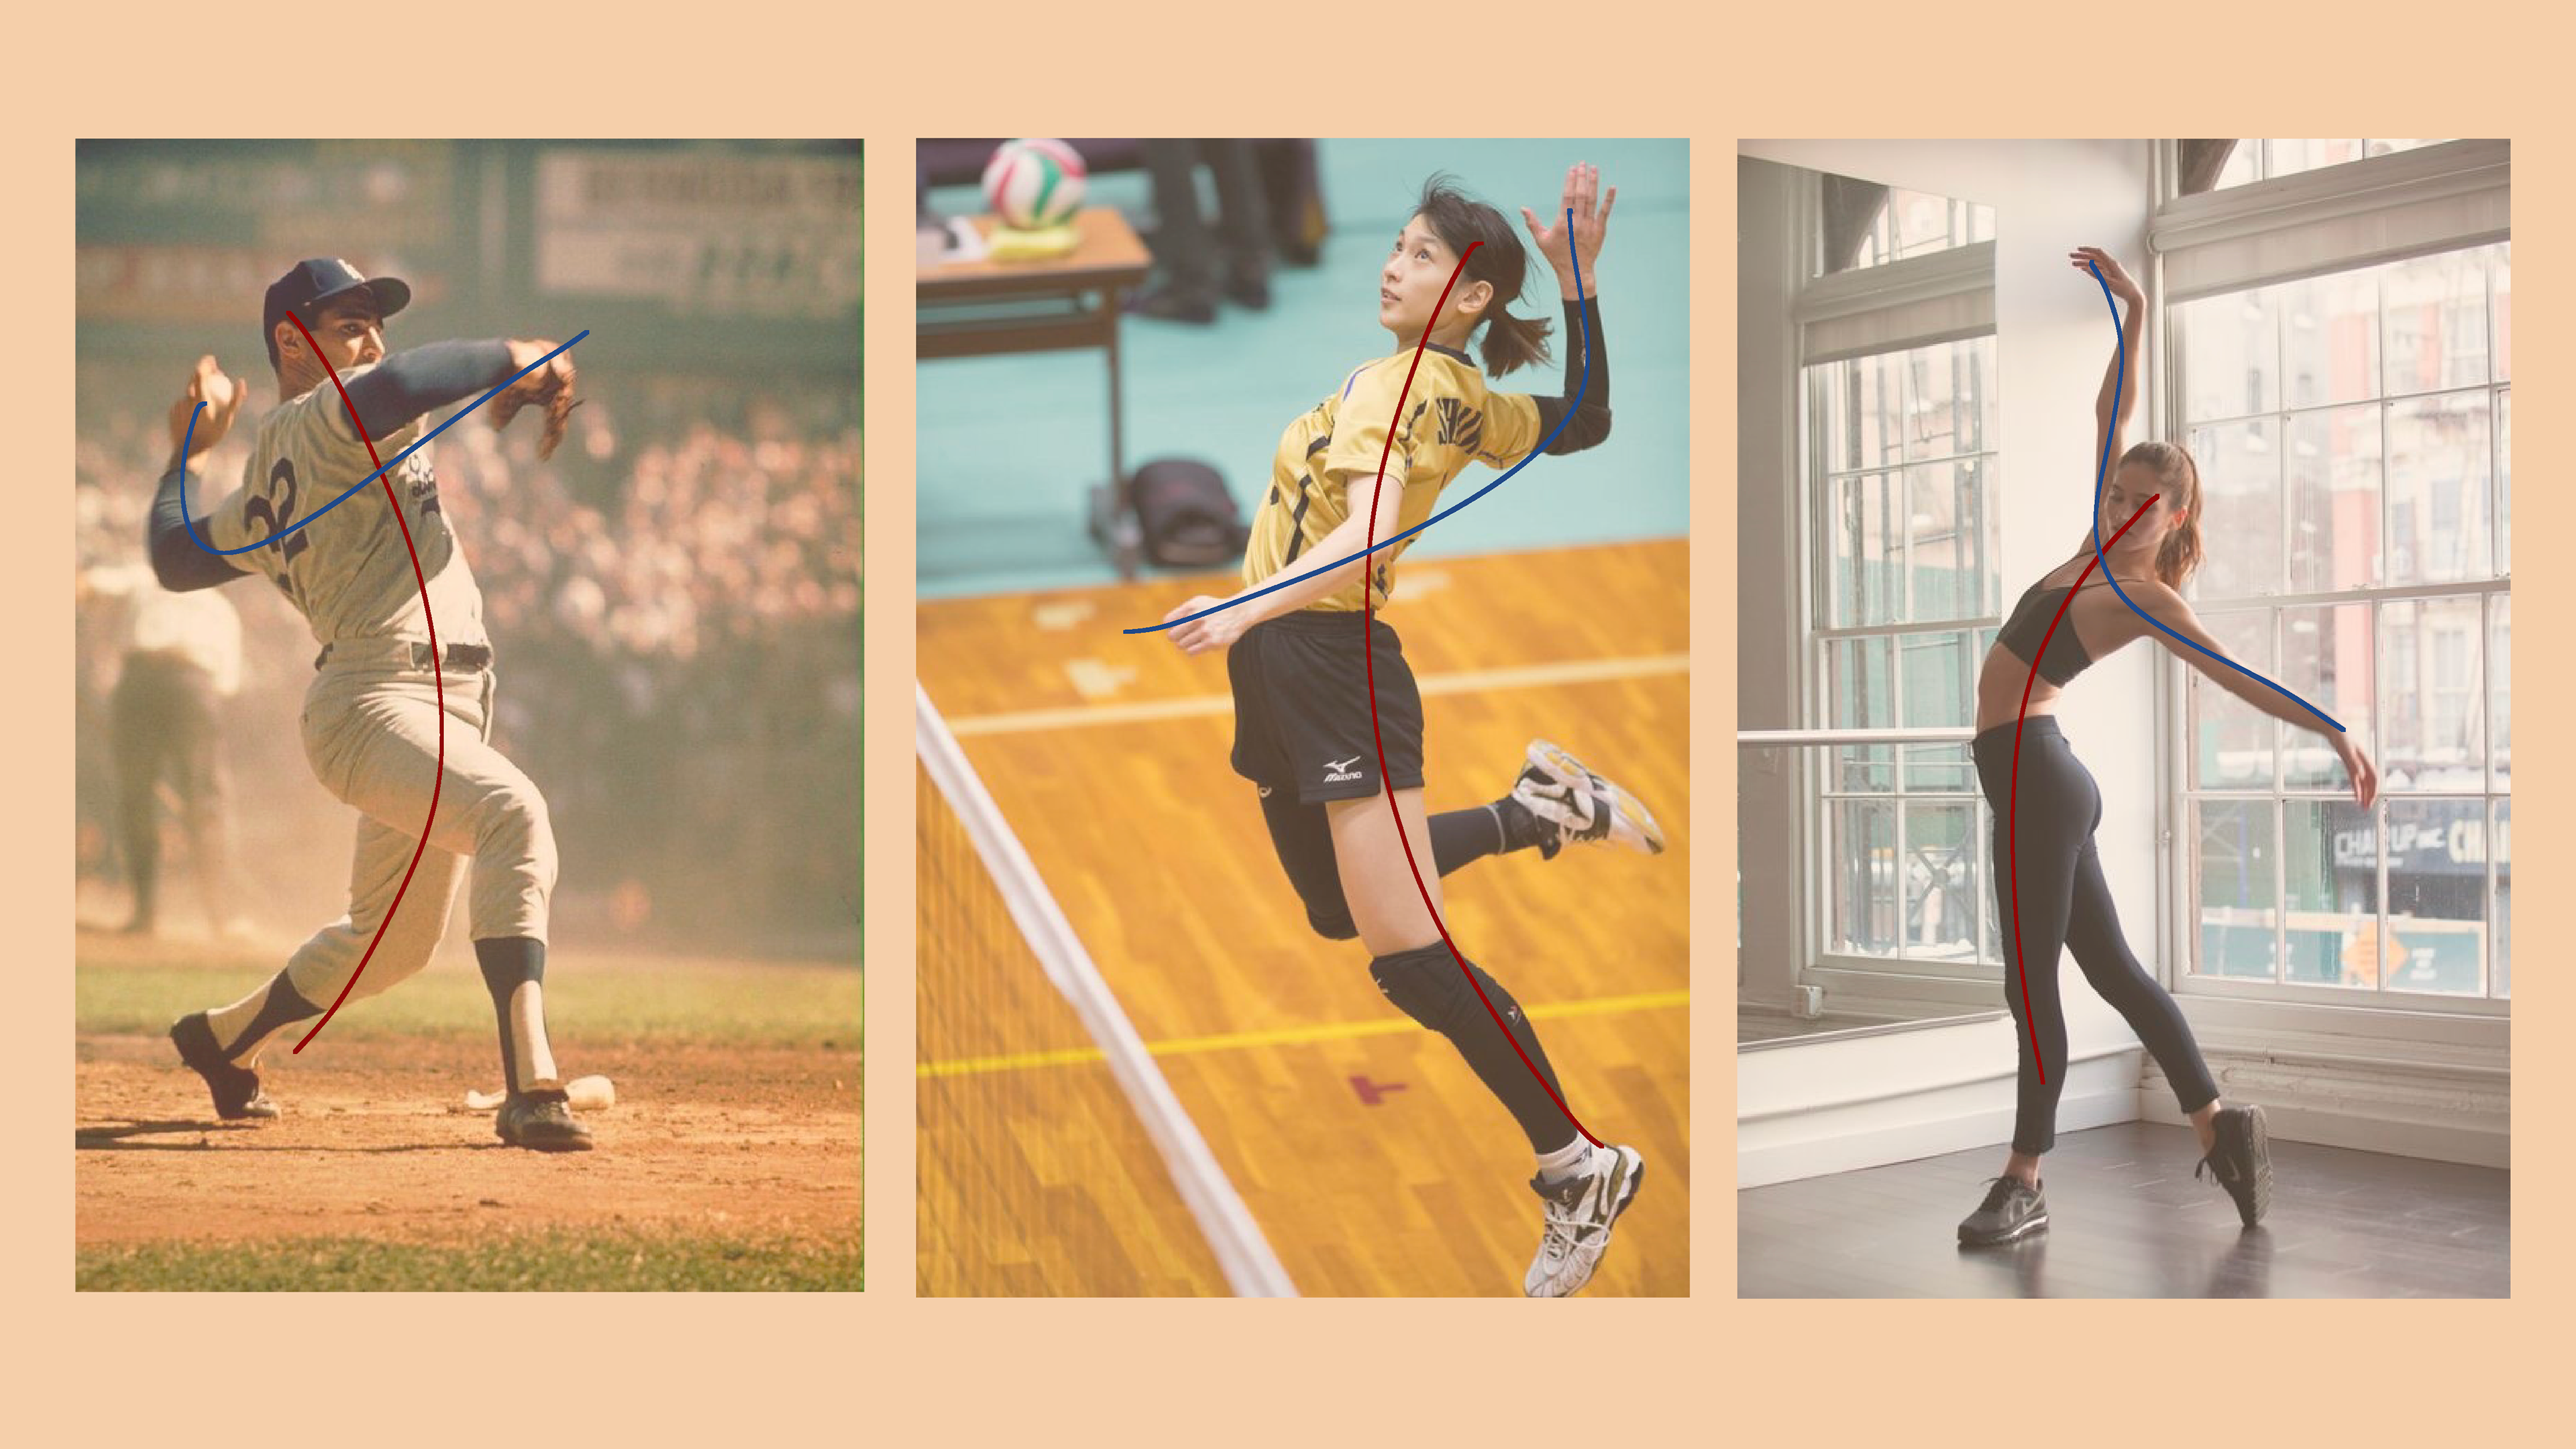
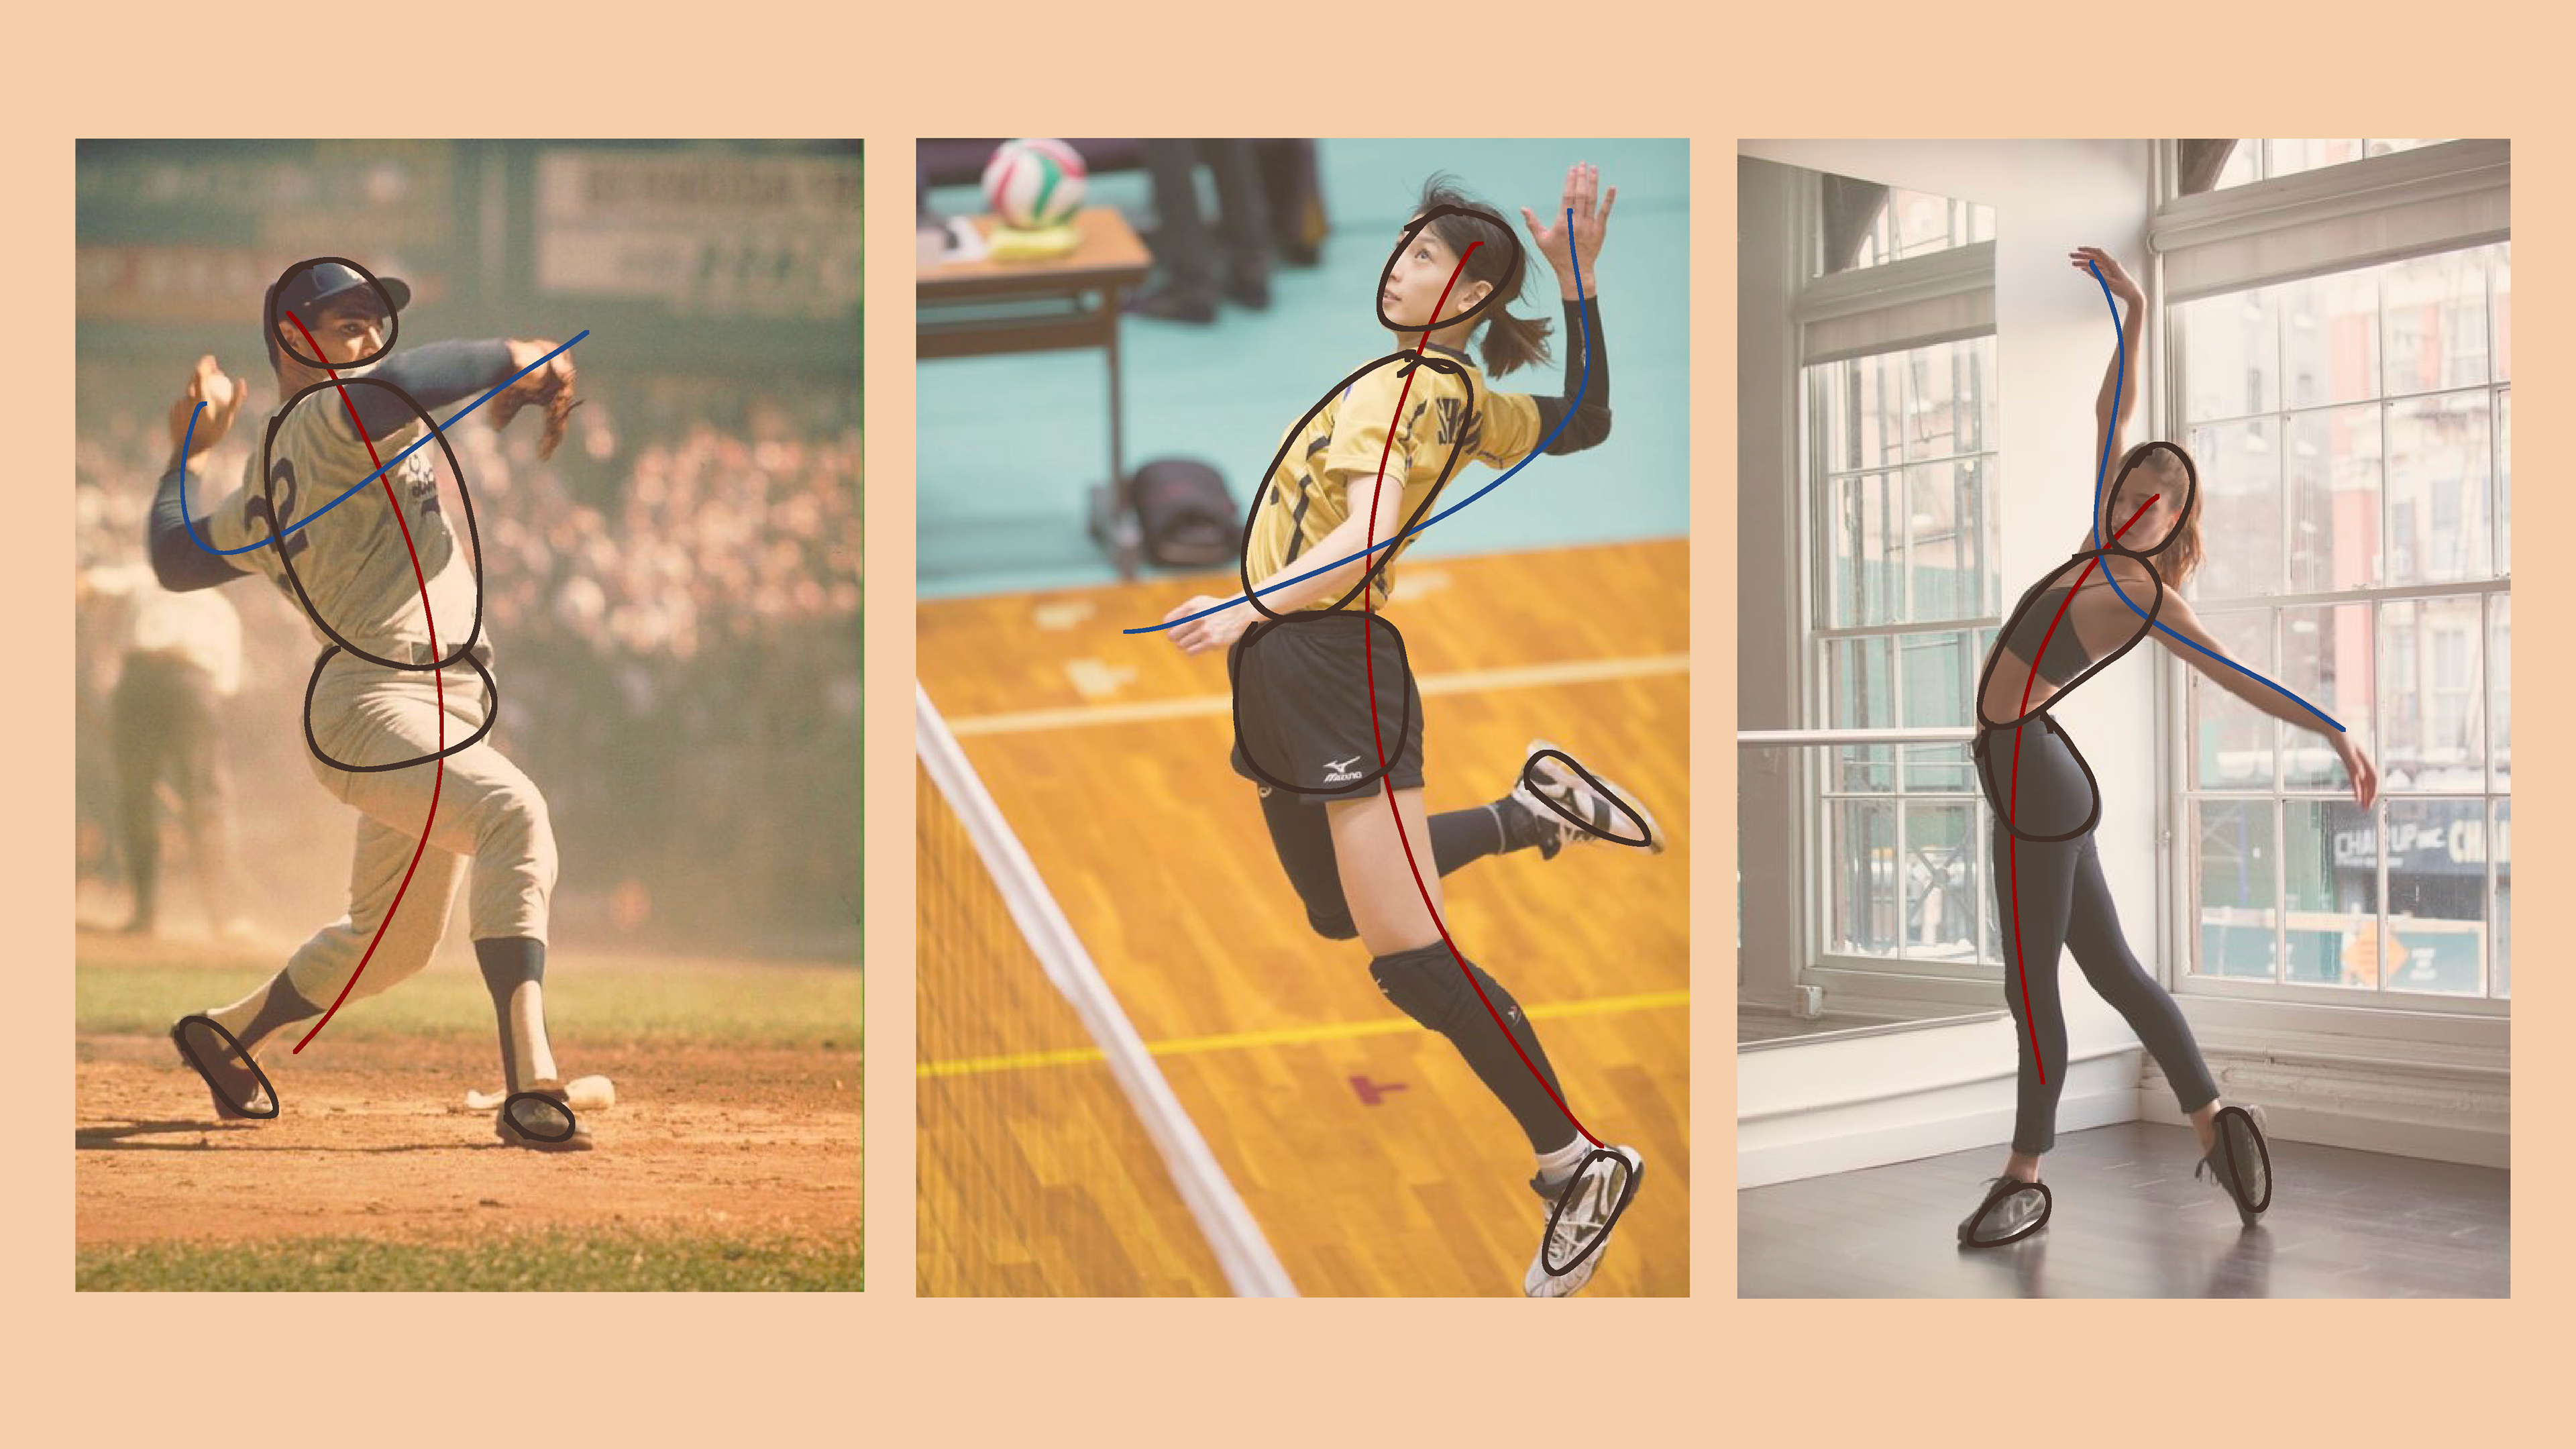
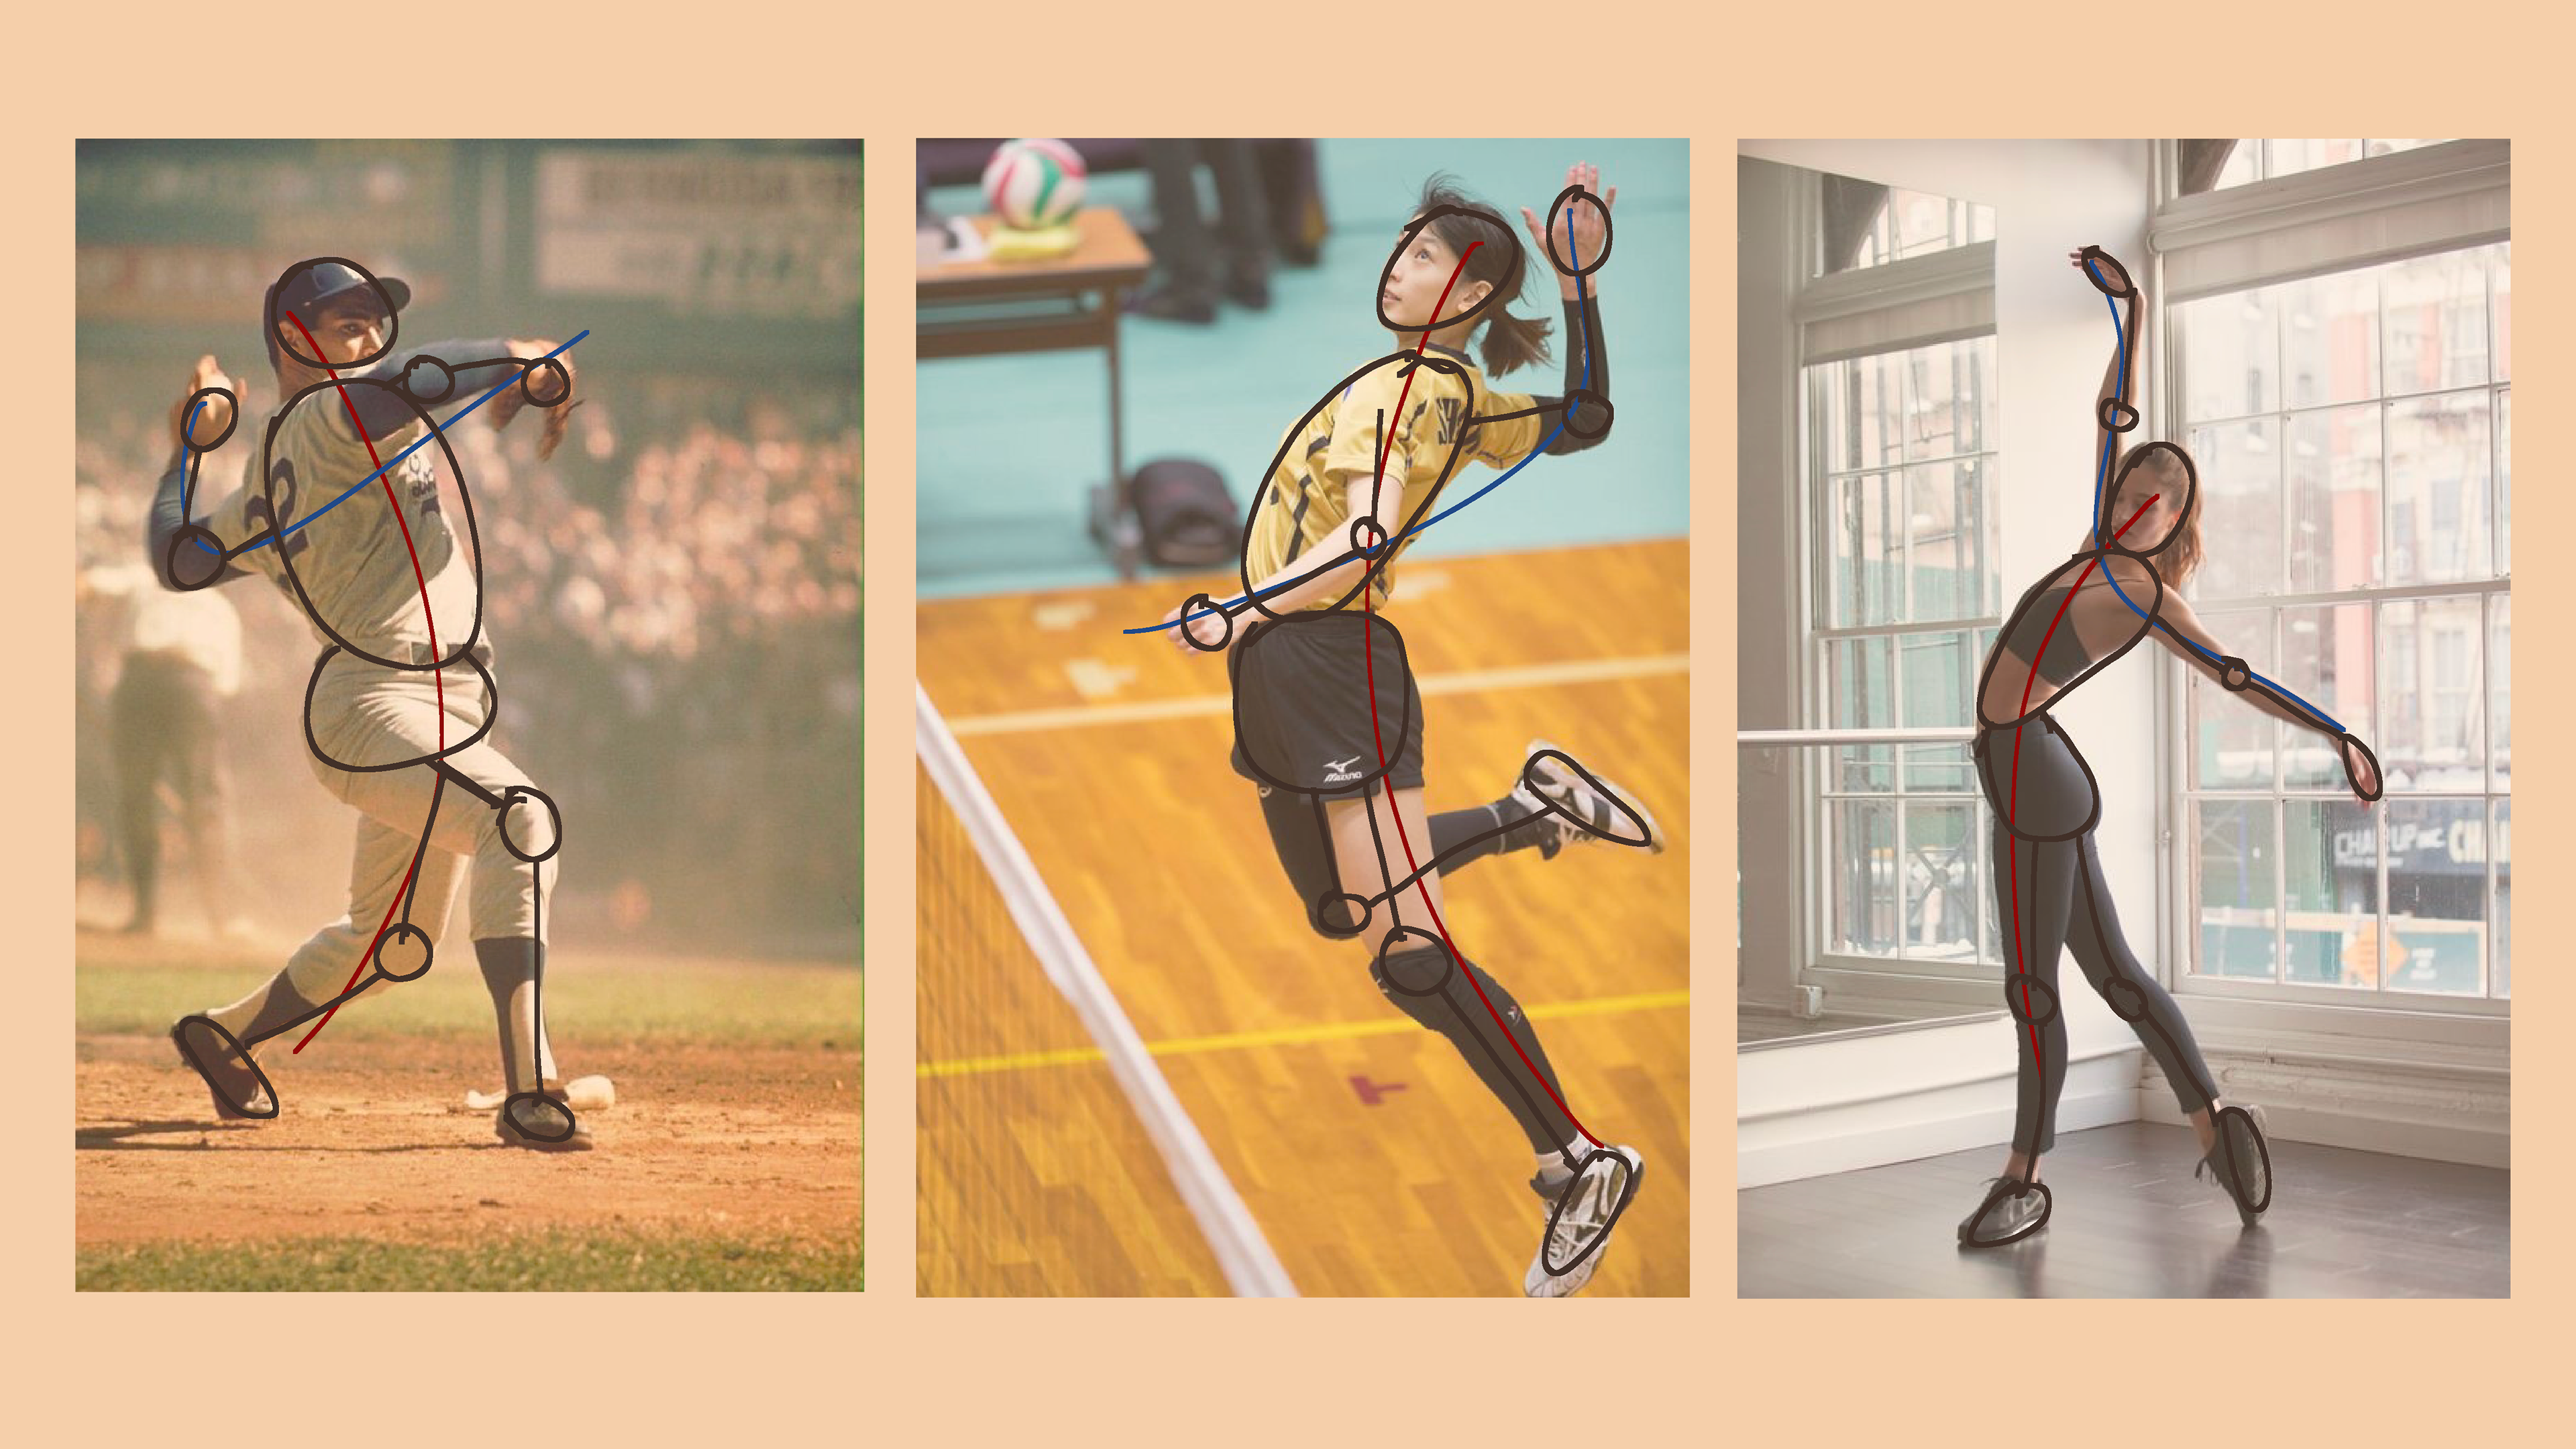
Drawing the line of action (red) and the secondary line of action (blue), then using these to create the form and movement seen in the last two images.
To conclude the class, we watched a short video and were encouraged to illustrate the movement shown on screen.

SELF-DIRECTED
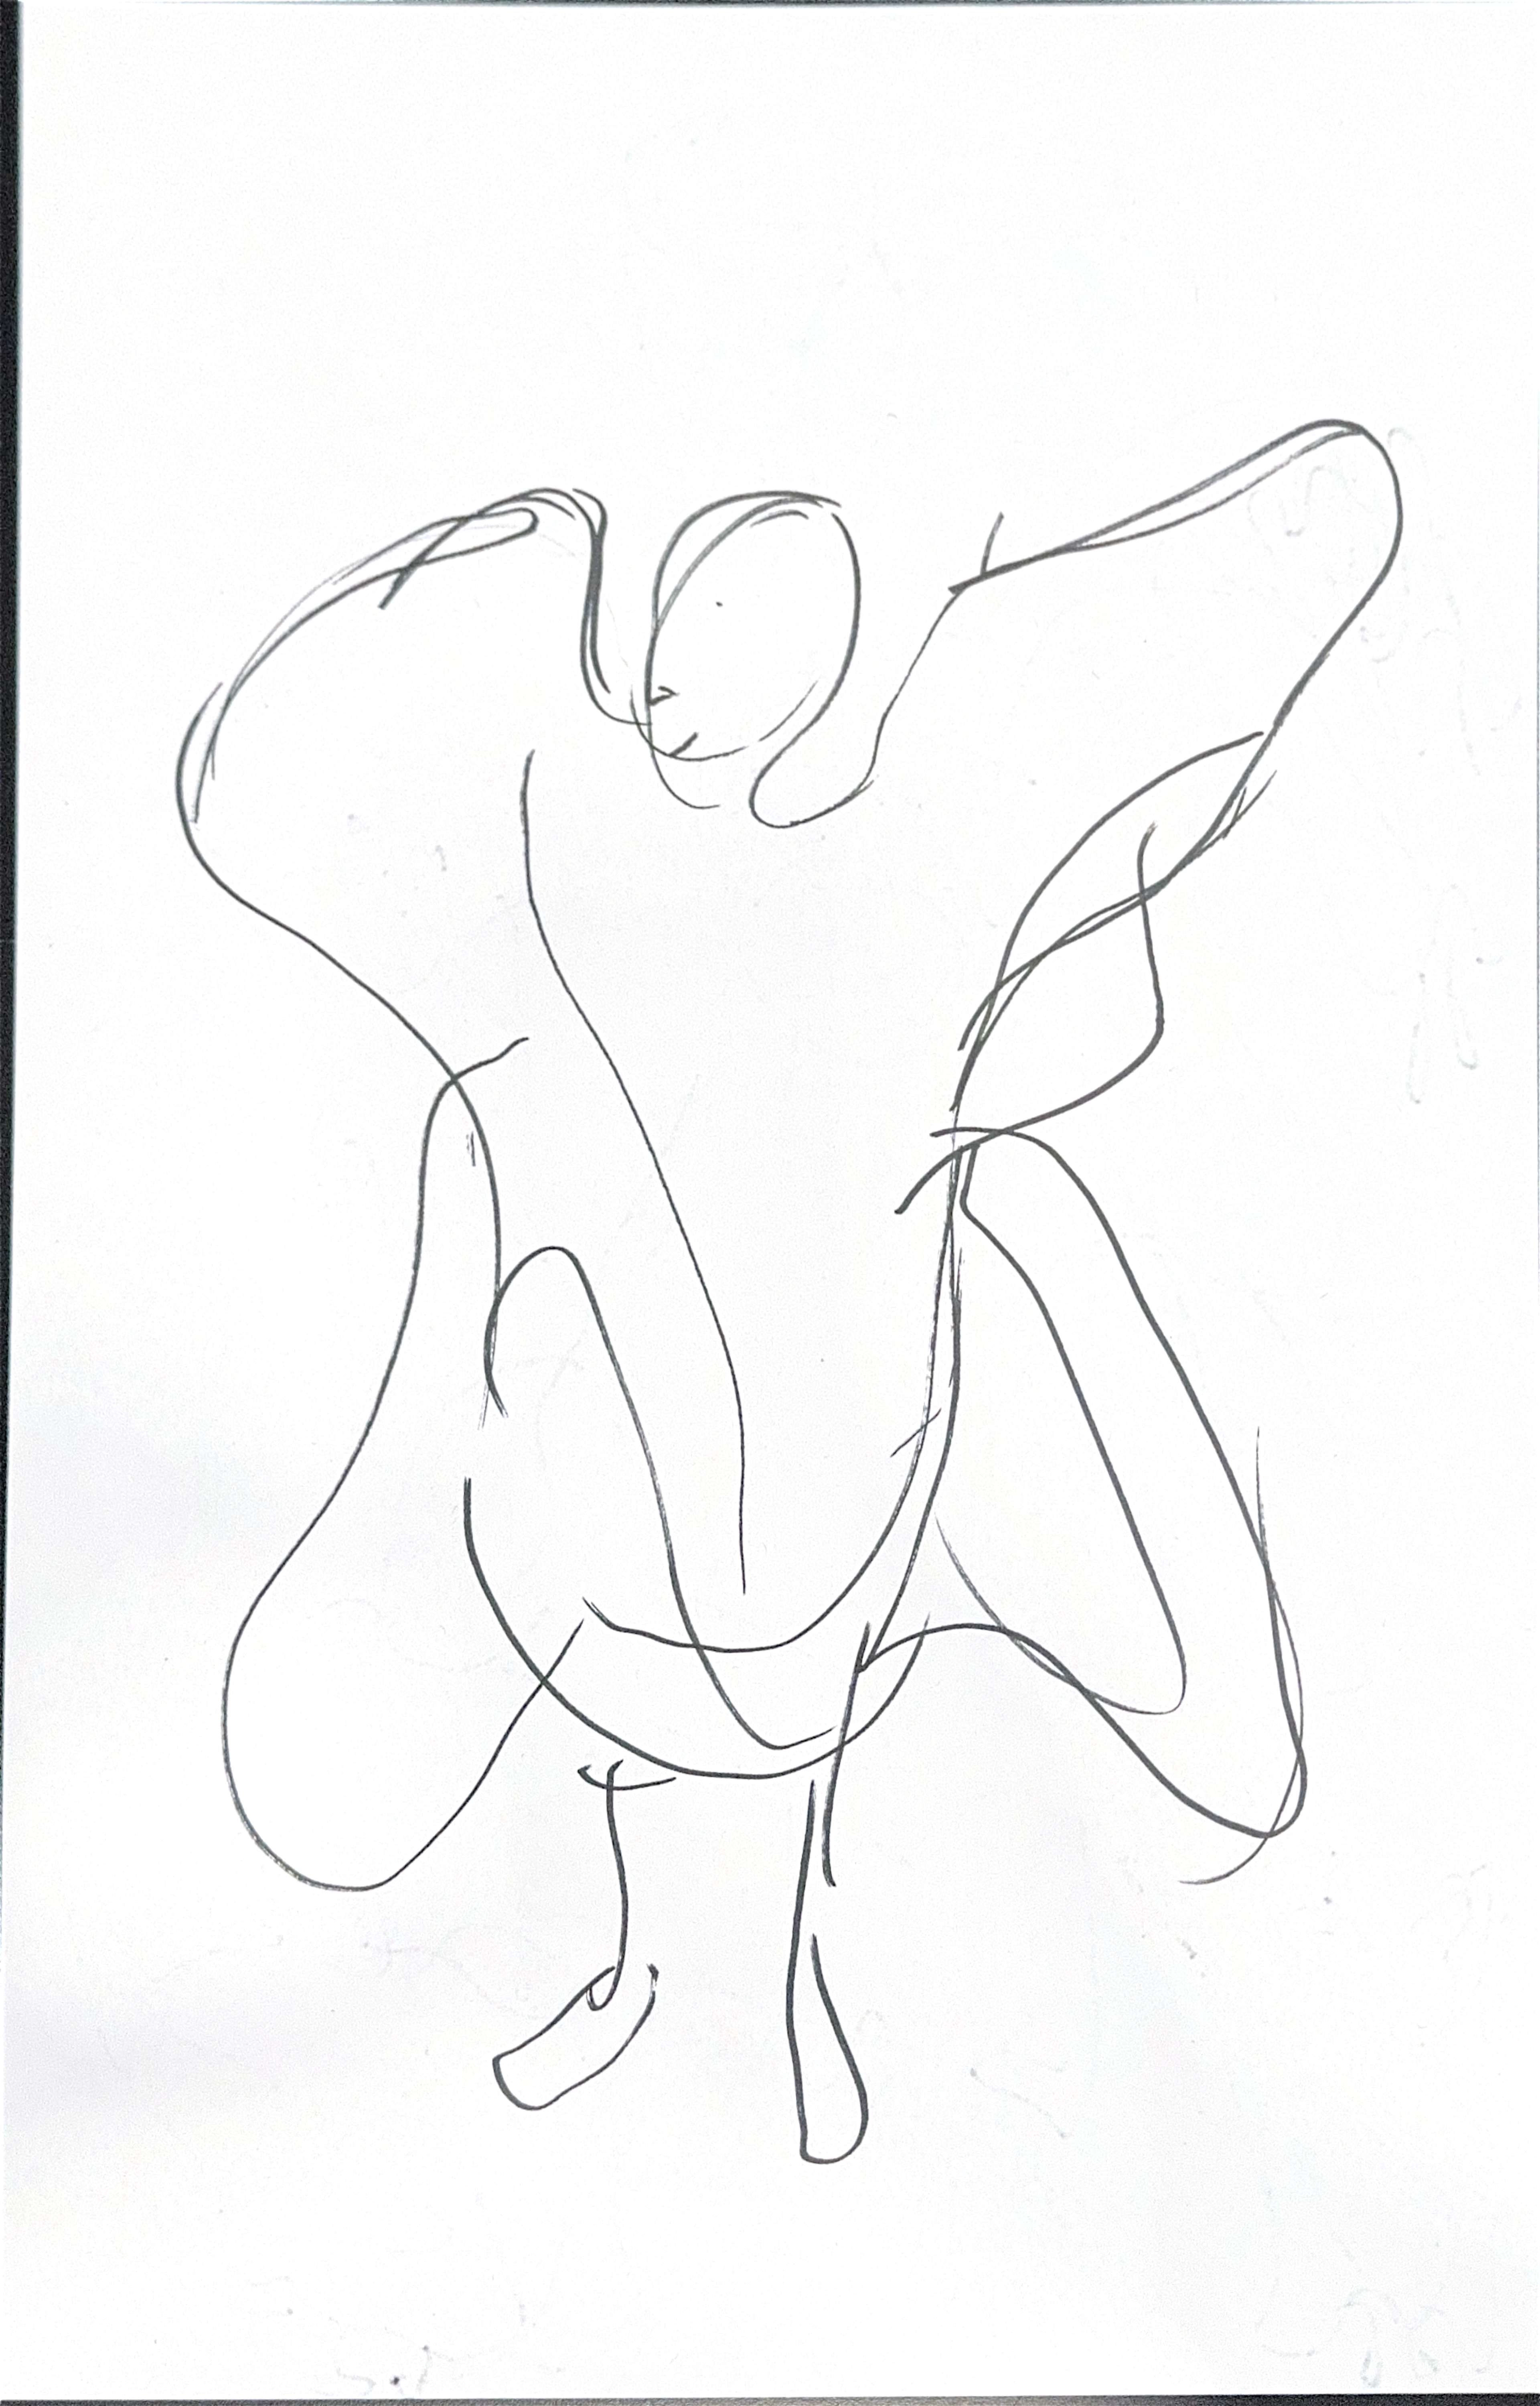
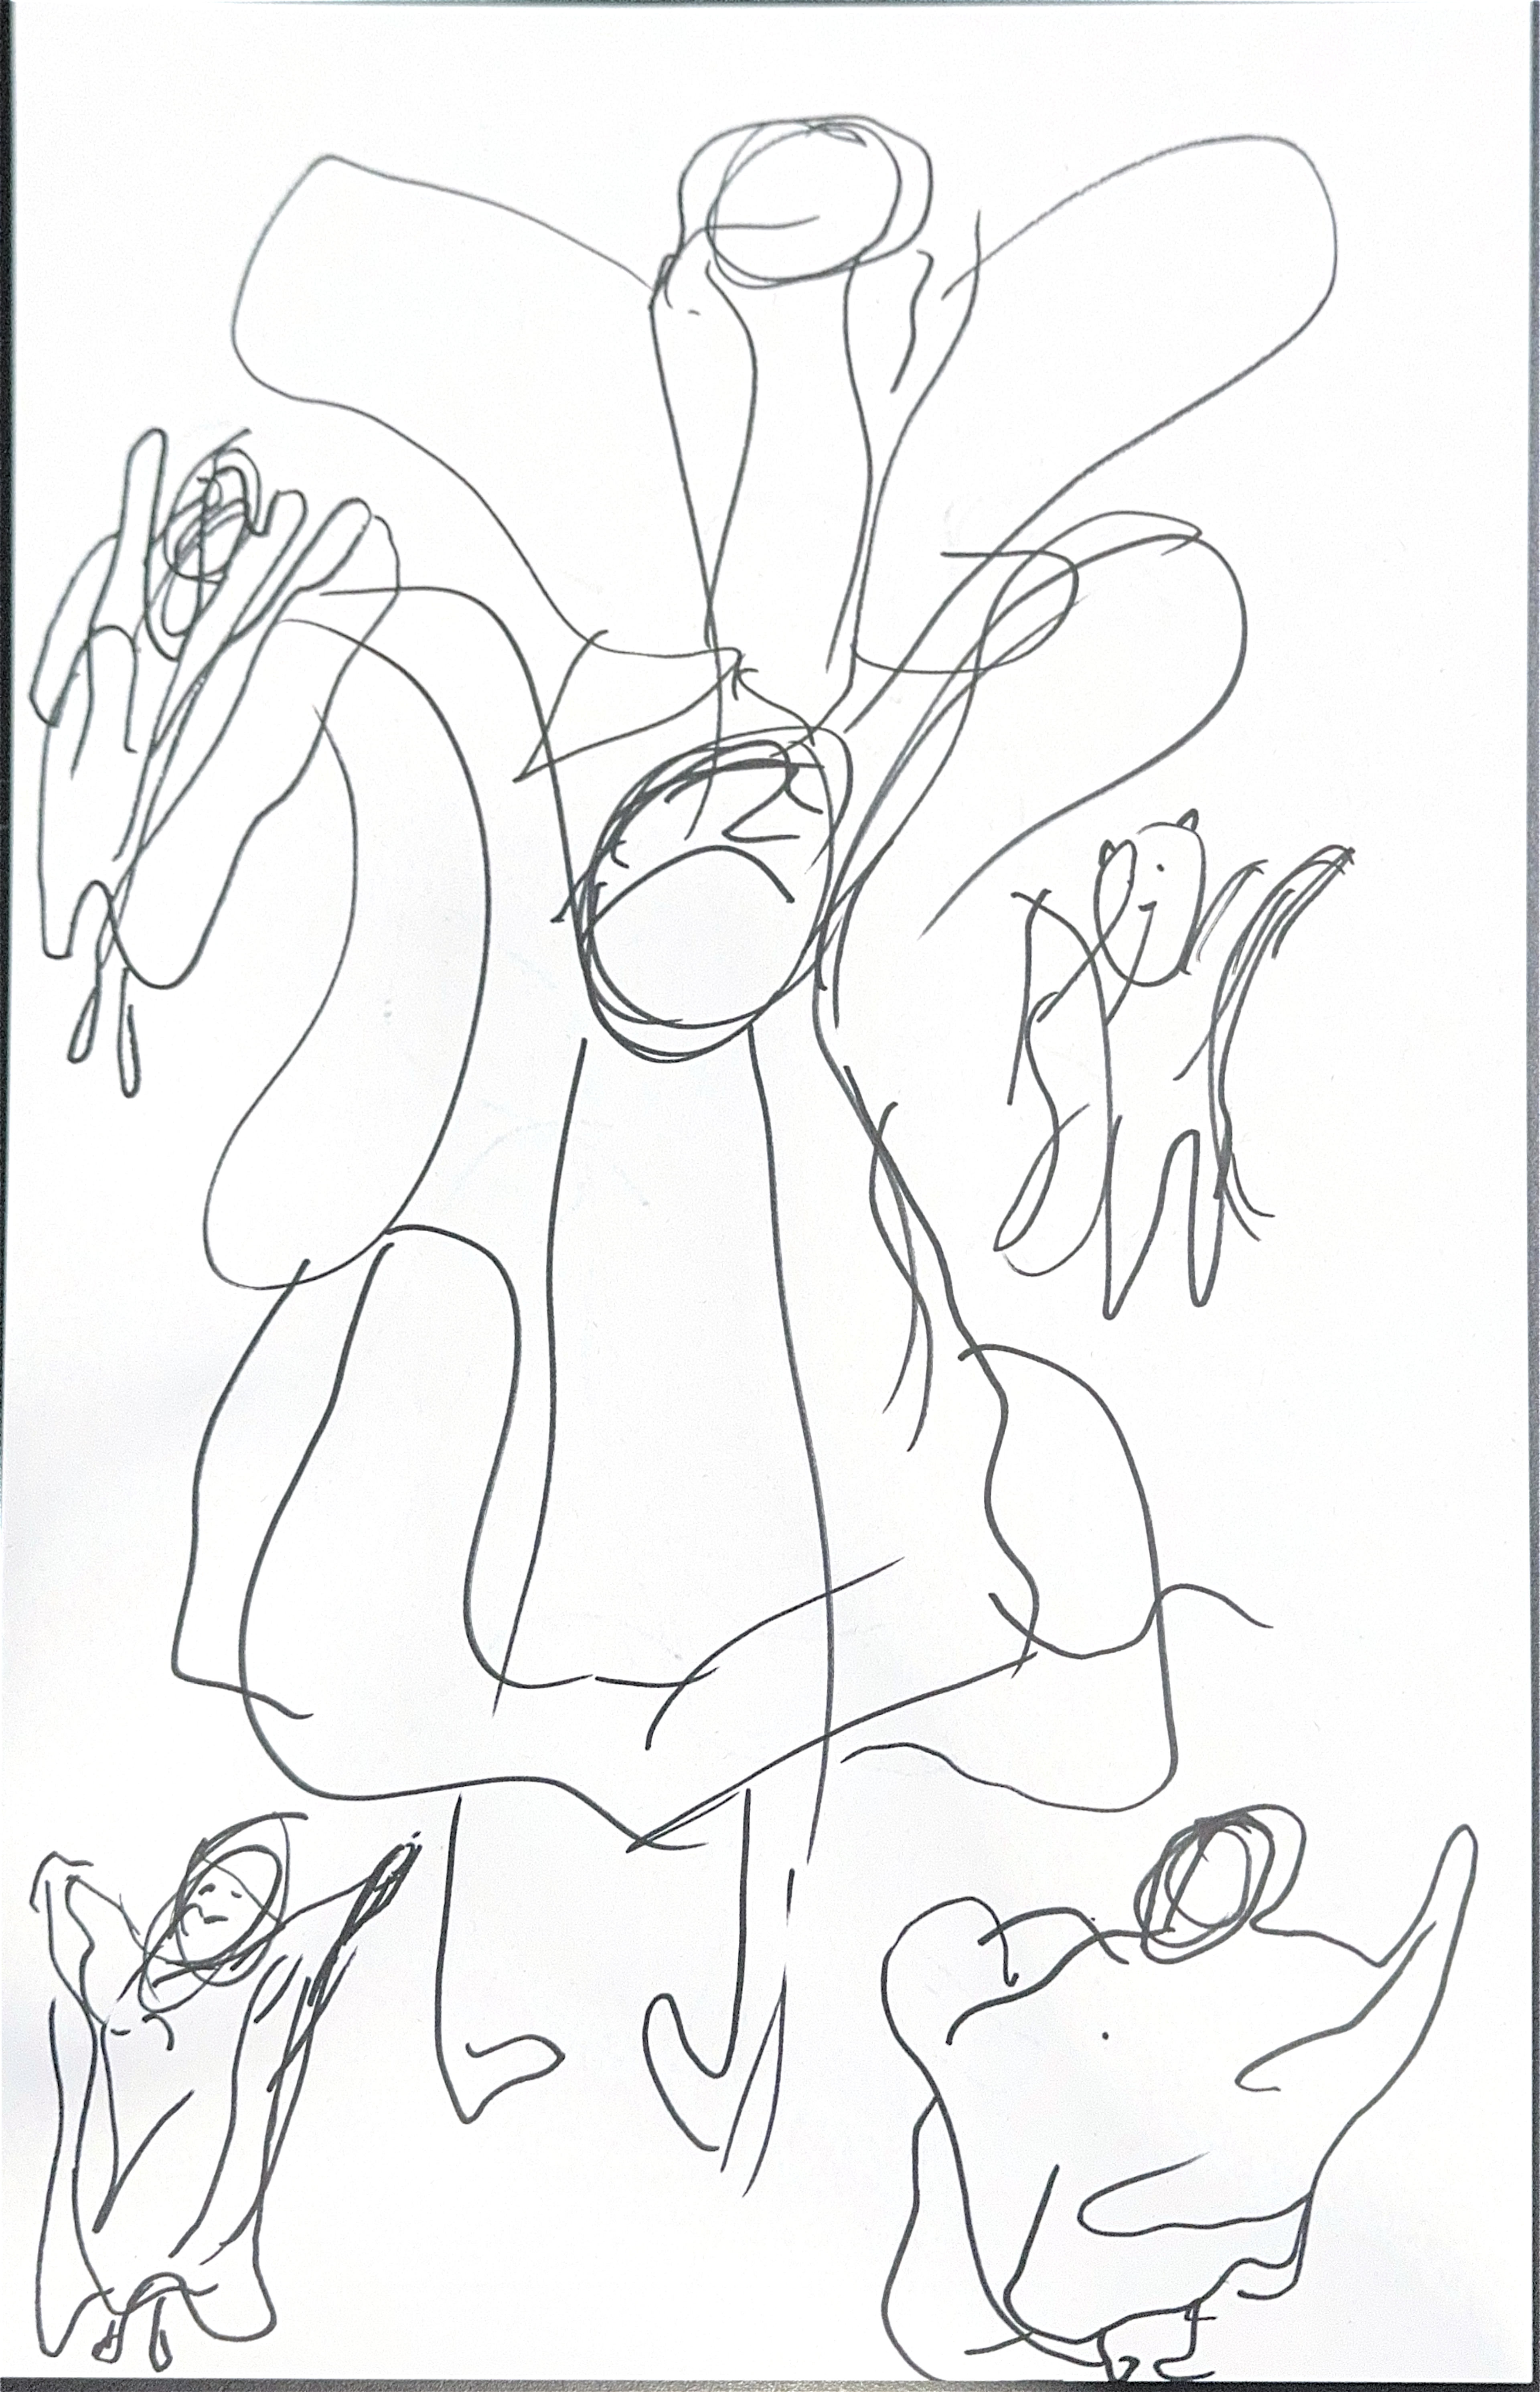
Take one of the character figures you created today and give them the ‘camera’ treatment.


INT- ROOM 903 14 - 11 - 24
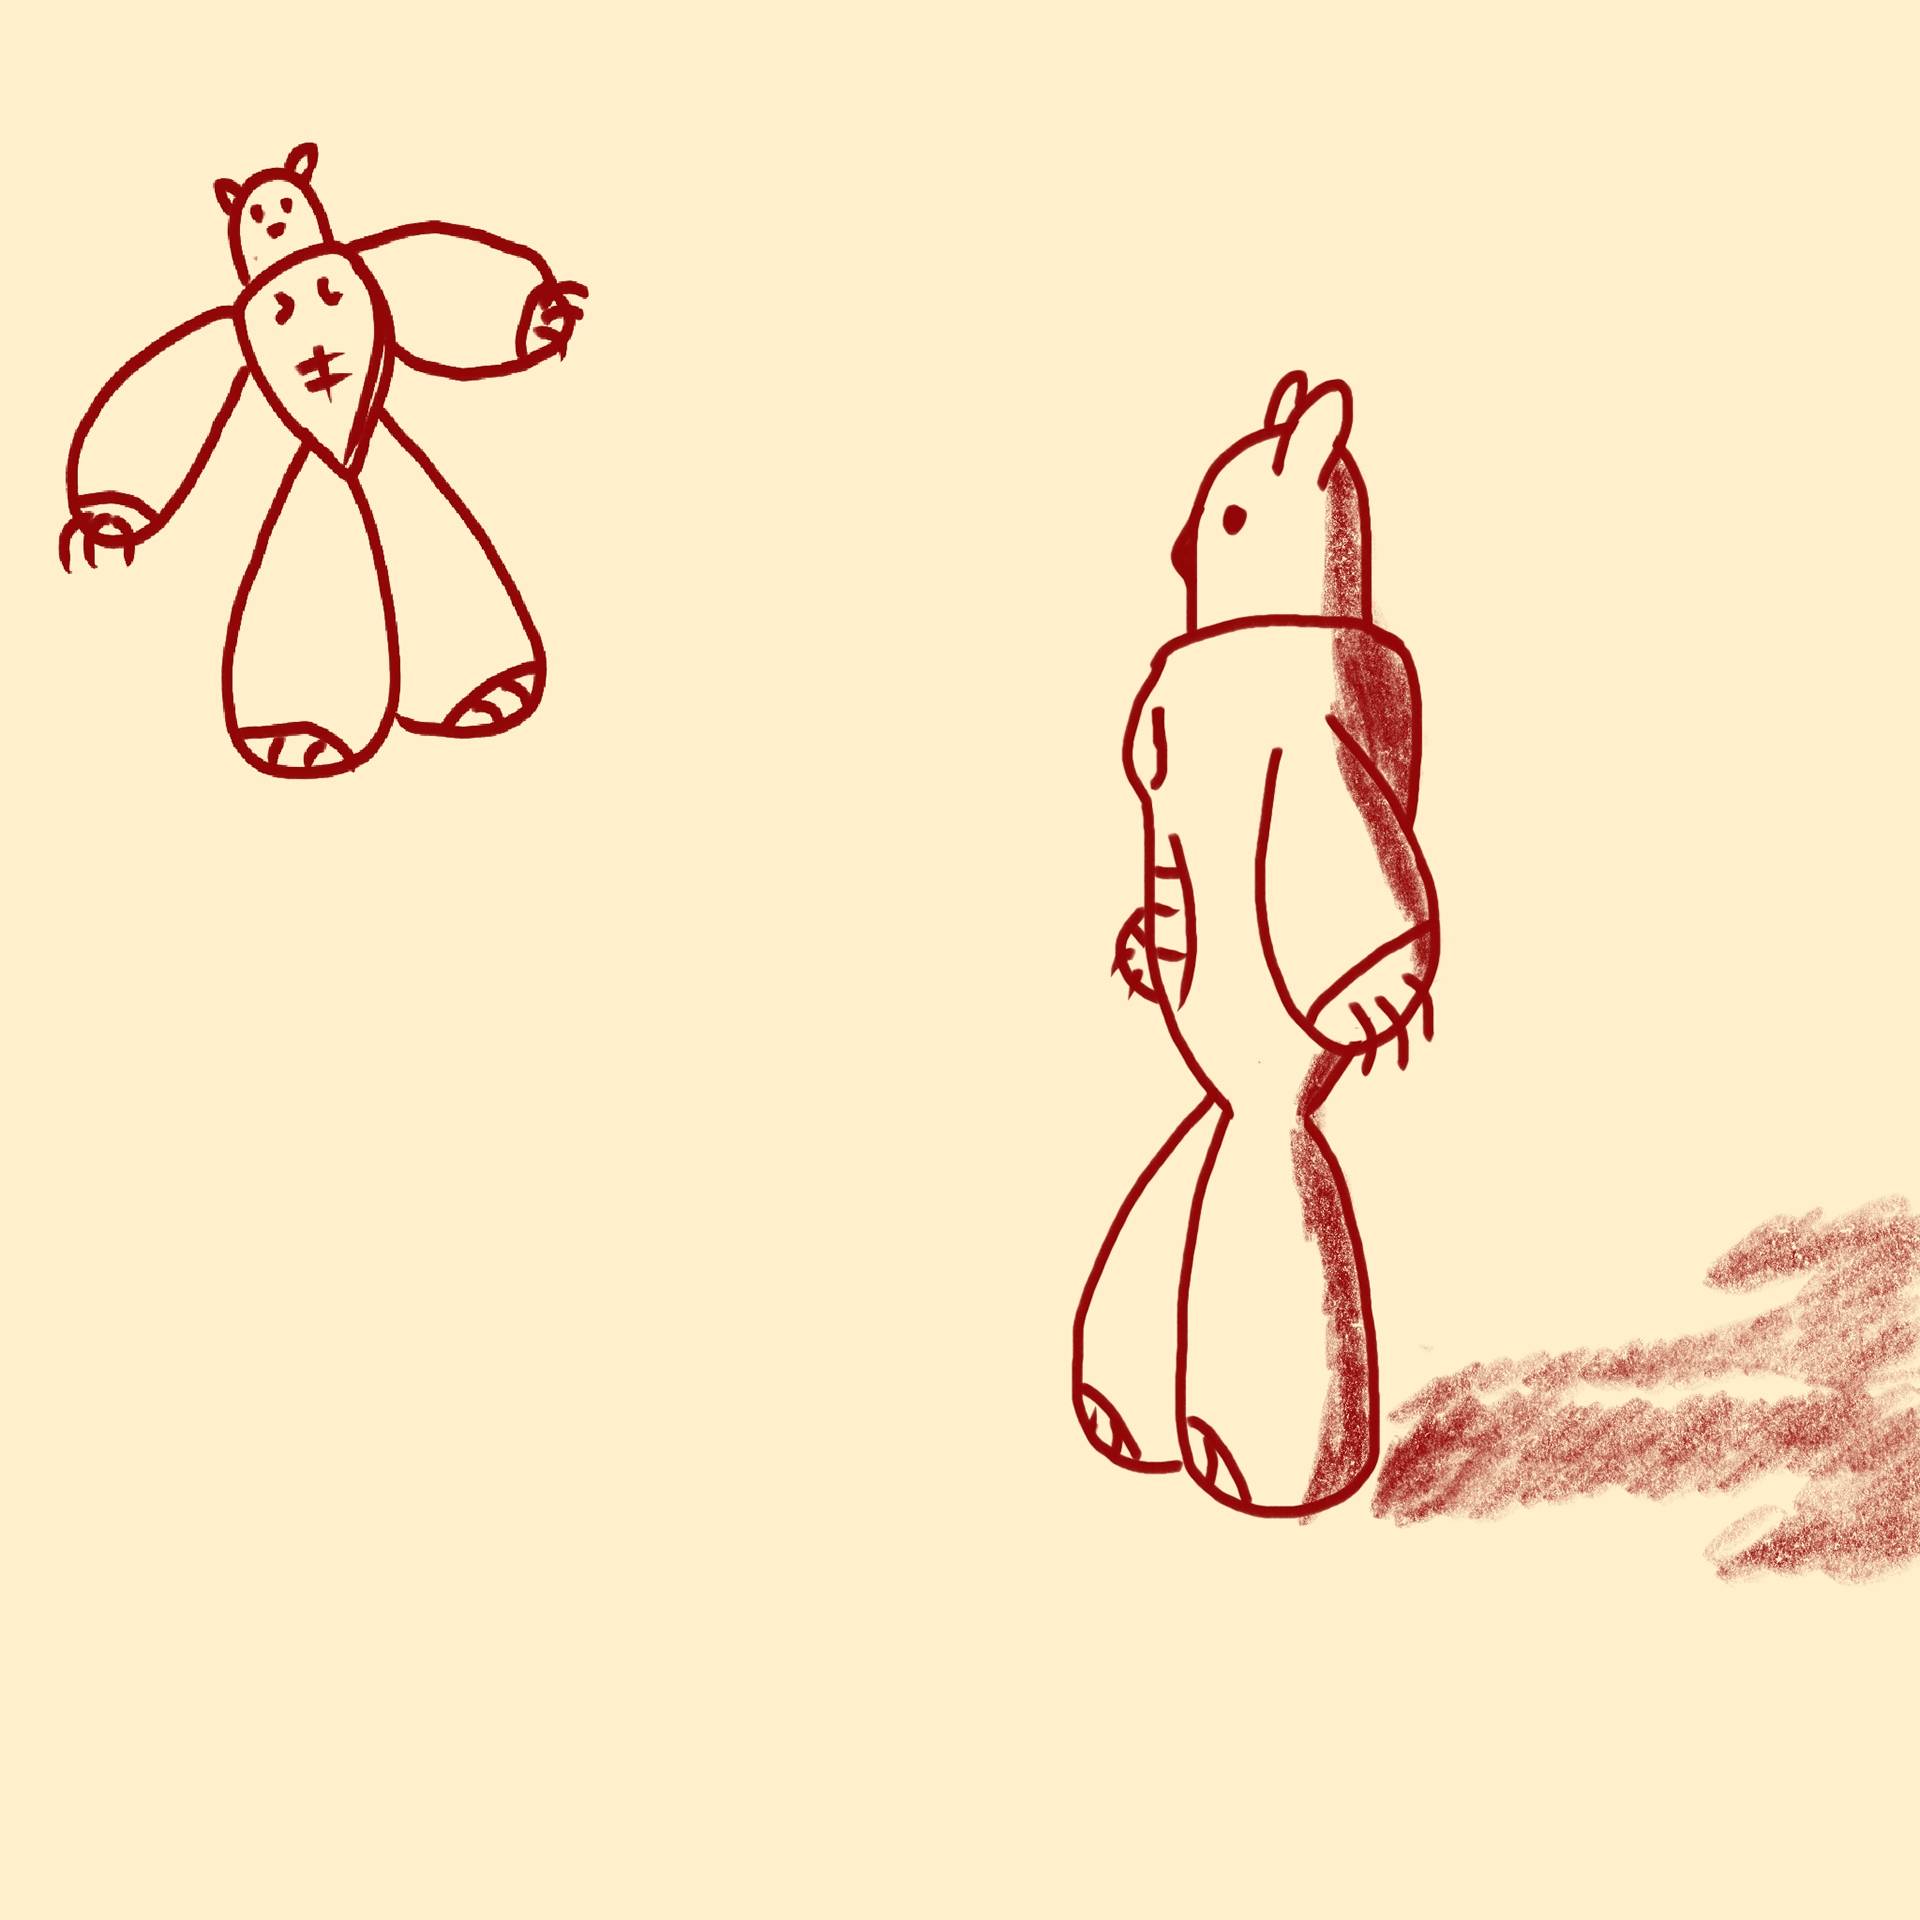
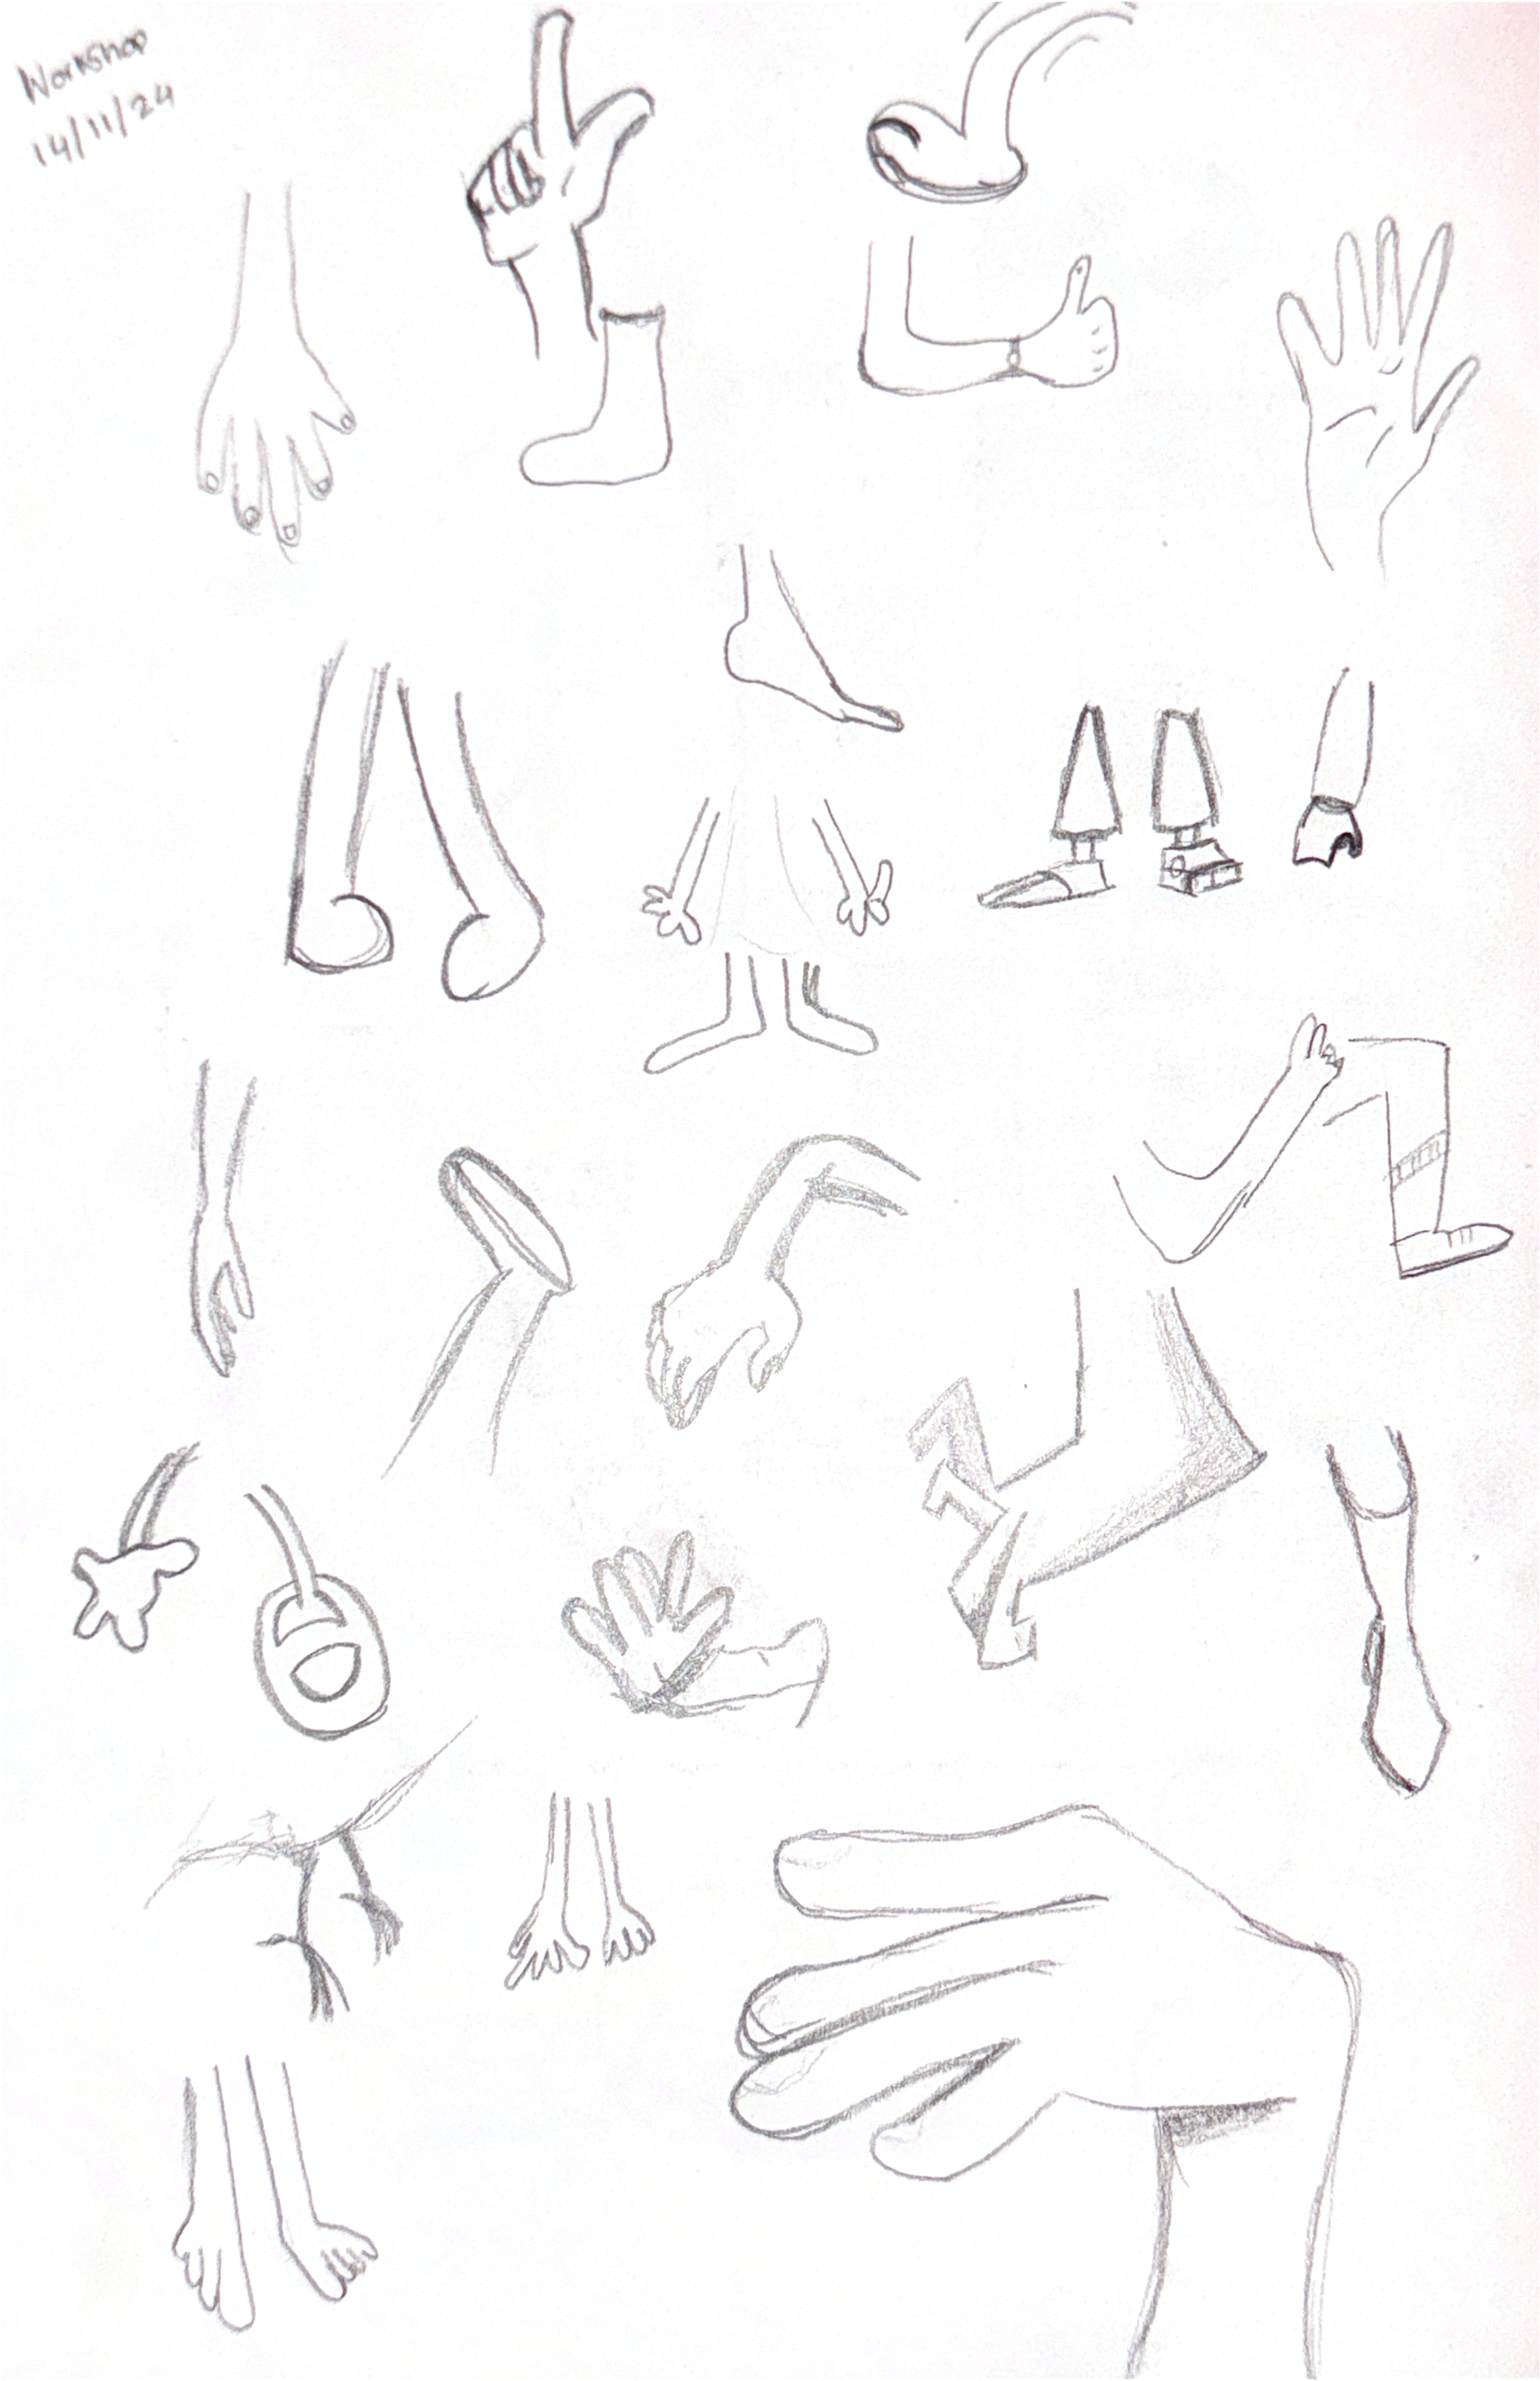
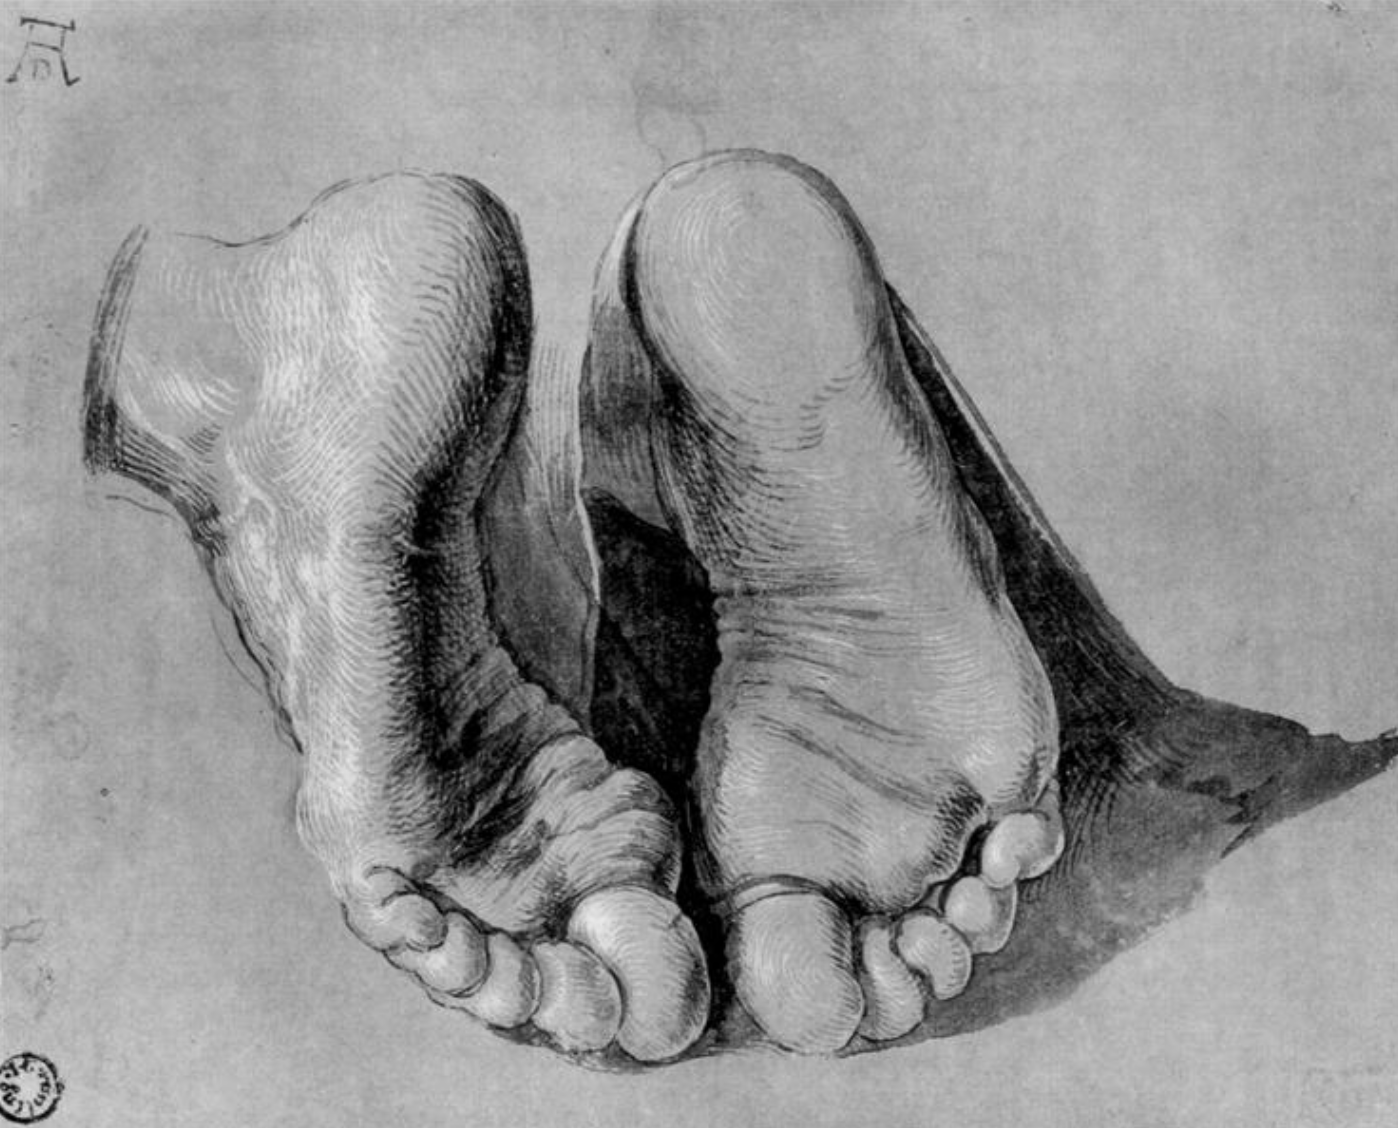
We begin the day with a fun workshop to draw various feet, hands, paws, and claws, ensuring that no two are the same.
Moving on to the contextual side, we also learned about the historical and artistic exploration of anatomy, its connection to beauty ideals, and its integration into things like architecture and game art.
Then began our wonderful little workshops.
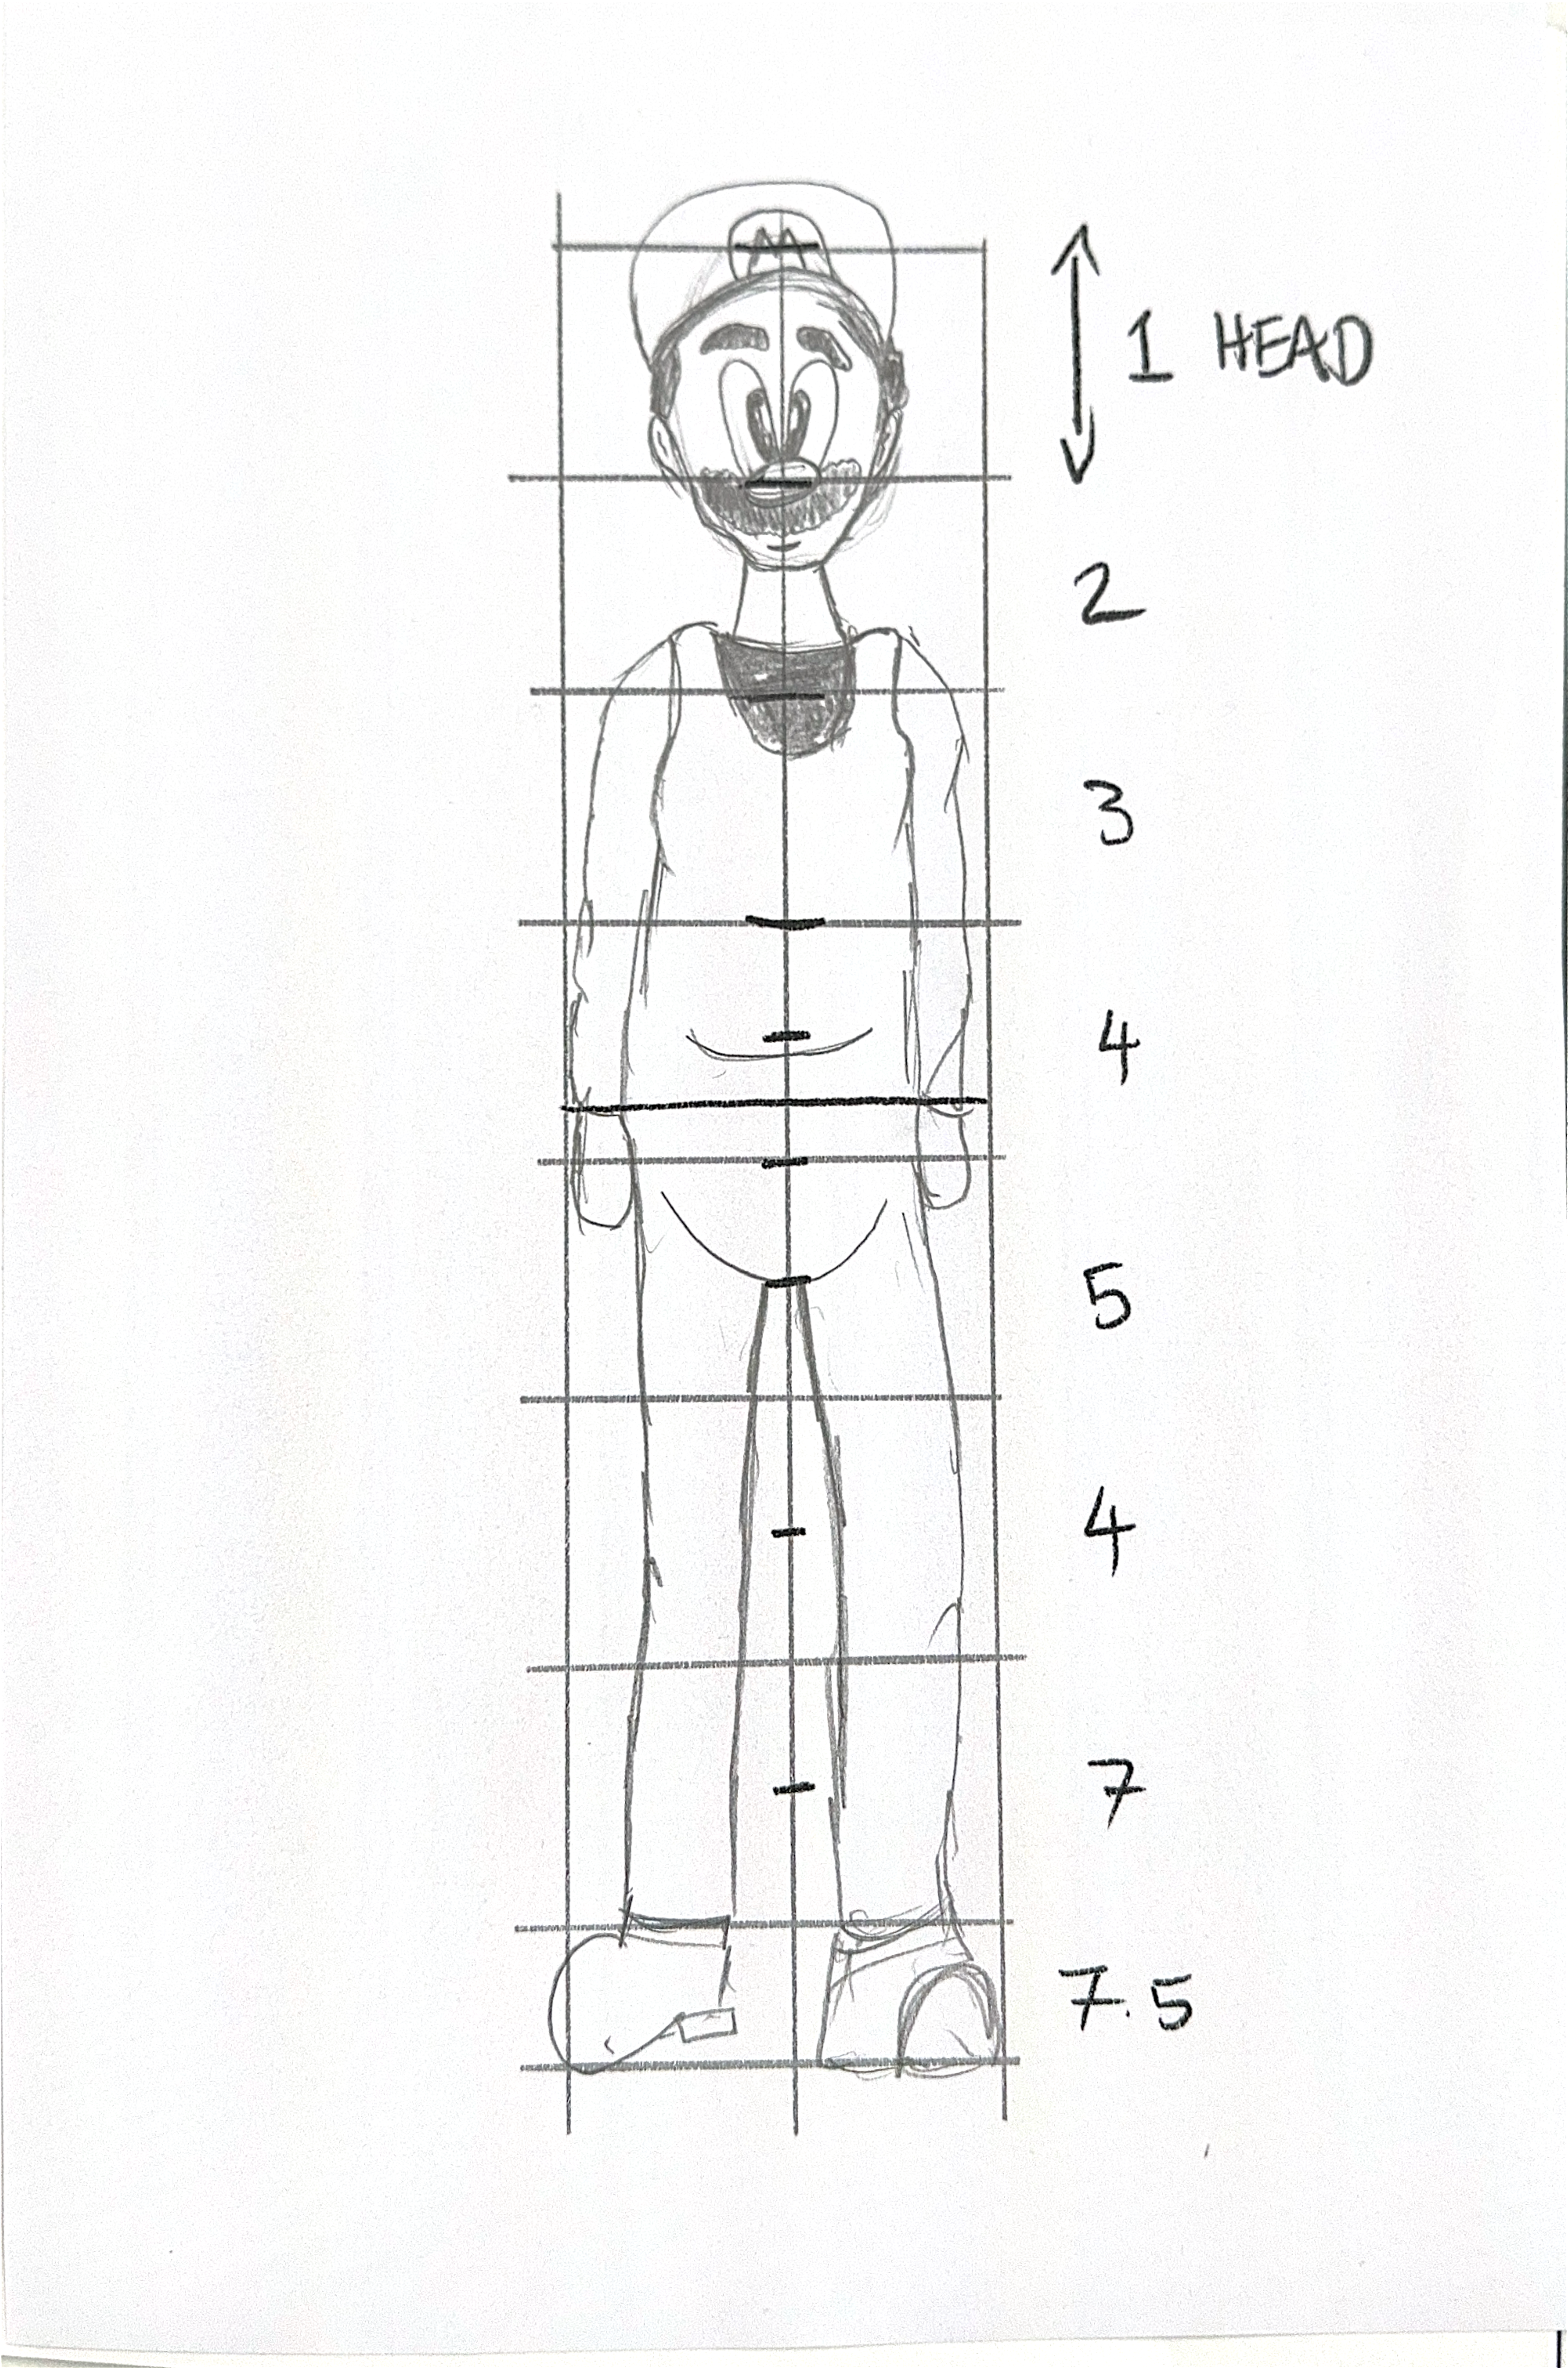
Mario.
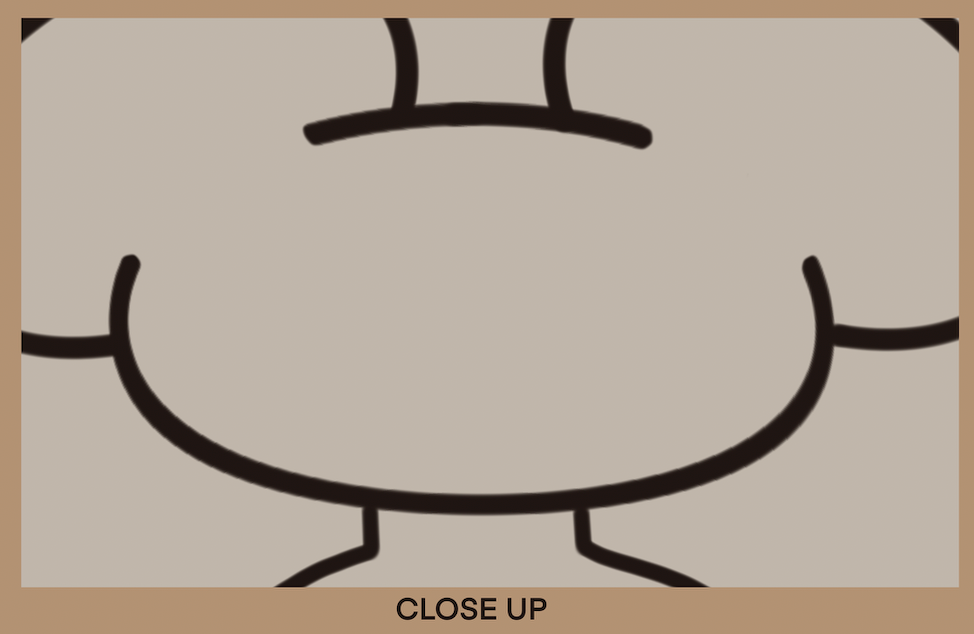
Something happened here.
After this, we were to draw and label the body parts on a green silhouette of a man using diagram sheets.
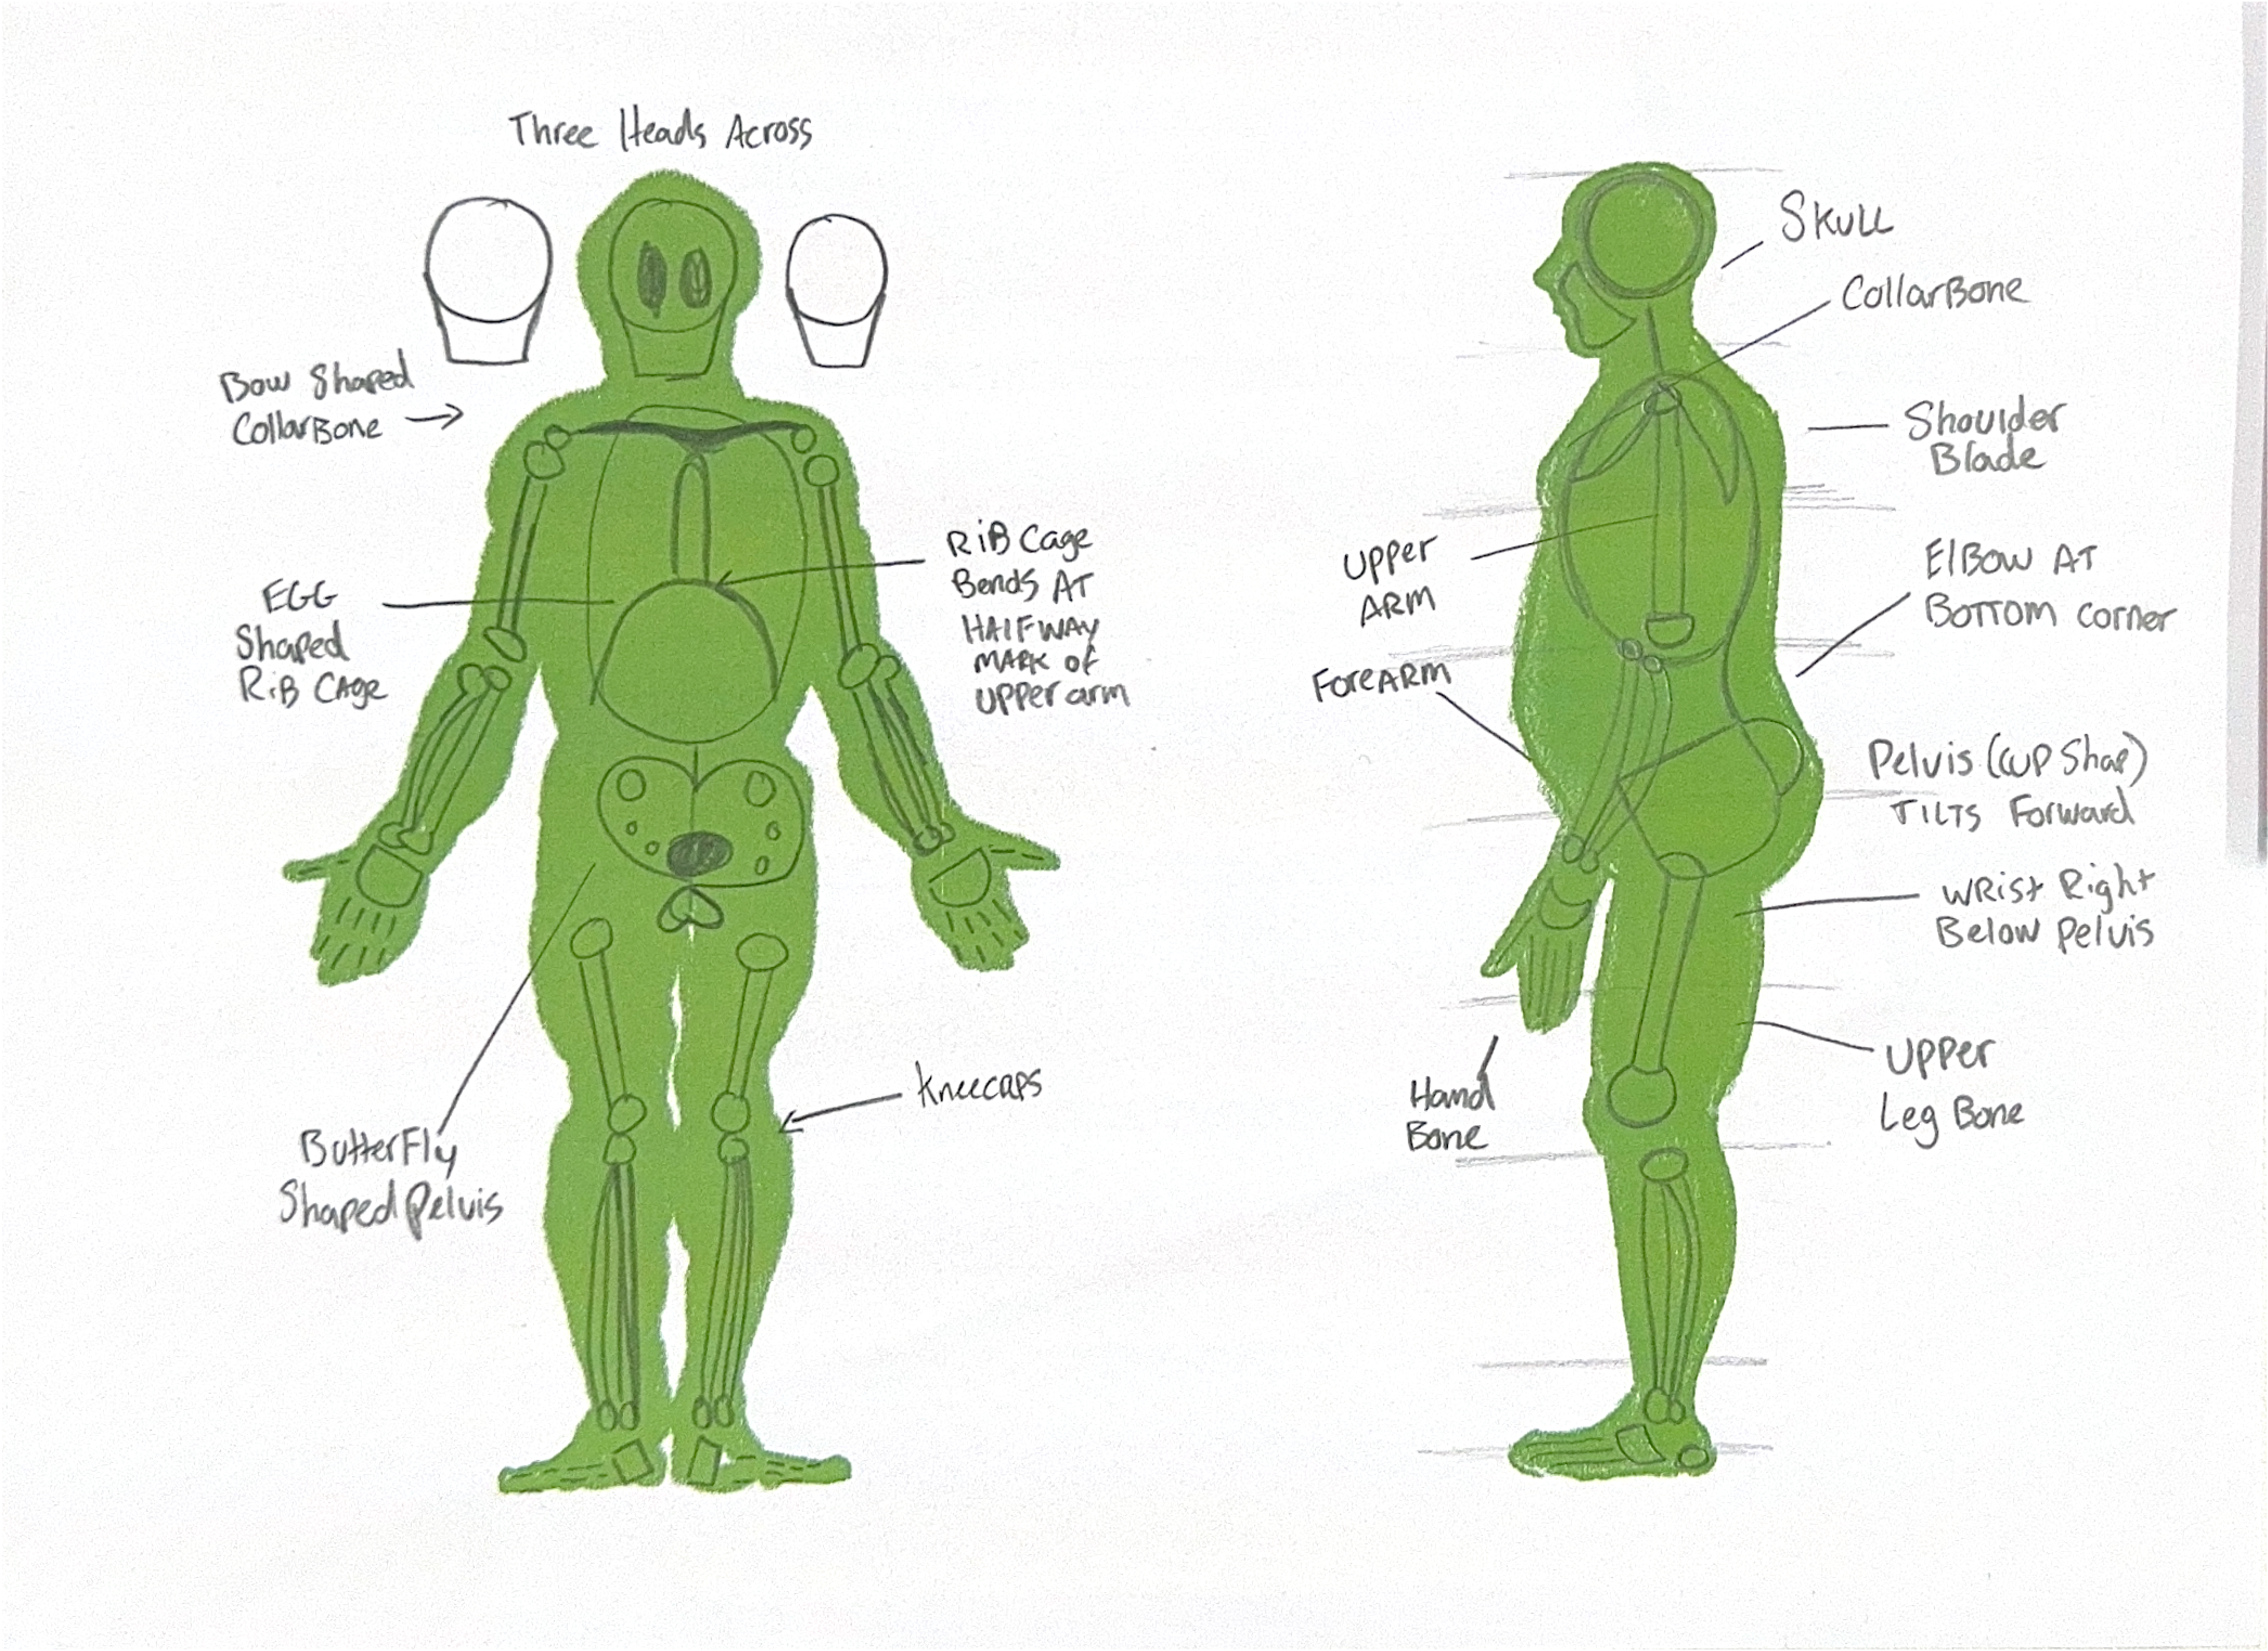
continuation of drawing diagrams
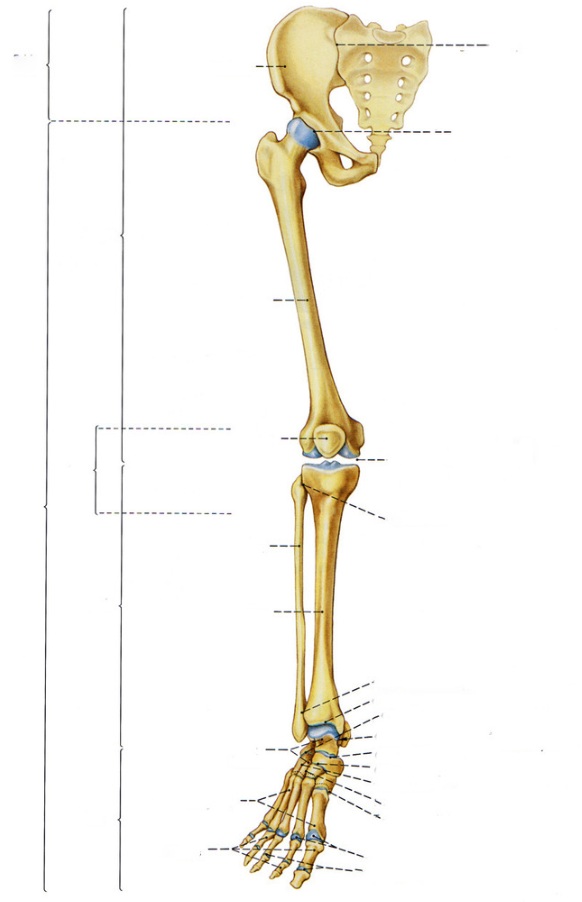
BONES
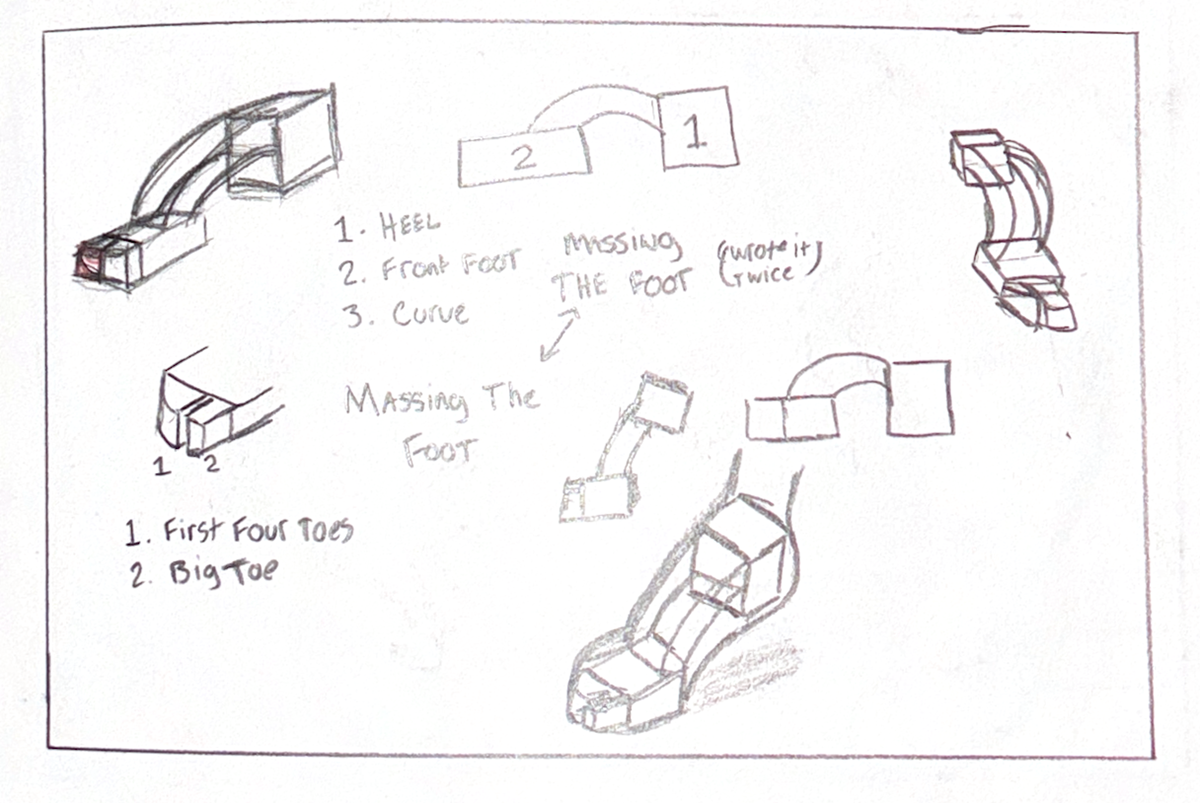
MASSING
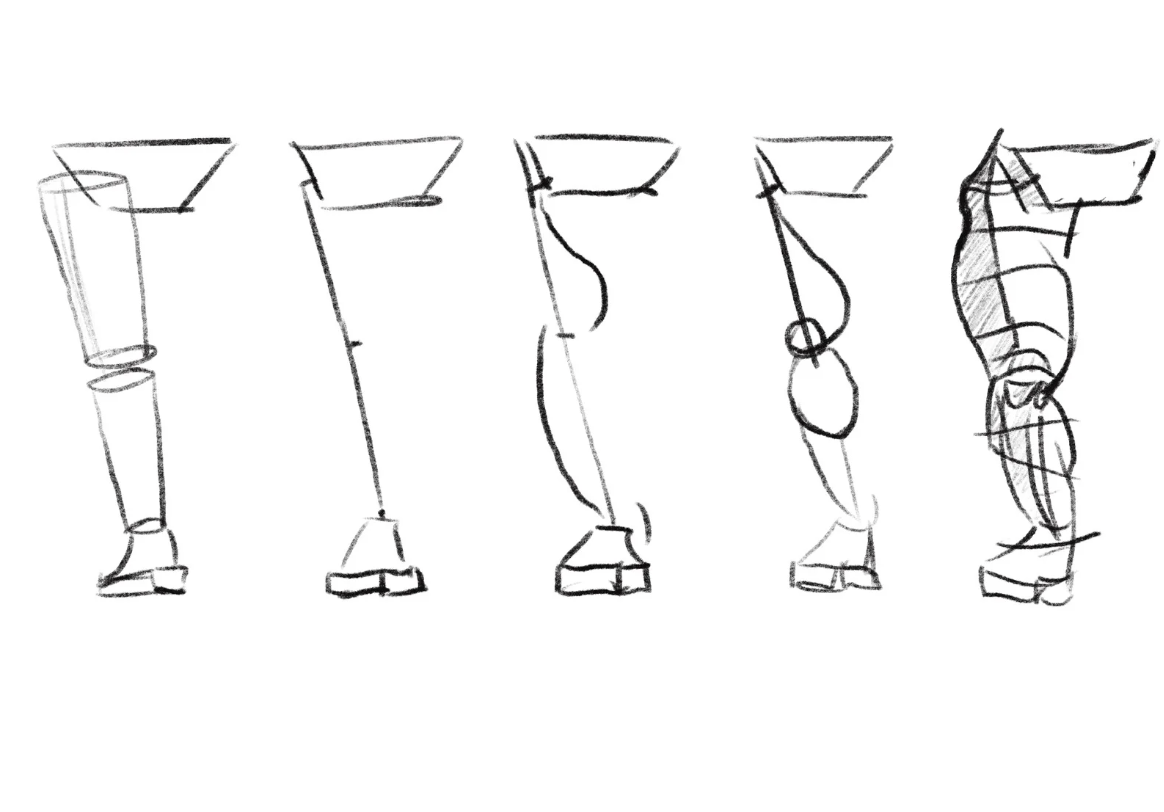
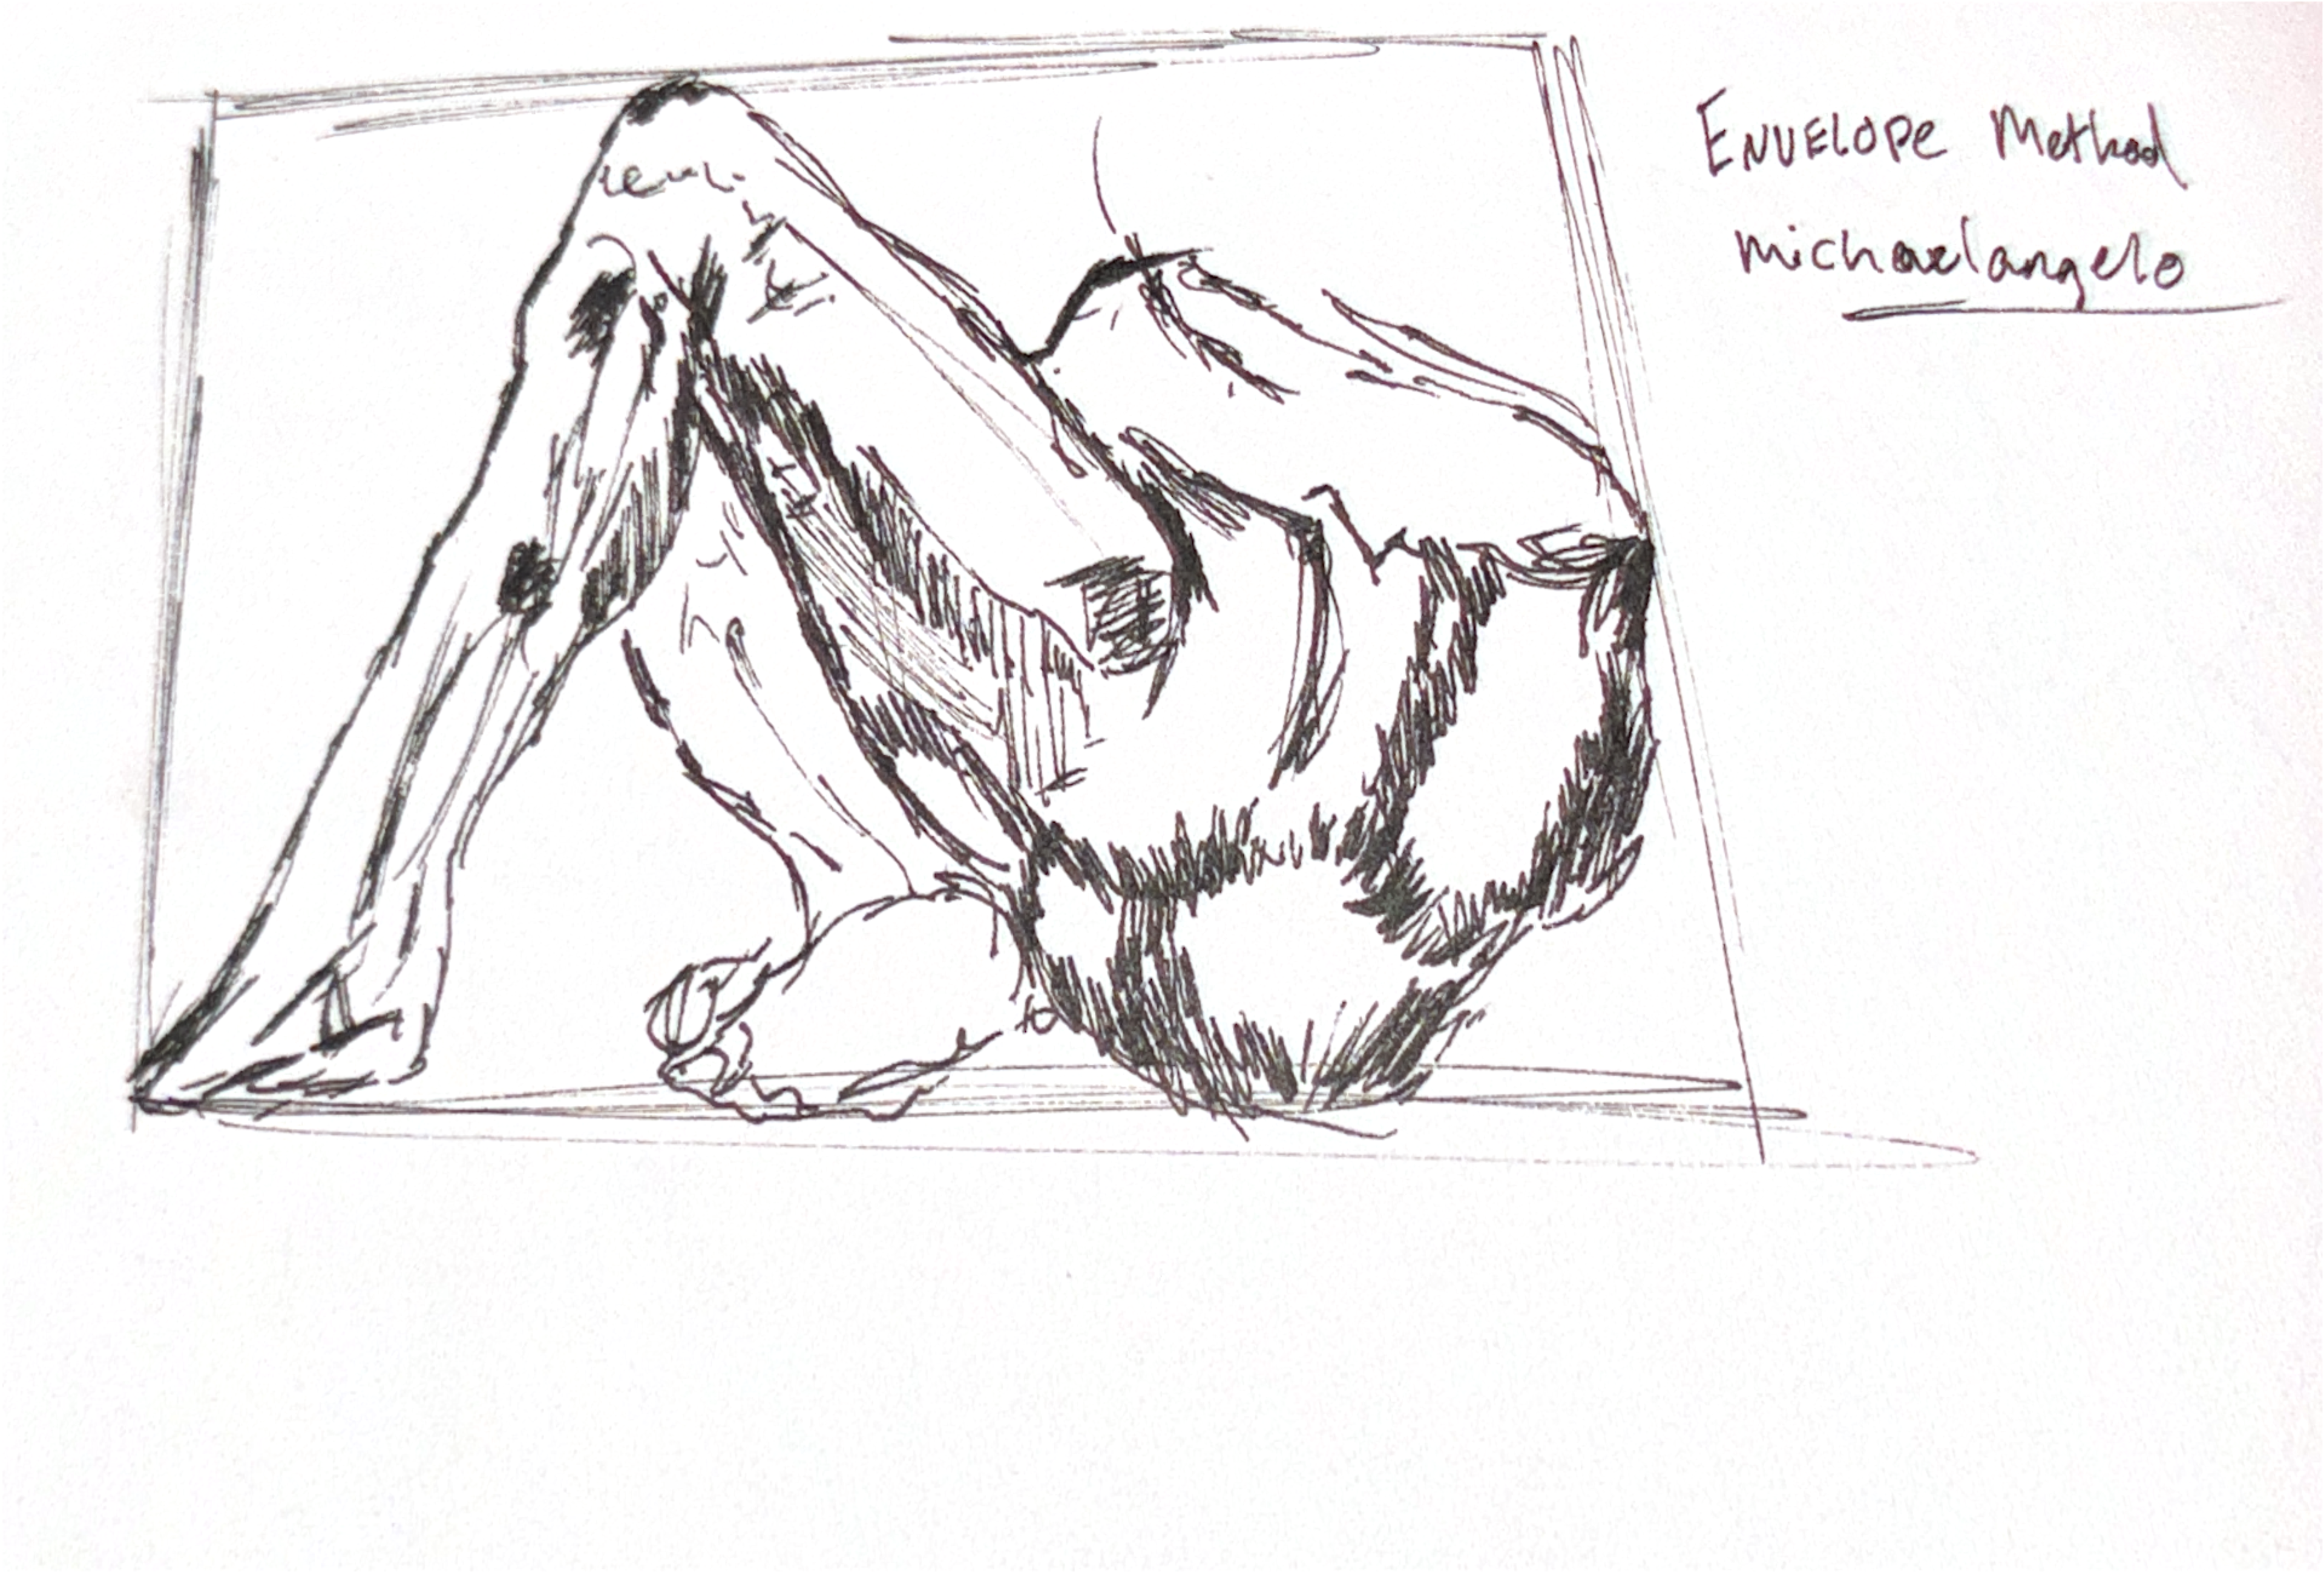
To wrap up the session, we learnt a drawing technique called enveloping
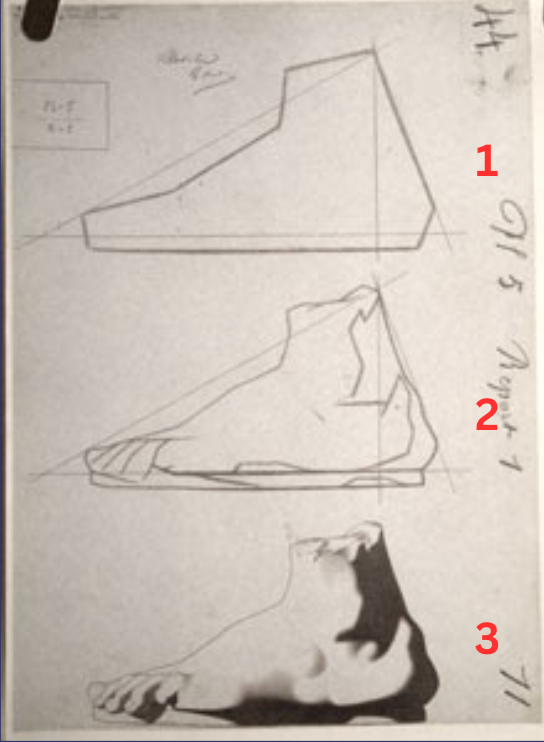
This image is provided to demonstrate the use of the envelope method.
The Envelope method.


SELF-DIRECTED
Choose a humanoid character and redesign them in different ways.
I decided to make this character tall and young (young as a child).


INT- ROOM 902 21 - 11 - 24
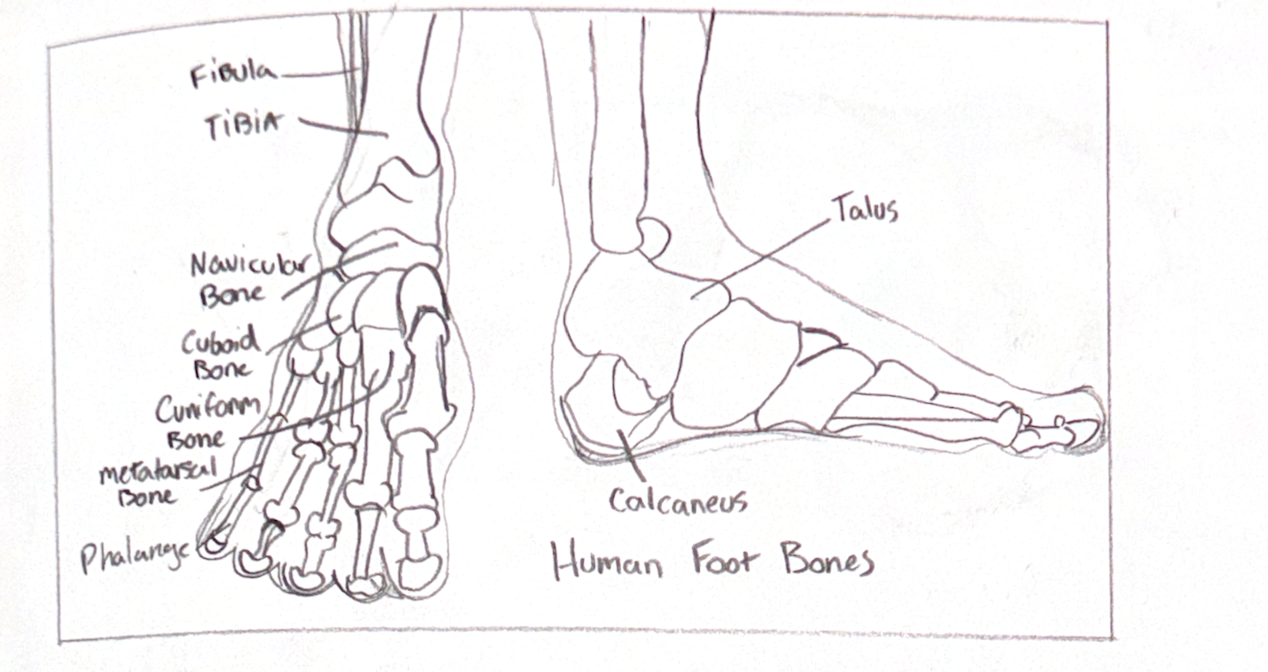
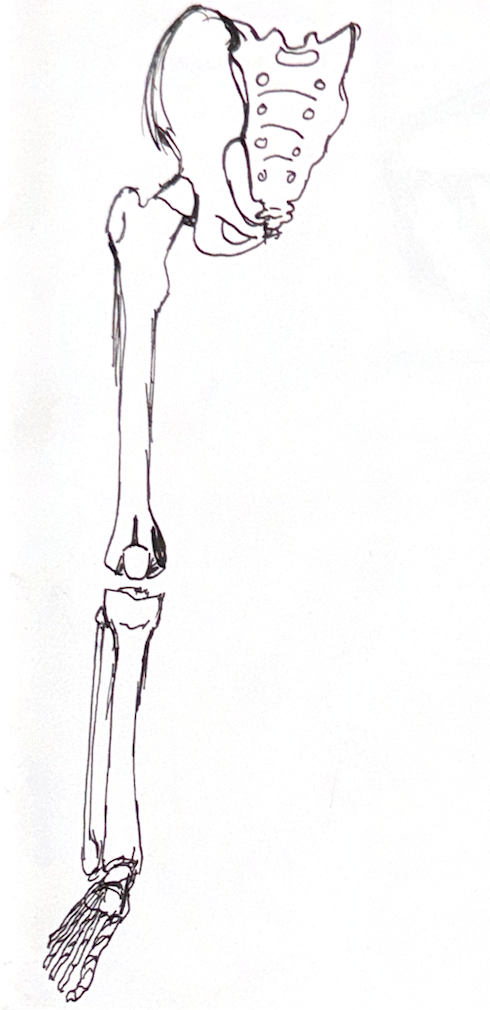
Since we didn't complete our anatomy workshop last time, we began today's class with the anatomy of the leg, starting with the bones.
I was quite happy with how these pieces turned out, considering we had to be relatively quick with them.

WORKSHOP
MINE
Comparing the drawings side by side, I realize I drew the leg too straight, which is likely why it didn’t feel completely right.
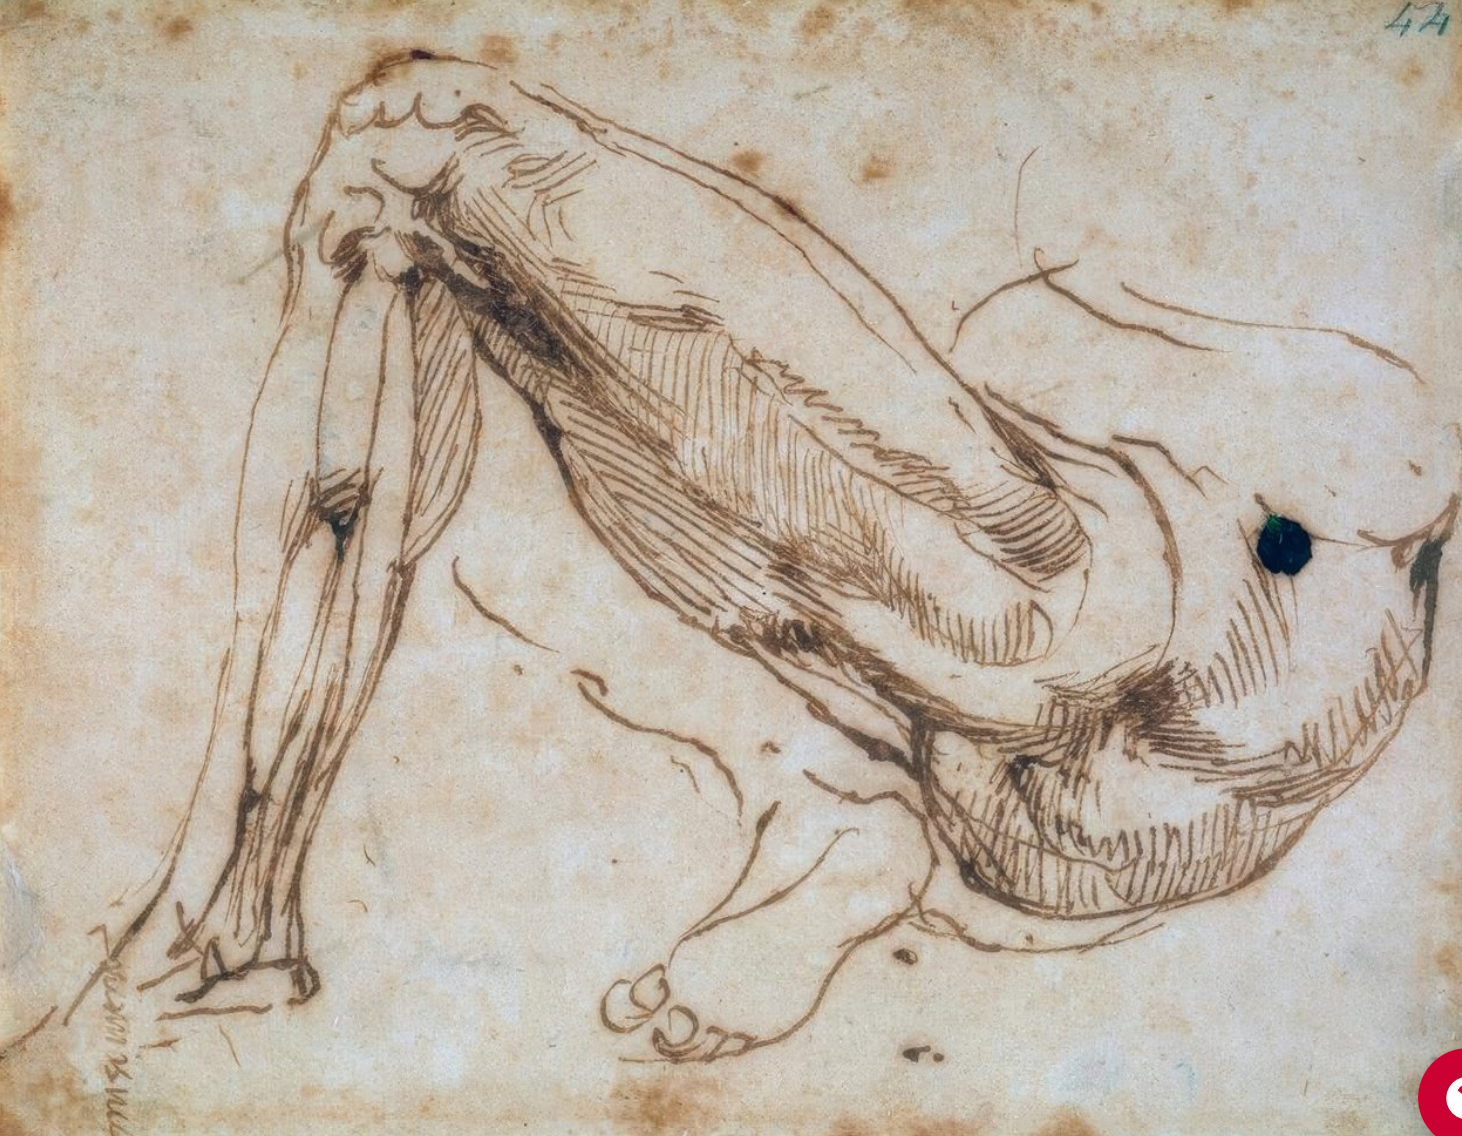
Finally, to conclude the anatomy lesson of the day, we will examine the enveloping method using one of Michelangelo's works.
NOW FOR THE CONCEPT SIDE OF THINGS!
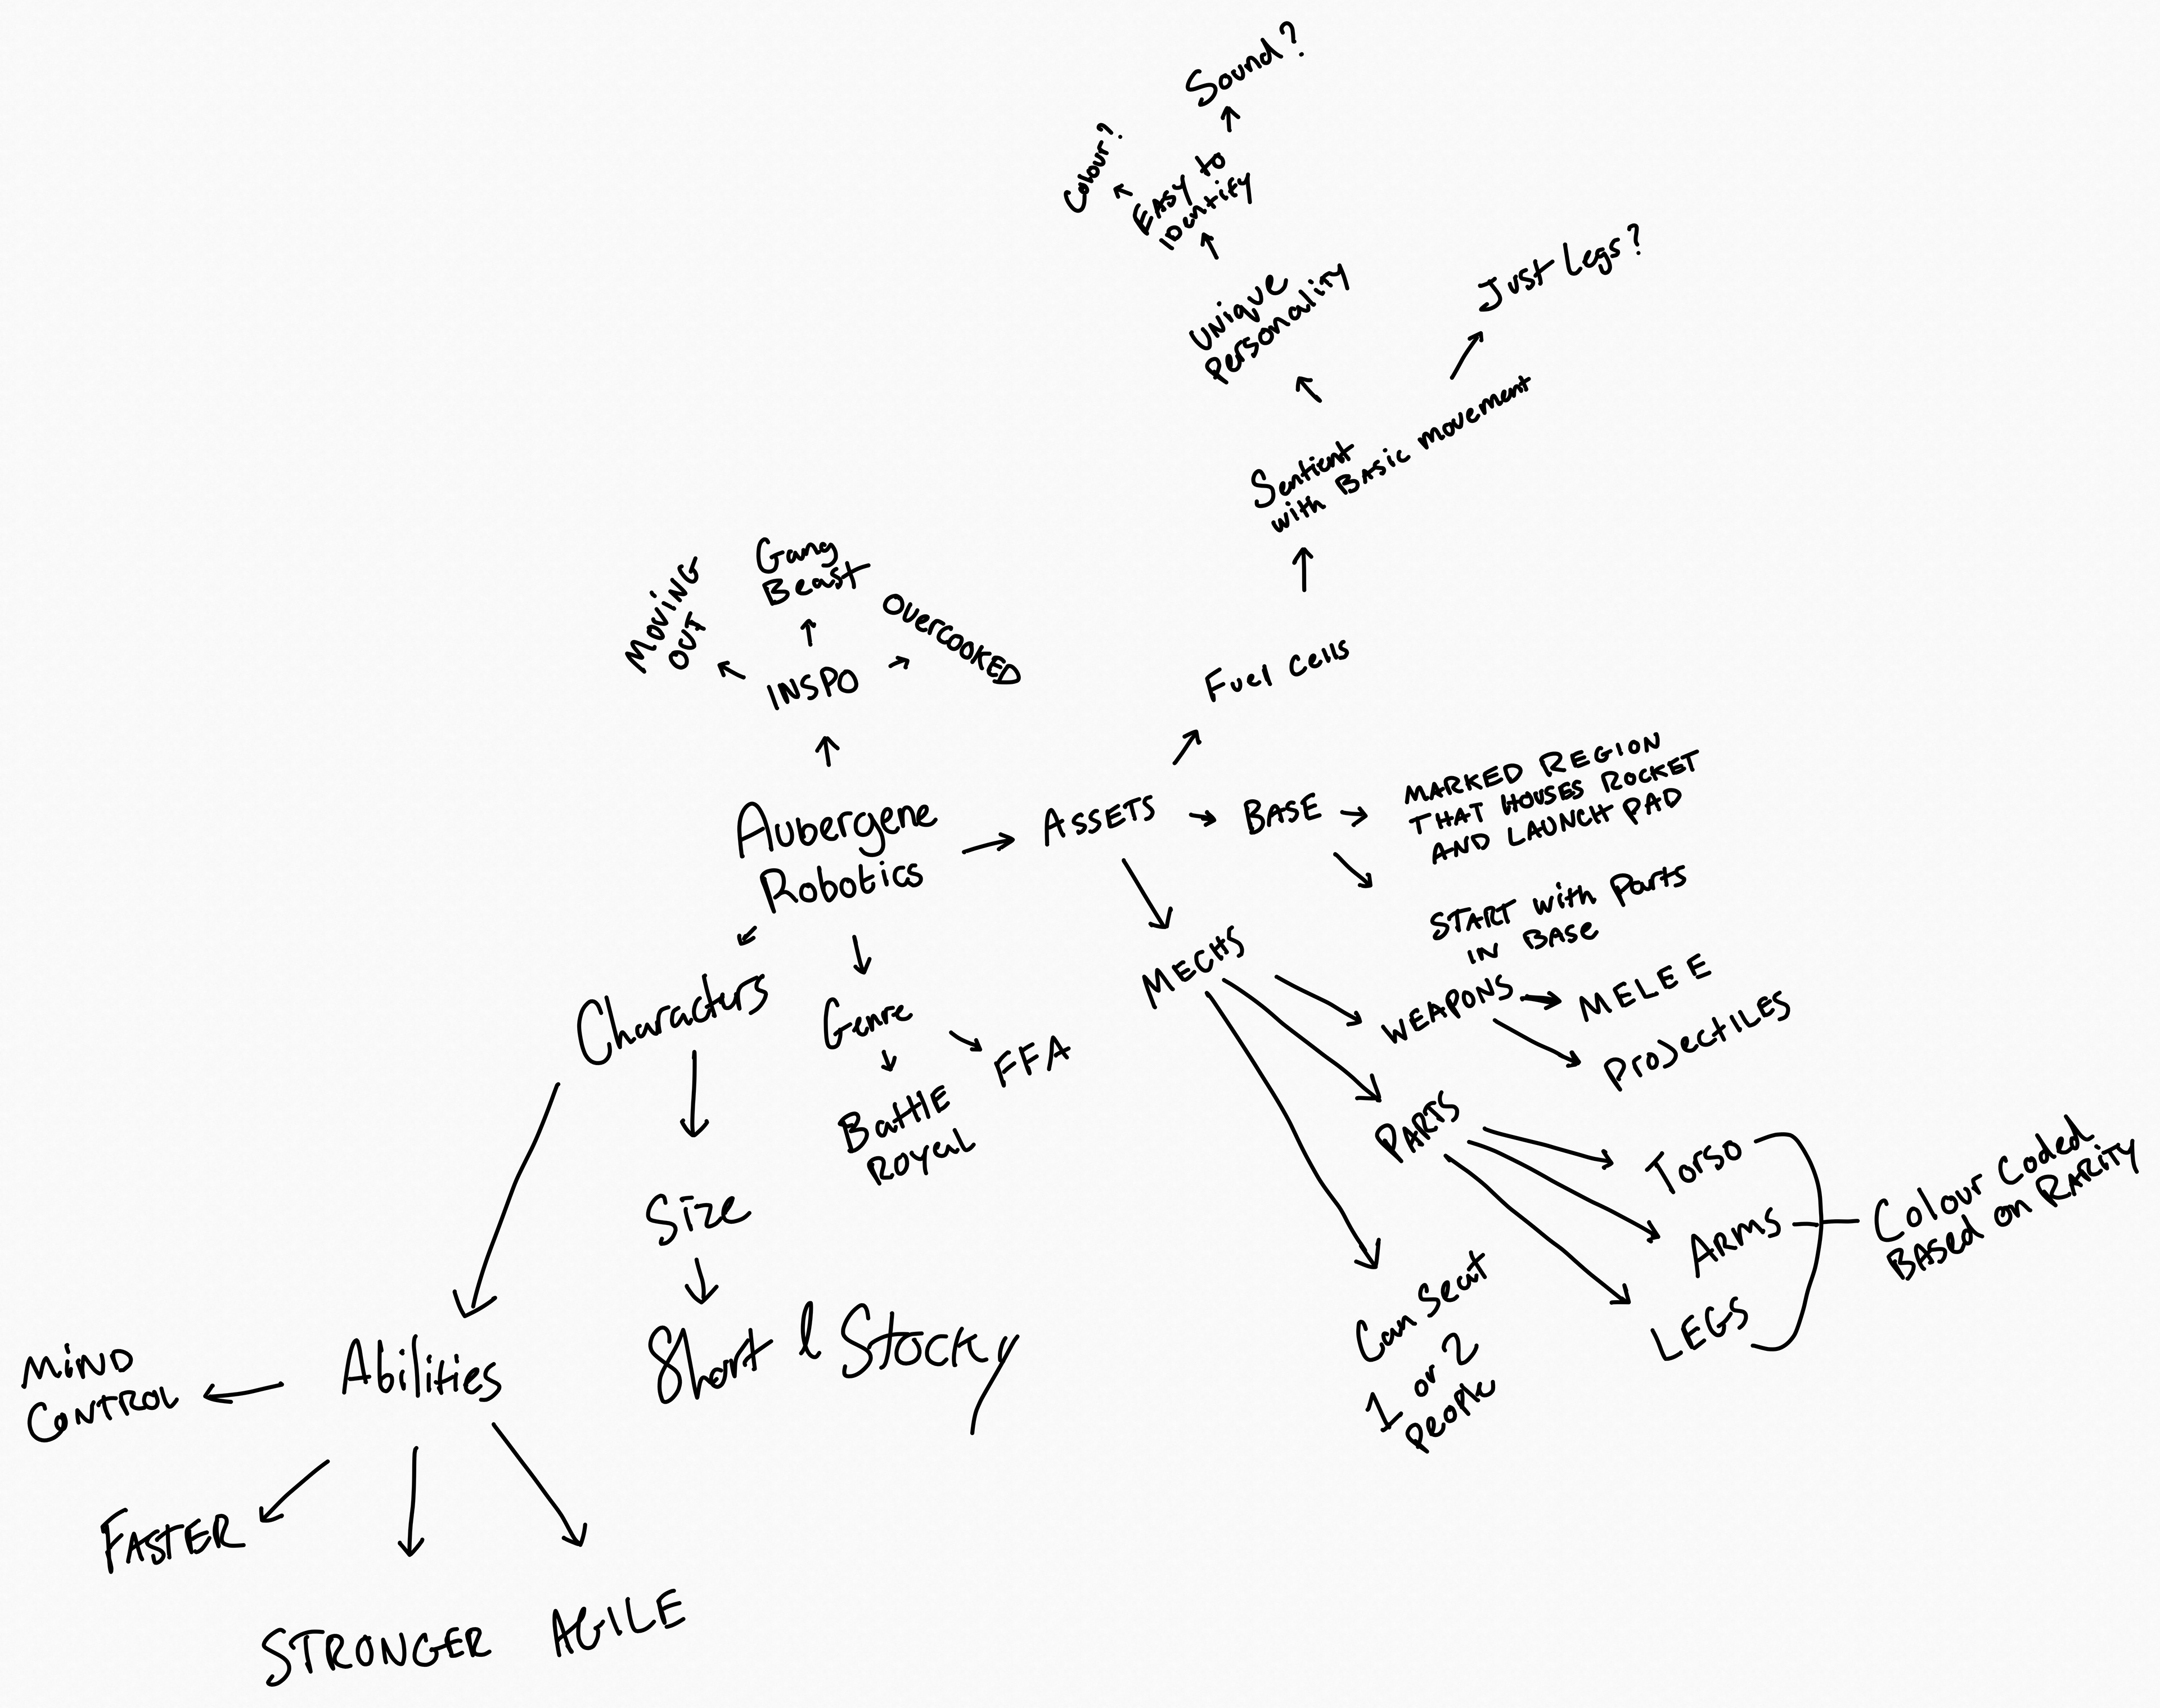
We received a brief for a game titled "Aubergene Robotics." The task includes the following:
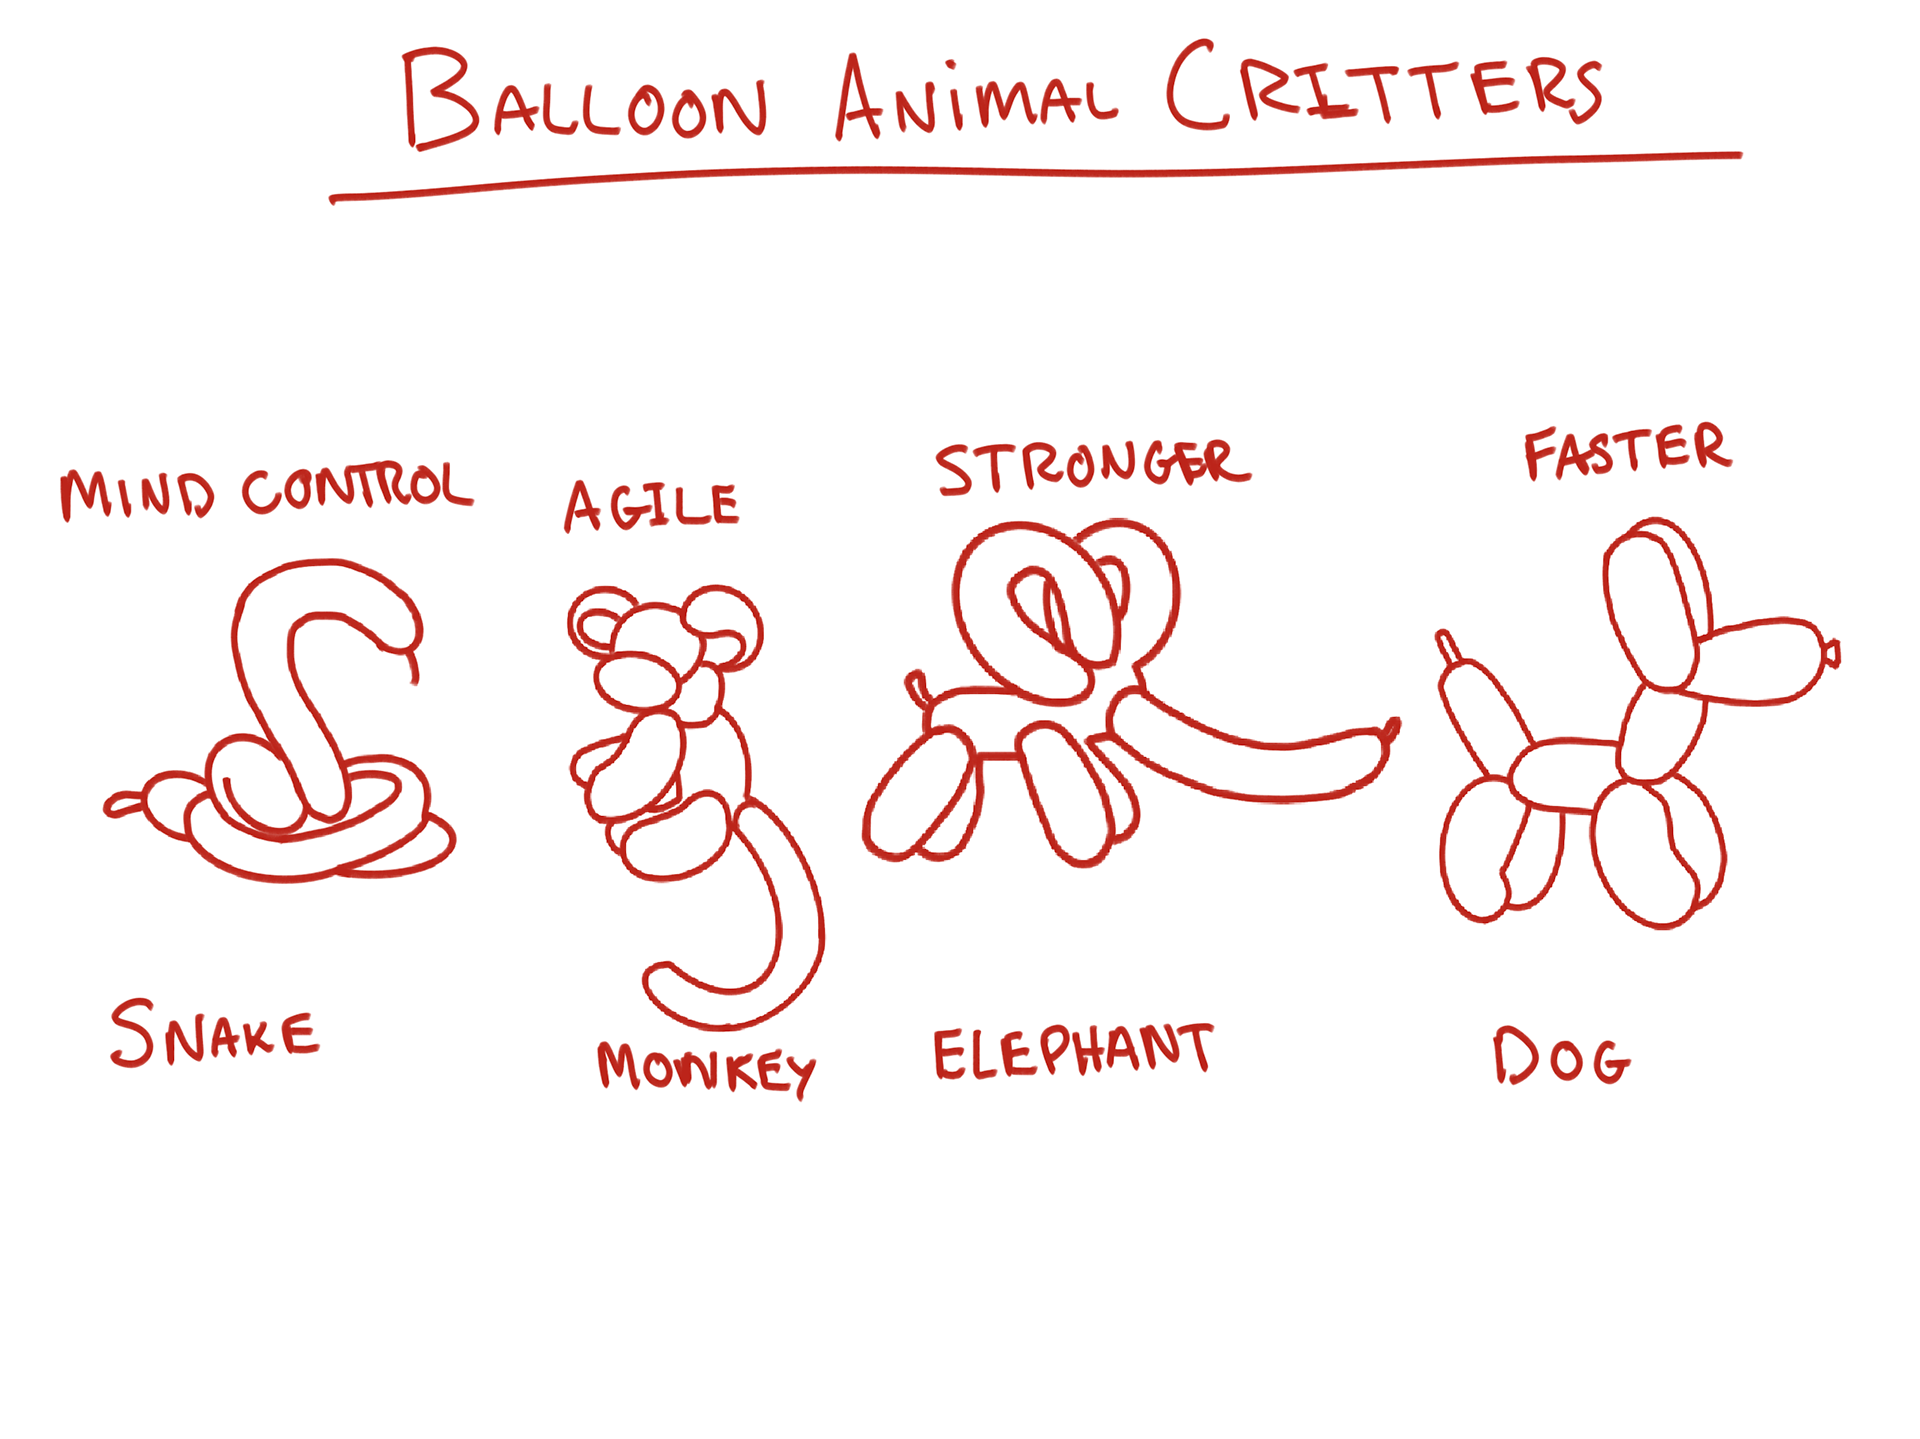
Critters:
Design four distinct critters, each with unique abilities:
1. Faster
2. Stronger
3. More agile
4. Sharper mind control
Robots:
Create three robots, each featuring:
- A central compartment for housing the critters
- A locomotion system, which can include legs, tracks, or other movement mechanisms
Locations:
Develop various locations that emphasize puzzle-like exploration to discover parts.
I started to put together a mind map but honestly, to me, its all confusing and I still don't understand it lol.
SELF DIRECTED
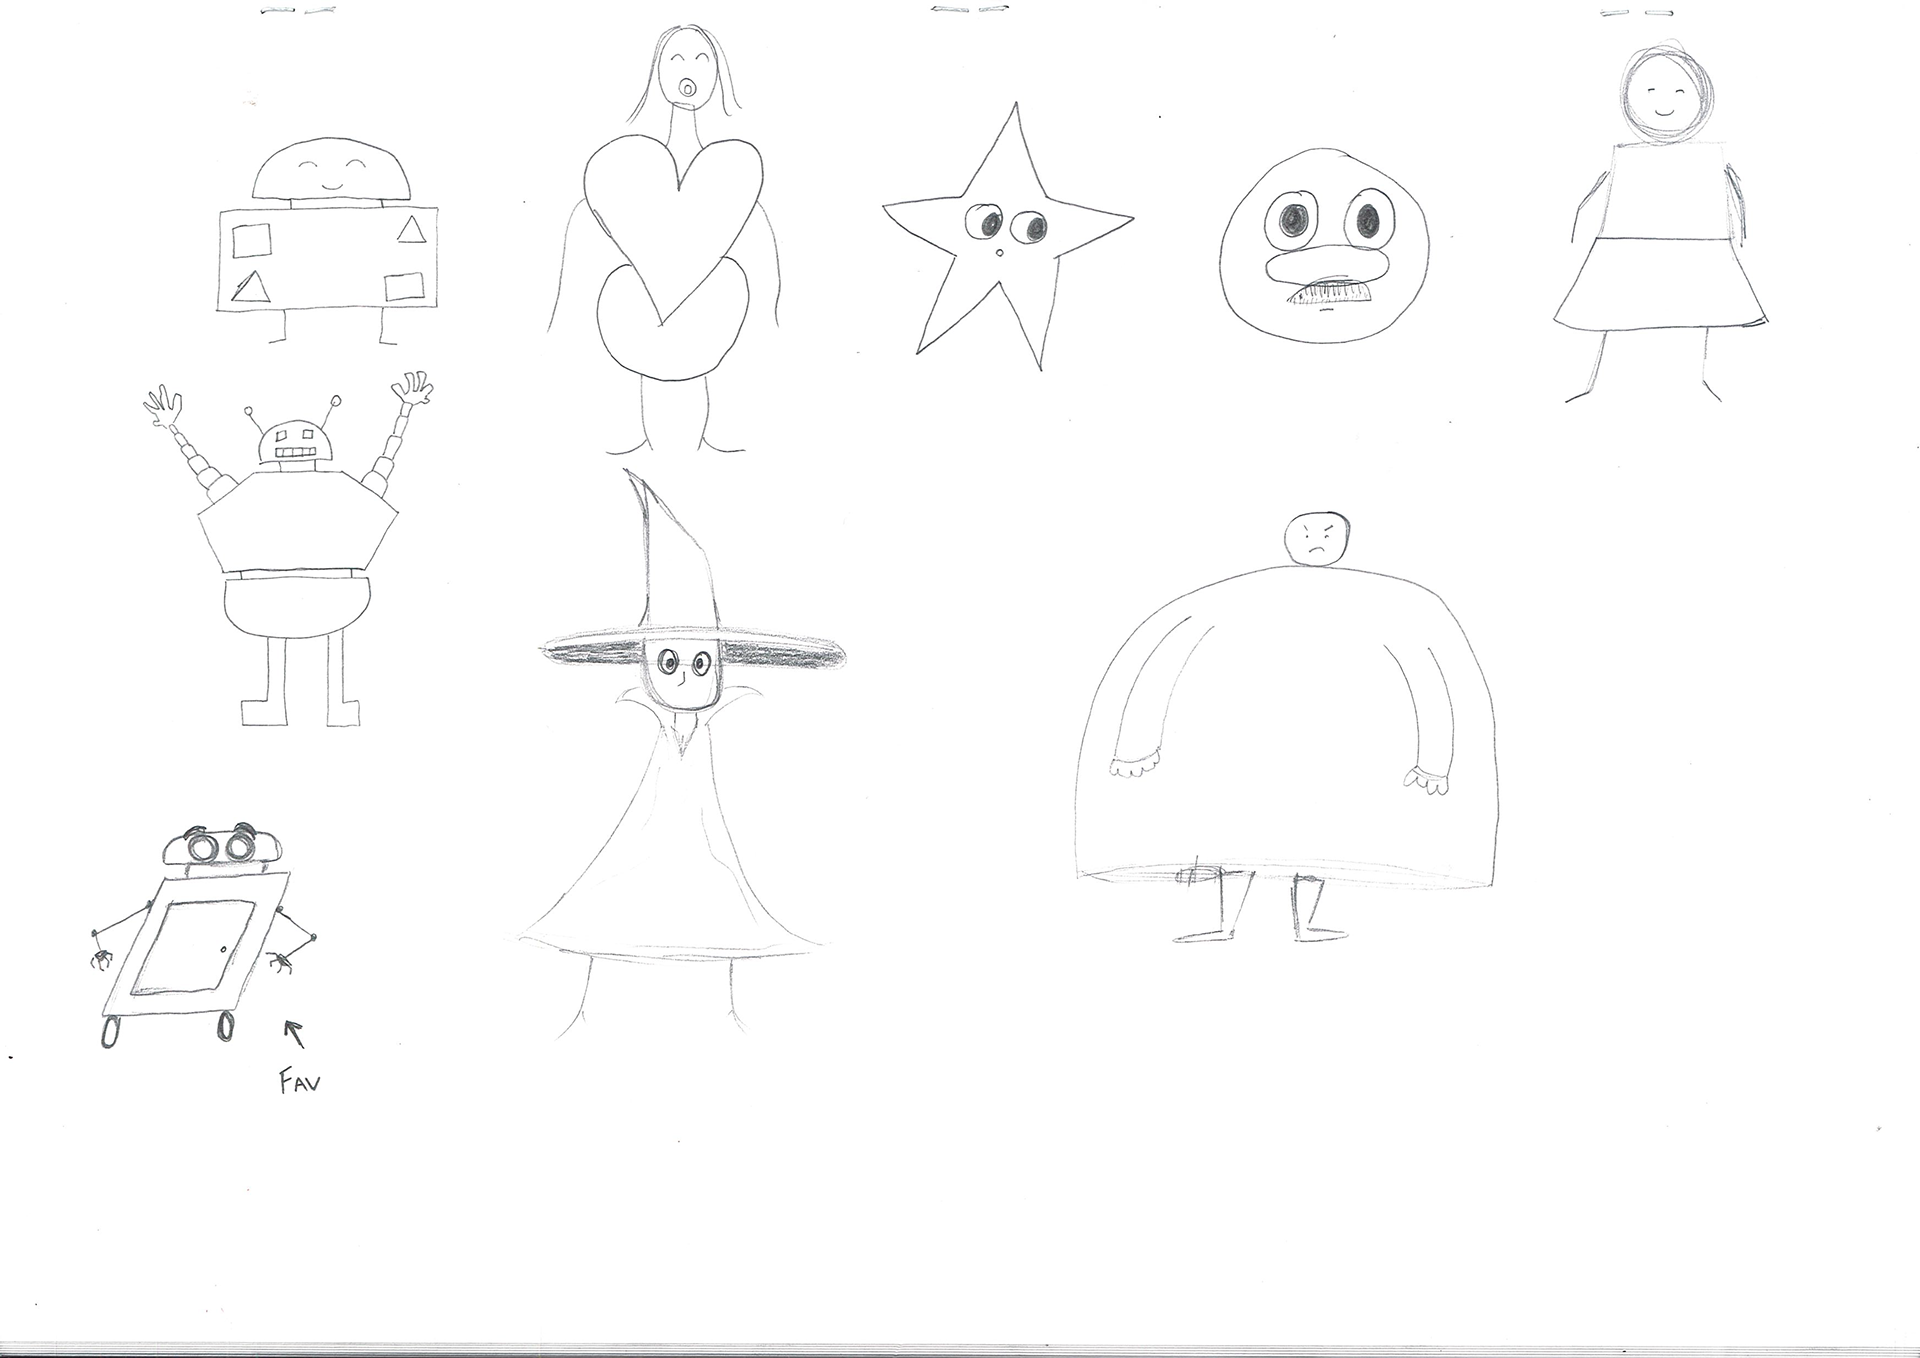
The self-directed project involved creating thumbnails for 10 environments, 10 characters, and 10 robots to prepare the final product.
ENVIRONMENTS

CHARACTERS
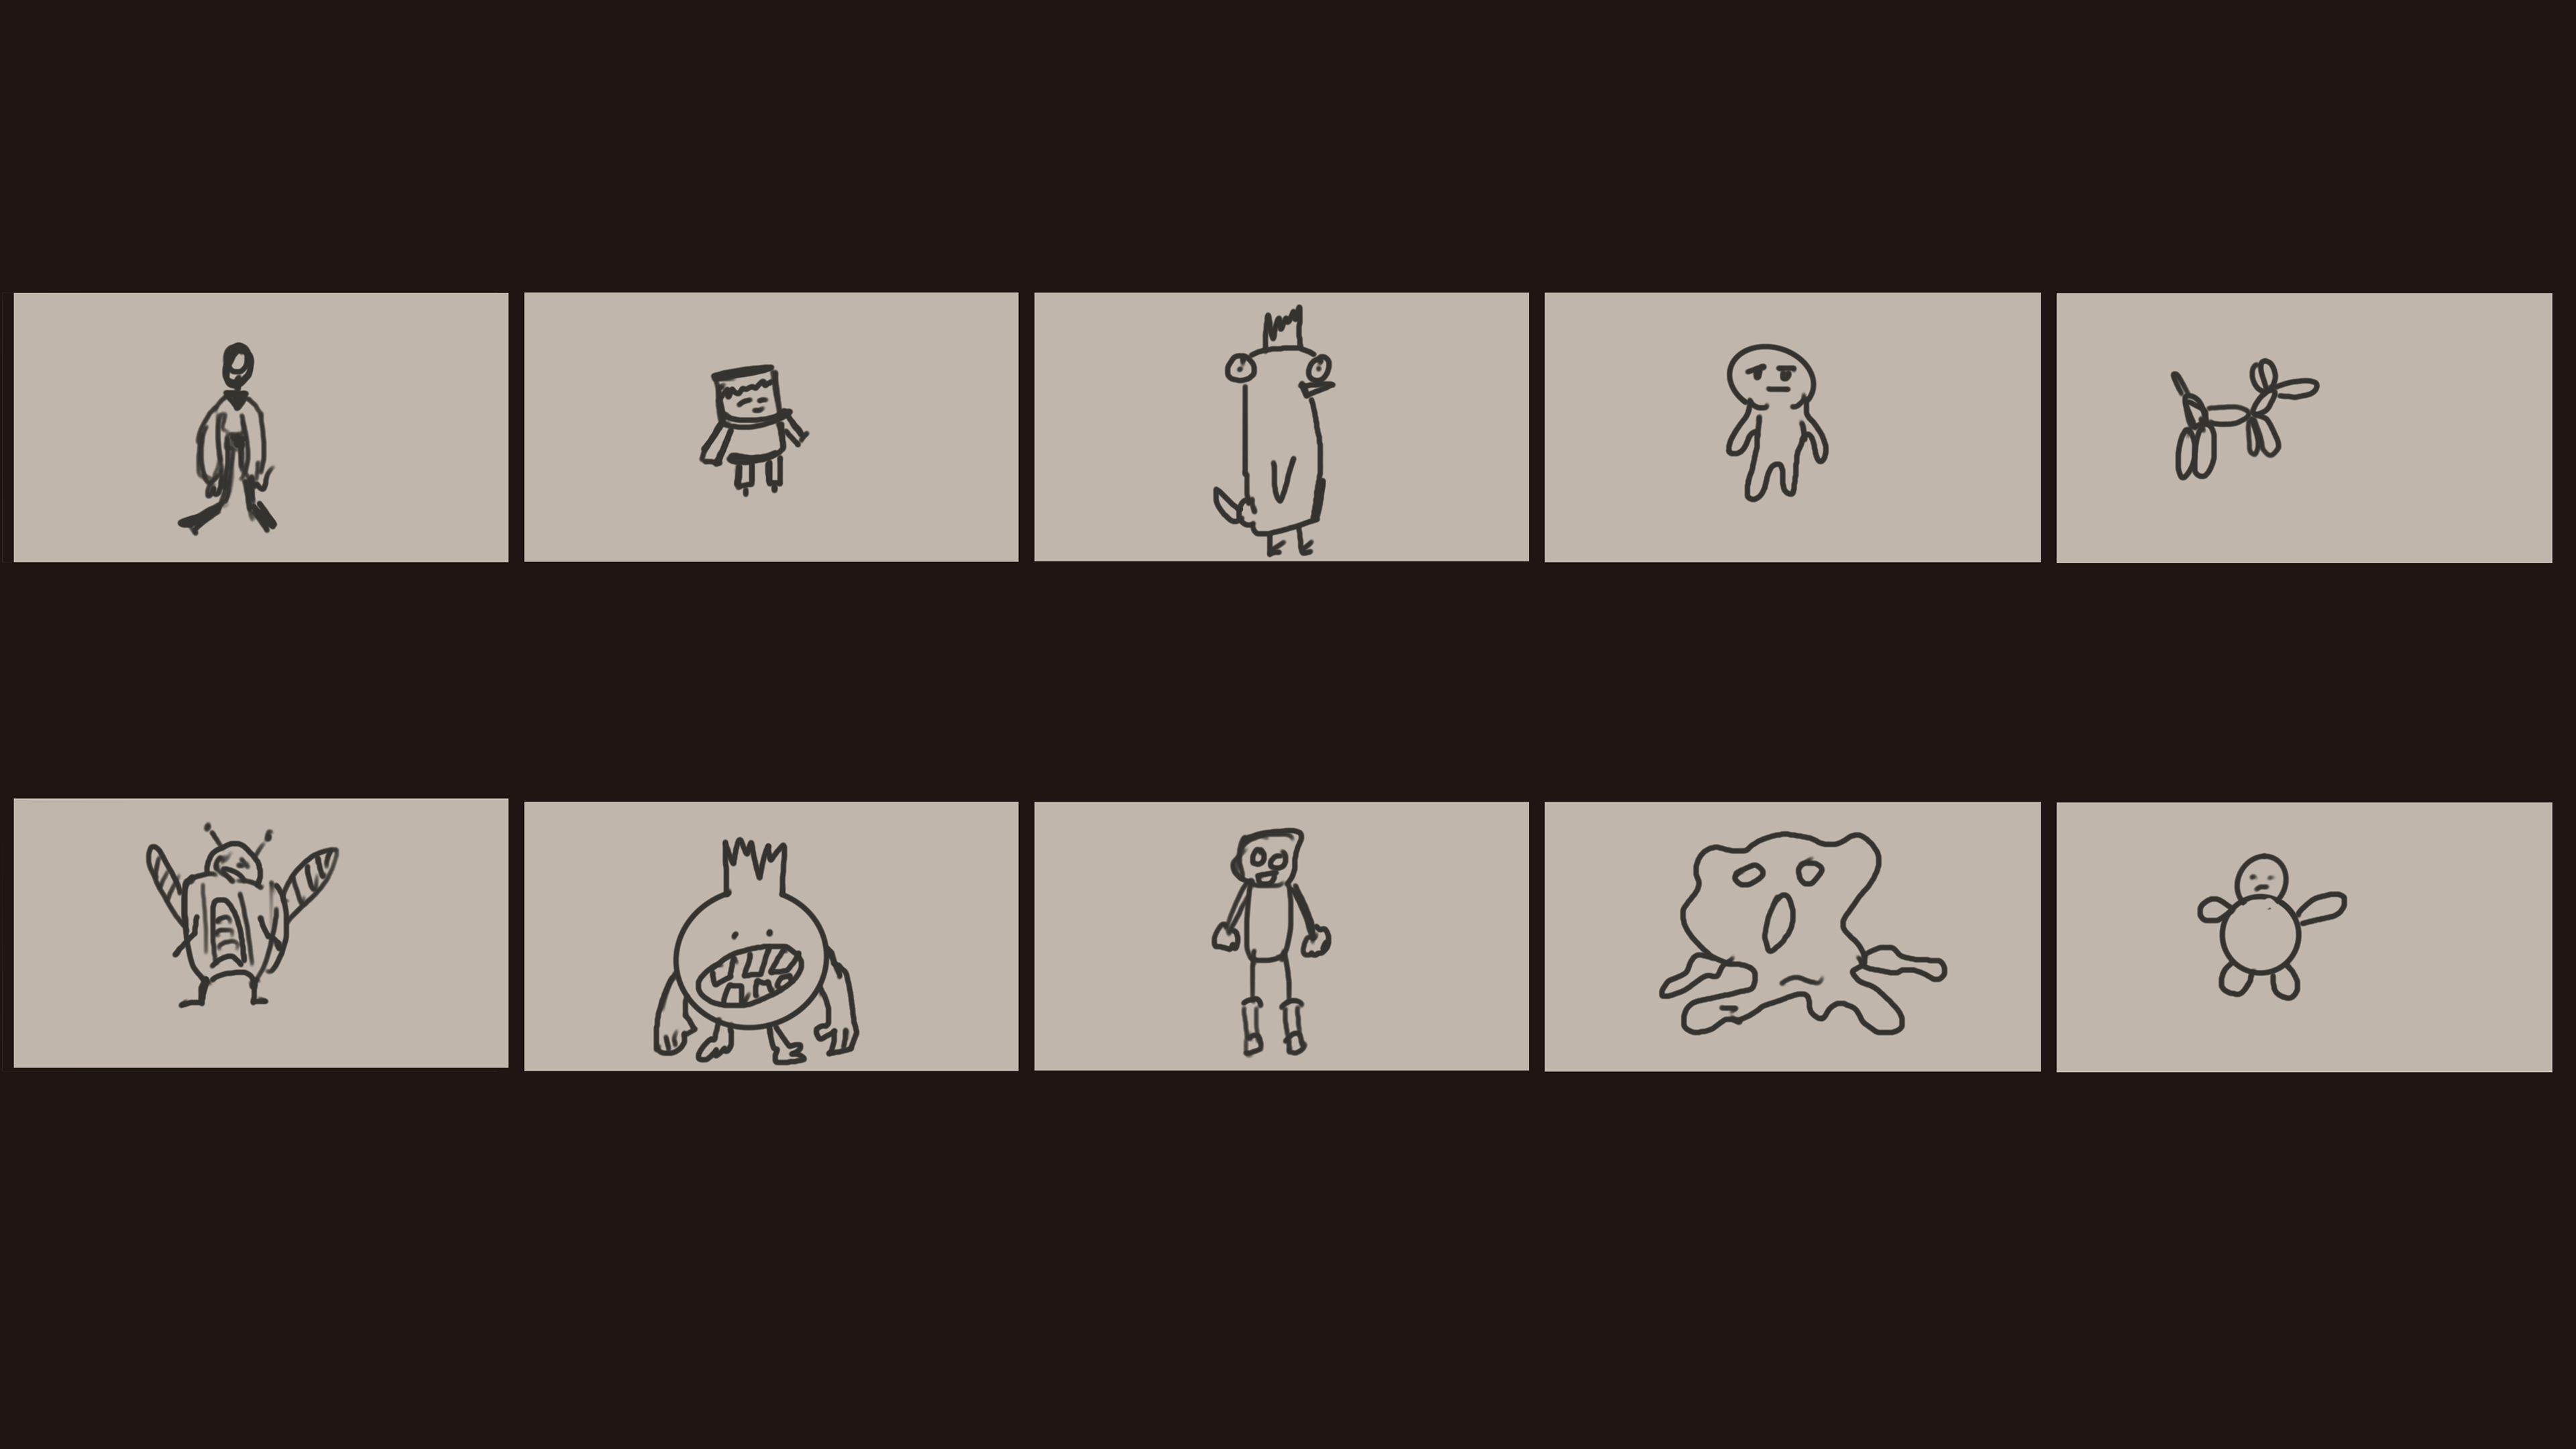
ROBOTS


INT- ROOM 902 28 - 11 - 24
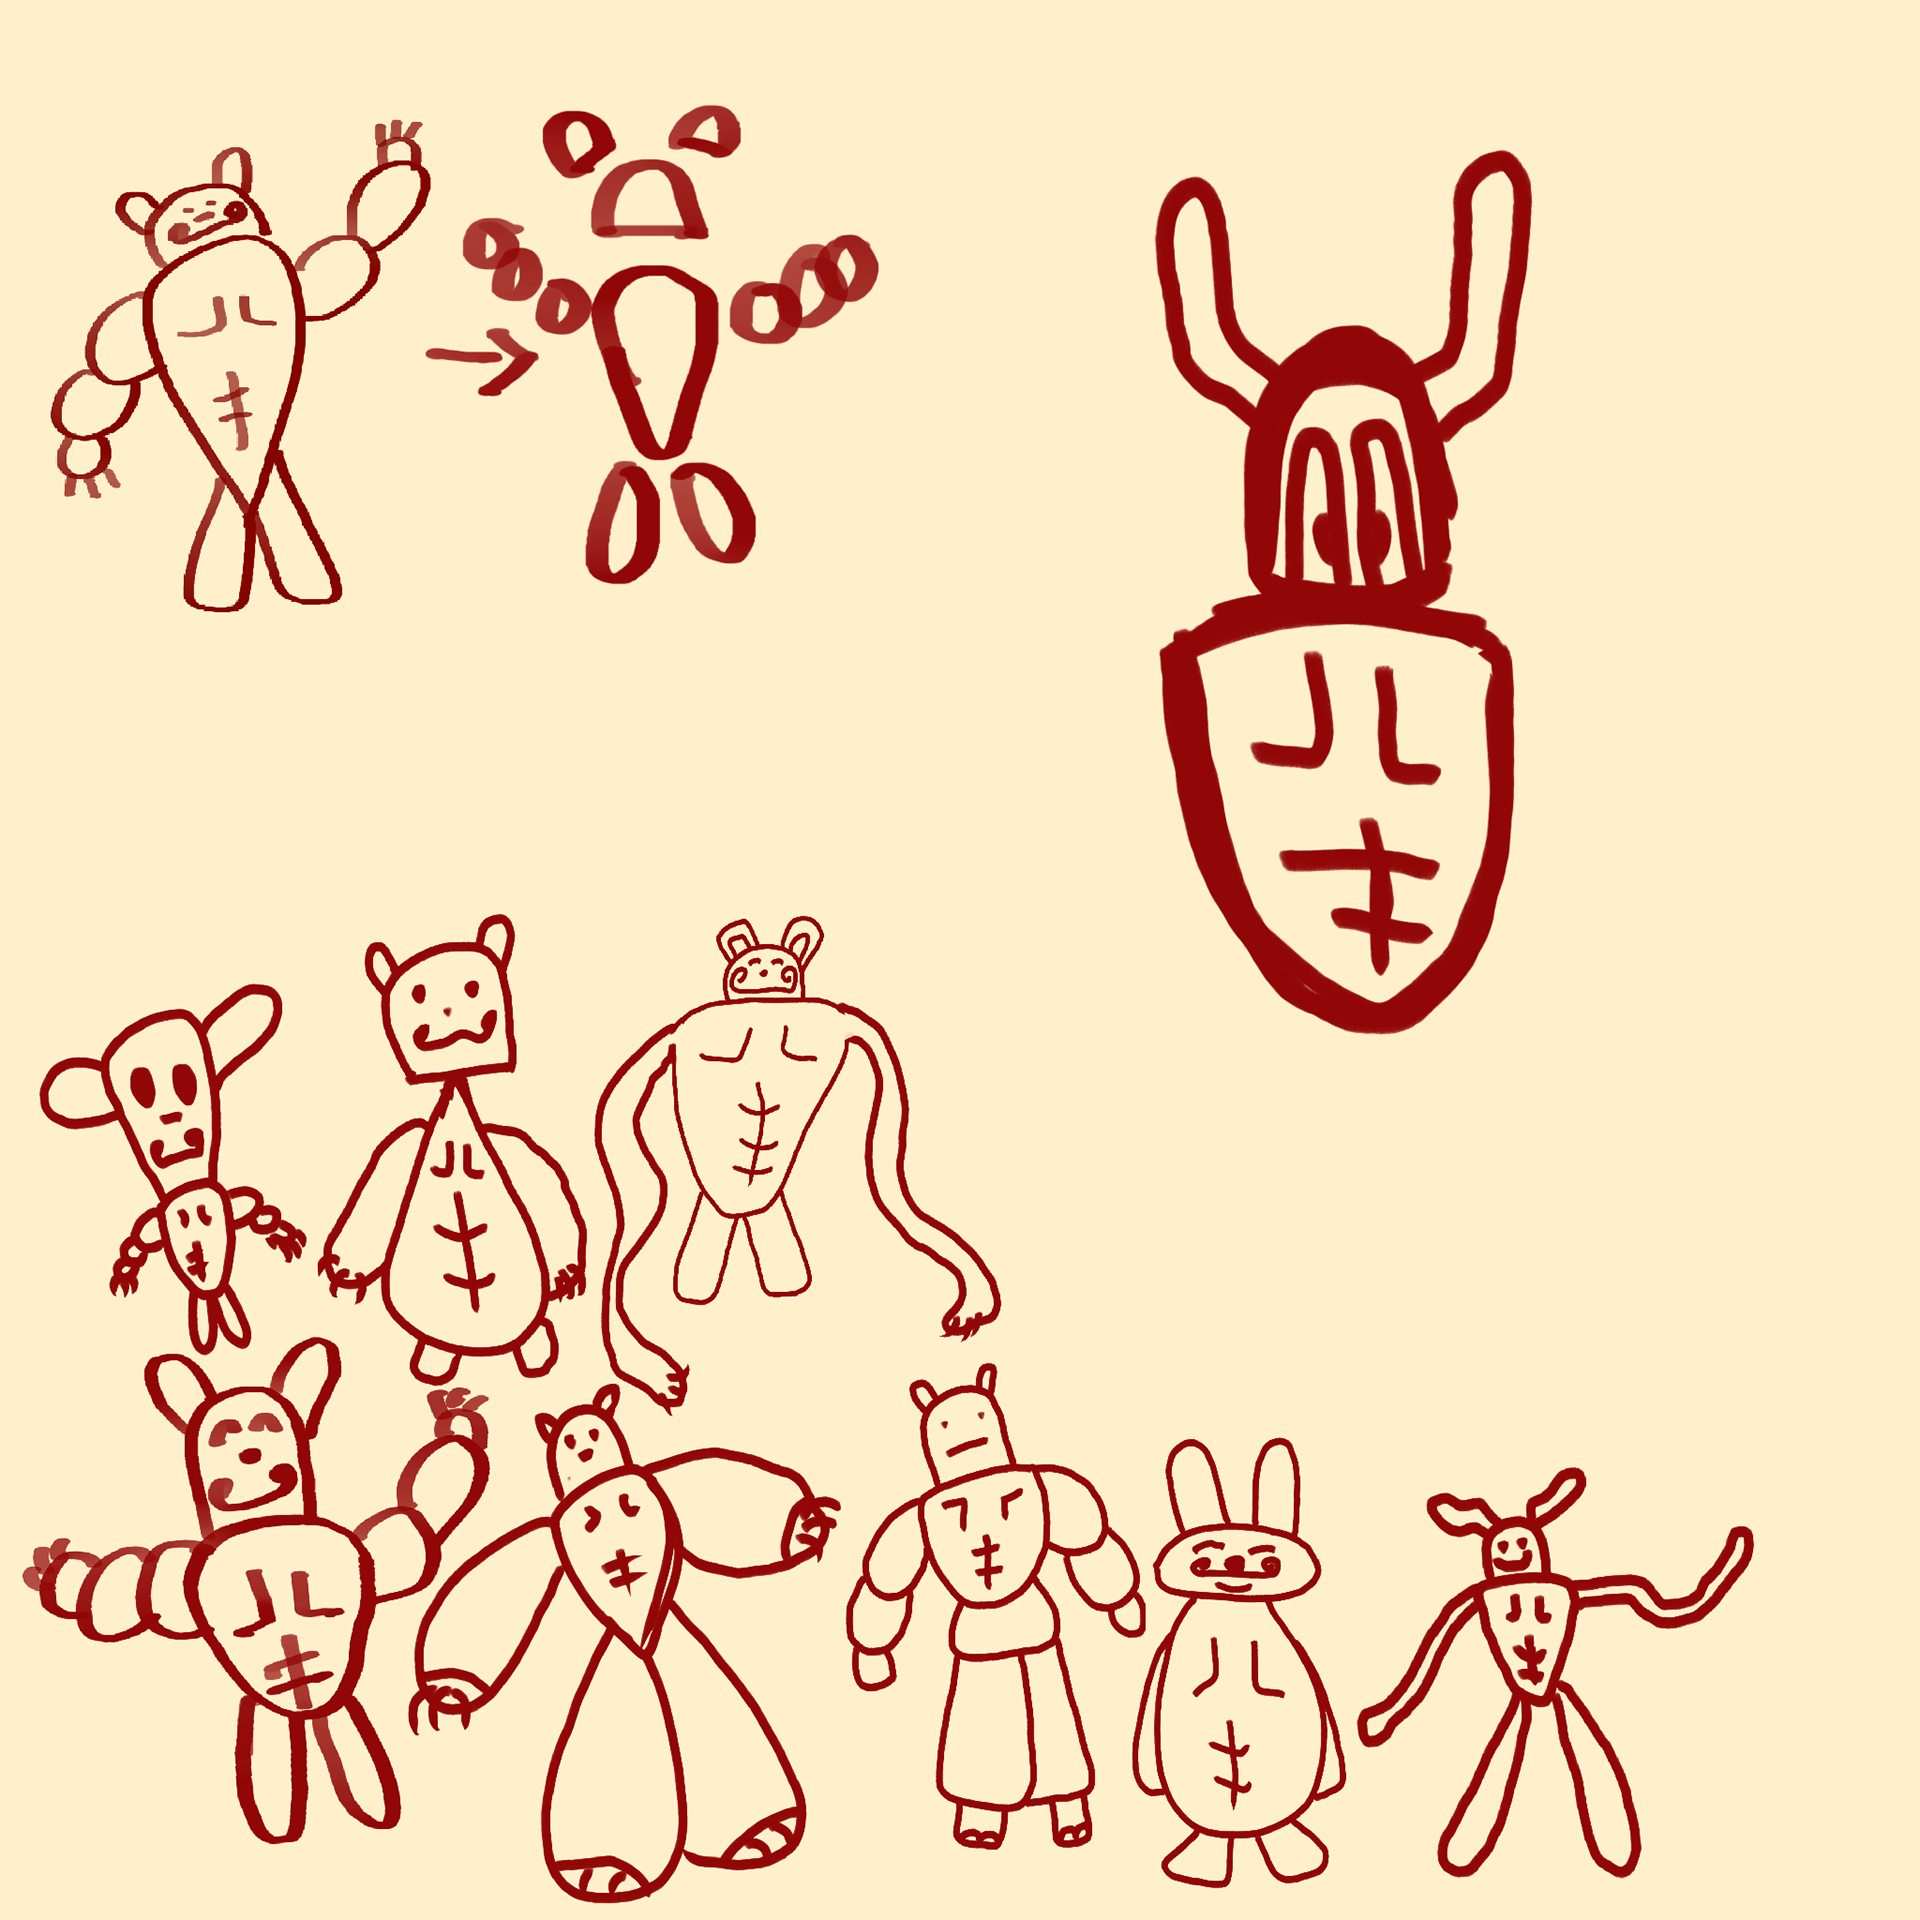
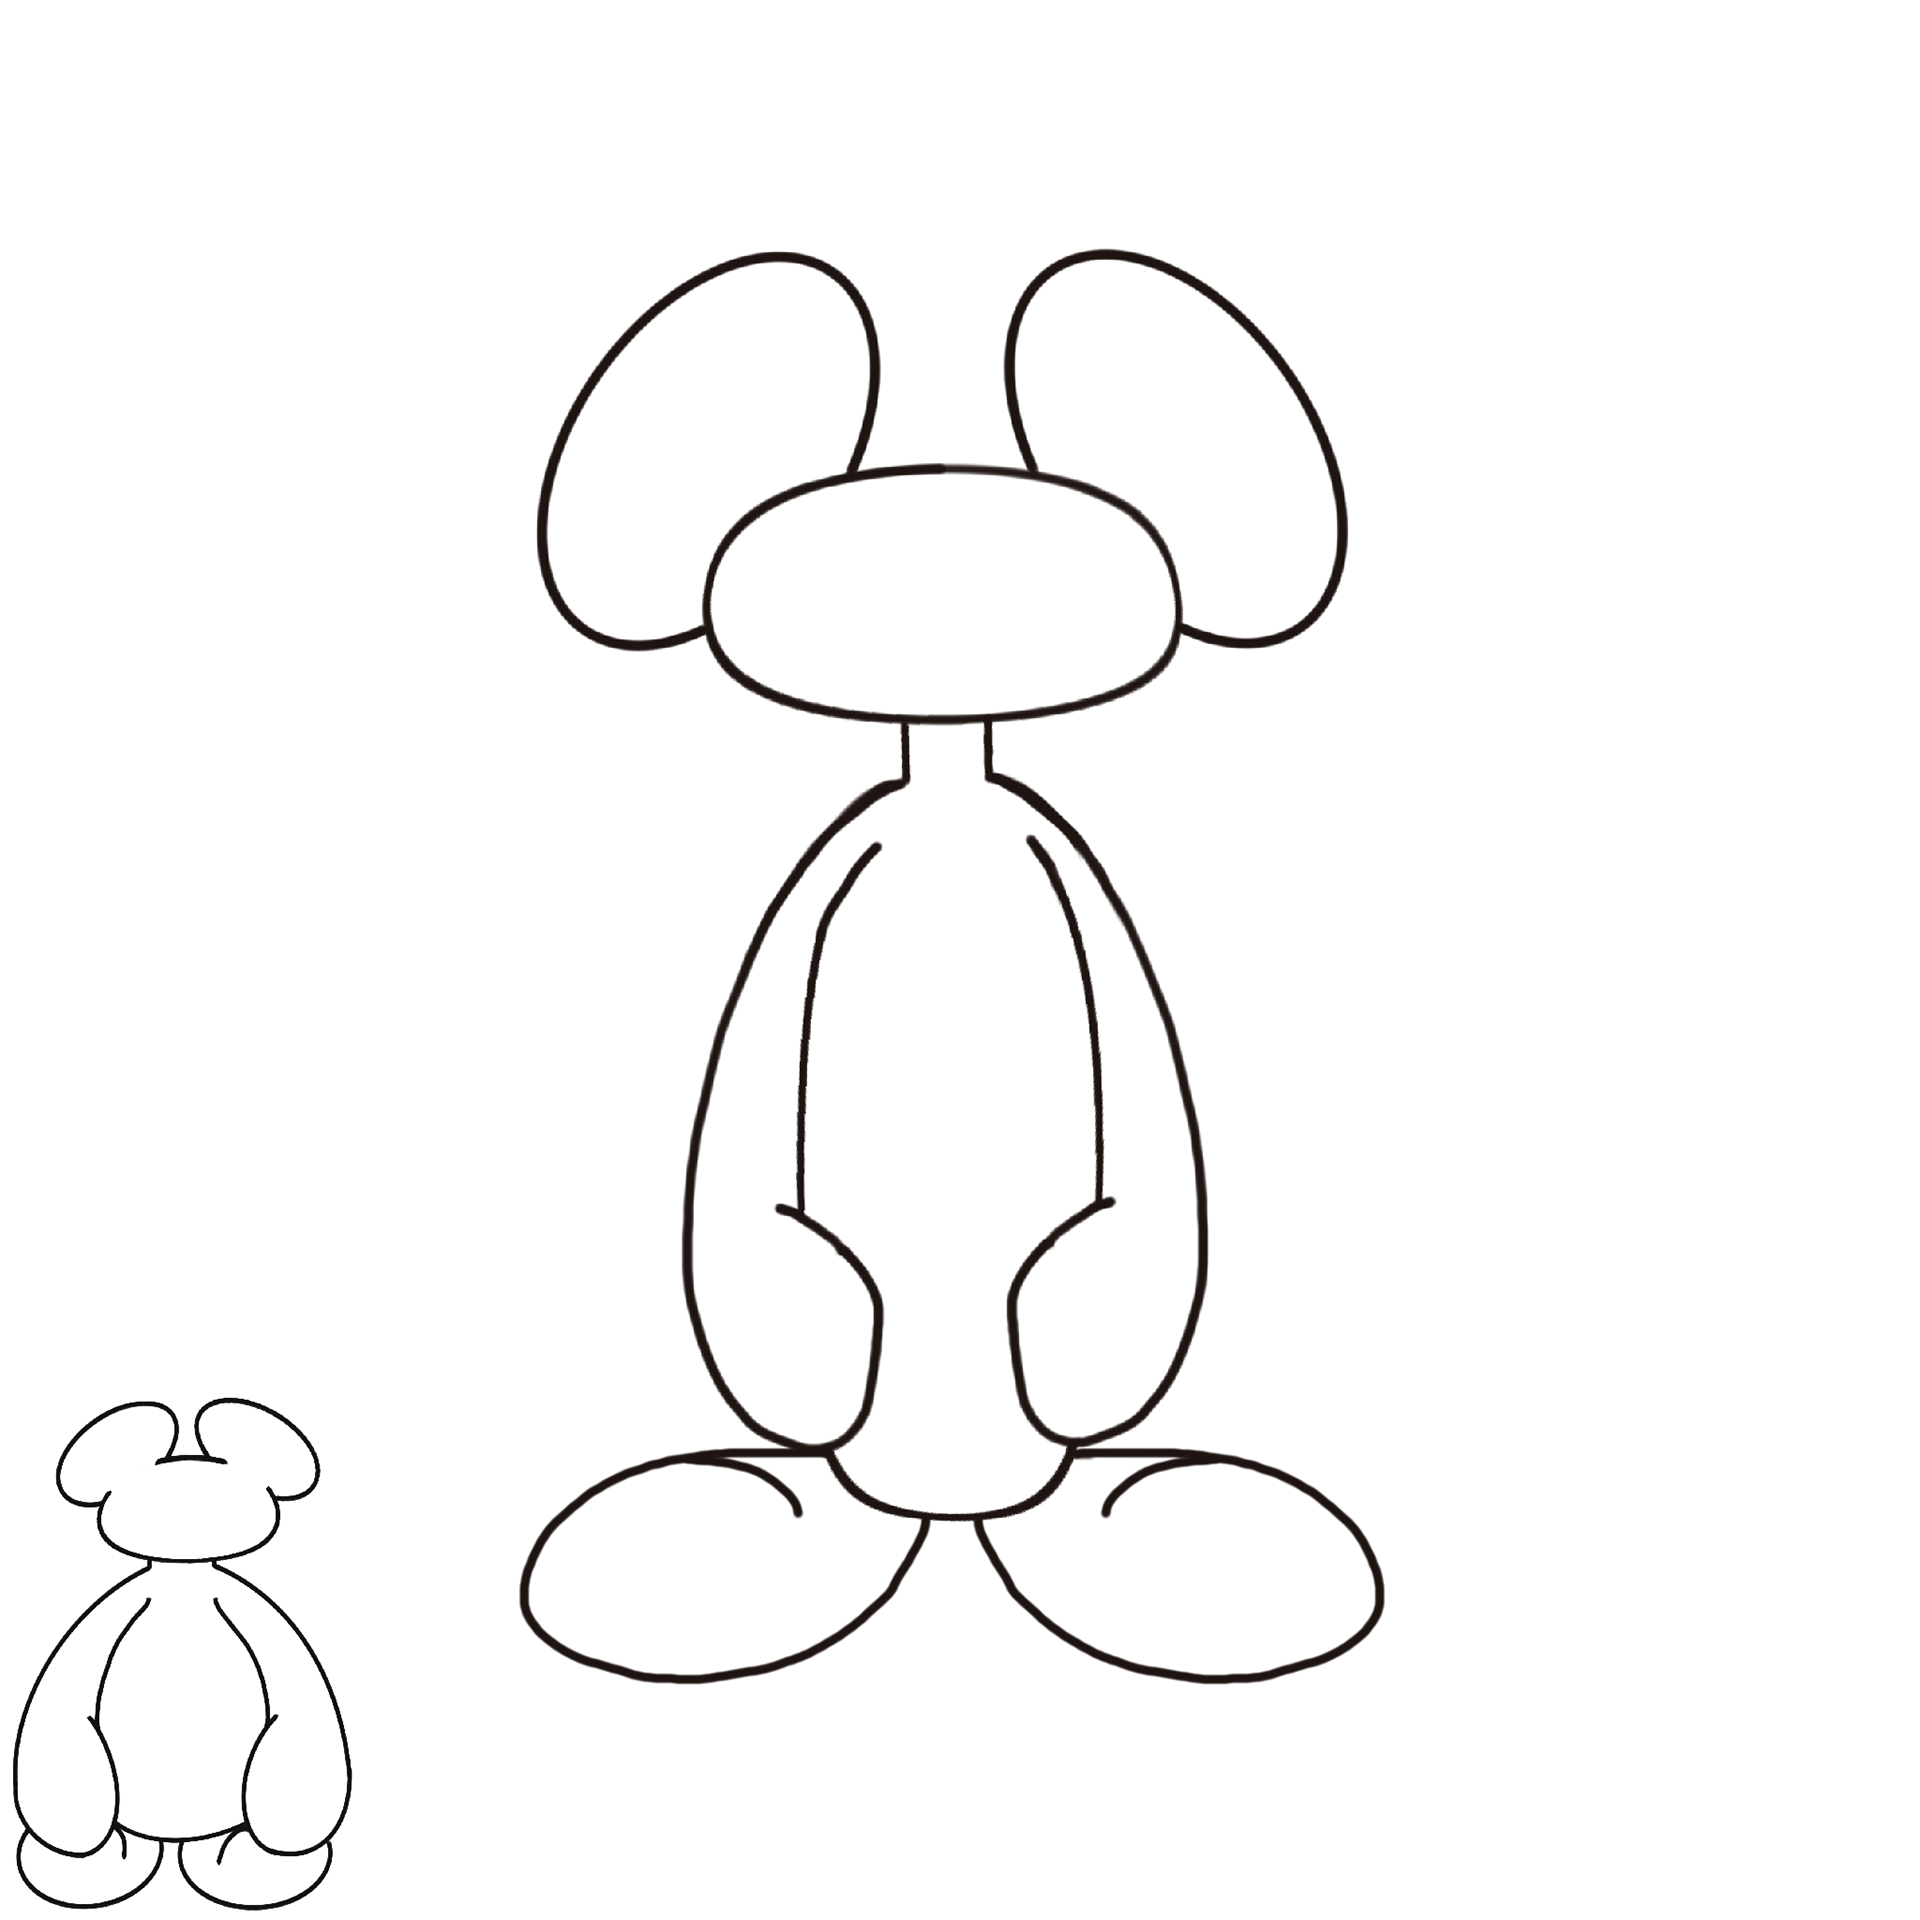
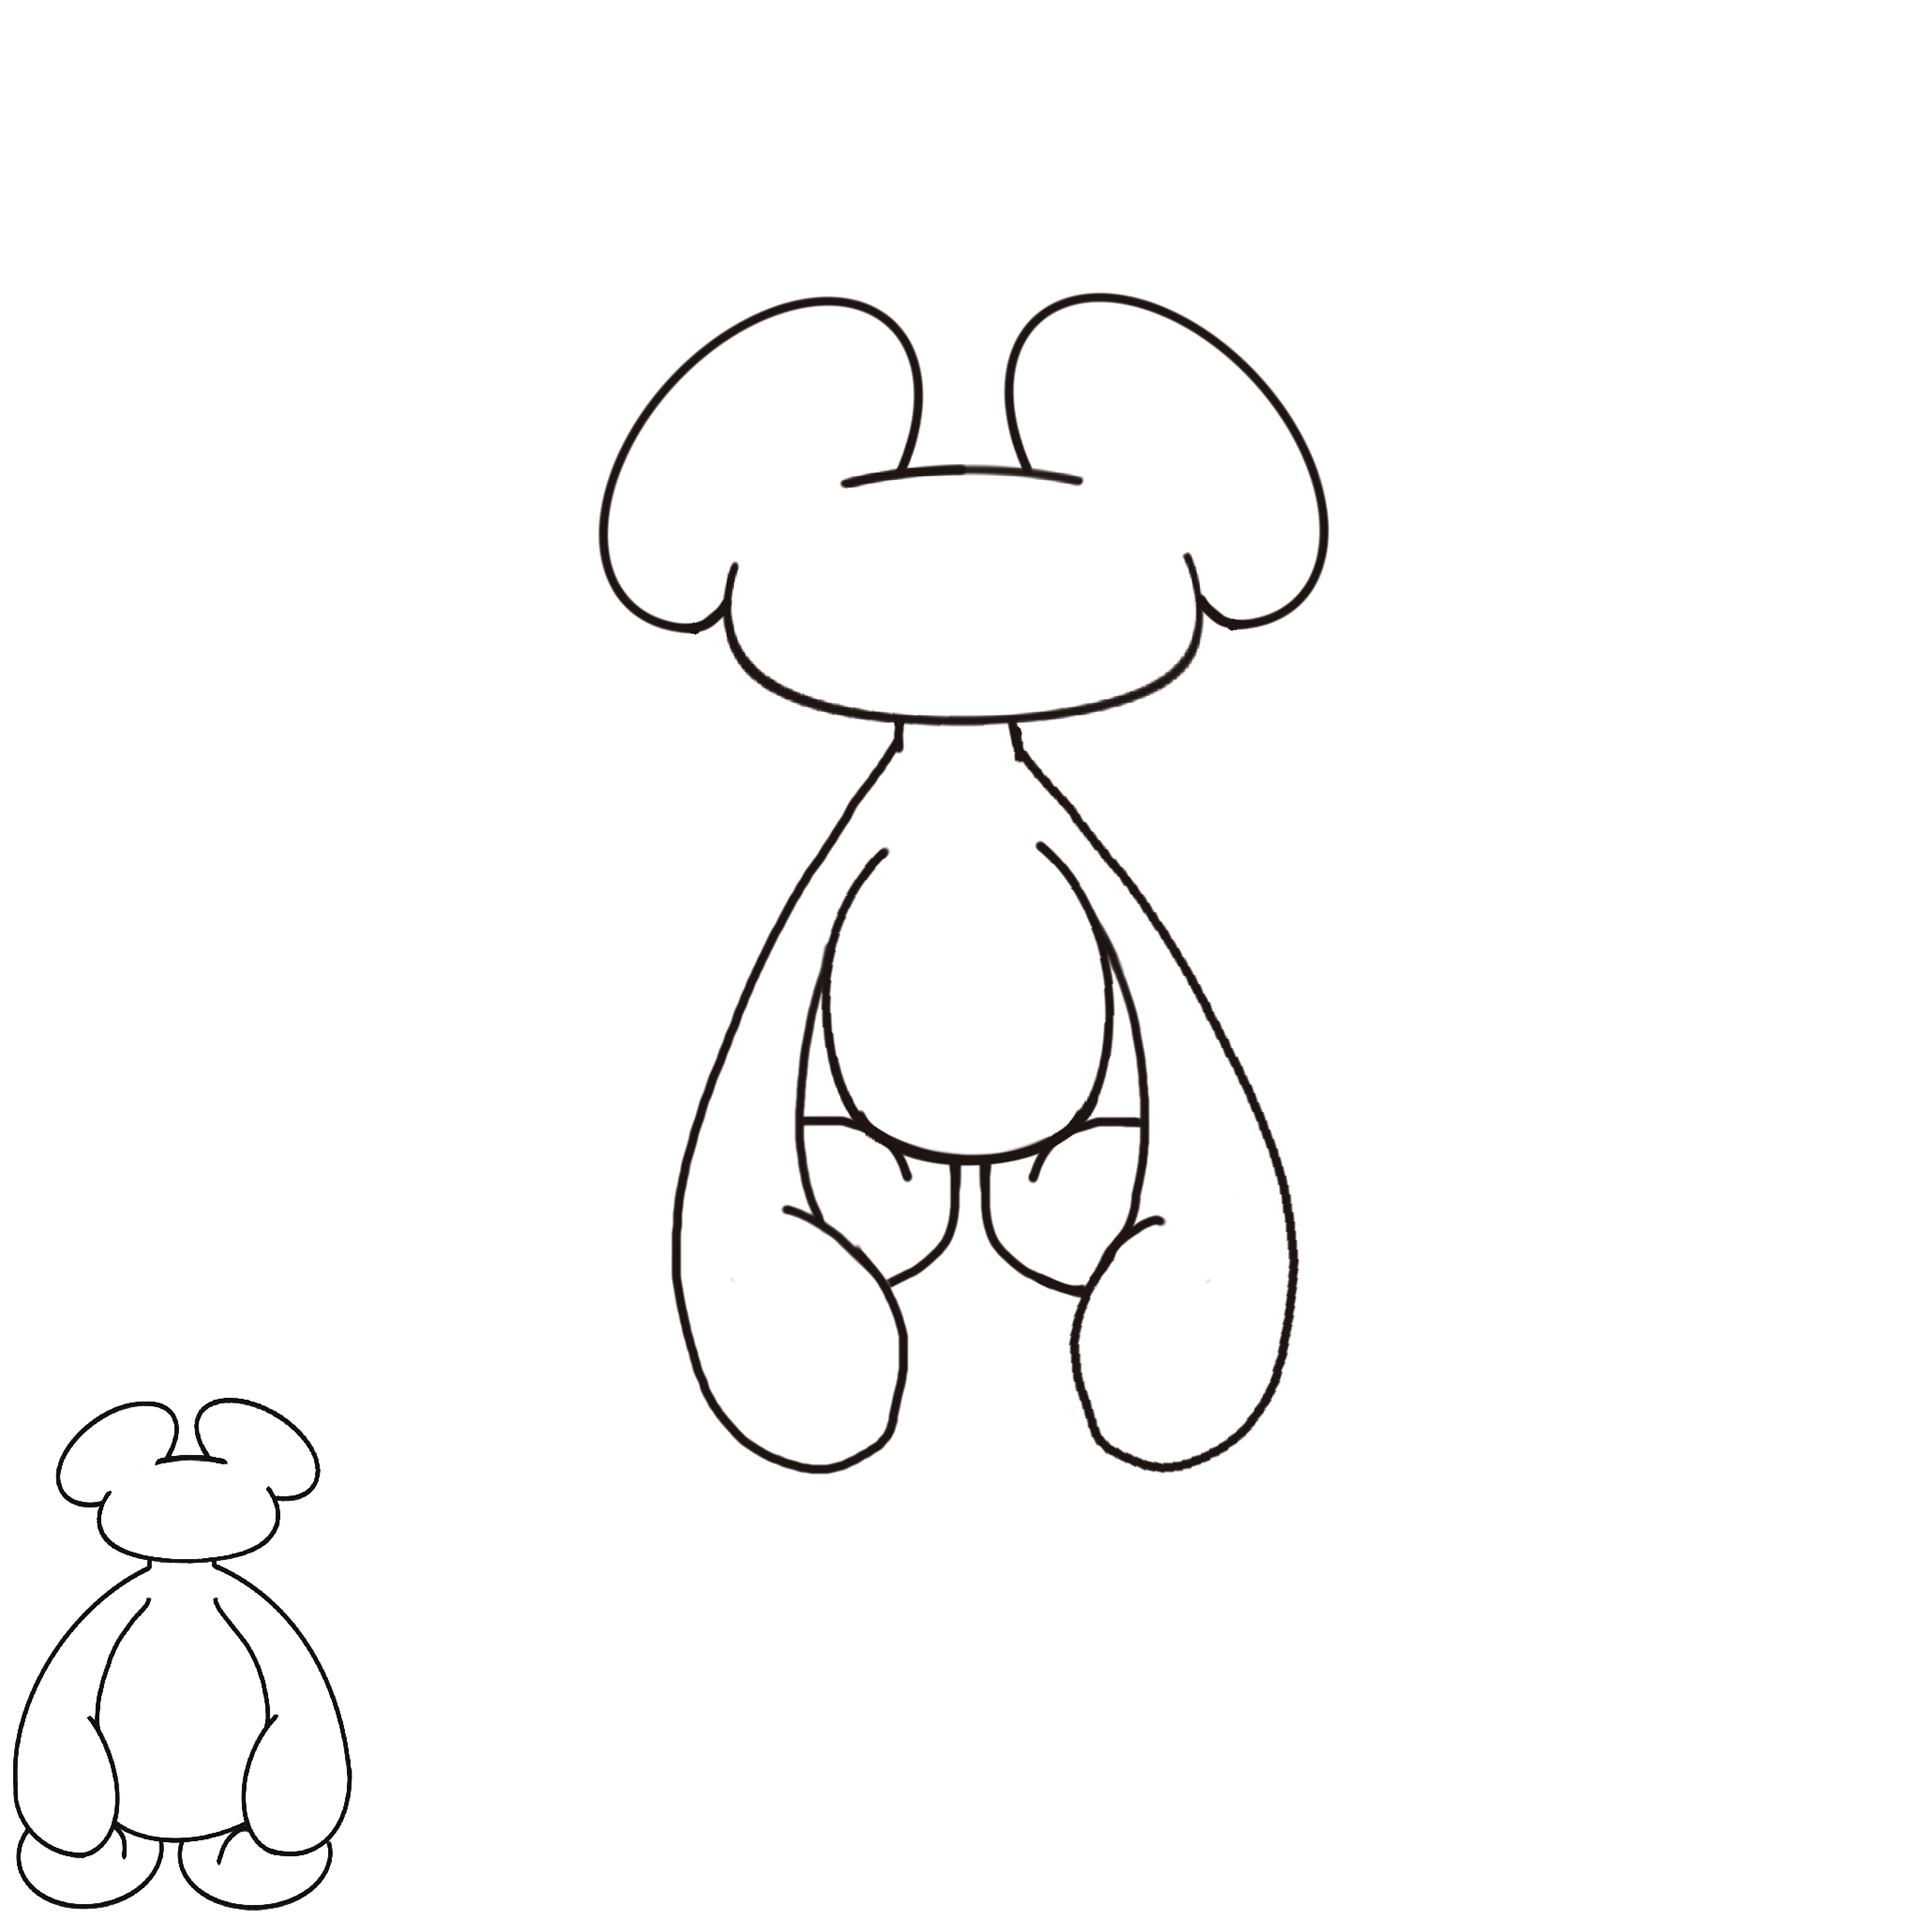
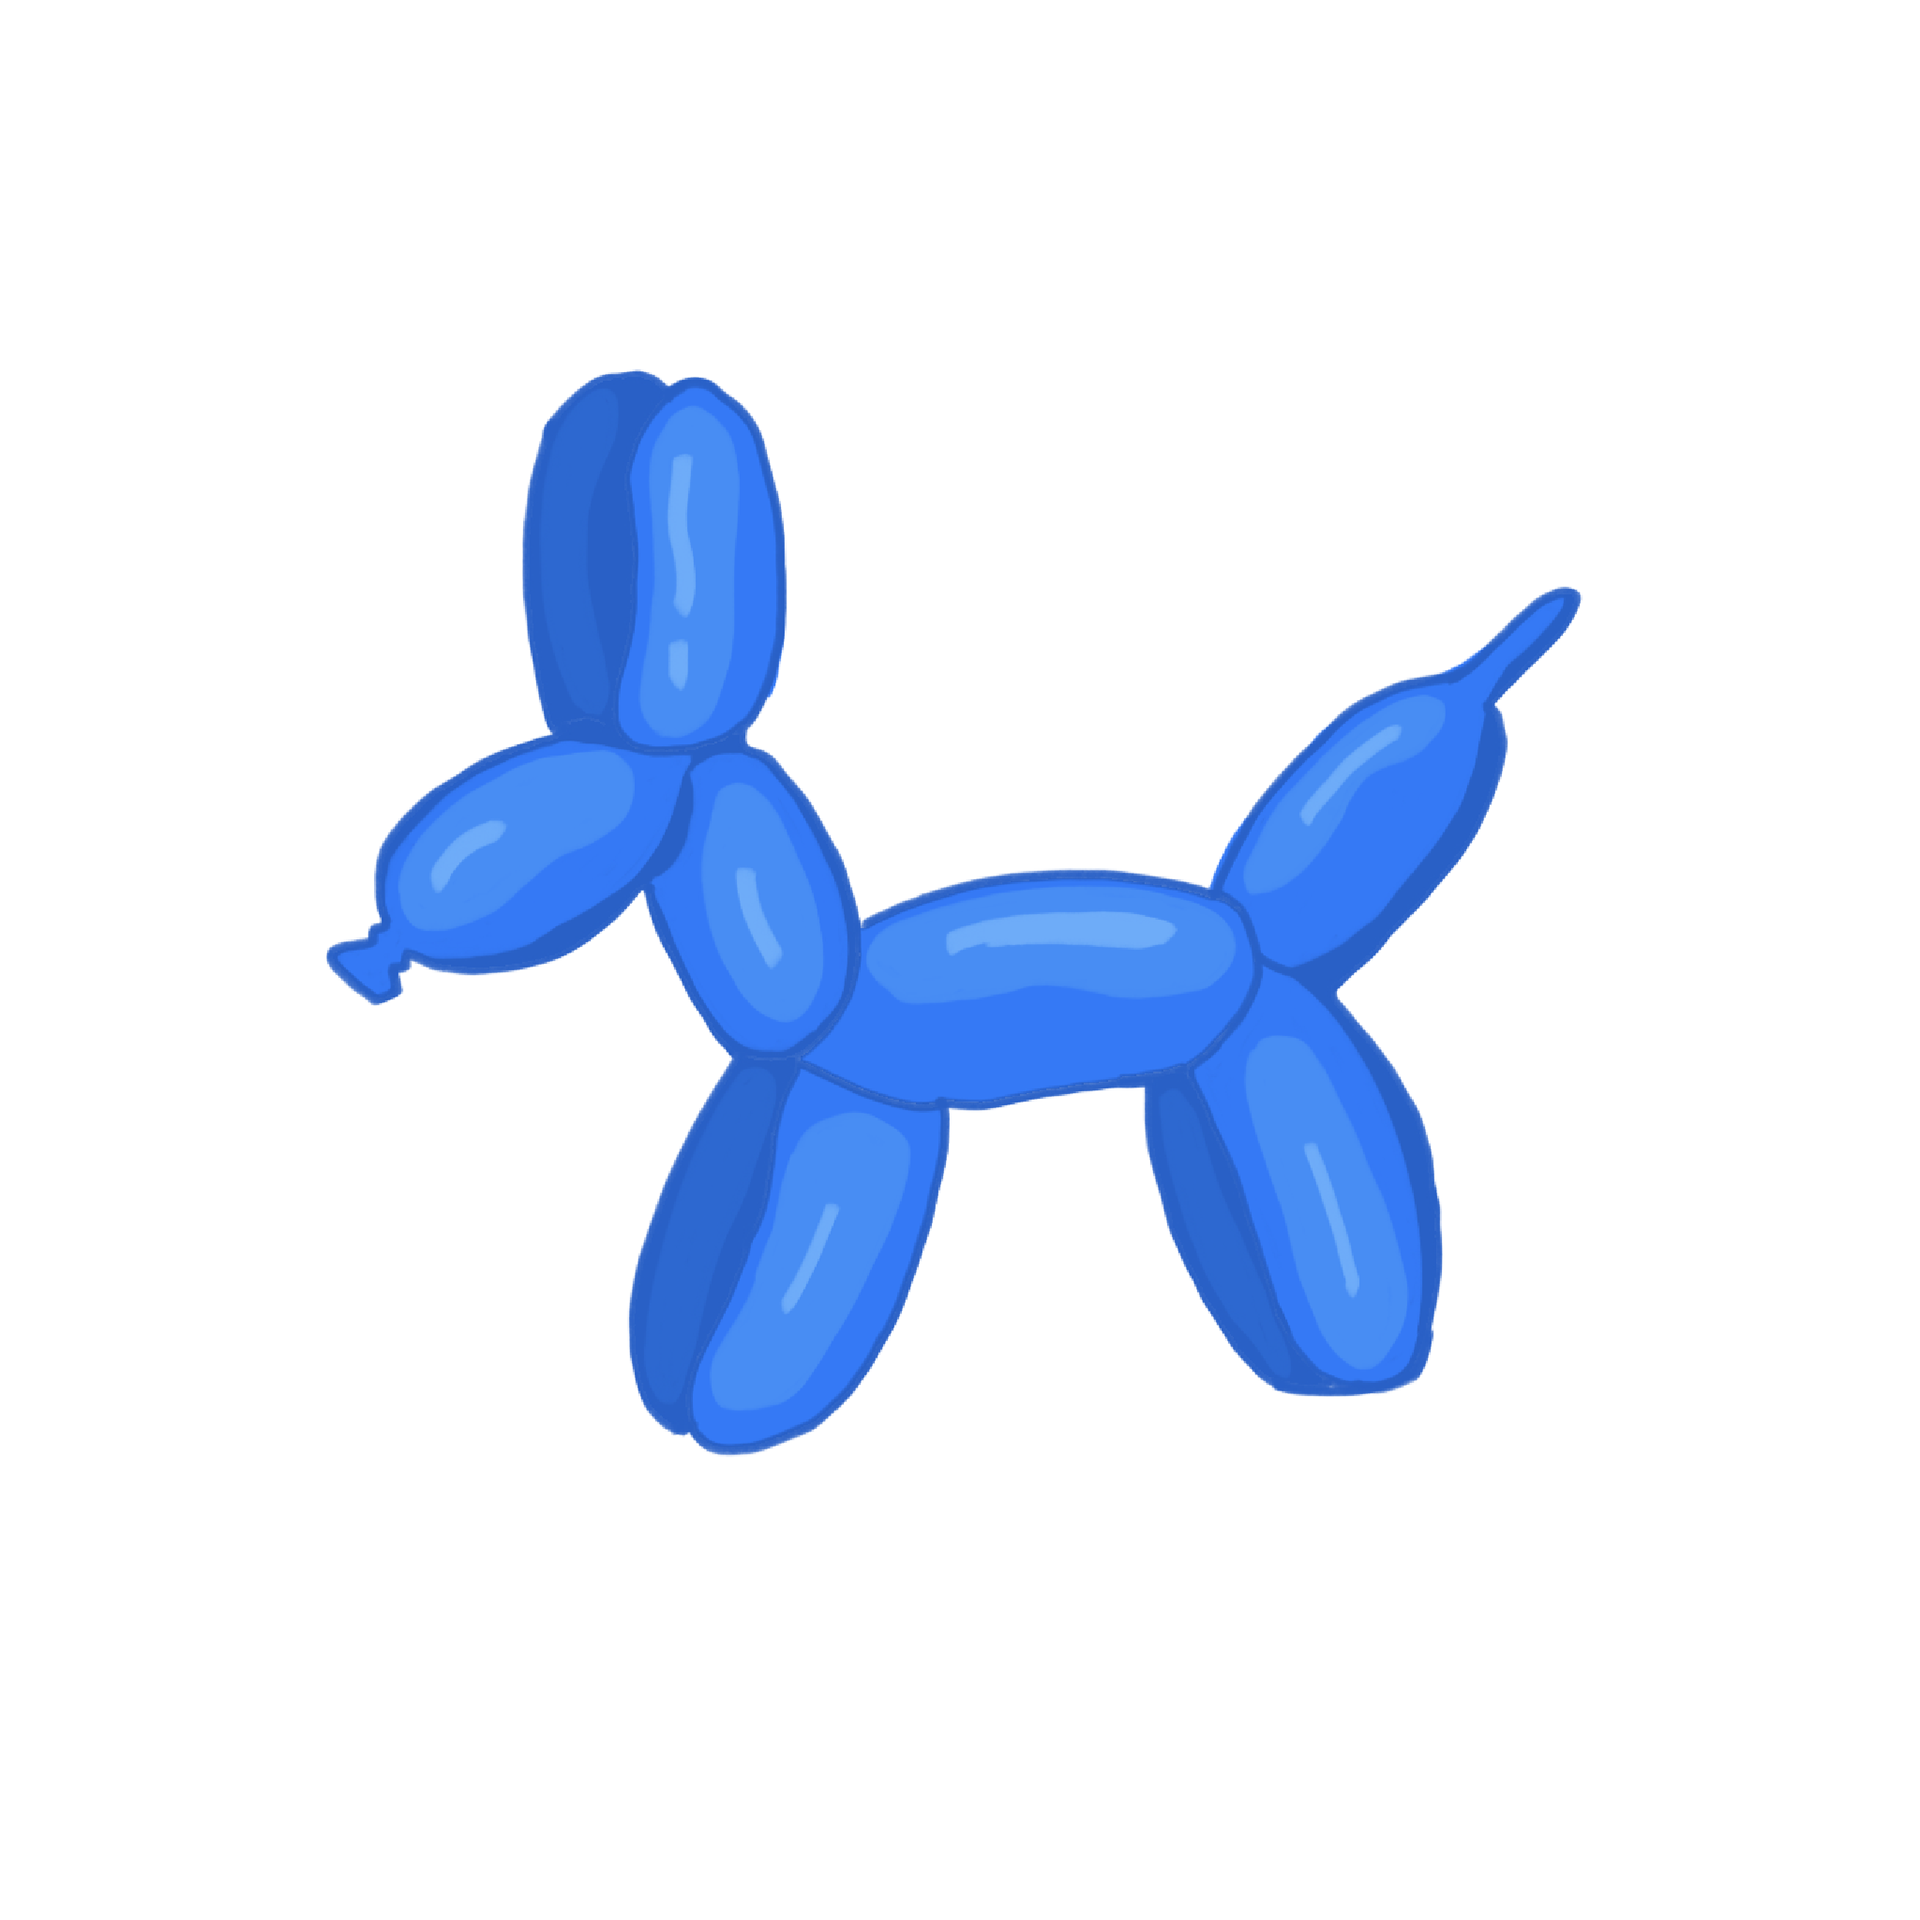
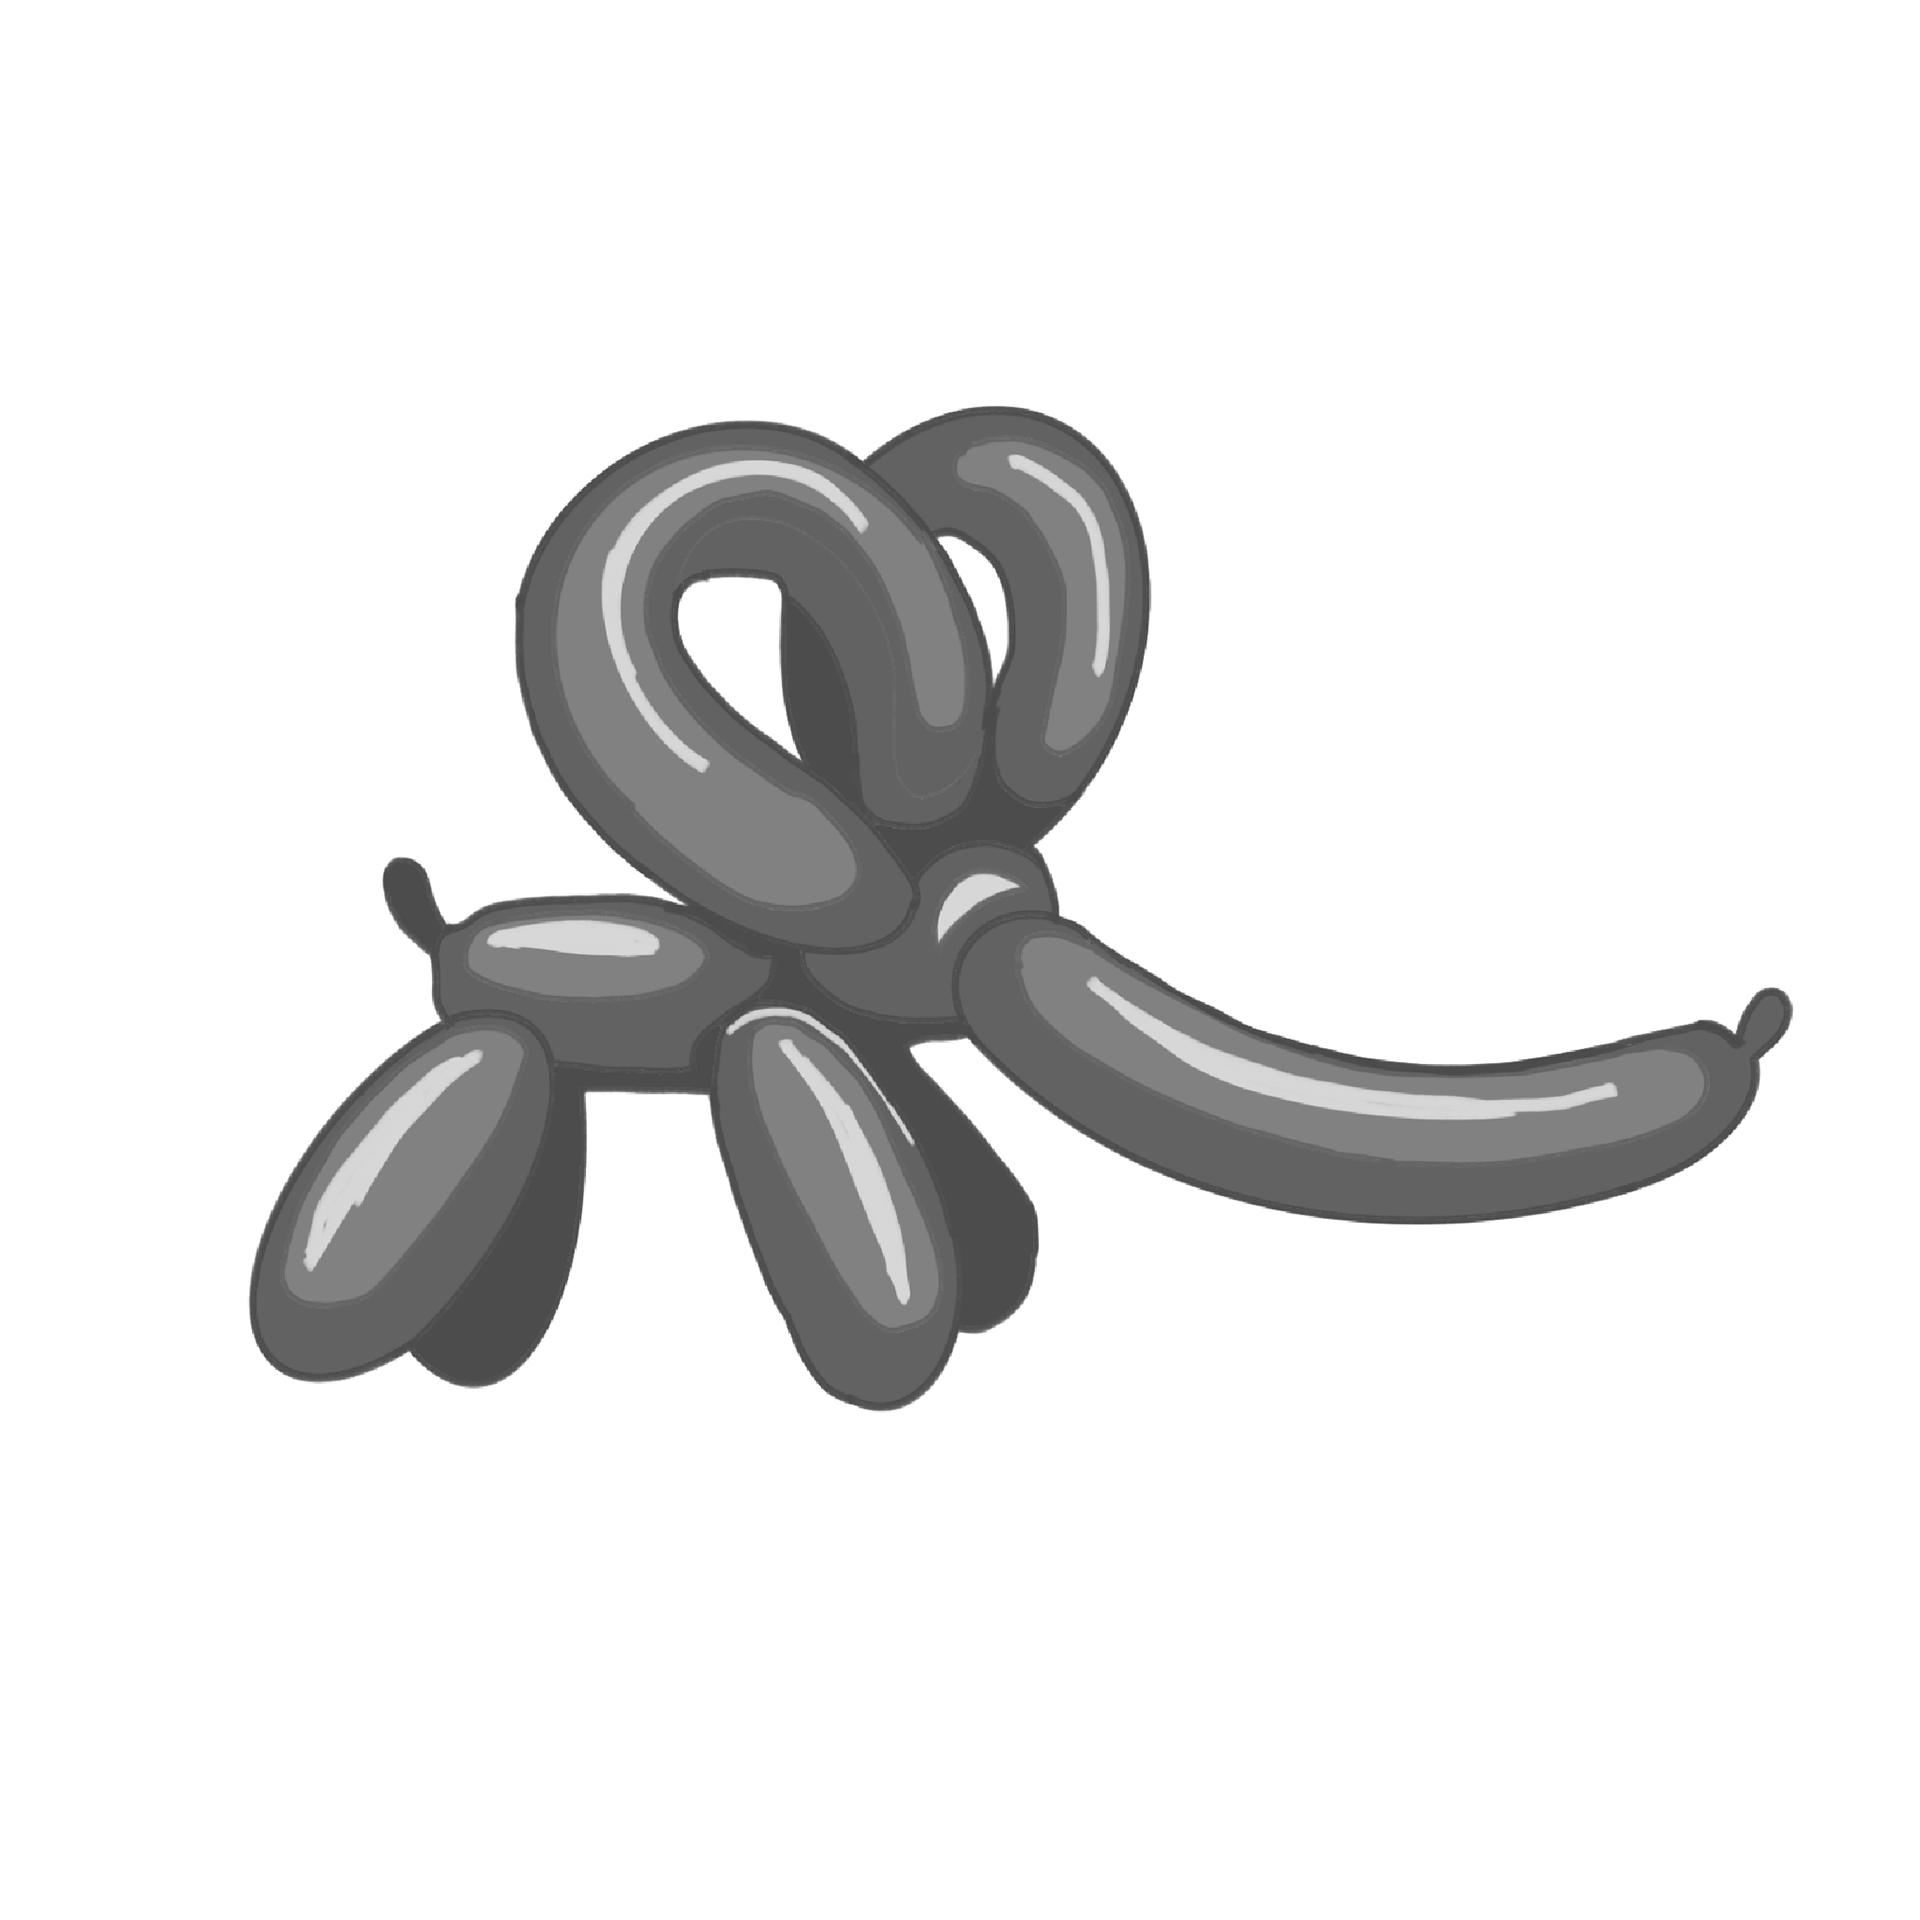
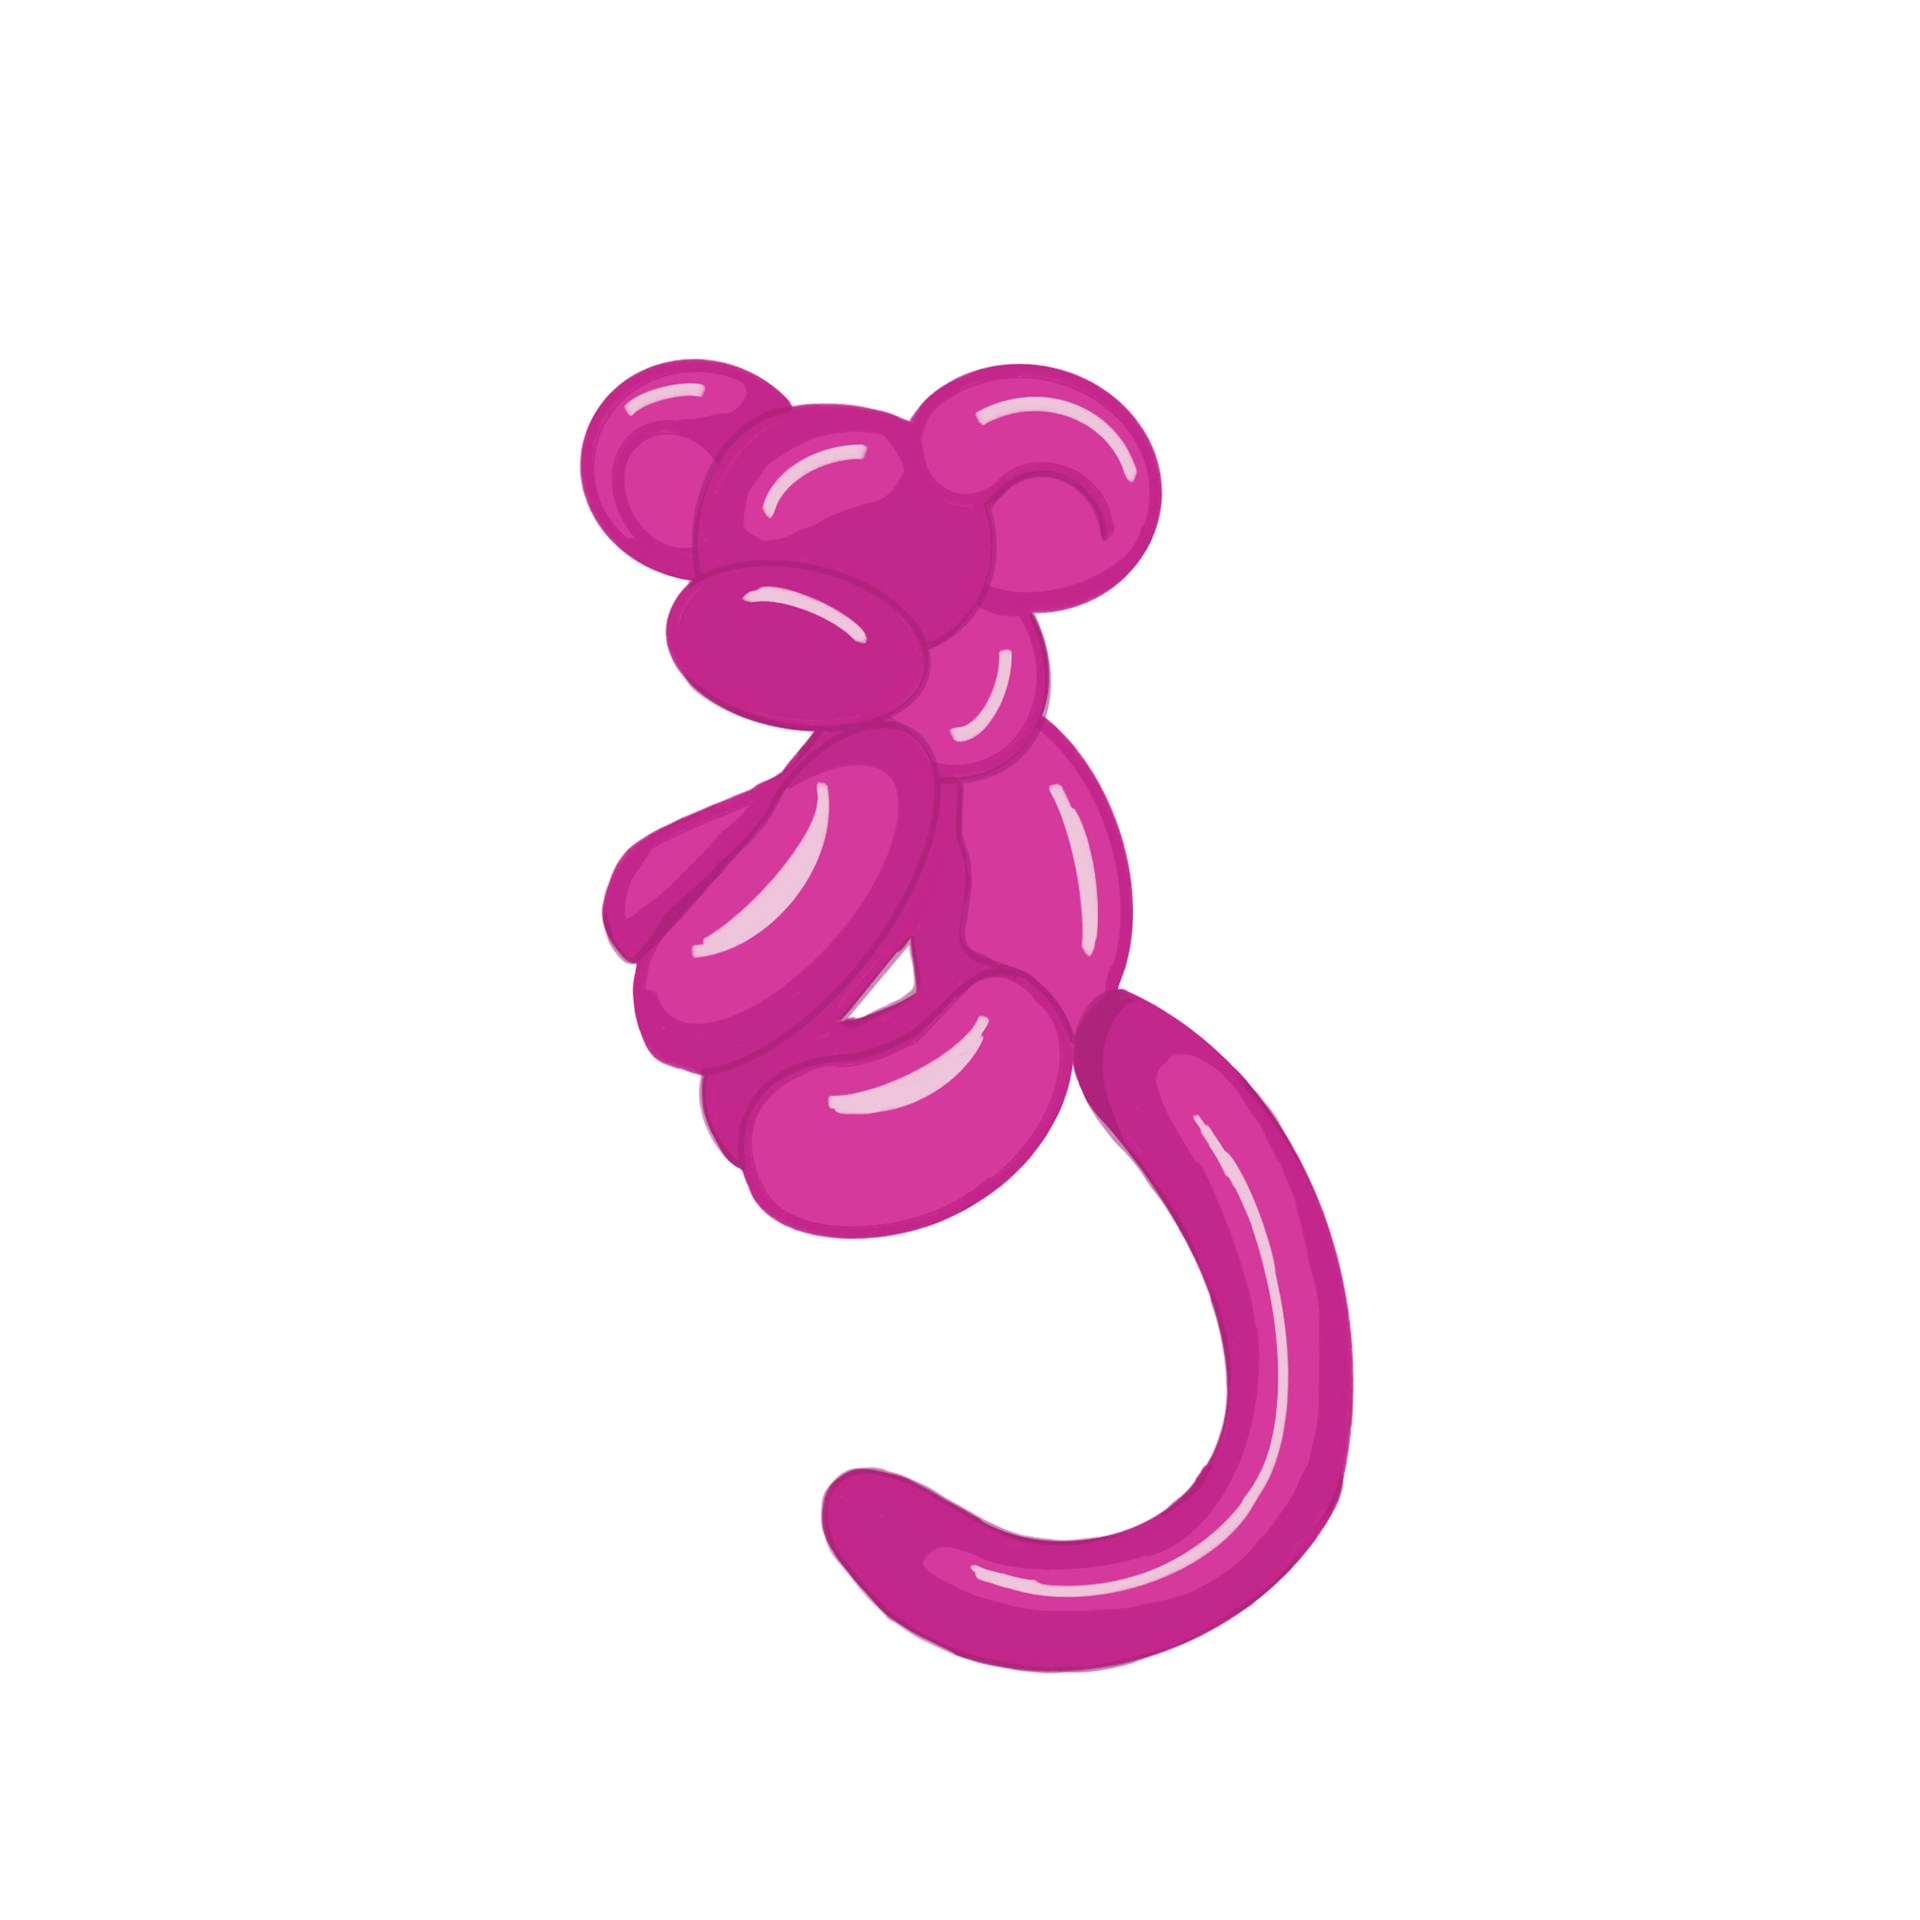
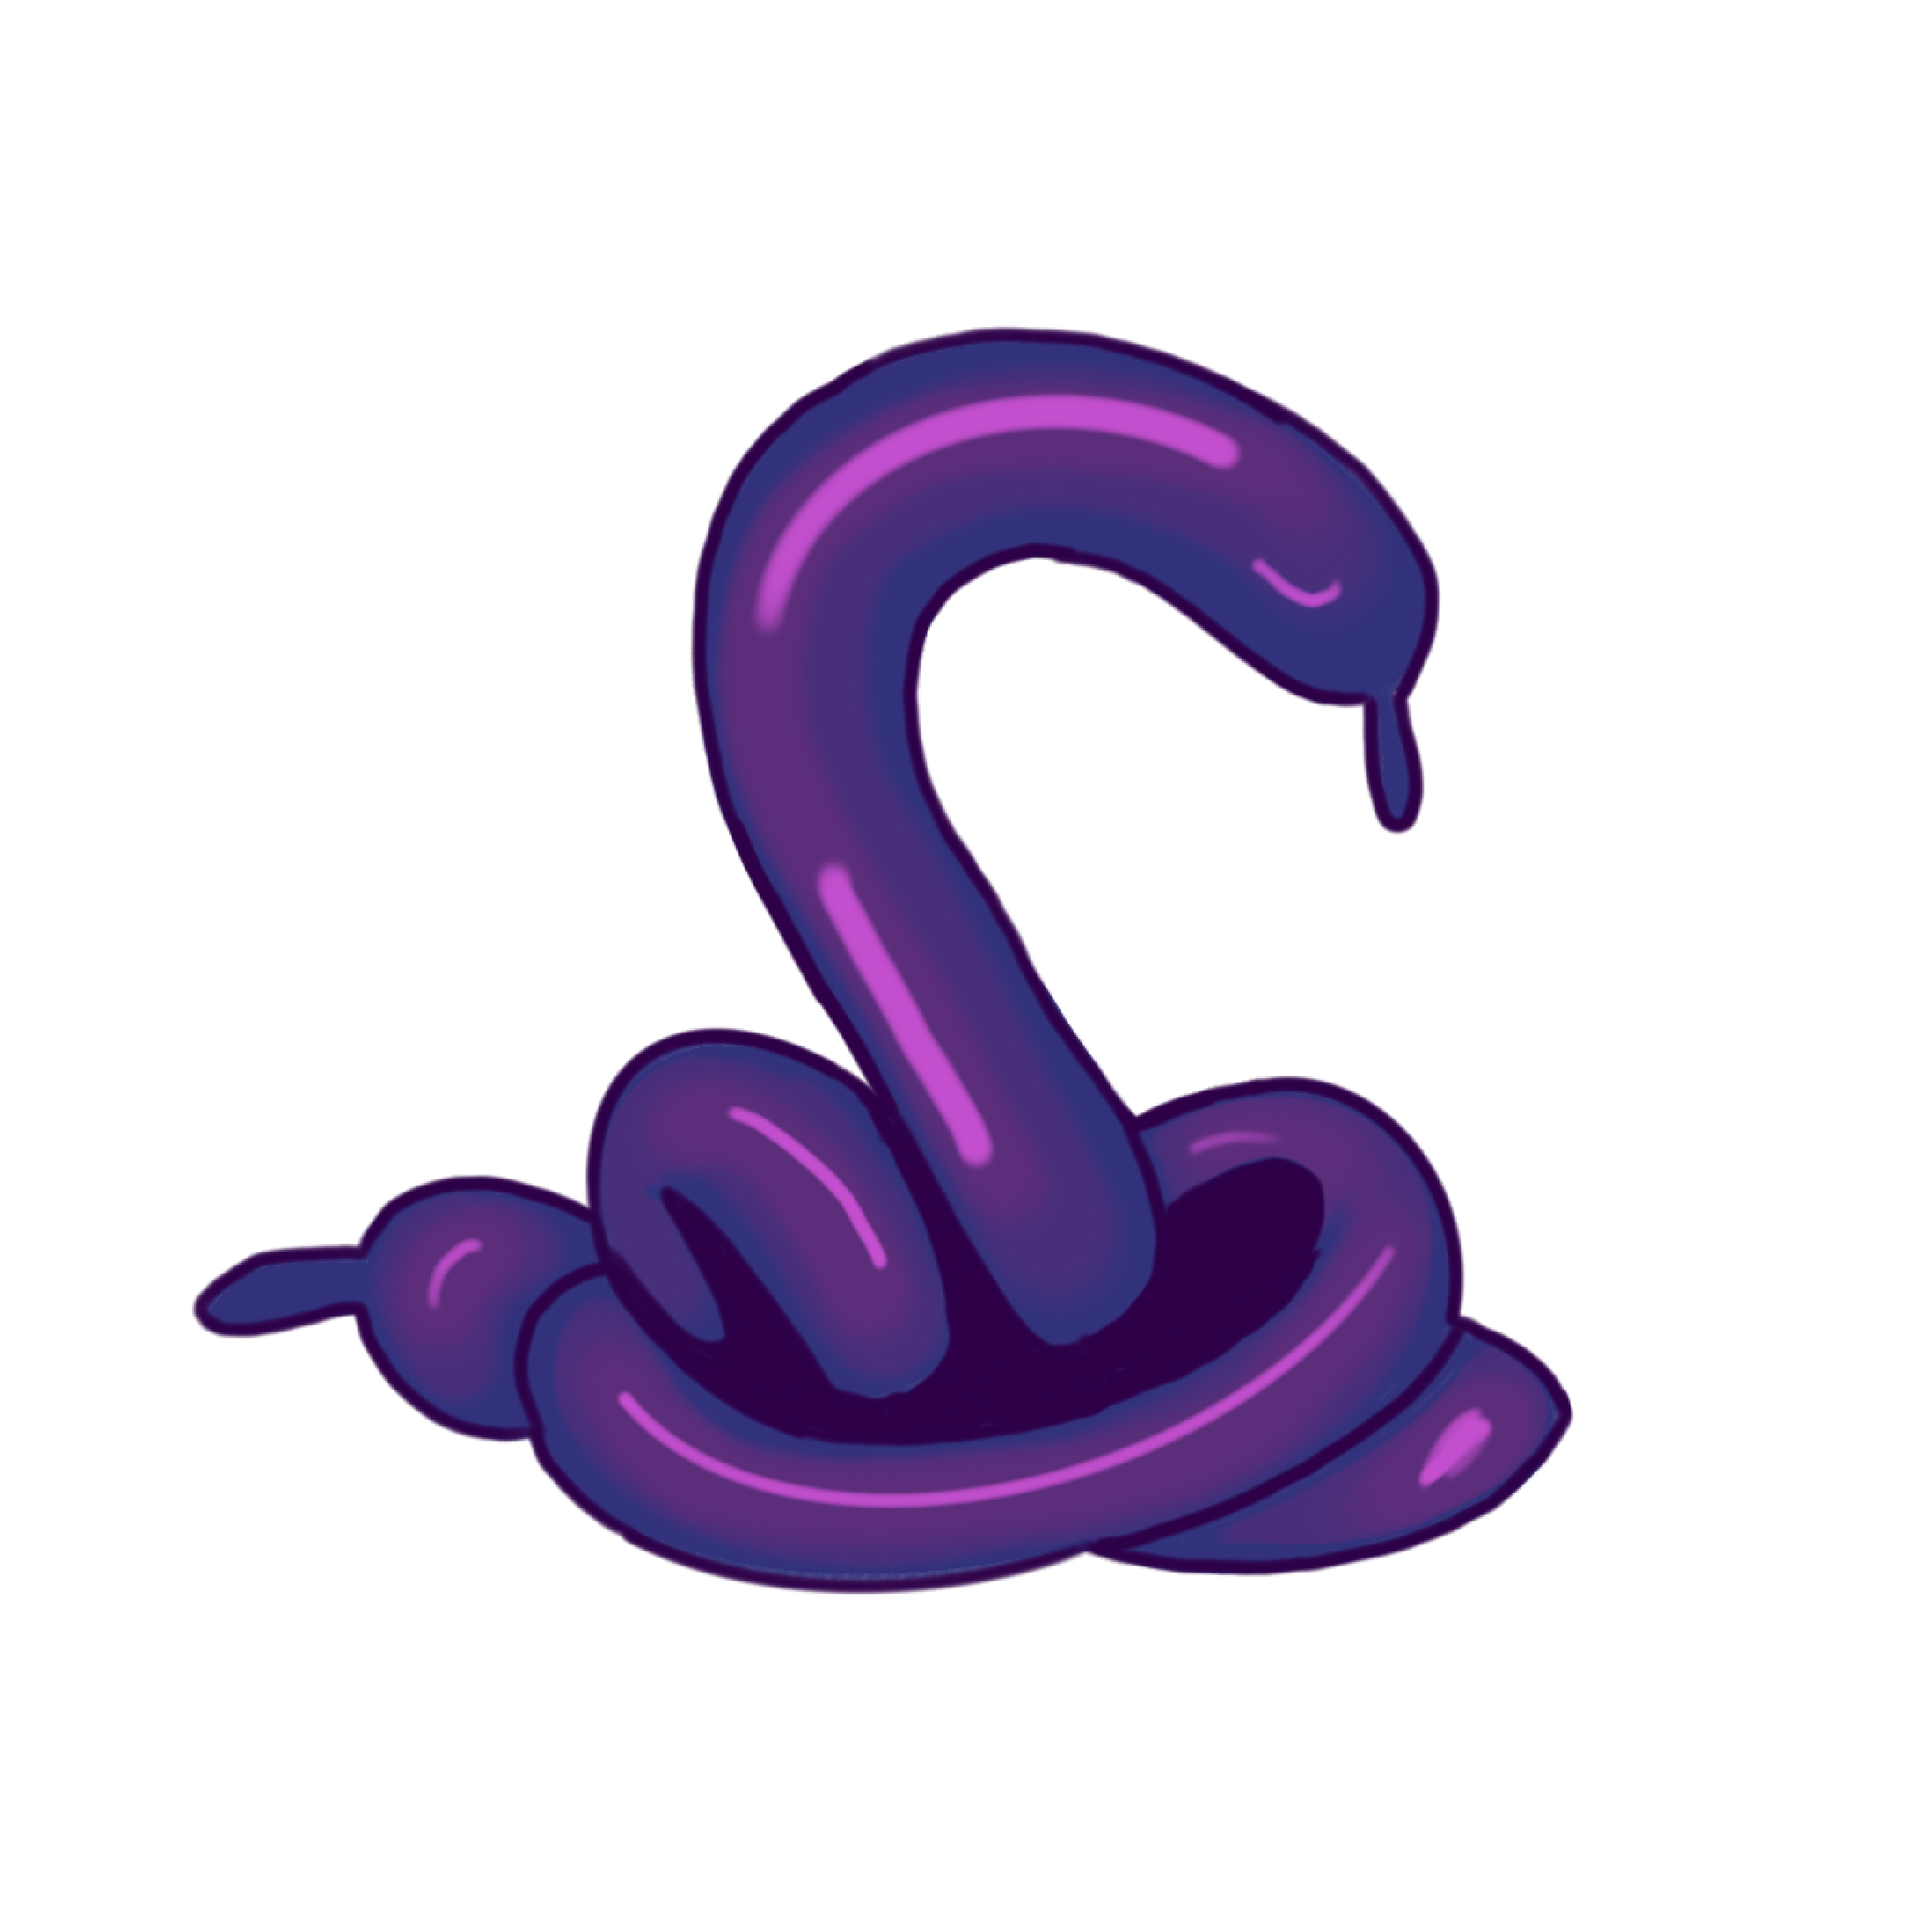
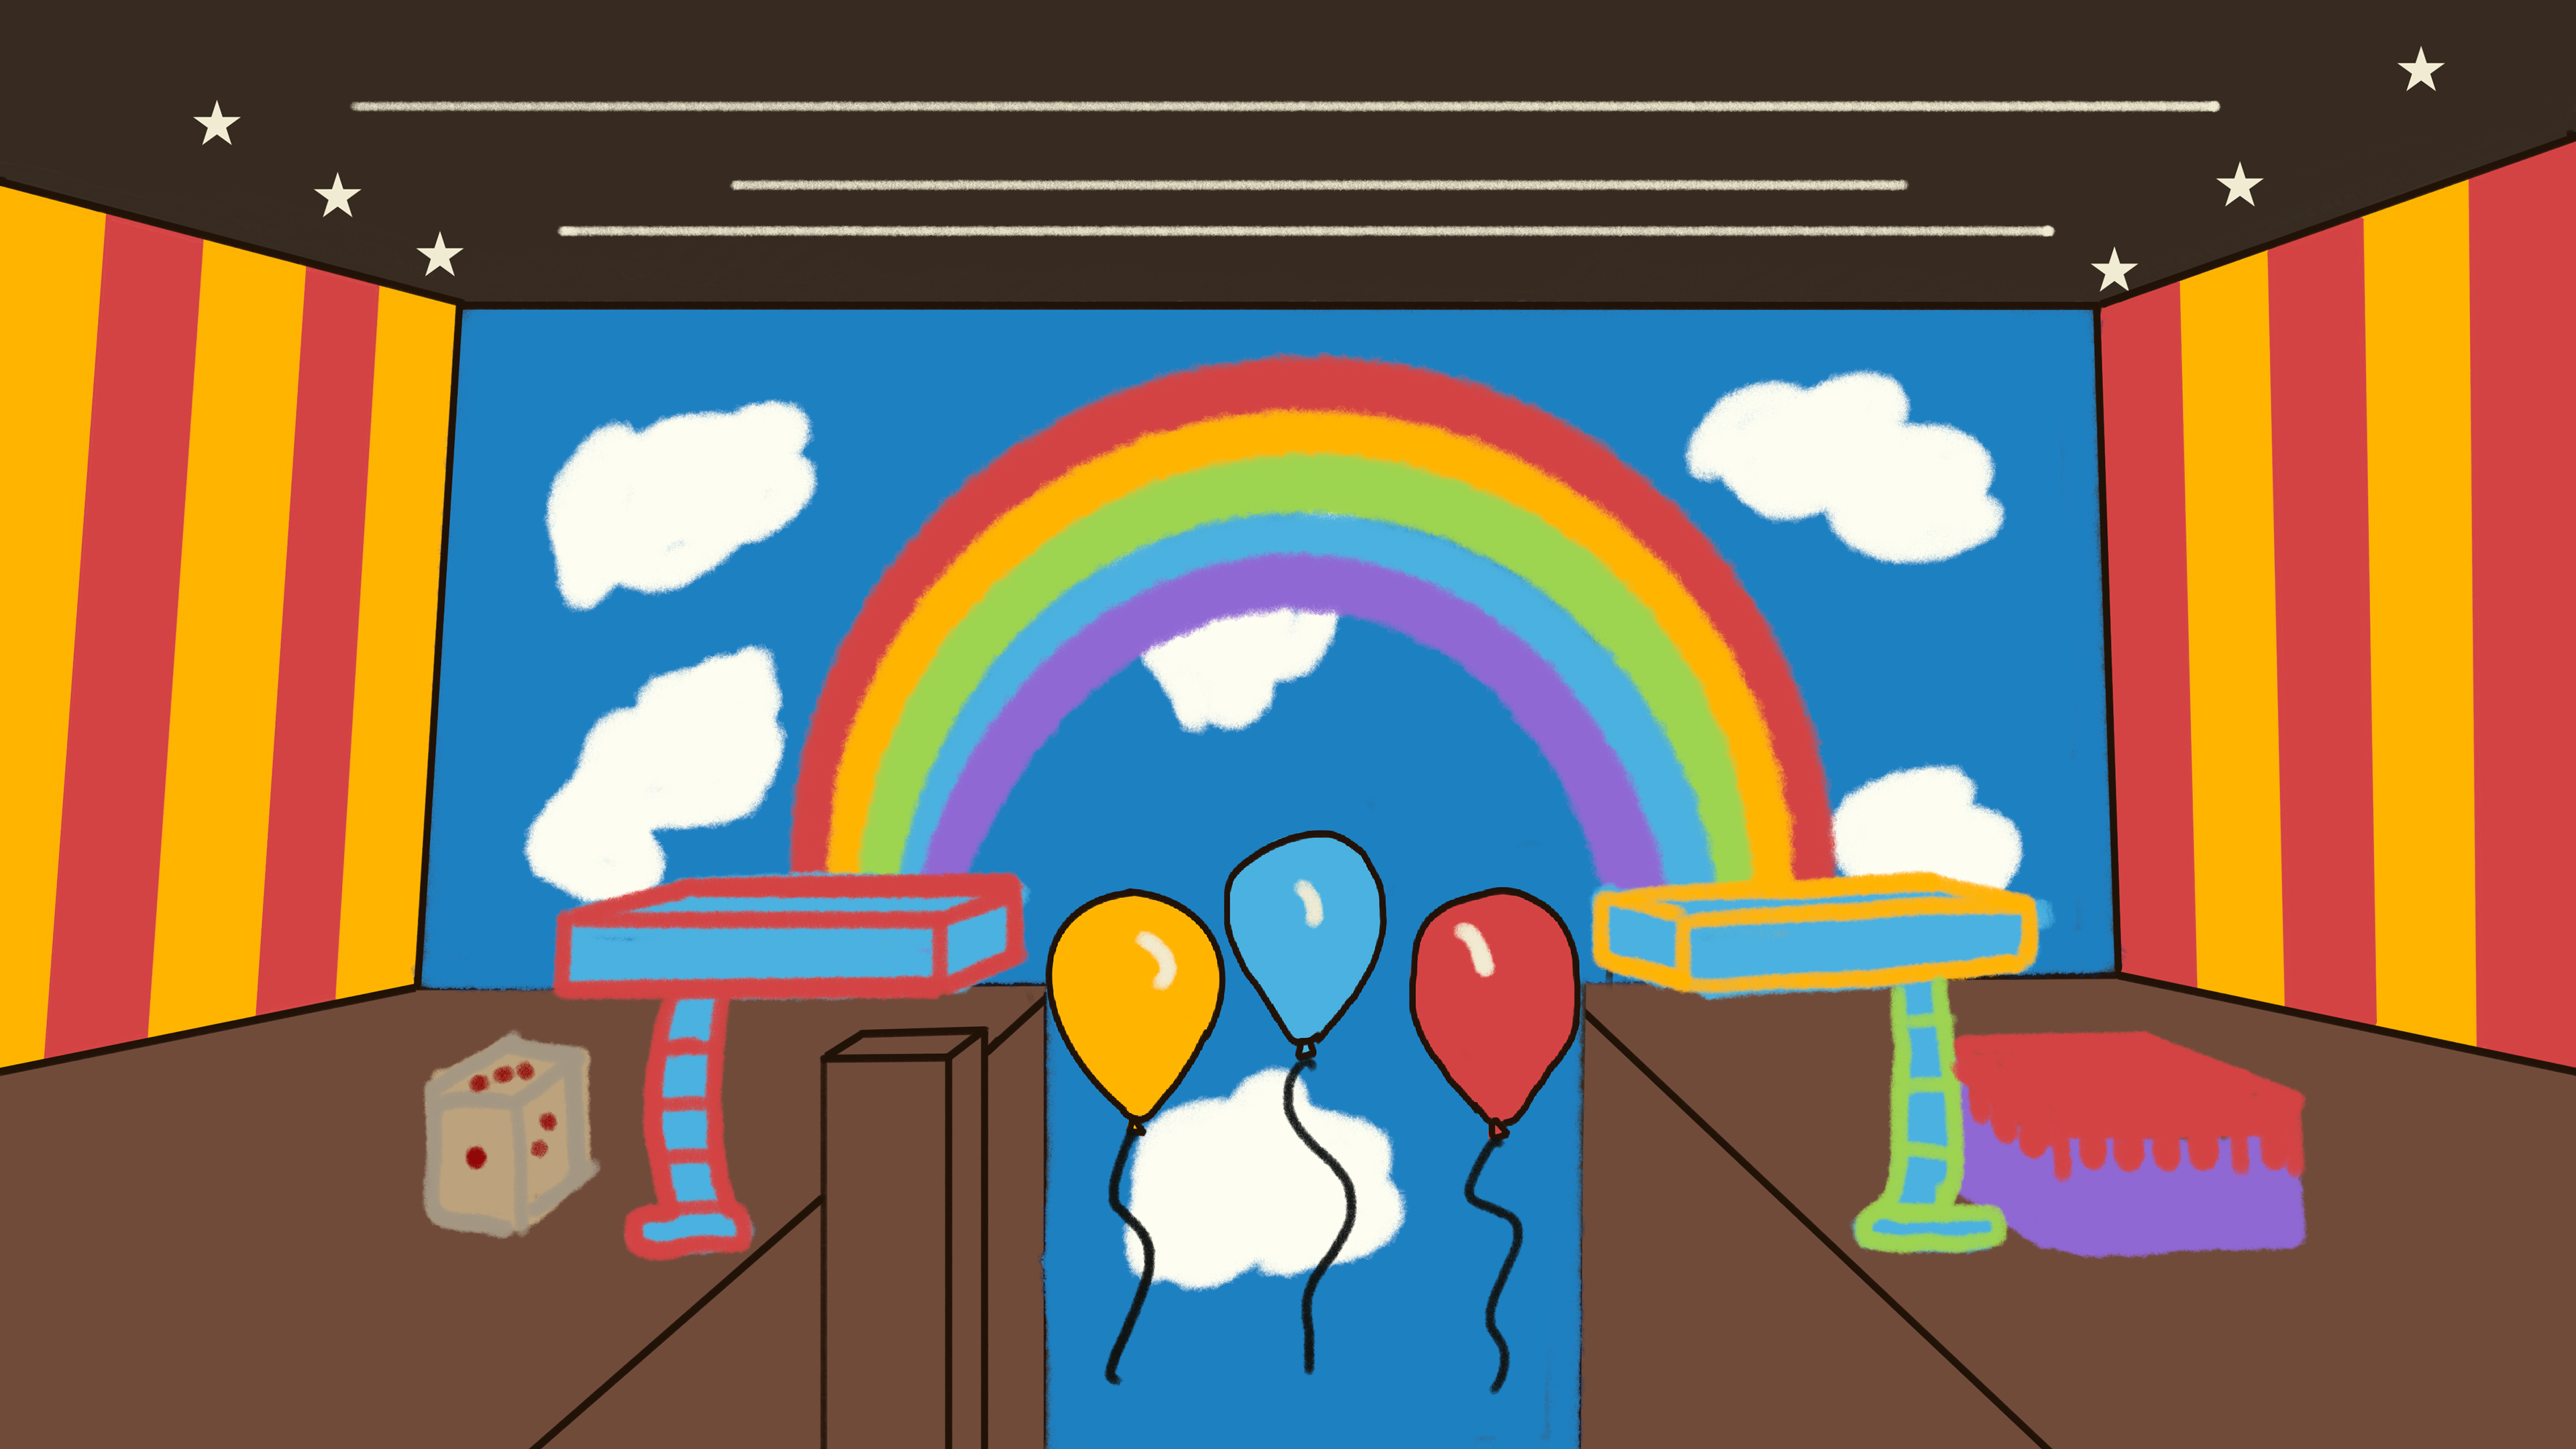
At first, I planned to create humanoid characters, but then I saw a balloon dog and thought, what if I designed the characters as balloon animals? This was the concept I developed in class.
I then refined those concepts and added a touch of colour!
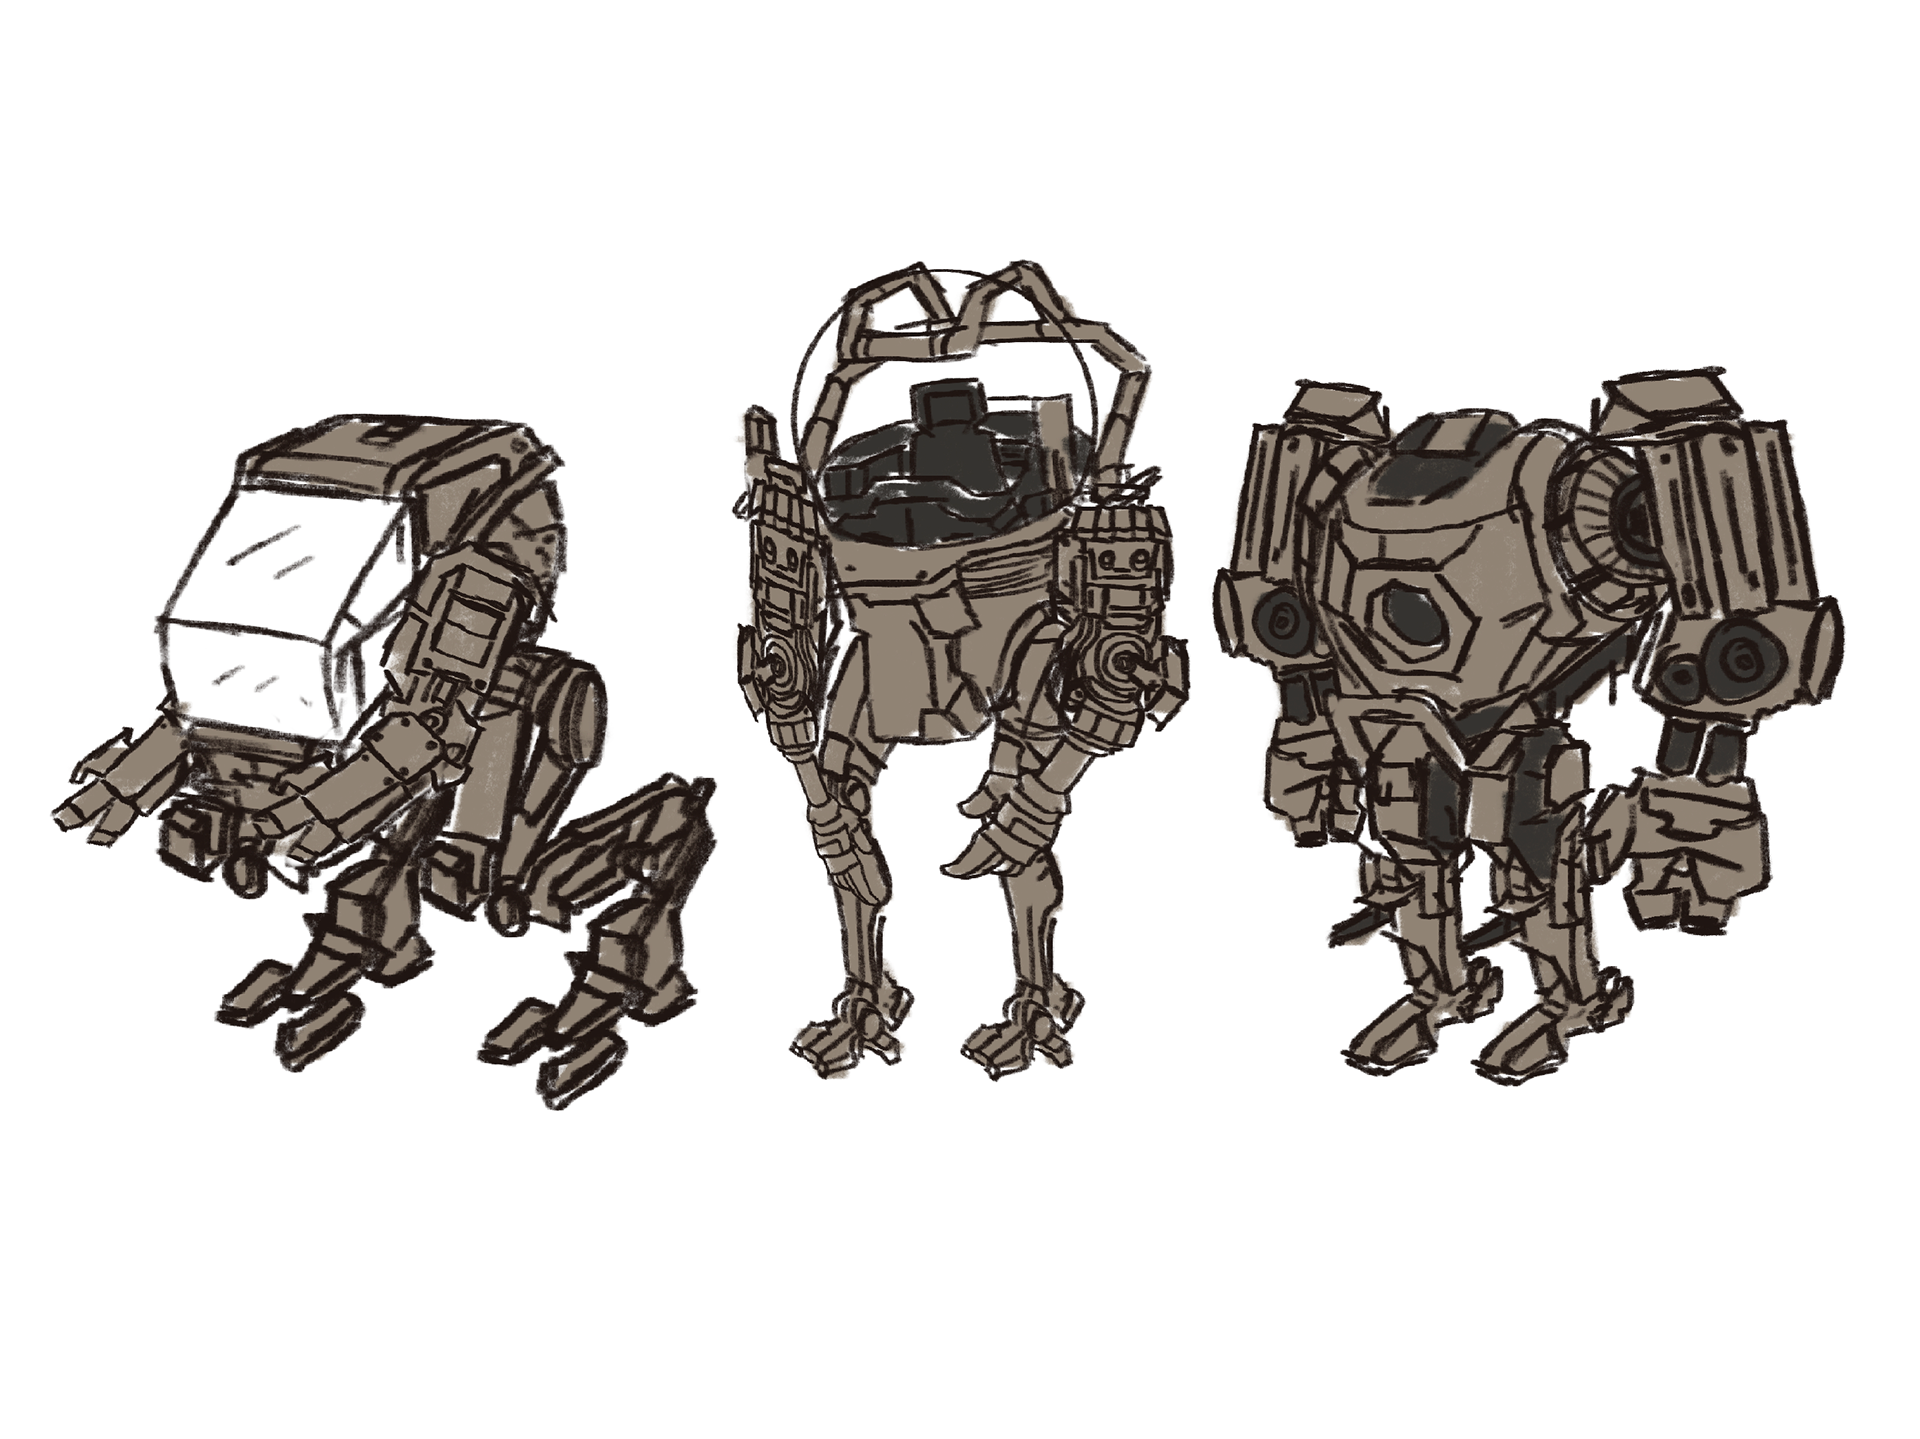
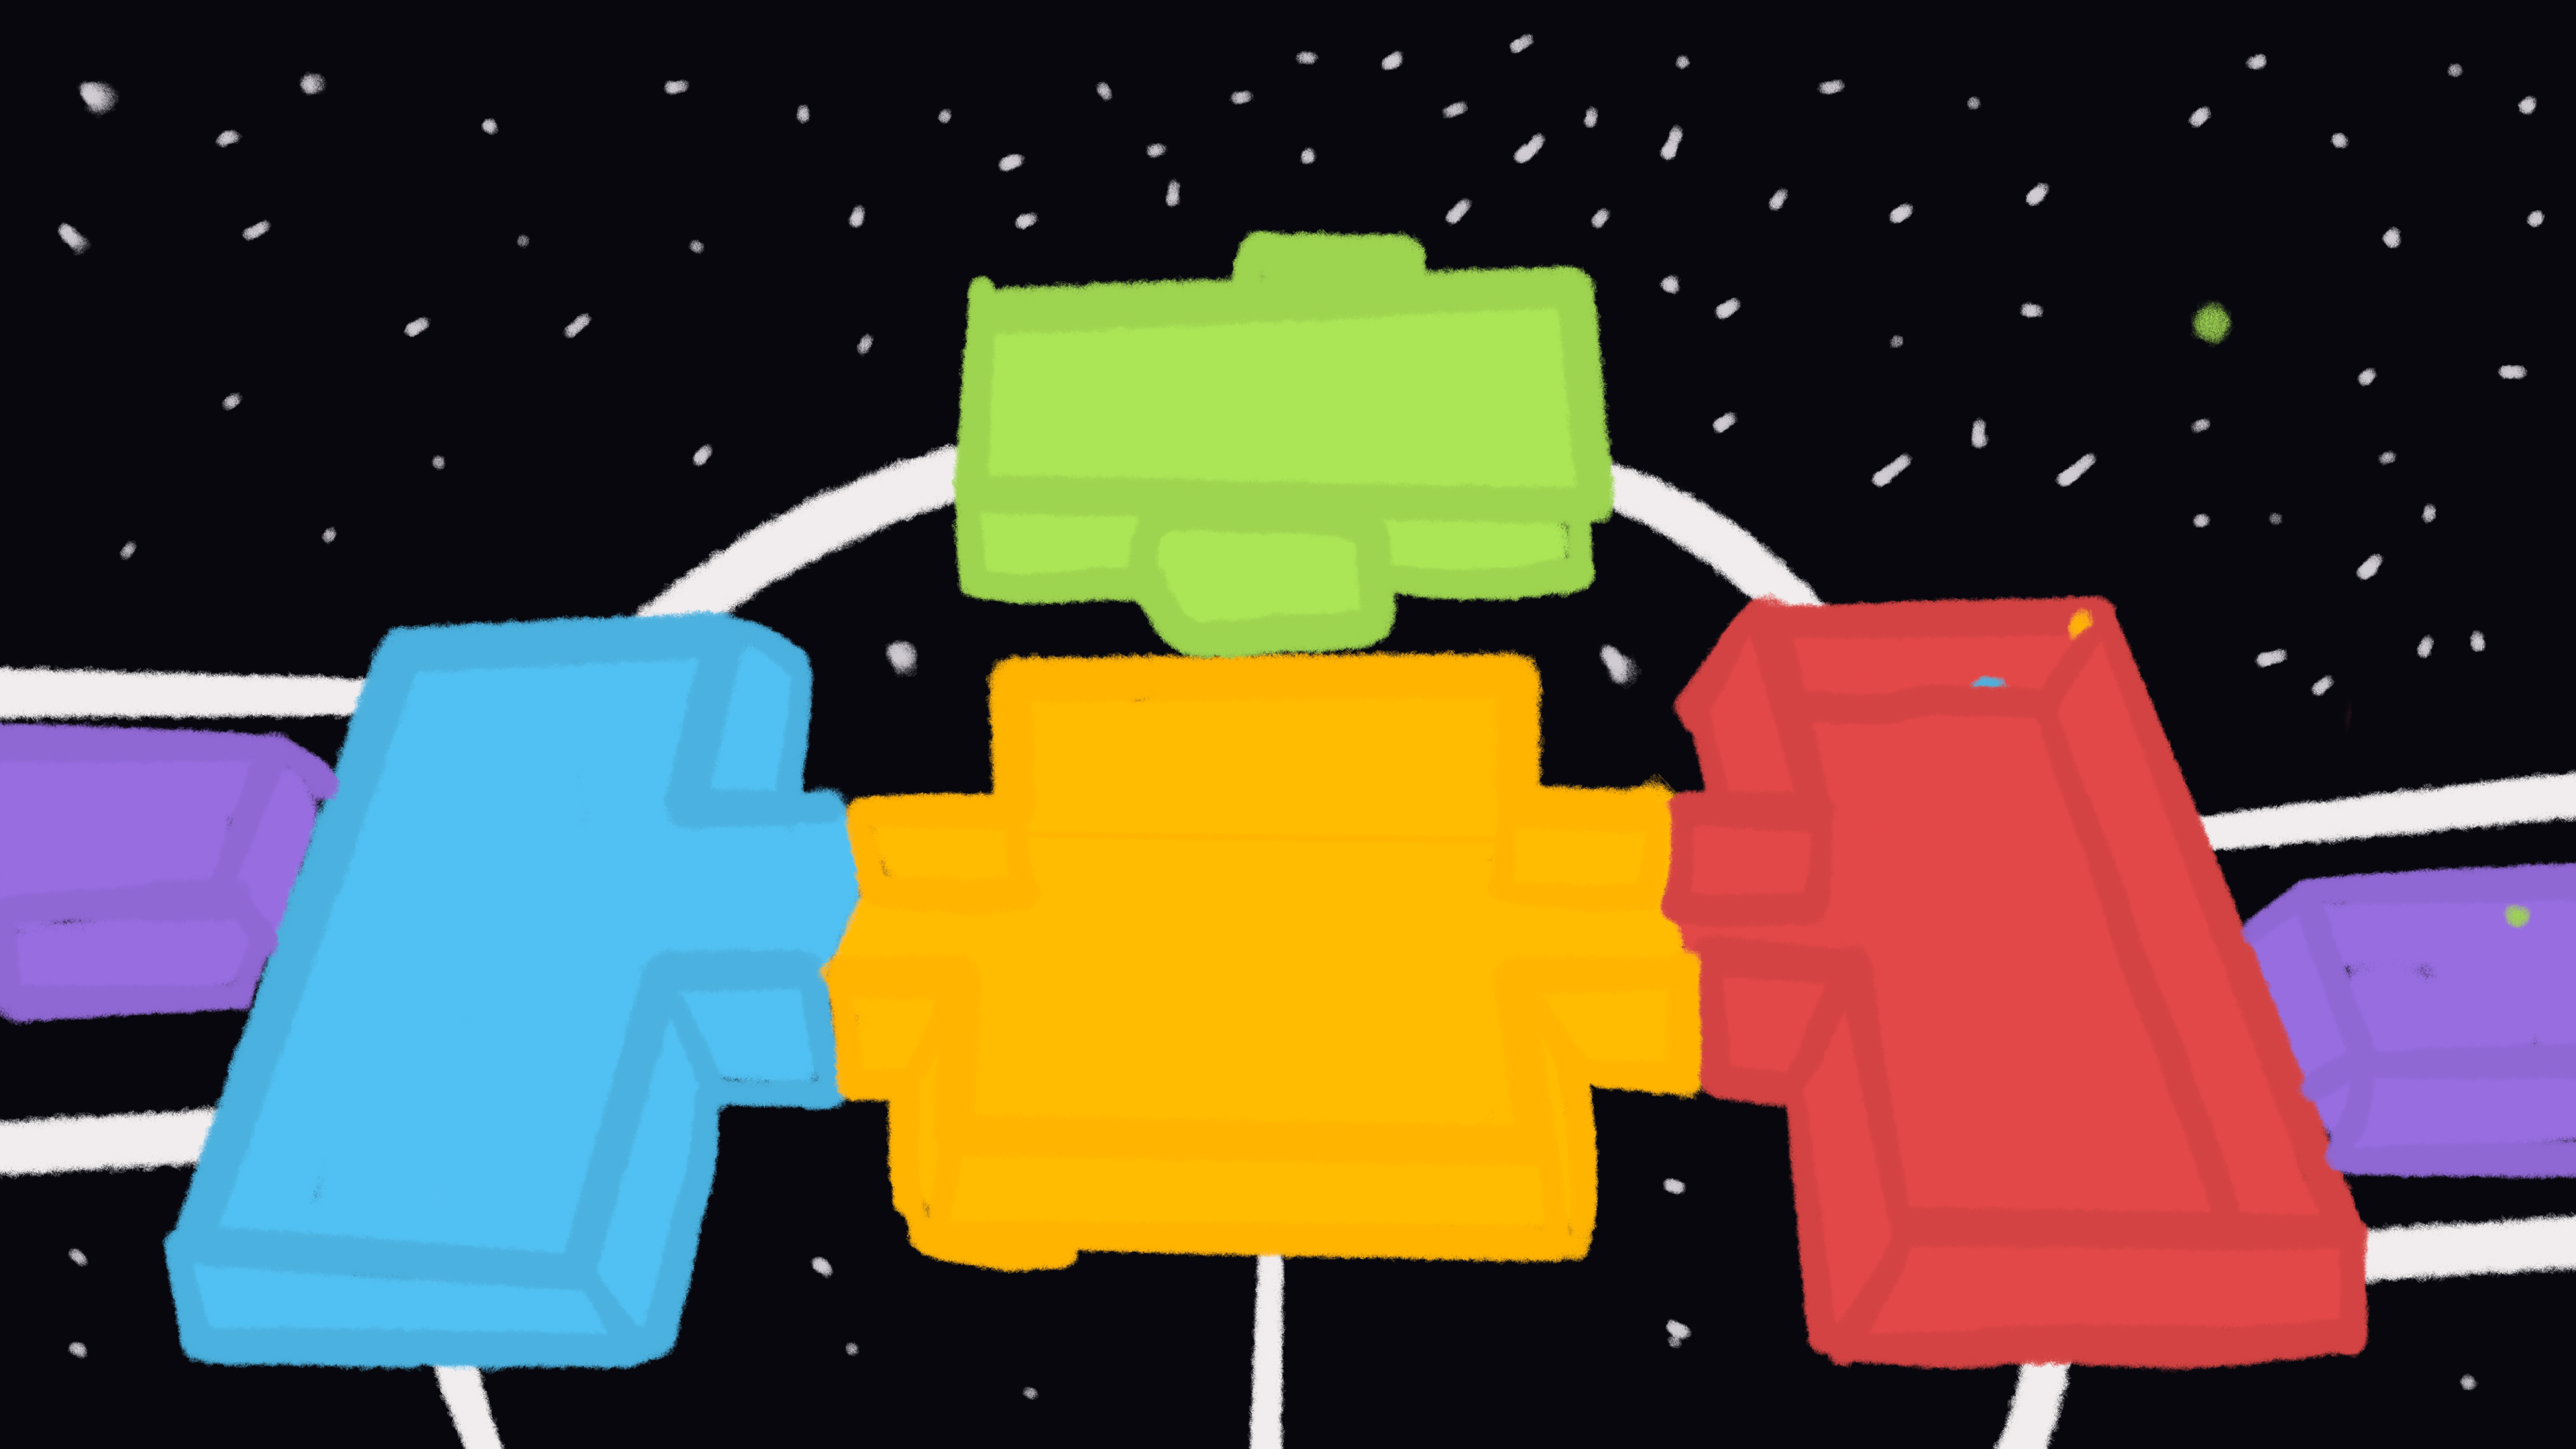
Once I finished the characters, I moved on to the mechs/robots.
I started drawing 3 of each limb, (Body, Arms, Legs)
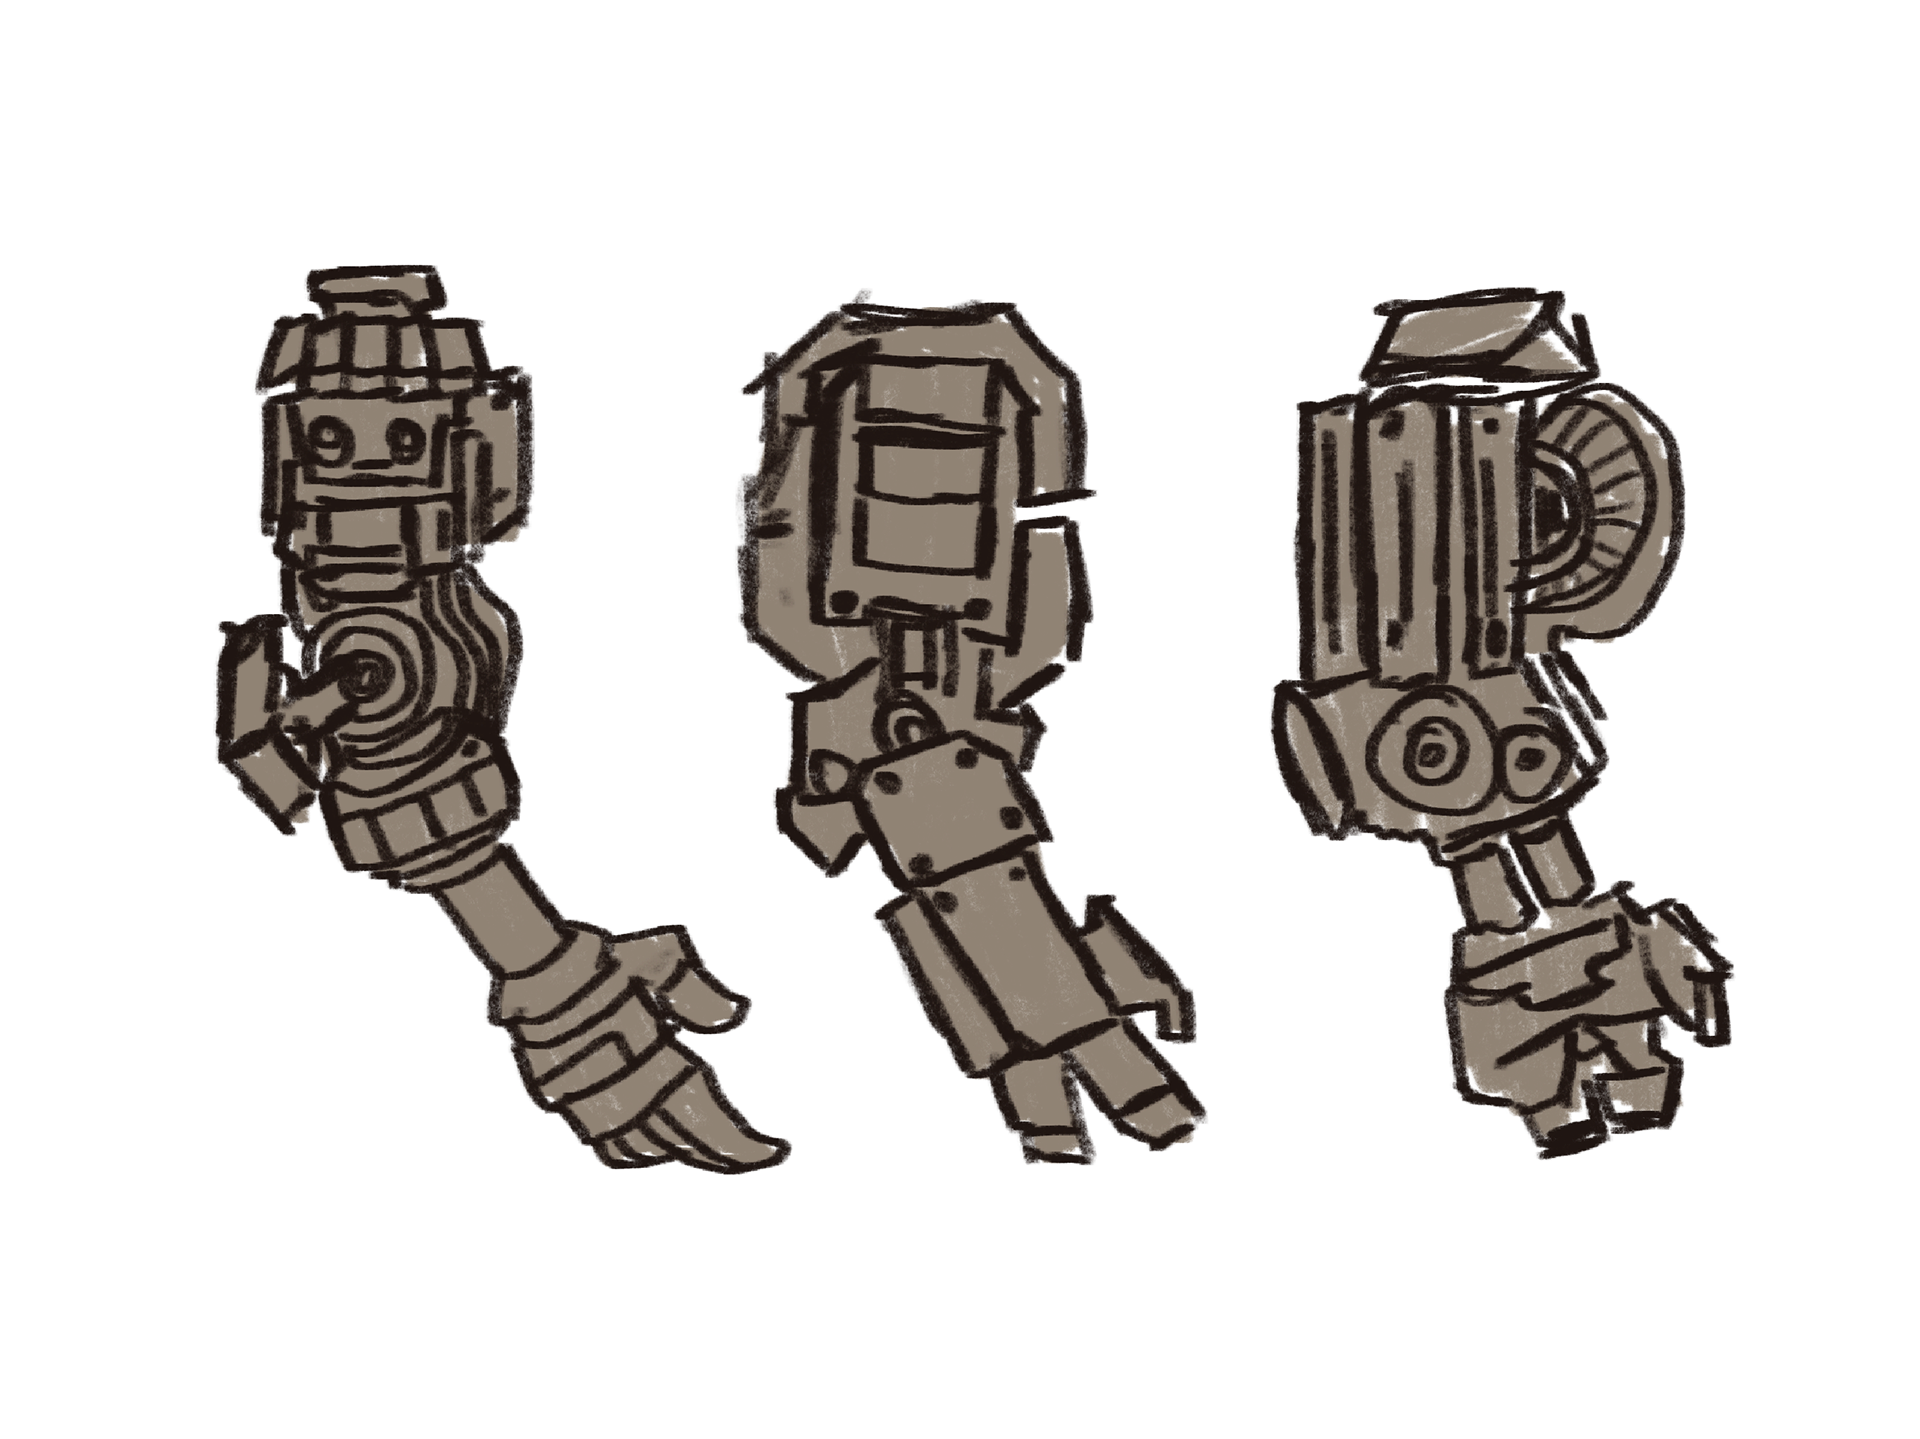

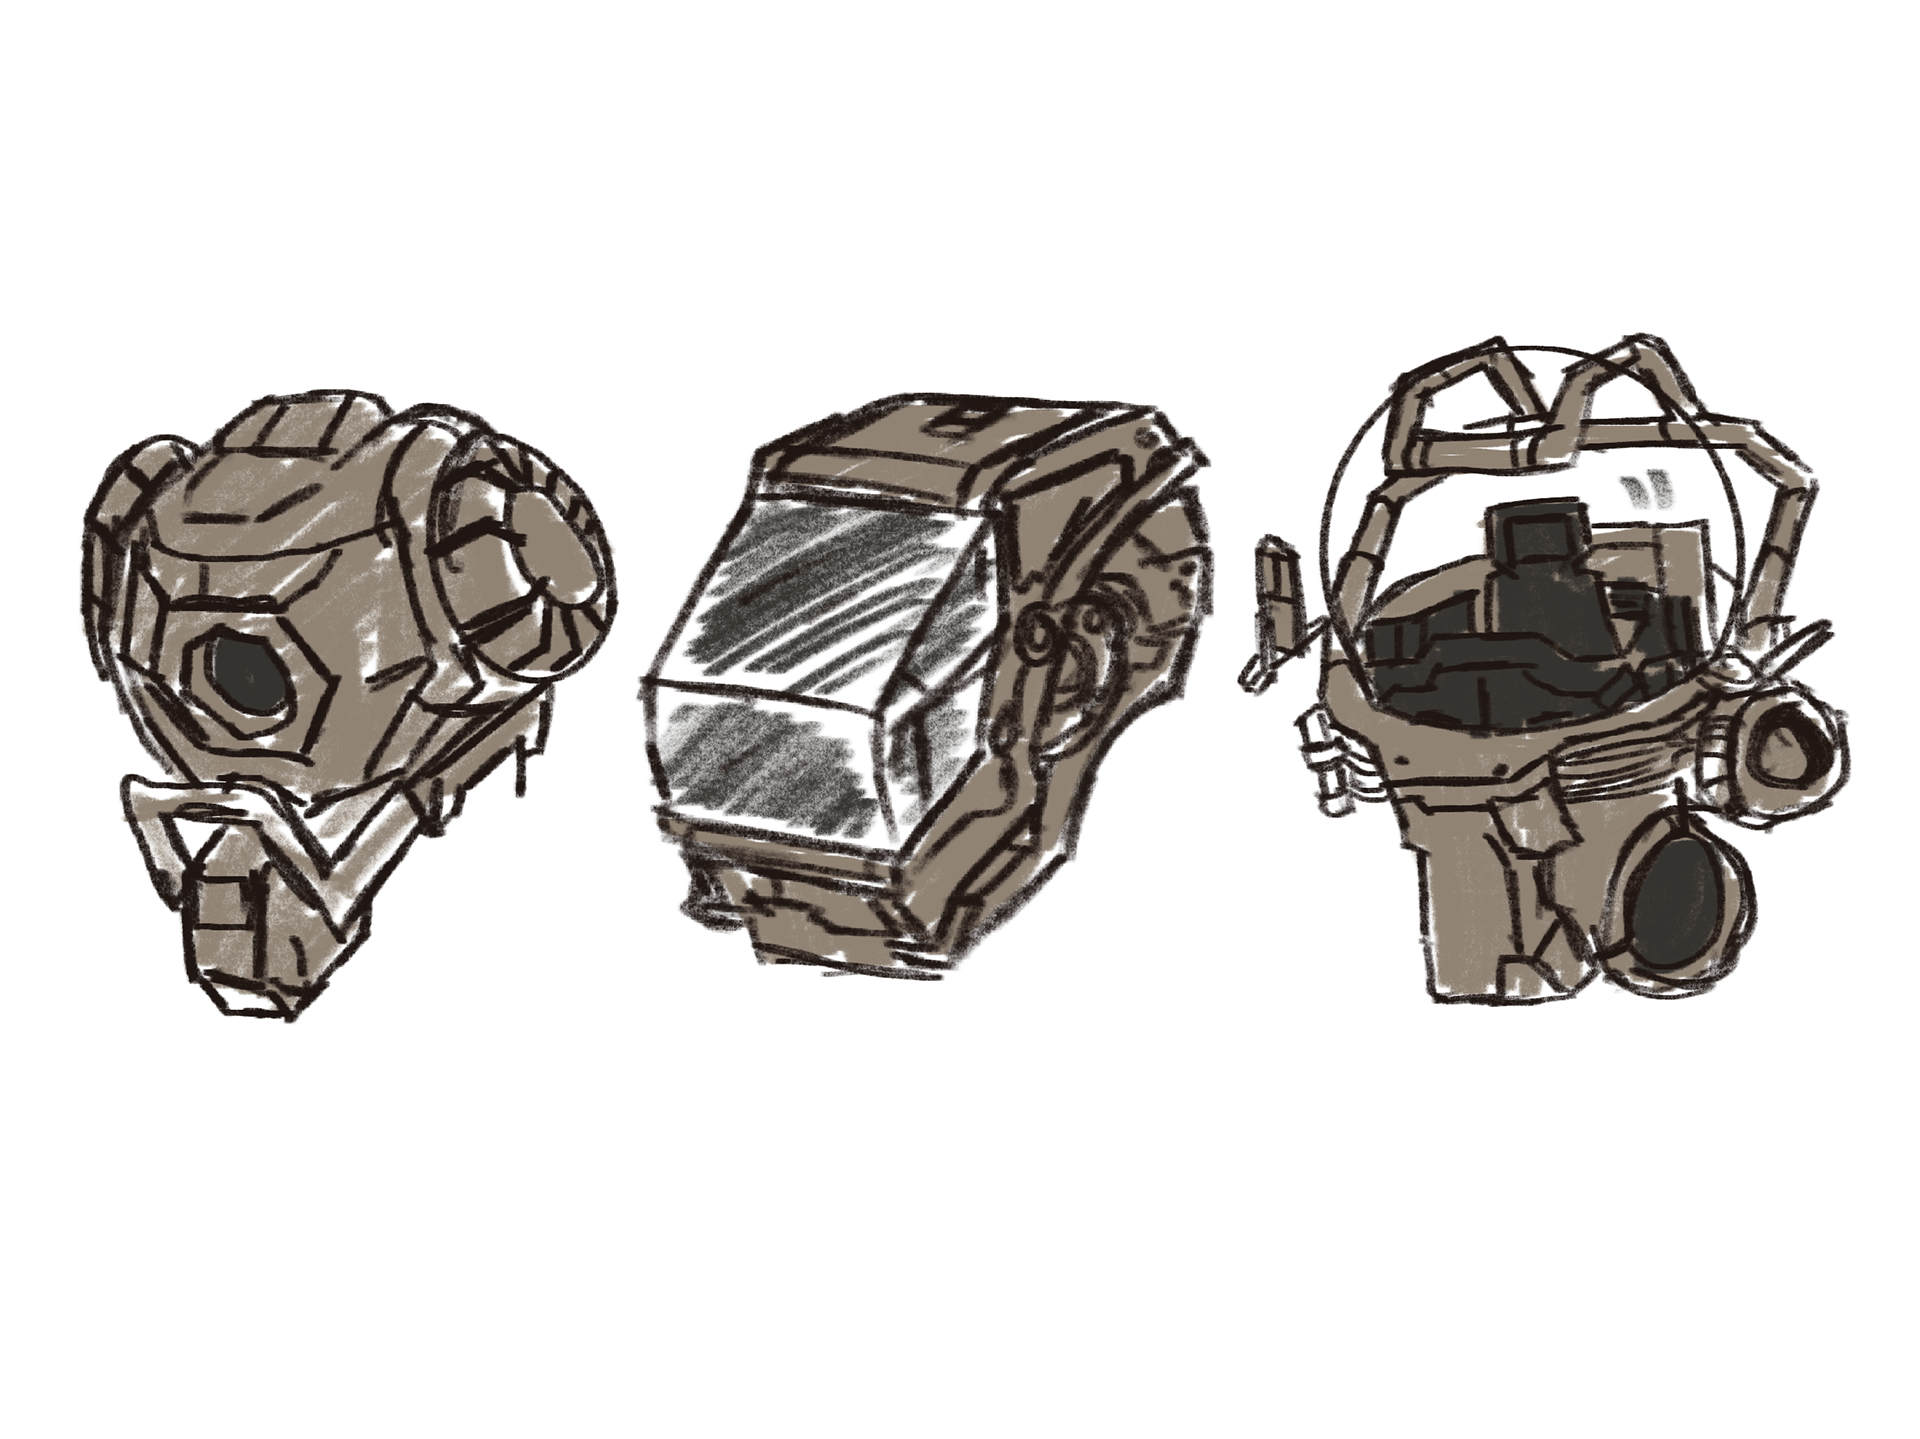
Following the brief to create three robots with interchangeable parts, I made the robots below using a kitbash method.


INT- ROOM 902 05 - 12 - 24
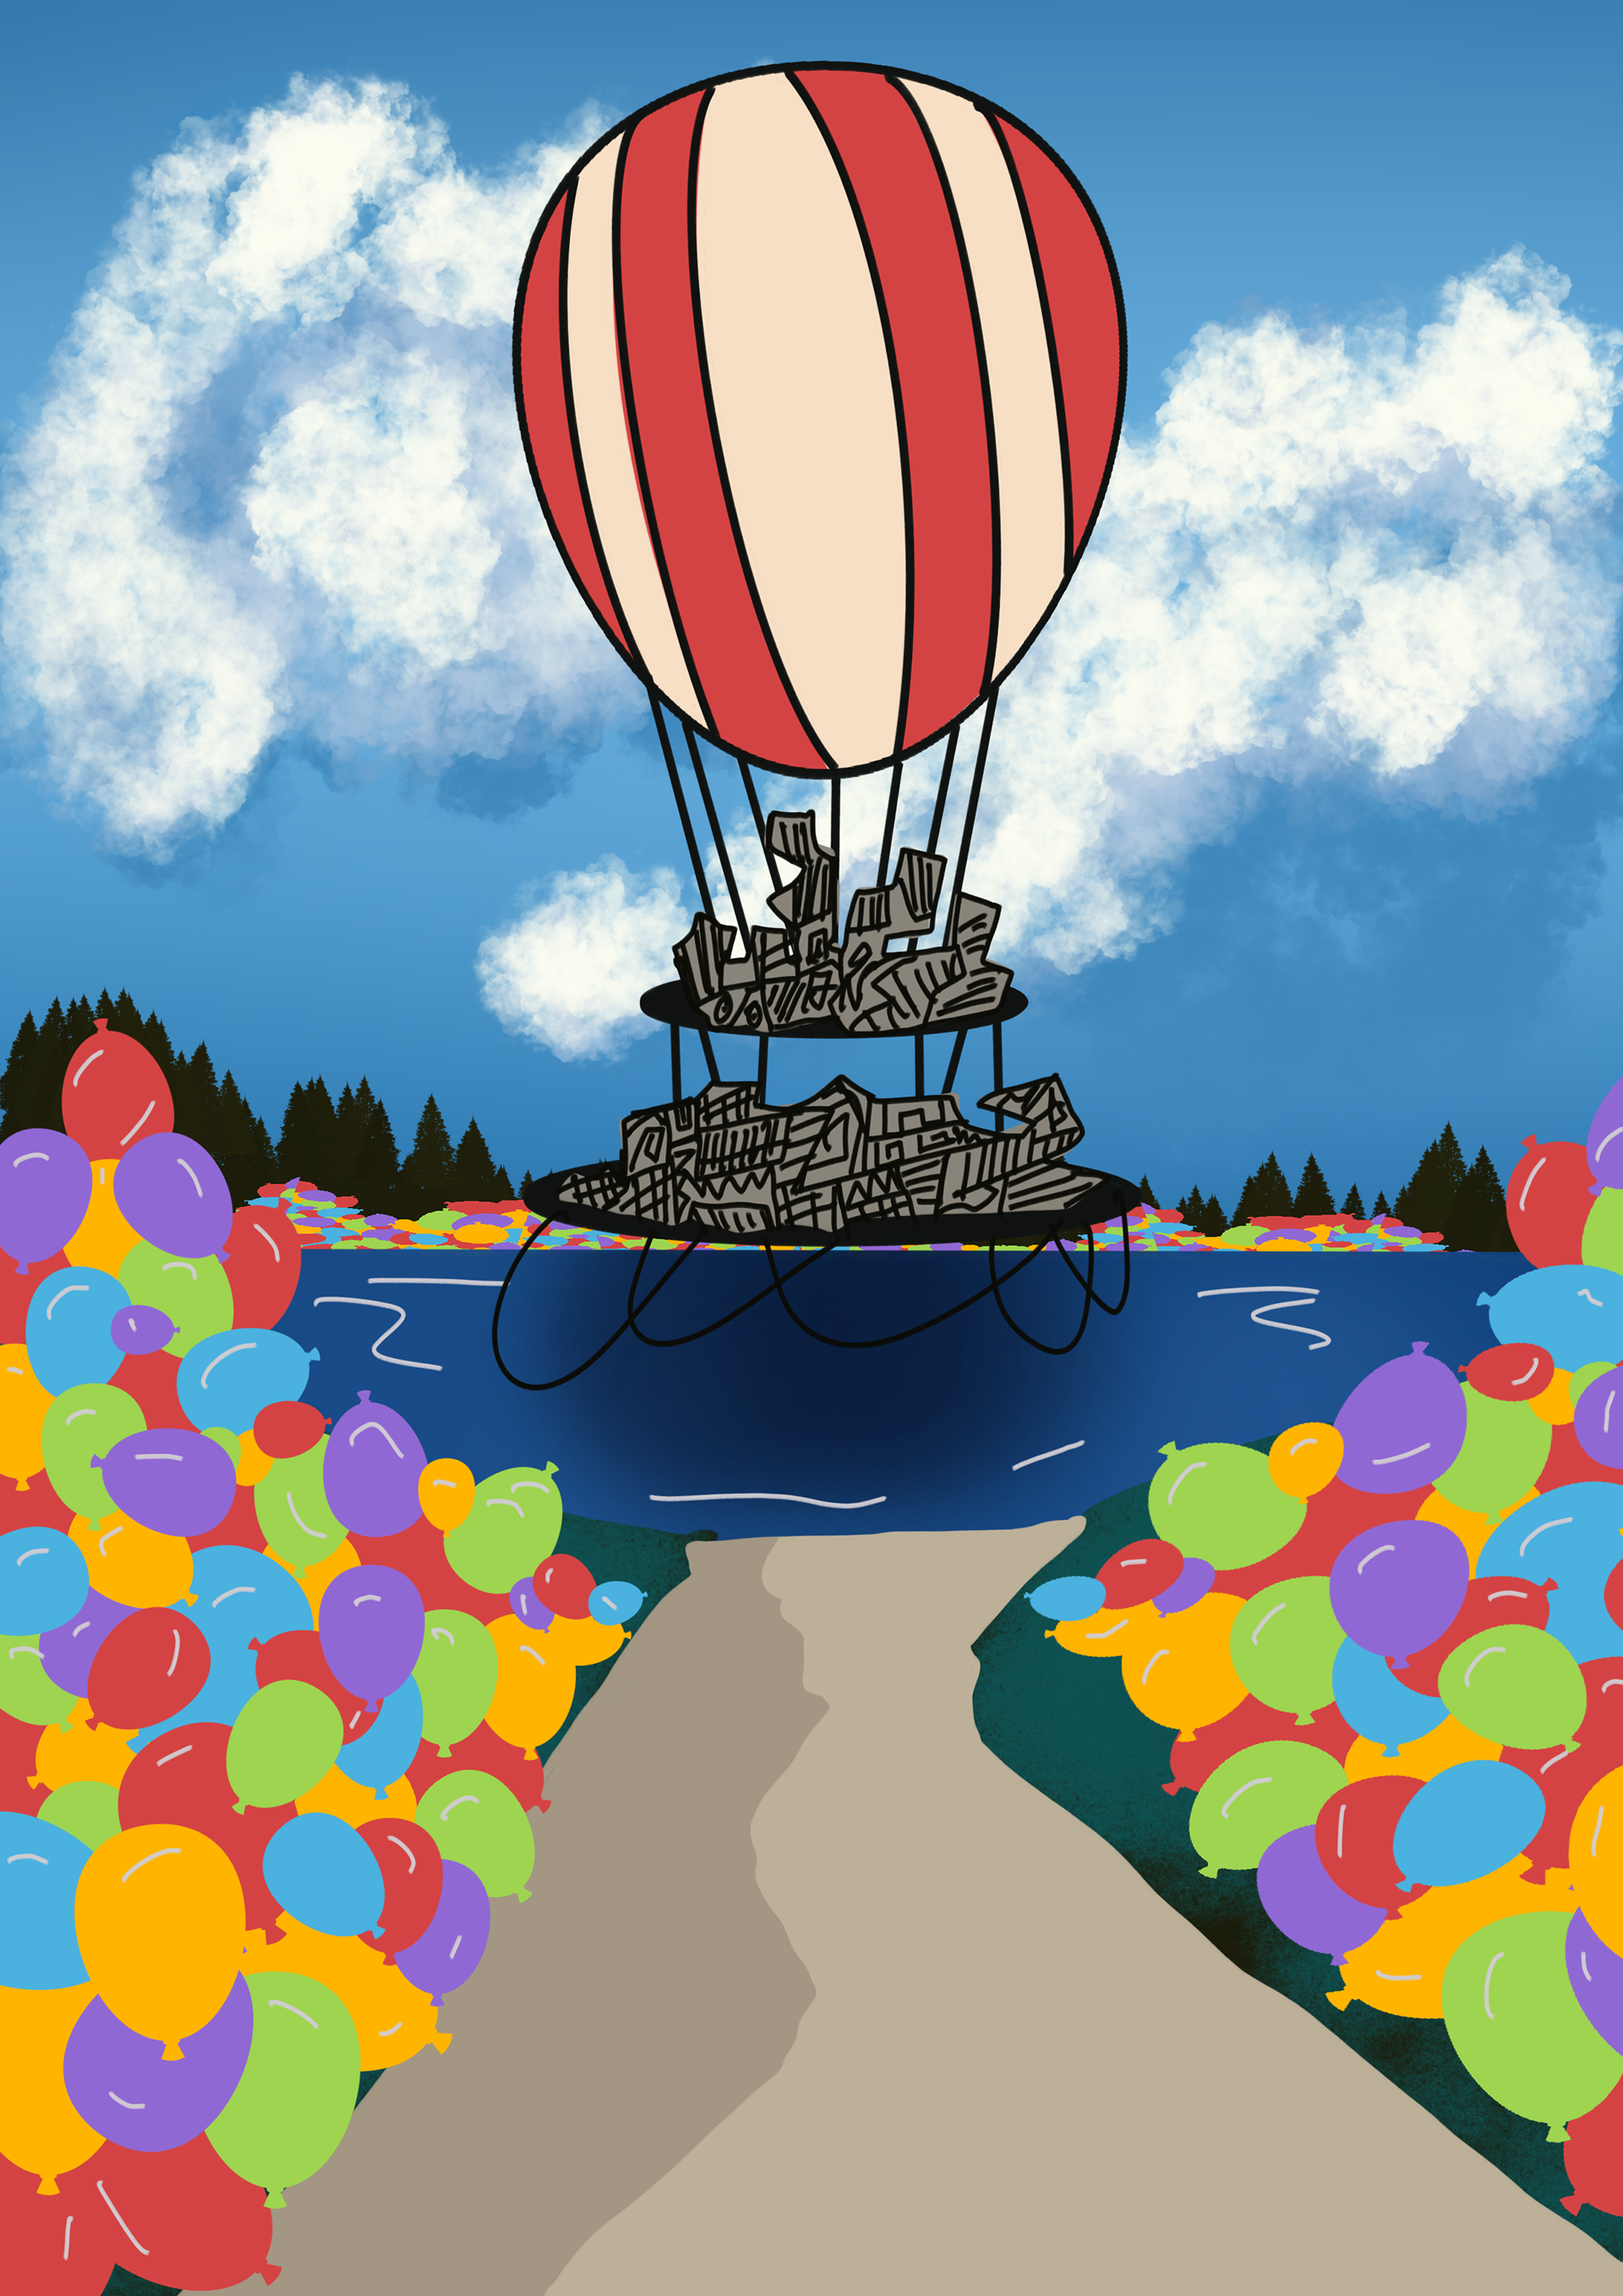
To my surprise, Environments were where I struggled the most for this project, despite being what I am most confident in when it comes to drawing. I don't know how to explain it, but it felt like everything I knew about drawing had completely gone out the window.
I knew I had to create something, so I started to play around in class and draw what came to mind.
I moved on to do more environments, but this time with the intention of making them more colourful and playful to match the character's designs.
Again, I had the same issue. I kept looking at my artwork, and I just really didn't like it.
I'll figure it out eventually.
In the end, I created an environment of a balloon scrapyard, and in the artwork shown, a hot air balloon floating over a pond contains all the mech robot pieces.
I think this may be the end of the art fundamentals module...
